Friday, 31 December 2010

Happy New Year!


"Here's to the bright New Year, and a fond farewell to the old; here's to the things that are yet to come, and to the memories that we hold" Anon


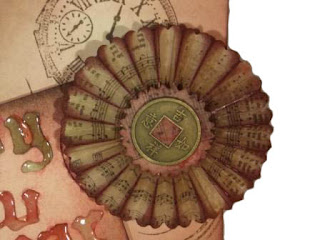
Here's wishing you a great 2011, may it be better and brighter and more colourful and of course more crafty than 2010!! I have made you a little tag using what else than distress inks, a few Time stamps, some Glossy Accented letters and Mr Holtz's gorgeous rosette!


Also, it is time to draw the last Hels' Tag of Christmas - thank you all for your lovely comments about the tags. I have used Random.Org to chose the winner... and the winner is:
JUDE - please can you email Hels your addy :O))


Thank you for all your support and comments throughtout the last year. Have wonderful New Year, and have a glass on us!

With love from Jennie, Hels, and all the Creative Team
xx

Tuesday, 28 December 2010

Do You Make Resolutions??

Bet you don't because you know you will break them, or if you do, you will break them by the 5th of Jan??


This year I am determined I will not break any and that is what determined my final project for The Artistic Stamper. So here is a Journal page, one of my resolutions is that I will do more Journalling - that I may or may not keep but I hope I do. I think my other resolutions will be much easier!


I have used Claudine Hellmuth Paints - which I favour over most acrylics for journalling as they are such gorgeous colours and being of such great quality they don't make the paper buckle. I started by painting on a generous amount down the middle of the pages and using an old credit card, drew/smeared the paint across the page. I then used the orange at the edges of the page and drew that towards the centre. After the paint had dried I filled in the spaces by sponging on and blending some Barn Door Distress ink.

The lines were made by dipping the edge of the credit card in paint.


I then used the Clockwork, Harlequin and Dotty background stamps all available from The Artistic Stamper. Masking out my 'resolutions' and then doodling here and there with a Red Sharpie Pen. The 'bubbles' were made by using the lid from a bottle of ink and, again, dipping it in the paint.

I really enjoyed this piece of Journalling - it was very therapeutic after the hustle and bustle of Christmas Day.

I have really enjoyed my time as Creative Designer for Jennie and Hels Blog but now I am done, so all I have left to do is to wish you all a Very Happy and Creative New Year.

Thank you for looking

Nicks -

Oh..... maybe I should explain number four - I will be Wrecking a Journal - more details about that on my personal blog!
 http://www.nicksartystuff.blogspot.com/

Saturday, 25 December 2010

Merry Christmas!

Wishing everyone a very MERRY CHRISTMAS
Enjoy, be merry, and have a wonderful day!

with lots of love
Jennie, Hels, and all of our wonderful Creative Team

Tuesday, 21 December 2010

Christmas Tag by Sioux Jenneys

Hello everyone! Sioux here and I've made a tag to share.
...now I wonder what put that idea in my head! LOL :)


1. Spray red and blue Perfect Pearls mist inks onto tag
...unusual combo for Christmas I know but I was after a vintage Victorian feel

2. Stamp the holly from Mini Christmas 1 plate in Distress Ink pine needles
...using this on the slick surface of the perfect pearls gives a mottled look which adds to the effect I think

3. Add red glitter to the berries

4. Stamp the seasons greetings (again from Mini Christmas 1 plate) in Archival coffee

5. Stamp T!m's snowflakes from Mini Holiday 2 set using Adirondack gold paint dabber on the edges
...this is not showing up too well on the photo due to the light bouncing off it

6. Prepare some textured card by inking with a combo of Distress Ink wild honey and brushed corduroy that has been spritzed with Perfect Pearls mist ink

7. Stamp the Christmas star with trees image from Mini Christmas 1 plate onto the card in Archival sepia and cut out leaving a small border then mount onto black card and attach.


This is my last scheduled piece for this year so I'll wish you all a
MERRY CHRISTMAS!

See you again soon in the New Year :)
xoxo Artyjen

Monday, 20 December 2010

Hels Tag of Christmas - #3

Goodly Morning... as promised, I am back with Hels' Tags of Christmas Tag #3 to giveaway... another one totally inspired by all those amazing ones by the Duke of Distress... oh and while I think about tags... did you know that Jennie is running a Tag Withdrawal competition??? Deets are all HERE and the linky-thingy is in the sidebar :O))


On with my tag and how I made it... it is up for grabs to one randomly chosen comment :O)) The winner will be announced on Thursday 30th December 2010. Anyways, how I made this... firstly, I smooshed Frayed Burlap DI onto the craft sheet and spritzed with Heirloom Gold Perfect Pearl Mists and dipped the tag into the inkyness, drying with a heatgun and re-dipping until I had the look I wanted. Next, I added a few drops of Fired Brick Re-Inker to a Mini Mister of water and lightly spritzed the tag. I popped a generous layer of Fired Brick Cracklepaint and allowed this to dry. Once dried, I stamped the music score in Walnut Stain DI and wiped off the excess from the Cracklepainted bit. (this is a nice look as the smudged DI goes into the crackles making it look a bit... erm... like me... old that is ROFL) I made a paper rosette using the Seasonal Paper Stash and the Rosette Alterations Die and popped an Idea-ology Crown into the centre. Behind the rosette is some mini tinsel from my own stash and... some dyed elasticated Idea-ology Trim - this was coloured with the Fired Brick Re-Inker mix and then dried on a radiator... drying with a heat gunmakes it shrivel up!!!


Along the bottom of the tag I added some of the flowery Trim, which had been coloured with the Fired Brick Re-Inker mist I had made. I popped a bit of tinsel behind this for a bit of extra bling. Next I made a little postcard using a Seasonal Sticker, mounted onto mountboard, sanded, edged with Walnut Stain and then stuck into a Memo Pin. The Facet at the top of the tag was stuck onto some Seasonal Stash paper using Glossy Accents and then fastened with a Jump Ring. Finally, I used some White UTEE on Grungeboard numbers, heating it til it bubbled and then adding smidges of Black Dabber to age it.


So, would you like to own this tag??? I hope you like it and... I just need to take this opportunity to say a HUGE thank you to everyone who has joined in with the monthly Challenge this month - WOWZERS we have had a seriously huge amount of entries so if I haven't got around to yours yet, please bear with, I am on my way LOL Thanks for looking and have a grand day! TTFN

Hels x

Sunday, 19 December 2010

And The Winner Is...

...THANK YOU all for your lovely comments on the Tag Giveaway - I have added all the commenters names to my hat (ok, I asked Mr. Random.org to do it for me LOL) and the winner he has chosen is....


#19 - Rumtruffle


Here is the tag that will be winging its way to Rumtruffle.


I will be back on Monday morning with another Hels Tags of Christmas giveaway... so please do check back :O))

Thanks again!

Hels x

Thursday, 16 December 2010

Mabel Lucie Attwell by Tina Barnett

Hello Crafty Friends!

This NEW adorable little Mabel Lucie Attwell stamp is available at The Artistic Stamper


I was drawn to this stamp as I am a dog lover and the image is CUTE! I have used Promarkers to colour the stamp.


The papers, ribbon and ribbon jewel are from my stash. I have shaped around the image and sentiment with a diecut.


I used a diecutting machine for the flower shape and the swirls.


I then finished off the card with liquid pearls and flowers.


I just LOVE this stamp, it is wonderful for young girls and ladies who are young at heart!


You have just got to try this wonderful range!


Take care for now!


Hugs Tina xx

Tuesday, 14 December 2010

Meet Professor Christmas...By Nicks

For my second project for The Artistic Stamper I just had to use my favourite stamp of The Artistic Stamper Christmas collection - Tick Tock Father Christmas


A few weeks ago my very understanding OH brought home some conical vases that some one was throwing out, because he had a suspicion that I could do something with them. Did I want them?? Of course I did!!


With Santa in one hand and a bottle in the other, it was obvious that the shape was perfect for a Santa shape and so this Christmas Steampunk Decoration evolved.

I dribbled some alcohol inks into the bottle and swirled it around, I didn't want it to cover the whole inside. I then partly filled the bottle with some bits and pieces from my stash - some hardware (I have more in my craft room that OH has in his toolbox!), some Tim's idea-ology bits and some Christmas Stars and snowflakes.


The Prof's cloak was made from a piece of wire mesh cut to shape and covered organza and roughly sewn along the sides with silver thread and edged with some washer thingamajigs - don't ask me what the are really called! - The sack was made from an odd bit of hessian I had lying around and filled with some rusty nails my son found in his friends dad's workshop.

I stamped the Santa stamp onto some TSS metal using stazon ink. Dry embossed with with a selection of the TSS tools and working from the back of the metal on a thick foam mat and using a paper stump, plumped (is that the word??) his face. Before trimming him down I filled the back with some lightweight polyfilla and allowed to harden - this keeps the shape of the metal.


He needed arms - He now has arms and a chest because I stuck him on top of a skeleton which I had saved from Halloween


I love Prof Christmas and he looks very much at home on our mantelpiece - not sure he will go in the Christmas Dec box after the festivities are over though!

Thanks for looking! I will be back again after Christmas, so I'll wish you all a very Happy Christmas now but if you would like to see some more project using the lovely AS stamps hop over to my blog each day before Christmas where I am opening my advent calendar every day and sharing a 'me time' treat with you all

Monday, 13 December 2010

Let the Tags continue..... by Nicky Cresswell

Hay Bloggers...
As some of you may know I've been having a bit of a sabbatical from the CT while I was recovering from my health issues, but I should be back properly come the New Year all being well, so this is just a quickie from me today.
***
Tim's tags may be finished but that doesn't mean we cant still have some tag fun.
The Artistic Stamper do some cracking christmas stamp sets some of which can be seen on this ere tag


Now you don't always have to get all technical with your tags as you can see..
A little stamping, a little colouring, a little highlighting with an Inkssential white pen, some glossy accents and a smidge of distress stickles goes a long way to making a pretty looking tag.
So come on.. let's see your Artistic Stamper tags today...

Make them Christmasy and you can enter them in this months AS challenge HERE
♥ HUGZ ♥

Sunday, 12 December 2010

Hels' Tag Of Christmas... Number 2

Goodly morning and a very happy Sunday to you! If you have arrived from Ink On My Fingers, welcome and thanks for coming over... if you have arrived on your travels, welcome and thank you for visiting :O)) First of all... I need to announce the winner of the first Hels' Tag of Christmas... so, Mr. Random.org has cogitated and come up with...


#16 - Stampersue

Many thanks for all your lovely comments, muchly appreciated. On with today's offering... another Hels' Tag of Christmas... so inspired am I by a certain Sultan of Stamping, I have been playing with more Tissue Tape (wow, I lurve this stuff!!!) and ink and made another tag.


I started by sitting pleating Tissue Tape onto a piece of cardstock that was big enough to cover the Pine Tree Alterations die. I pleated the tape and overlapped each layer - starting at the bottom of the card and making my way upwards to the top... this way, the pleats stay stuck down by the layer above. Once the card was covered, I cut the Pine Tree out of it and then used Forest Moss Distress Ink to colour it. I then smothered the whole lot with Rock Candy Cracklepaint and once this had dried, I wrapped some raffia around the trunk.


I used Snowcap Dabber to add streaky patches to the top and bottom of the tag, these formed a resist and I wanted them to look a bit like icicles. I coloured the whole of the tag with Bundled Sage DI, added some Forest Moss, blending over with a Blending Tool and foam and then added script, stamping using Bundled Sage. Finally, I edged it all with Walnut Stain and then used a soft cloth that had been spritzed with water from a Mini Mister to remove the ink from the paint. I stamped a flourish in Snowcap Dabber and then the sentiment in black StaZon, adding white dots with a Ranger White Pen. Finally, I added some elastic trim from the Idea-ology Trimmings and a piece of gold tinsel (from my stash) Oh and the trim at the top is more Trimmings (ribbon this time) which was coloured with Bundled Sage DI and then a few baubles were added as a bit of extra bling.


To be in with a chance of winning the tag, all you need to do is leave a comment here for me and I will use Mr. Random.org again to draw out a number. The winner will be announced next Sunday, 19th December and I will post the tag out as soon as I get the addy deets thru, so all being well, you should have it before Christmas :O)) Anyways... that's it from me for the time being... thanks for looking... have a fabbilicous day! TTFN

Hels x

Saturday, 11 December 2010

Travel without Observation by Sioux Jenneys

Hello everyone! It's my turn again and I'm here to share an ATC :)

That's me Sioux by the way!


1. Stamped the the man image from the Mens Plate 001 #35......such a dapper chappie love the tash!....in archival coffee onto white card.....then used a punch the same size as my bottle top....and filled with glossy accents adding a touch of beadazzles jazz.
2. The base board was covered with Viva Decor Terra Sahara and stamped into whilst still wet using the mini lattice wire background that had been inked with walnut stain distress ink....(make sure you wash the terra off the stamp quickly ;) )

....love the texture this gives :)

3. Used my best tool (a finger!) to smudge Viva Decor Inca Gold rose in the central area and copper on the edges.
4. The wings are from T!m's Heart Wing die painted with Studio gesso then stamped with calligraphic mat 4 using pumice stone distress ink which also was used to age the edges.

5. Stamped the sentiment onto inked card and layered onto black card.

6. Used one of the fabulous little metal mini crowns.

....well actually I only used half a crown....those were the days! LOL.

.....cut the crown in half using my Tonic scissors

....Just to say that I did question the reason to buy yet another pair of scissors when instructed that these were the only things you would be allowed to take into the workshop I'm doing with T!m in February!....but honestly they are fabulous....I was having difficulty using my wire cutters but these scissors really did cut the metal like it was butter! :)


I love the dimensionality on this :) See you again soon!

xoxo Artyjen

Thursday, 9 December 2010

Hels' Tag Of Christmas... Number 1

Goodly morning peeps...Well, who is totally enthralled by those fabulous 12 Tags of Christmas by Tim Holtz?? I am!!! I love tags, I love inks, I love rubber and most of all... I love a good crafty session! For the last few years I have been doing the 12 Tags but also have make my own versions with different bits and bobs from the originals on them... and this year is no different. This tag here has several of the techniques we have seen so far this year and... I am giving it away to one randomly picked comment. So, if you would like to win this tag, please just leave me a comment on this post and I will ask Mr. Random.org to choose a winner on Sunday 12th December '10


I started off this tag by inking up a holly stamp *all stamps used are Tim Holtz Collection* with Peeled Paint and Forest Moss Distress Ink and then wiping away patches where the berries are and popped a teensy droplet of Fired Brick Re-Inker... when I say teensy, I mean reeeeally teensy - just the touch of the end of the pippet will be enough as it is very concentrated. I stamped randomly on the edges of the tag and then embossed with clear powder. Next, I used Frayed Burlap DI and went right over the tag, working the ink with a Blending Tool and then adding a touch of Crushed Olive and then Forest Moss Distress Ink to the edges. I used a splash of water from a Mini Mister to add a bit of distress and then dried with a paper towel.


Next I used the music script stamp and stamped in Frayed Burlap DI... stamping Seasons Greetings in black StaZon, wrapping some jute around the tag... making a Tissue Tape rosette (my new addiction - all the deets on how to make this are on Tim's blog with a video too!) The centre of the rosette is an Acoutrement button and I also added Walnut Stain ink over the Tissue Tape (gently does it) just to tone it in. The little sentiment is actually a sticker from the Seasonal Stash Sticker book - this was popped onto card, sanded, Walnut Stained edges and then attached to a Memo Pin. And there you have it... a Hels' Tag of Christmas... I will try to make another which will be a giveaway for next week... I just need to figure out how to slow time down now so I can make my seven hundred and 23 Christmas cards LOL Thanks for looking... Oh and before I go... don't forget that the challenge here this month is Christmas ... so, if you are doing the 12 Tags you can link in with those... the deets are HERE. TTFN

Hels x

Wednesday, 8 December 2010

Tag 7 1/2 by Jennie

The phenomenon that sweeps the stamping world early this month has grabbed hold of some of us again, and certainly has done me....lol what am I talking about? If you haven't been there, then you must visit Mr Holtz's 12 tags of Christmas! Now some of his tags are mind blowing exercises in lots of techniques, and complicated things to make!
So, I took some of the elements and techniques that has used so far to make a simple ten minute tag ( hence the title , as today is Tag 8!) for you to copy if you wish. I love simple, the simpler the better! So with this in mind, I use the Merry Christmas Artistic Stamper stamp, and inked it up using cut n dry felt. Stamp your stamp using black archival ink onto the material part of the felt pad, and using distress ink re-inkers colour up the inked stamp. Then place your stamp back onto the pad ink, and stamp in colour!  Keep the felt in a plastic bag, and it should last for ages. If you haven't felt then just ink your stamp using distress inks. I clear embossed the words.
I have to say I cheated here and used the same felt that I used when making his tag no 2!! and it had kept its colour perfectly!
I then inked the tag using Forest Moss , Crushed Olive ( love that name!) and edged it in Barn Red ( my favourite of all the colours!)
You can ink up over the clear embossing with no fear of the embossed image being discoloured.
I stamped the cones from Tim's Winter Sketchbook using the same method.
Add lots of Idea-ology baubles, and a facet. I glued a tiny picture from the Seasonal pad to the back of it with Glossy Accents. I added a few pearls on the bottom too.
There you go a ten minute tag perfect for your presents!

Happy Tagging
Jennie

Monday, 6 December 2010

Bobby The Snowman By Hels Sheridan

Morning! Blimey, Winter came early last week didn't it??? I didn't get that much snow here but I know a lot of peeps were affected by it. One thing I always love to do is make a snowman... and seeing as I didn't have enough of the real white stuff to play, I improvised and used my Bobby Snow Stitchels design instead and made an Easel card.


Bobby was stamped in Black StaZon and then coloured with: Tumbled Glass, Vintage Photo, Fired Brick, Aged Mahogany, Crushed Olive and Spiced Marmalade Distress Inks - using a waterbrush to apply the colours to him.


I stamped some Stichels Holly Garland, coloured with Forest Moss Distress Ink and added some Fired Brick Distress Stickles to the berries and to Bobby's buttons and flower. The sentiment is a new one for 2010 - I am just loving that font! Thanks for looking... hope you have a good week!

Hels x

Saturday, 4 December 2010

Journey by Sioux Jenneys

Hello everyone! It's my (Sioux) turn again and I'm here to share a card :)

This time round it's one for the men!

Although I would love it if someone sent this to me! :)


You'll be pleased to know there is no masking involved in this, just use different coloured inks and over stamp where necessary ;).....using images from the Open Road 1 Plate #47 and Ephemera 1 # 48

1. Stamp the cycling image onto kraft coloured card using Versafine onyx black
....tattered the edges and blended Distress Ink Vintage Photo to grunge it up a bit. LOL
2. Place the stamped focal image on the card front and lightly mark in pencil where the top and bottom corners are on the base card.

...I used a mottled card although it is not showing up very well in the photo.

3. Using Distress Ink Old Paper stamp the ruler top and bottom

4. Using Distress Ink Aged Mahogany (second stamping) stamp the franked postage

5. Using Distress Ink Brushed Corduroy stamp the ticket

6. Using  Distress Ink Vintage Photo stamp the words "original" and "All of life is a journey"...although of course you can change these sentiments to anything you desire :)

7. Using Archival Crimson as a second stamping (I just liked the slightly different tone of colour) stamp the 1/6

....those were the days!!!!!! LOL

8. Fix the focal image using double sided tape.


Happy stamping :) See you again soon!

xoxo Artyjen

Friday, 3 December 2010

Winner of the November Challenge

Two posts in one day! and both winners! I have to admit in my excitement at giving away such wonderful stuff over on the website, I completely forgot to mention the winner of our November Challenge which was "Something hidden". So please step up to the podium
with this gorgeous piece:)
Congratulations! Please email me , so we can arrange for your prize to be sent to you:)
Thank you to everyone who joined in last month's challenge and this month's is CHRISTMAS! well what else did you expect? lol
You can join in using your Tim Tags, or Christmas cards or decorations, and in fact the more we get the more prizes I will give away!! It is Christmas time , after all.. so get adding to our froggy link:)
Hugs
Jennie

Winner of the 3 Birds blog candy, and an offer!

Hi,
I hope that you are nice and warm, and not snowed in! Here in deepest Kent we have thick snow, and I have been warming myself up by making Tim's Tags everyday! Such fun, and such inspiration to work from :)
Here is my take on Tim's Tag from yesterday

Are you taking part? If so pop by my blog and say hi..love to see what you are making.
On the website , I am loading up his tags (with his permission) and listing all the ingredients , so you can find them easily. I have a brilliant offer on anything you buy until December 13th..just spend over £10 , put the code 12tags into the discount code box, and voila 12% off your order and a packet of 12 Tim Tags (manila size #8 tags) as an added bonus! If you would like more like this offer, then add yourself to our mailing list to get mailings throughout the year!
Now onto more wonderful things like the winner of the 3 birdies!
I put all the comments into the random generator, and number 18 came out! So can  Julia Dunnit!!! email me please with your snail mail so I can send you your tree hanging:)) Congratulations! and thank you to everyone who joined in.
Hugs and keep warm
Jennie

Thursday, 2 December 2010

It's Advent Time!!

Thank you Jennie and Hels for inviting me to join the Creative Design Team, I have already had a ball on my project for this month. Christmas is always a very busy time for everybody and I am sure I am not the only one who, come Christmas Day, is frazzled and worn out! So I have devised an 'Advent Calendar' just for me. Not a Choccie everyday, but a few 'me time' treats. Each day on my own blog I will be picking a tag to show you and sharing a treat with you, along with showing you how I have used the gorgeous stamps Jennie sent me to use and some of the fabulous products she sells.


So here is my tree - I have got to admit that you can's see too much on the photo as its so large, but it looks great on my wall. 

traditionally you start your advent calendar on the 1st of December - well who wants to be traditional? Not us at the Artistic stamper! The blog was a bit busy yesterday announcing the new monthly challenge, so I opened my tag on my ownsome (all together now..... ahhhhh......) but I'll share it with you today. All the tags are made using mountboard, which is nice and stiff and will withstand alot of battering - which is just as well, I am not a delicate girl as you will find out! I love using UTEE and for this tag I covered the whole piece of MB (which was a dark cream colour ro start with,  with Versamark and covered with with a couple of layers of clear UTEE, heating it between layers to melt the powder. If you are quick you can get the second layer on whilst the first is still warm (but mind your fingers!!) but if it does cool down you can give it another coating of Versamark. I then sprinkled on various colours of coloured UTEE - you can use ordinary embossing powders at this stage if you wish. I had the AS Harlequin Background stamp ready inked with versamark, when the UTEE was still hot I pressed the stamp into it and allowed it to cool - you MUST wait for the UTEE to harden before you remove the stamp or else you will make a right mess of it! Then I inked the edges of the card and edged it with a gold UTEE, get you heatgun nice and hot and try to work quickly, just directing the nozzle at the edge, otherwise you are in danger of remelting the triple embossed area and losing your stamped image.
The main embellishment is a large A6 size stamp from the Victorian Christmas Plate that I stamped onto shrink plastic and shrunk! Even though it is a very detailed stamp the images still came out really well once reduced in size.

Now what was yesterdays treat?? Well I met a friend to swap the kids Christmas pressies and I had my favourite treat at my favourite teashop of a cheese scone and a long natter with my mate Sands.

Each day I will be 'opening' advent calendar on my personal blog - NicksArtyStuff  so please feel free to join in with our daily treat!
Here is today's tag....please pop over and see how I made it


Thanks for looking, I will see you later this month with another - but very different - project

Nicks xxx

Wednesday, 1 December 2010

It's Christmas Time! by Jennie-edited with more candy!

A pinch and punch for the first of the month, and welcome to another challenge at The Artistic Stamper Creative Team. Thank you for all the entries for last month's challenge, I will be picking a winner later in the week :))
Of course the 1st of December means only one thing ...Tim's Twelve Tags of Christmas! I have taken part in the last couple of years, and try my hardest to make them the same day he posts, and blog them! No mean feat I can assure you, so this year is no exception! As we are 8 hours in front , it means I can get up at my normal silly o'clock, have a look at his blog, and make them almost right away!
I will be posting them on my blog and on here ,, along with Hels. So what other challenge could we set for this month other than Christmas??!!
All you have to do is add your challenge entry, (as many as you like) and if you use The Artistic Stamper stamps you get an extra entry :) At the bottom of this post is the froggy link, so join in and we will come and visit! The prize as usual is £15.00 worth of The Artistic Stamper stamps. We have had a fantastic number of entries this month ( keep them coming...lol and so I am adding more candy..there will be three more winners of The Artistic Stamper stamps..yea! Please bear with us as we are trying to get round to everyone's blogs to see your entries...
My entry for this month's challenge will for obvious reasons be many and varied, so here is my first take on his first tag!

Don't forget to pop back tomorrow for our new monthly Creative Designer...
Happy Creating
Jennie

Sunday, 28 November 2010

Victorian Christmas by Alison Hall

For my third and final piece as November's Guest Designer, I decided to make a Christmas card.

The Artistic Stamper has some wonderful vintage Christmas stamps, and there are plenty to choose from.

For the main image, I chose the little girl hanging her Christmas stocking up, from Victorian Christmas 1. I coloured the image with Antique Linen Distress Ink, edged it with Fired Brick, and matted it onto black card.


The corner stamps are from Victorian Christmas 2. This layer was also coloured with Antique Linen, then matted onto green card. I added some torn, inked music sheet, then the little girl image.
The Baubles were stamped onto clear shrink plastic, and coloured with Sakura Stardust pens. I punched a hole at the top, before shrinking them. These were attached to a length of vintage brass chain, then attached to the stamped layers with Tim Holtz long fasteners.


I covered an 8 x 8 inch square card with music sheet, then attached the stamped layer to this.

The 'poinsettia' is made from Grungepaper, diecut with the Tattered Florals and Tattered Leaves Alterations dies. They were coloured with Distress Inks, then I added Rock Candy Distress Stickles to the petals, and Fired Brick to the leaves. The centre of the poinsettia is a shrink plastic bauble, that had the top cut off before it was shrunk.


I hope you like my vintage Christmas card, and thank you for looking.
Alison

Saturday, 27 November 2010

Bling & Baubles By Hels Sheridan

Oooh, I loooove Christmas, all the preparations, the decorations and the fact that I can add as much bling to artwork and get away with it LOL For this piece I have used the brand new Steampunk Bauble stamps - aren't they just F A B!!!


I started with some Gold Nuggest TSS metal - you can any colour you want to to match in with your festive colour theme, which was popped onto black card with Humungo Tape. I stamped the baubles with Black StaZon, giving it a quick zap with a heat gun to set the ink. Next I used a teflon tipped refining tool (TSS) and added little indents all around the cogs inside the baubles and then used a scootchy tool to make a nice edge for each one. These were then covered with Black Dabber, which was wiped off with paper towel whilst still wet - this just ages the metal nicely and the paint sits in the bits you have refined.


The base of the canvas was covered with Terra, which was stamped into using background stamps, heat dried to make it warty and then painted with Traditional Tan, A Dash of Red and Sable Brown Claudine Hellmuth paints. Once these were all dried, I used some Perfect Pearl mists - Heirloom Gold and Forever Red, spritzing and heating to dry them. These added a load of bling which doesn't really show in the pics. Finally, I used my favourite applicator tool (my index finger LOL) and popped some Inka Gold onto the bobbles on the canvas to highlight the contours. I added Idea-ology Ball Chain for the baubles to hang from and a Memo Pin and Charm Clip for the sentiment. Thanks for looking! TTFN

Hels x

Thursday, 25 November 2010

3 birds in a row!-by Jennie

Hi, it's the boss again, but don't worry I won't be staying long..lol Just popped in to show you a hanging piece I made , which doesn't take long, and is just perfect for your Christmas Tree, or for any occasion really! I used 3 different sized Chipboard birds from Maya Road, These came from the Fancy Bird coaster, mini bird cages, and the bird keyring.
I coloured them using my favourite colour..blue! I took three different shades of Distress ink, and used the direct to paper, or in this case direct to chipboard. I loved how it came up different shades.
 
The stamp is one of Wendy Vecchi's swirls from here Botanical Art stamps, which if stamped randomly gives a great pattern. I inked them with Pearl Dabbber. Just make sure you use a rub it scrub it to clean the stamp before the paint dries!
The birds are joined together with Tim's Lace chain, and a few of his baubles to add a bit of bling! The pearly colouring in between the birds on the chain, is a new product which will be available on the website shortly , and is called Hot Tubez. Watch this space :))


If you would like to be in with a chance of winning this hanging birdie set, then just leave a comment on this post, add it to your sidebar for another chance and I will pick the winner next week on Friday 3rd December.
Have a very Creative day
Hugs
Jennie