Friday, 29 December 2017

Super Speedy Tags by Gemma

There are so many things to do and make in December, So I try to keep thing super quick and simple where I can especially when I feel like the gifts needing wrapping will never end.  


 So for my gifts this year I made these tags they are easy to do and to batch make.


I started by using leftover white card sitting on my desk but you could easily just do a whole sheet. I covered each piece with two similar shades of Distress Ink and sprinkled some water over the top.


I then stamped over the top with background and calligraphy stamps and more Distress Ink.


Then I die cut lots and lots of circles, which I attached to the tags, then it was just a matter of sitting with a nice hot cuppa and doodling around the tags and turning the circles into baubles.


Thanks for popping by

Gemma


Tuesday, 26 December 2017

My favourite 3 creations for 2017 by Titbelsoeur

 Hi everyone its that time of year again where I share
my top three for the 5th year. Yes, 5 years have passed and I am still very happy to be here with you !
 I hope you enjoy revisiting them as much as I did making them.
It was not that easy to choose my favourites, anyway here they are !
So to start with we have 


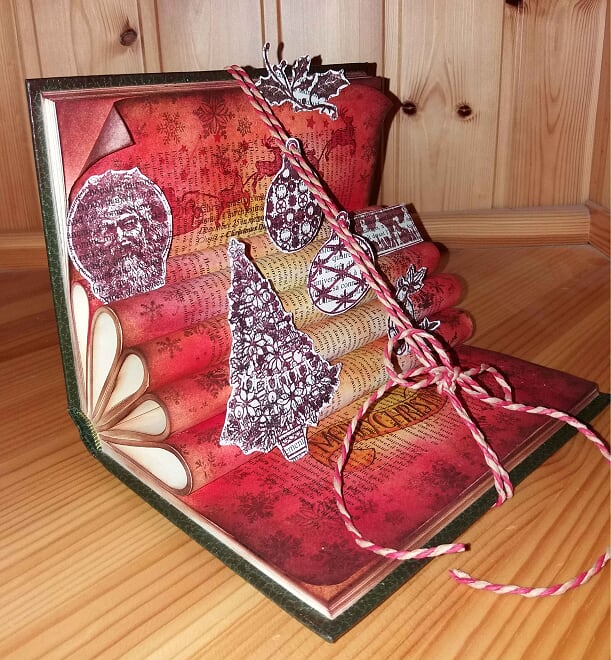
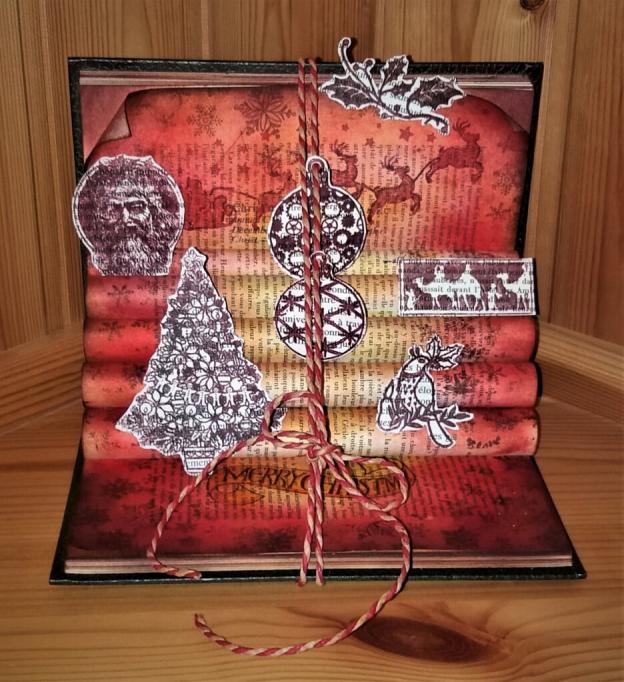
I love to alter books one way or another, and I have been very happy to get back to this Christmas decoration. I had once made one for The Artistic Stamper, inspired by my teamie Astrid here : Titbelsoeur's 2013 Artistic Stamper highlights

Second, this was a great pleasure to be featured by the Craft Stamper magazine, thanks to Super-Jennie :


Et au final, se la péter !

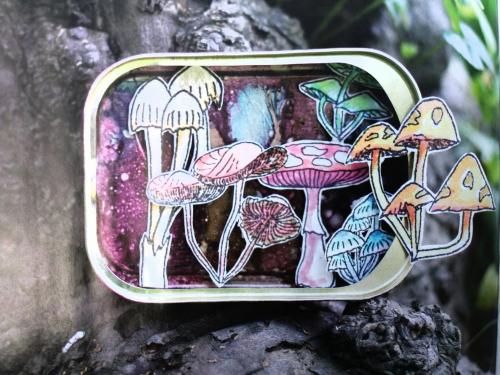
You know that altering sardine cans is one of my favourite activities, and it was a double fierce that my can be featured, and decorated with the Mushrooms A5 Plate © Tit Belsoeur stamps I designed for The Artistic Stamper !

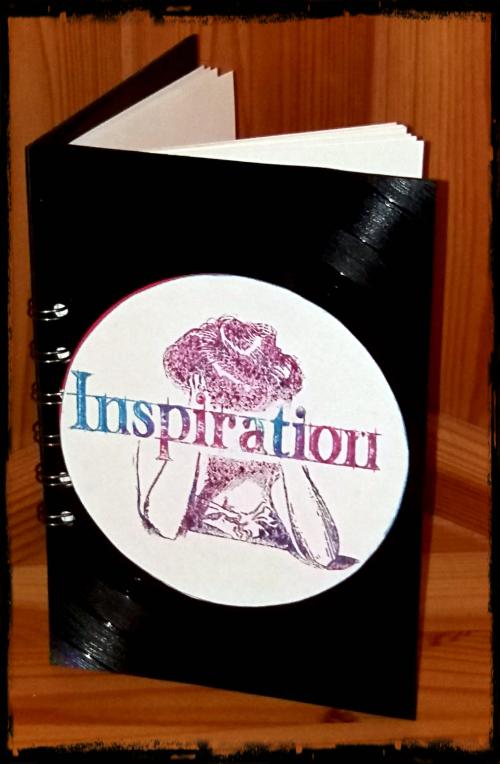
And third, I had to make a difficult choice between my love of using tea bags, my experiment in making Galaxy  or minimalist cards, and my new field of experiments : vinyl LPs !


You will find all my posts here : TitbelsoeurI hope you have all enjoyed reading these 
as much as I have creating them for you.
I do hope that over the last year my work has inspired you in some small way.
A very Happy New Year from me
again, I have been so pleased to spend this year with you, and I hope there will be many others like it ! 

Enjoy this year-end time, have a lot of fun and celebrate !
xxx

Sunday, 24 December 2017

Christmas Tag Decoration with Lisa

Hello folks, Lisa here with today's 
blog post for 

One more day till the big fella comes down the chimney.... and along with that lovely thought comes the manic wrapping!!!

So with that mind, I decided to make a Christmas decoration to go on top of a special present. 

Here is my creation...


I used Artifacts Funky Fairy stamp and the Tick Tock Christmas Baubles stamp set.

Artifacts - Funky FairyTick Tock Christmas Baubles A5 (cut out and mounted on cling cushioning)


I stamped the three baubles and the fairy with clear embossing ink on to black card. Then using white sparkle embossing powder, heat embossed it. I fussy cut the baubles out and did the same on the reverse. 


With the big bauble I stamped it again on a separate piece of card and used foam pads to make a more 3D bauble. 

I added lace and red paper ribbon to some of the baubles and attached different lengths of green/white bakers twine to each of the baubles and fairies. 


I then tied the lengths of twine together at the top with a knot.

I used some red paper ribbon to make a big bow to cover the knot of the twine.  


I hope all your Christmas gifts are wrapped as pretty. 

Wishing you all a very merry christmas and a happy and healthy 2018.

If you would like to pop over to my blog, here is the link.
Lisa xxx 

Thursday, 21 December 2017

"Two for One" by Jane

Hi Guys!!. Well....as you will probably soon find out anyway....I have a confession....I have an addiction...yes...(I am standing up now to say this next bit)!!.. Hi, my name is Jane and I am a corrugated cardboard addict!!!!. Heck it doesn't even stop at corrugated card, I don't know what it is about the stuff, I just love it and cannot bare to throw any of the stuff away, I am sure there are others like me..lol.
Anyway, onto my card, that actually turned into making two cards because I made the second with the bits that I had used to judge how many times to use the snowflake stamp to make a circle.
I started off by ripping off the first layer of some corrugated card and then using the A4 SWIRL MASK to stencil with some gold paint.

Then I used the SMALL DOTS mask

I then stamped the SNOWFLAKES in a circle..after practicing the placement on a separate card,


 then added the santa image from the VICTORIAN CHRISTMAS 2 stamp set, and the sentiment from the CHRISTMAS GREETINGS 1 stamp set. After doing a spot of spritzing with ink, and mounting it on the corrugated card, it finished up like this....

I couldn't waste the scraps that I had cut up to try guesstimate the positioning of the snowflake stamp to make a circle, so I made this card out of it, I just added a few die cuts and the same sentiment as my first card on a scrap piece, it got the same corrugated card addition, et voila...another Christmas card done!!.

 I am so enjoying seeing your entries for the current ARTISTIC STAMPER CHRISTMAS CHALLENGE, so if you haven't already joined in the fun..it would be great to see you there. Merry Christmas to you all and a very Happy New Year. 
Hug: JANE


Tuesday, 19 December 2017

Christmas tag by Titbelsoeur

Goodly Morning Stampfans! 
Today I am here showing you a quick Christmas tag I have made using some of my favourite Artistic Stamper stamps... 


I hope you like it, and here's how I made it :
To begin I stamped the bird image from 
Modern Christmas # 1  onto a small piece of white card, coloured it in with Distress inks and then cut around the outline of the image.
Next, I made my own tag support from a cereal box and covered it with black gesso, then I used a piece of  white watercolor paper and blended some Distress inks over it with blending tool and foam. And I stamped baubles and holly (find them in Christmas Stamps) on it with the same inks.
Just had to stick the bird to the tag and add a nice ribbon.

So, that's about it for this creation and I won't be posting again this side of Christmas...so, I'd just like to wish everyone a wonderful Christmas and thank you for all your comments since I joined The Artistic Stamper Creative Team. It's been lovely reading each and every one of them and I really do appreciate them all.

And don't forget you can win these fabulous stamps, just participating in our challenge 

December's Creative Challenge - Christmas

 for 3 chances to win !

Bye for now and happy creating. 

Titbelsoeur

Saturday, 16 December 2017

Star Cards by Gemma

 I decided to make my own Christmas cards again this year, but instead of making the odd one for a specific person and decided to make a batch of cards so I could also donate some to my son's school fair. 

These were easy to replicate and work through systematically and I just changed colours when I got too bored.


After I cut cardstock down to fit my card blanks, I used a repositionable spray to hold in place stars I cut by hand, these acted as a mask and were removed at the end. Over the top, I sponged different shades of green paint.


I then stamped over the top with orange and white paint using background stamps.


The last layer before removing the stars was to stamp using a calligraphy mat and brown ink.


To finish I doodled around the start and the card with a black pen.


Thank you for popping by

Gemma

Wednesday, 13 December 2017

Christmas Rose Wreath by Lesley Mackenzie

Hi all , For my monthly challenge I have created a strikingly simple 3D Christmas card in gold and white.


Artistic Stamper stamps used:
Holly Background
Dog Rose - Lesley Matthewson

Other items used:
Gold Embossing Powder
120g white card stock
Patterned Parchment Paper
6" x 6" white square card
Corrugated packing card

Step1
Trace and cut 2 circles (one inside the other) and cut out to make a ring. Peel off the top layer of the card to expose the corrugations, dry brush with white paint and dab the edges with the ink pad and emboss in gold.


Step 2

Stamp and emboss in gold the Holly Background onto the centre of the card front. Using foam pads stick the wreath on the card positioning in the centre.

Step 3

Stamp and emboss flower heads and leaves onto white card stock and cut out. I used 3 of each. Affix to the wreath using silicone glue or foam pads to create dimension.   I added a gold 'peel off'  Christmas greeting.


Just time to say Merry Christmas everyone ! Thank you for your support this year and I look forward to you joining me and seeing your creations in 2018.

Sunday, 10 December 2017

Star of Wonder by Lisa

Hello folks, Lisa here and welcome to my post for The Artistic Stamper. 
I've been with the team now for a couple of weeks and I'm loving playing with the amazing stamps. The only problem I'm having is choosing which ones are my favourites!!!

The theme is, of course, Christmas. And it has been snowing in the North West today so beginning to feel very festive.

Here is my creation...


I used the new Artifacts stamps, Shooting Stars and Star of Wonder And a colour theme of kraft card and white. 

I wanted to make a tile and imprint the image of the stamp. I first gathered a collection of embossing enamel and embossing powders in white, green, clear, gold and some with lots of sparkles. It is Christmas after all....


I cut a piece of greyboard in to a square shape just bigger than the Star of Wonder stamp. I put some clear embossing ink on the greyboard and covered it with white sparkle embossing powder. Then heated it to melt it. While the powder was molten, I added more powder, and continued to do this with a selection of colours to build up the greyboard tile. 

When I was happy with the thickness of the tile, I put the Star of Wonder stamp on to an acrylic block and added some clear embossing ink. I melted the top of the tile then gently pressed the stamp in to the embossing powder.

I left the stamp on the tile for a good 30 seconds then when it had cooled slightly, peeled off the stamp. 


I then cut a piece of kraft card and stamped the Shooting Stars stamp with black ink. I stamped it on the left side and right side of the card. I then adhered the embossed tile in the centre of the card. 


I added the kraft card to mats and layers of white and kraft card. 

To finish I distressed around the edges of the card to add some texture.


Thanks for popping by the blog today. Leave a comment if you wish, 
either here or pop over to my blog.
I love to hear what you think.
Toodles for now,
Lisa xxx 


Here are the stamps I used, which are available from The Artistic Stamper website


Artifacts - Shooting Stars   Artifacts - Star of Wonder

Thursday, 7 December 2017

Christmas present by Titbelsoeur

Good morning friends,
What about home-made Christmas presents ?
Like altered books ?
They are easy to make and are usually very well appreciated.
First of all, grab an old book and roll 5 groups of pages.

Then, colour them with Distress ink on blending tools and foam
Make your Christmas Stamps choice, stamp some of them directly on the book, and others on separate book pages that you will cut out and stick to the book. Use a pretty ribbon to bend the book, and here it is :


Would you like to win these fabulous stamps ? Easy : just participate in our challenge 

December's Creative Challenge - Christmas

 for 3 chances to win !

Thank you so much for stopping by.
Your comments are very much appreciated here, on my blog

Titbelsoeur

Wednesday, 6 December 2017

Winner of November's Creative Challenge

Hello!
I am back this month with the winner of last month's challenge which was Take a Quote. We had some wonderful creations, and thank you to everyone who joined in.
I have chosen a winner by random, and please congratulate
ArtyJen with this lovely card . 
Please email me so I can arrrange your prize.
This month's challenge is Christmas, and you can find The Artistic Team's contributions here
We look forward to seeing your creations

Have a very Happy Holiday season
Jennie x

Monday, 4 December 2017

Happy Kissmas by Jane France

Hi there all you Artistic Stamper fans, this is Jane here with my very first design team post, I am thrilled to be here and looking forward to seeing all your fabulous creations, as well as hopefully inspiring you with my makes.
For my first card I wanted to do a Christmas themed card with non traditional colours and to make use of a stamp that is not necessarily for Christmas. I have this Rodin's "The Kiss" statue on my fireplace...(obviously the small version!!) so when I saw that The Artistic Stamper had it in a stamp....I just fell in love with it, a versatile stamp that can be used for lots of occasions... ie... Valentines Day, Birthdays, Anniversaries, Weddings,....and now...... Christmas!!.


I started by inking up an old book page, then stencilled blue ink through the SMALL DOTS 6x6 mask, then stamped and heat embossed the SNOWFLAKES, then on a separate piece of paper, stamped the THE KISS, cut it out, and along with the computer generated sentiment, added it to my card. 

Friday, 1 December 2017

December's Creative Challenge - Christmas

Hi
 A Big thank you to everyone who joined in last month's challenge. Amazing Creativity!
 This month's challenge is Christmas and can be interpreted any way you like, as long as it has rubber stamping in it.
 

To join in with this challenge (we are limiting the challenge entries to 3 per person), is simple; all we would like you to do is, make a piece of artwork, making sure that you include the theme and some rubber stamping. Pop back here to link up using the Inklinkz at the bottom of this post, so that we can see what you've made and then, leave us a comment to let us know you have joined in with the challenge.
 As always, there will be candy for one randomly picked entrant - the winner will receive a stamp of their choice from The Artistic Stamper .

In addition, you can enter the same challenge on Facebook!

To join us on just go to our new Facebook group, and send us a request to join..  There will be a prize for the Facebook challenge, as well as the blog challenge!
And don't forget....if you use The Artistic Stamper stamps on your entry, you will entered into the draw, twice! To get you started here are creations from some of the team....and please give a big shout out to our two new team members, Lisa and Jane

Soooooo.....it's the Christmas countdown, so that means doing the two things that I love, making cards, and drinking!!... (sometimes doing both at the same time!!) !!
For my first team card I started with a piece of sheet music...We Three Kings Of Orient Are...which is apt because I have used three of the crowns from the Crowning Glory stamp set to depict the three wise men, I have also used the Swirl Mask and the sentiment is from the Christmas Greetings #2 set.
For more info on how I did this card, it would be great if you visited my blog.

My first project for The Artistic Stamper comes during my favourite season, Winter. And with Winter comes Christmas. 
For a more detailed look at my creation please pop over to my blog


 I created a mini Christmas card using Funky Fairy and Snow Strands, embossed in silver. I added lots of glitter to her dress!

I tend to go fairly nontraditional with my Christmas decorations so when I came across a polystyrene heart in my stash I knew I was looking at my new tree decoration. I decorated the heart with acrylic paint and background stamps from The Artistic Stamper. You can pop over to my blog for more information if you like and I hope me and my teammates have inspired you to join in this months challenge.

 
Here is another way to use the vintage vinyl notebook you already saw  
make it a Christmas present :
To make this notebook, you will use :
- 2 LPs
- 4 A4 pages you will fold in 4 and cut
- another page to stamp the image
-  Mini Christmas 2 stamp you will find on the Christmas Stamps page

We hope that you will join in this month's challenge, and also join us on Facebook too.

We look forward to seeing your creations. Don't forget to add a comment when you have posted your entry.

Have a very creative and festive month

Jennie xx


Wednesday, 29 November 2017

Rapunzel Journal page by Gemma

 A couple of days off December, which is a super busy month for me as I am sure it is for lots of you, I am so behind. I wanted to take some time to play in my art journal, so I have a page to share with you all today inspired by this window stamp from The Artistic Stamper that always reminds me of Rapunzel, so I added a quote from the story 'That beautiful bird is no longer sitting in her nest, nor is she singing anymore'


After laying Gesso down I sprayed some purple sprays I had left over from a different project, while they were wet I sponged areas for texture. Once that was dry I made some marks with a black paint pen.


Then I randomly stamped over the top with a calligraphy mat. On a separate sheet of card, I stamped the window and heat embossed it with black embossing powder.


I made a pencil mark so I knew where I wanted the window to be, and then masked round the section I wanted to use on Jennies flourish stencil.  Once I had the stencil in position I applied I mixture of green paint and texture paste.


While waiting for that to dry I stamped several flowers and a butterfly onto card. After colouring them in with pencils and distress ink I cut them out and glued them into place.


Thank you for popping by

Gemma