Friday, 29 July 2016

Love Butterfly card by Gemma


Hello Everyone

It is really, really hot as I am writing up this post, I hope to be out later enjoying the sun.
I have made this bright card using lots of white space to help the colours pop.


I cut a sheet of white card to fit the card blank and covered it with gesso. Once it was dry I placed the  honeycomb mask over the top and sponged through a very small amount of Fossilised Amber Distress Ink. Then moving the mask around I sprayed Cherry Pie Dylusion Spray over the top. Because of the layer of gesso the spray and ink have been slightly absorbed and muted.


On my craft mat I mixed small amounts of Paperartsy Granny Smith, Banana and London Bus paints with water and using a small round paint brush I flicked the different colours of paint over the top. I then edged the card with Distress Ink and ripped pieces of three different washi tapes into strips and glued then in place.


On a separate sheet of card I stamped out three Butterfly's  and coloured them in with Aqua pens. Before cutting them out and gluing them in place on the card.


To finish I added the word Love from the word mask using black paint.

Thank you for reading
Gemma


Tuesday, 19 July 2016

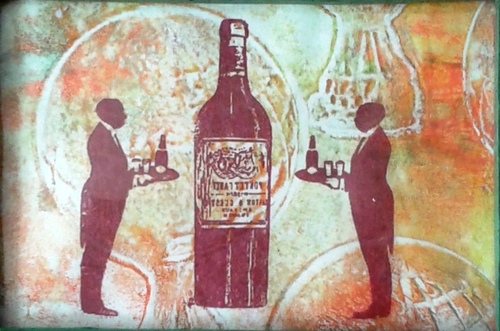
Let's have a drink, by Titbelsoeur

Hello there, this is Titbelsoeur on board today,
I am happy to present you my last creation for the Artistic Stamper :


I first stamped Round the World on to my gelli plate to make ghost prints, let the background dry and then stamped the bottle & butlers from Men’s Plate 001 # 035 A5 on it with Plum Archival ink.
Here are the details :


Thanks so much for stopping by,
your comments are very much appreciated, 
here, on my blog, or on the Artistic Stamper's Facebook page

Do not forget to participe in our

MONTHLY CHALLENGE 

 to win some fabulous Artistic Stamper stamps !

Titbelsoeur

Saturday, 16 July 2016

Butterfly 3D frame by Gemma

 Hello everyone

I have a bit of a butterfly theme going on this month. For this post I decorated a 3D frame that measured 20 x 20 cms.


To start I coated the frame in a white paint to prime it.  Then I put some Fresh Lime, Dylusion paint and basic florescent green acrylic on my craft mat.  I applied the different paints to the frame blending them together as I went. It took two coats to cover the frame.


Once dry I applied some grunge paste through the Random Dots mask  and some gilding wax along the inside edges of the frame, once the grunge paste was dry I also brushed gilding wax over the paste.


On sheets of acetate I stamped out butterfly's and columns from the architecture plate, and butterfly plate


Using my fingers so the paint was applied fairly thickly I applied Titan Buff and different shades of grey acrylic to the backs of the columns. When cutting the pieces out, I had to remember to leave tabs so they could be glued in place on the frame. 


On the back of the acetate sheet with the butterfly's I sprayed different ink sprays including cherry pie and lemon zest Dylusion sprays.


Gluing the pieces into the frame was very fiddly and I ended up making little stands from acetate to prop everything up.


I then added a strip of green paper along the bottom to represent grass and some die cut swirls from patterned paper.


I then stamped the same butterfly's onto card stock and coloured them in with pens, gluing the acetate butterfly's over the top. Then I just had to glue them into place on the frame.


Please take a look at this months challenge- All Things Bright and Beautiful, here on the blog and on the Facebook page. There is still plenty of time to enter for your change to win some lovely stamps.

Thank you for reading
Gemma

Sunday, 10 July 2016

All Things Bright......... And Beautiful Card by Debs

Hi All

Here is my latest creation for this months challenge, I had a bit of fun with this one.  Thought i would put a slightly different take on the theme.


The background is nice and bright and then the subtle black and white of the Gibson Girl stamp from the Gibson Girls plate 1 represents the beautiful.

I covered a sheet of patterned paper with gesso covering pretty much the whole sheet (a great way to use up paper scraps or pages that you don't use for other things.

Then i scribbled some distress crayons over the gesso (they work best over gesso, as they move more freely)  Then i added a tiny a bit of water using my finger and blended the colours together.  Then once happy out came the stencils i used chevrons, random dots and honeycomb and the dylusions paints and with a sponge added stencilling over the top

It doesn't look great here but the more you add the better it looks

I used crushed grape and vibrant turquoise Dyslusion Paint, applying it through the stencil with a sponge  this way you don't get big blobs of paint  I did the same with a smaller piece of card for the backing of the embellished image

Added some white pen to make it all pop, wrapped some fibres around the piece of paper and using foam tape stuck the background to a card and then mounted a piece of black card the extra coloured piece and the stamped image onto the top.

I hope this has given you some inspiration and i shall look forward to seeing your projects added to the blog and Facebook as you do them.

Happy crafting
 Debs


Thursday, 7 July 2016

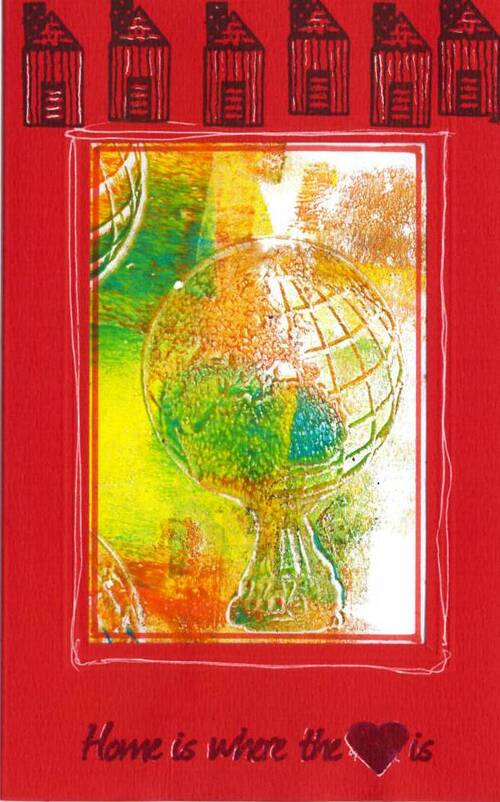
Home sweet home by Titbelsoeur

Hi there !
Are you crafting this summer ? ready to participate in our July challenge and delight us with bright and beautiful pieces ?

Here today is a card for all those who are travelling around the world.

I first stamped this fabulous Round the World stamp from the Steampunk section on to my gelli plate and made a few tests. Then I chose this very piece 


to be inserted into the card. On the card, I stamped this little house from Houses with Black Archival and highlighted some details with a white pen :


Same thing for the sentiment :

and here is my card :


Thanks so much for stopping by,
your comments are very much appreciated, 
here, on my blog, or on the Artistic Stamper's Facebook page

Do not forget to participe in our

MONTHLY CHALLENGE 

 to win some fabulous Artistic Stamper stamps ?

Titbelsoeur

Wednesday, 6 July 2016

Winner of June's Creative Challenge.

Hi!
Thank you to everyone who joined in June's Creative Challenge. There were some gorgeous entries.
There can only be one winner, and Mr Random.org has chosen
 with this gorgeous creation


Congratulations , and please email me so we can arrange your prize.
Don't forget this month's challenge is All Things bright and Beautiful  and you can find inspiration here, and here on our facebook page.

We look forward to seeing your entries.
Have a creative day
Jennie

Friday, 1 July 2016

July's Creative Challenge-All Things Bright & Beautiful

Hello!
Welcome to our monthly blog challenge!
A big thank you to everyone who joined in last month's challenge. We had lots of fabulous entries and I will be announcing the winner of June's challenge in the next couple of days.
This month the challenge theme isAll Things Bright & Beautiful.
You can interpret it any way you like, as long as there is rubber stamping in it.


To join in with this challenge (we are limiting the challenge entries to 3 per person), is simple; all we would like you to do is, make a piece of artwork, making sure that you include the theme and some rubber stamping. Pop back here to link up using the Inklinkz at the bottom of this post, so that we can see what you've made and then, leave us a comment to let us know you have joined in with the challenge.
 As always, there will be candy for one randomly picked entrant - the winner will receive a stamp of their choice from The Artistic Stamper
In addition, you can enter the same challenge on Facebook!  
To join us on just go to our new Facebook group, and send us a request to join.. 
There will be a prize for the Facebook challenge, as well as the blog challenge!
And don't forget....if you use The Artistic Stamper stamps on your entry, you will entered into the draw, twice!
Here is a little bit of creativity for you from the Creative Team to help you get started....


I have made the background page with Bamboo Open Texture Mat C156 © CaroLines stamped on my gelli plate and stamped Round the World on to it. I also stamped Floral Open Background with 2 Free Flower stamps on to the gelli plate to highlight the sentiment.

Then I glued houses and flowers from Houses on the bottom of the tag.


I created the background using acrylic paints, the honeycomb masksequin waste background and a calligraphy mat. I used washi tape and butterflies over the top.

Debs


I painted a tag with Dylusions paints, added some grunge paste through a mask (Designs by Georgina small Daisy) with a bit of paint, some Infusions and some embossing powder. Stamped honeycomb onto the background along with a bee and two butterflies from Butterflies 2 plate on painted tissue paper and a phrase from the  Botanical 3 plate onto piece of card painted in a contrasting colour.

We hope that you will join in this month's challenge, and also join us on Facebook too, and we look forward to seeing your creations. Don't forget to add a comment when you have posted your entry.
Have a creative month
Jennie