Monday, 29 February 2016

Hearts Canvas by Gemma

 Hi Everyone

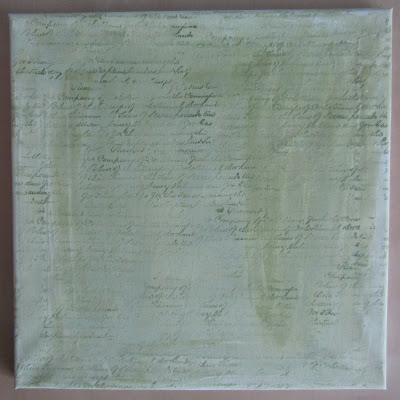
February is over and it is my last chance to use as many hearts as I possibly can for another year. So this time I painted a 12x12 inches square canvas.


After covering the canvas with gesso, I painted the whole canvas with two different shades of green fresco finish paint. I used Teresa Green and Granny Smith. I then stamped over top with the darker shade of green (Granny Smith) using  Calligraphy mat 11. When I was stamping I made sure to cover the whole canvas but stamped two or three time before applying more paint to the stamp as I wanted some areas to be more faded than others.


 I used both Haystack and Chalk fresco finish paints and the dots from the swirls, splats and dots plate, to add the circles to the canvas. I love how imperfect they are, areas where you can see the paint has splodges or areas that were missed.  


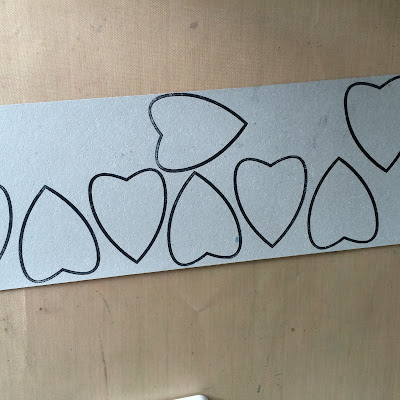
The hearts are wooden and just something I had floating about in the crafty stash. I covered them with gesso and then with the Haystack fresco finish paint. I really should have added a second layer of gesso because as time has gone on I have noticed areas where the wood is still visible. Then I stamped on the top of them using Tango fresco finish and the dots background stamp.
.


After edging the hearts with the same Tango paint I glued them in place using Cosmic shimmer acrylic glue. Then with a black stabilo pencil I added a boarder, some stems and some grass, so the hearts are a little like flowers. To finish I added the word love from the words mask.


Thank you for reading, taking part in the challenges and commenting. Me and my Team mates really appreciate it.

Gemma (inkykitty)


Friday, 26 February 2016

Heart Journal page Tutorial by Shilpa

Hello Everyone,
Today, I am sharing with you an art journal page and its tutorial.


I've used many Artistic stamper Decay stamps to create the background on this page!

here are the step by step photos...


I stamped squares and rectangles from Decay Journaling Stamp set #2 with Jet blck archival ink. Fussy cut them and adhered them on surface to my satisfaction.


I applied mustered seed distress paint and spritzed water to spread it. I dried it with heat tool. And next I used decay numbers stamps with black archival ink to get more texture.
I also used Calligraphy Mat 3 stamp for text on my background.


For more texture I used stencil and gold embossing paste.


I cut out heart and stamped on it with heart background stamp and Calligraphy mat #13 and Coffee archival ink. Applied Fired brick distress paint on it and spritzed water. Let it dry.


I attached the heart on the texture background and my page was ready? Are you liking it !

You have 4 more days to participate in our this month's challenge - "Theme- Heart"

Thanks so much for stopping by.

Products used from Artistic Stamper:
Decay stamps
Calligraphy Mat 3 stamp
Calligraphy Mat #13
Heart Background stamp
Distress Paints- Mustred seed, Fired brick
Ranger Archival inks - Coffee, Jet black


Wednesday, 24 February 2016

HeArt Art with a twist

Hi All

So we have got Valentines Day out of the way, and unless we are making cards etc for loved ones or the occasional wedding.  I know i tend not to bother too much about hearts.  However, we all like extra usage out of our stamps so here is alternative use, which I am sure some or all of you will have already thought of  - turn hearts into petals and make up a flower.


This was quite a simple canvas and came from an idea about using the three colours of Distress Paint which were sitting on my desk! Weathered Wood, Frayed Burlap and Victorian Velvet.  The three colours are all quite muted colours and as paints personally come into their own, working really well with each other.


I started off with a 12 x 12 canvas and added grunge paste through The Artistic Stamper Chevron 6x6 and Large Dot 6x6 Mask with Grunge Paste  

Whilst i was waiting for the Grunge past to dry I stamped 8 of the large hearts from the Roses are Red Plate with Black Archival Ink onto Tim Holtz Grunge Paper

And then cut them out and painted with a quick coat of Gesso not quite sure why as I didn't really need to!!

And also stamped the Chinese Background stamp onto a piece of beige tissue paper again with Archival


Then painted stripes in Weathered Wood and Frayed Burlap overlapping as i went across


Whilst waiting for the stripes to dry I painted all of the hearts with the Victorian Velvet.  The paint comes out a beautiful dusky pink, far less muted than the Distress Ink

I then stamped each heart with the Dots Background A6 stamp using Victorian Velvet Distress Ink

I also went around the outside edge of each heart with Ground Espresso Ink


Using the Dots Background again i added some Victorian velvet paint and stamped some random dots directly onto the canvas, and also added some bottle top marks from the lids of the three colours


Ripped up pieces of the tissue I had stamped with Chinese script and added that to the canvas using Prima Soft Matt Gel

And added the heart petals to make the flower using Prima 3D Matt Gel This gel is absolutely amazing.  You can use it through stencil or as an ordinary glue however if you put a dollop of it onto a project it will stay raised so that you can add dimension really easily.  Plus it adheres pretty much everything including metal and it dries really quickly.  You do have time to move it but you do need to be quite quick if you do.


I stamped the lovely flourish from the Swirls Splats and Dots Plate onto white white tissue and carefully tore around the edge.  I also stamped Follow your dreams from  Journaling Words #1 onto a bit more of the beige tissue and added it onto a piece of cardboard and painted in Weathered Wood and Frayed Burlap but when mounting ensured the colours were the opposite of underneath!  Stuck down the tissue with the soft matt gel 


I made three smaller hearts and coloured the same as the large ones however, this time i used Ground Espresso Ink to add the dots as well as to edge


Added a metal embellishment and a glass bead from my stash and there it is!
As always do let me know your thoughts good and bad, and don't forget to add your project to the blog, we do enjoy seeing what you have produced and you still have a few more days to go.

Happy Crafting Debs


Monday, 22 February 2016

Bubbles & Fish
Hi everyone Dee here with a couple of altered beer mats. Looking at 
the photos it looks a bit dark but it actually is quite pale.
Firstly I put texture paste through a stencil when dry covered 
it in a coat of gesso or thick cream paint if you don't 
have gesso.
Next I used the paint in pale blue, green, pink violet & orange.
Spritz each colour as you apply it drying in-between. 
Once happy with the result stamp the random dots from the boarders plate 
& the 3 large circles from swirls splats and dots plate in black
 archival ink. Colour the dots on the small open dots images with a
white gel pen and the large circles use gesso to colour.
take a fine black pitt pen and scribble a zigzag line round the larger circles.
To finish the effect apply the Black Soot Distress Spray and
activate with water. 
Stamp the fish image from the sea side 1 plate on white card and cut in half.
use the glitter paste see below around the edges. Also use it through 
the circle stencil, along with crackle paste colour with
a silver wax.
Swipe the edges with silver once finished.
That's it for today folks I hope
you enjoyed it.
Cheers Dee x

Products Used
  1. The Artistic stamper stamps:-Borders A6#2, Swirls Splats and Dots, Seaside No. 1 # 018.
  2. Stencil 6 x 6" - Cobbles, A various sized circle stencil.
  3. Any Acrylic paint spritzed with water so it becomes translucent.
  4. Modelling paste
  5. Black soot distress stain spray.
  6. White gel pen or sharpie.
  7. Crystal Stickles/ clear 3D gel with glitter mixed through it to create a glitter paste.
  8. White Gesso and crackle paste.

Friday, 19 February 2016

A whole village... by Titbelsoeur

Hi everyone, Titbelsoeur here showing you how to build a whole village and have it all gather into a sardine can. Would you believe it ?
You should.
Because it is possible !
Just follow my step-by-step :

First, you want to gather all of your gelli print leftovers and stamp your houses from Kat's creations

and cut them out


On the bottom of the can, just cut out another print and glue it on


and on the back, you may glue a map :


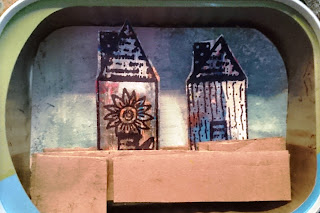
then you glue a piece of cardboard and glue your first two houses


and so on and so on, house, cardboard, house, cardboard... until your village is complete :


add some grass from the Gardening Garden #2 set :


Stamped and cut the text out, then glued it on the top


and houses on both sides


Thanks so much for stopping by,
your comments are very much appreciated, 
here, on my blog, or on the Artistic Stamper's Facebook page.
Do not forget to participate in our monthly challenge
 to win some fabulous Artistic Stamper stamps.

To build this village, I was inspired by a Jessica Sporn's workshop

Titbelsoeur

Tuesday, 16 February 2016

Blue Heart canvas by Gemma


 Hello Everyone

I am not much of a mushy valentines day person, but I do love creating pieces of er............well anything with hearts on it really, Well hearts and circles. I managed to get both of those on this canvas.

The canvas measures 16 x 20 inches, and I started by spraying some Blues, greens and purple sprays. I used a mixture of different sprays from my stash including dylusions ink sprays. Then as I often do, I completely changed my mind on how I wanted to create this canvas, and started adding gesso, crackle paste, texture paste and gel medium with beads. 


I spread a fairly thick layers of crackle paste in a few different areas. Then I placed the large dot mask over the top, and pressed it down into the paste.


 I also spread texture paste through the petal mask, after that I added circles with the beaded gel and the large dot mask. I wanted them to be dangling from the top so using I spatula I carried the beaded gel to the top in lines. This feels so strange now its dry, its a bit bubbly and scratchy all at the same time. I had areas of texture paste scrapped onto the canvas that felt quite plane so I stamped into it with the dots background.


Once all of that was dry I went back to spraying, letting the different colours run down the canvas and blend together, focusing the green spray along the top and bottom. I also added white dylusions paint to the raised areas of texture and crackle paste.


 I cut out three different sized hearts covered them in texture paste and pressed the petal background stamp into them. I then painted some grey ink onto the hearts and on to the dangles from the top.


  I went over the dangles and around the hearts with a black stabilo pencil, which I blended in with a water brush. Then to finish with the same pencil I added the word inspiration from the words mask and drew stems/lines from the hearts to the bottom of the canvas.

I am loving at the entries for this months challenge, there's still plenty of time to enter and be in with a chance of winning some great stamps.

Thanks for reading
Gemma (inkykitty)