Tuesday, 29 August 2017

Dancer Card by Gemma

 I have a CAS card to share with you today using Distress Oxides and stamps


Cut a piece of white cardstock to fit your card blank and stamp a ballerina in the bottom corner using Versa Mark ink and heat emboss with black embossing powder. Leave additional powder over the card it will blend in with the splattered inks.


Spread three different colored Distress Oxide inks onto a craft mat, mix with water and use a paintbrush to splatter the ink onto the piece of card.


 Once dry use the same three inks and stamp around the edges with a backgrounds stamp. When stamping with the background stamp, overlap the stamping and the colours slightly.


Stamp the text near the edges of the card allowing the text to overhang the card in places, then mount onto a piece of black cardstock before gluing into place on the card blank and doodling a frame around the card with a black pen. 


Thanks for reading 
Gemma

Saturday, 19 August 2017

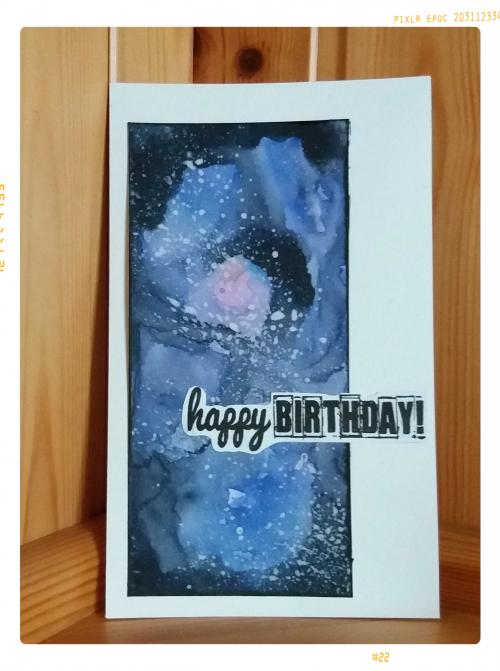
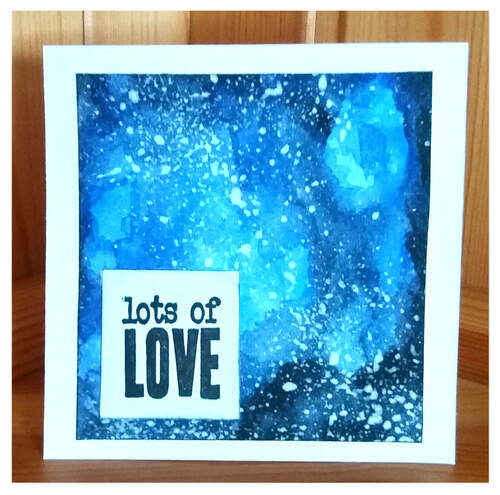
Galaxy cards by Titbelsoeur


Hi there, hope you have a wonderful Summer time.

To make these cards, I have followed tutorials on YouTube showing how to make Galaxy painting with watercolor. This is a very nice process and you can never fail it, which is quite a pretty good thing, isn't it ?
And I am done with my backgrounds, I use the Artistic Stamper's word stamps to make beautiful cards I will send to my friends, either for their birthday, or simply to say Hello !
I have used stamps from the Grungy Greetings #1 A6  plate, but you will find many others in the words-and-sayings section.


Would you like to win these fabulous stamps ? Easy : just participate in our monthly challenge "Anything goes" for 3 chances to win !

Thank you so much for stopping by.
Your comments are very much appreciated here, on my blog

Titbelsoeur

Wednesday, 16 August 2017

Journal Bookmark by Gemma

Today I have a bookmark I made for my art journal, I will be doodling away, stop for some reason and then spend an age looking for the page I am working on. The bookmark is almost the full length of my largest journal so if I remember to use it, I should spend less time looking for a page and more time playing. 


I marked the length and shape of the bookmark using the wavy edge of an acrylic block. The base of the bookmark is the side of a cereal box. Once cut out, cover in a layer of tissue paper and gesso.


Blend red, orange and purple acrylics over the top, and dry completely. 


Spread some white acrylic paint over a craft mat, press your stamp into the paint and then stamp onto the card. This should give you a nice uneven image with lots of texture.


 Spread some pink and yellow paint on your mat, I mixed both of my colours with white so they were a little more opaque and stood out against the background. Then stamp the two largest circles from the set over the top. 


To finish I punched several holes in the top of the bookmark and threaded different ribbons through them and plaited them together.

Thank you for reading
Gemma


Sunday, 13 August 2017

Pop Up Posie by Lesley

Hi Everyone,

Todays project is creating this lovely 3D pop-up jar of flowers, that will fold flat for posting.


Items used are :
Double sided patterned paper card stock for the jars
Double sided coloured card stock for the flowers and leaves
Artistic Stamper stamps -  Flower Power and Inspiration Jars
Black embossing ink and powder
Twine

1. Stamp and emboss 4 jars onto the coloured cardstock leaving space to add a tab on one side of each jar before cutting out.


3.  Cut out all 4 jars remembering to include the added tab on the right side of each jar. Using double sided tape/glue on the tabs attach each jar to the next . I find its easiest to lay them flat and fold the creases before attaching the final 2 jars to make the 3D shape.


4. Using the same patterned cardstock cut 3 strips the width of the jar allowing  0.5cm flap on each end and fold the flaps in. Attach the strips inside the jar at the top. This makes a fixing point for the flowers, stems and leaves. Its fiddly to do and I find quick grab wet glue the best for this job.


5. Stamp and emboss flowers and leaves from the plain coloured card. You will need 7 flower heads,  you can mix 'n' match the sizes and colours to suit yourself. Cut strips of the green card to make stems(I doubled up the card stock for extra strength). Attach the flowers and leaves to the stems.


6. Attach the stems to the 3 strips inside the jars, again wet glue is easiest and I fasten with a paper clip until dry to stop them moving. Vary the heights to create an arrangement and embellish as you like, I've added coloured twine to the top of the jar. The Jar will fold flat to enable you to place in an envelope.

 
Have fun, hope you enjoy making this effective card...let your creative inspiration loose!
Lesley


Thursday, 10 August 2017

Creative Team Callout!

Hi!
Welcome to The Artistic Stamper Creative Team blog.
For the first time in a long time, we are looking for 2 creative people to join our Team!


Do you think you have the time , and creativity to join us?
Do you have a blog?
We require you to create 2 or 3 pieces a month with our range of stamps.
Have a little look at our stamps here, and check out the rest of team's blog posts, and if you think you would like to join us, please email us with your blog address, and one piece of artwork in a jpeg.
You will also find the email on the side of the blog.

I probably have forgotten something, so if you have any questions please do not hesitate to ask any questions.
 Entries close August 31st. We will choose a winner in September.

We are looking forward to seeing your creations, and good luck!
Jennie, Tit, Debs, Gemma, Angie and Lesley.
The Artistic Stamper Creative Team


Monday, 7 August 2017

Mail art envelope by Titbelsoeur

Hello happy crafters !
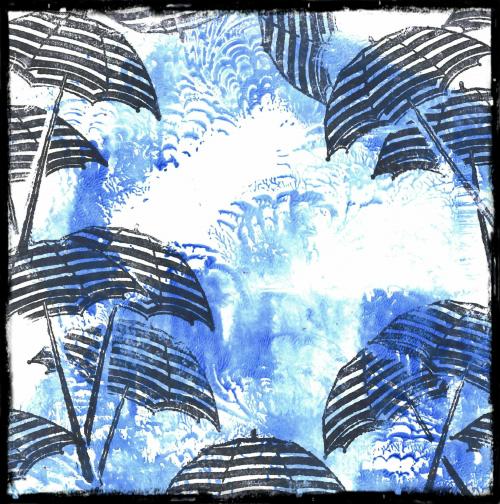
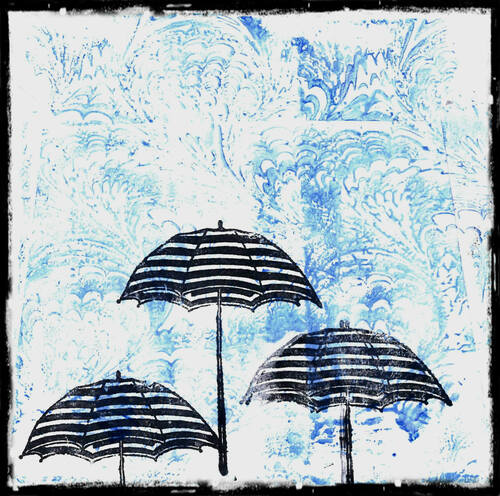
This is Titbelsoeur today to present you a customized envelope to send to your mixed-media friends all the treasures you collect during your holidays !
I have used the same technique as to decorate a LP record here : A summer wall hanger by Titbelsoeur
and used the very same stamps, for a beachy atmosphere :
the umbrella from  Seaside No. 1 A5

Would you like to win these fabulous stamps ? Easy : just participate in our monthly challenge "Anything goes" for 3 chances to win !

Thank you so much for stopping by.
Your comments are very much appreciated here, on my blog

Titbelsoeur

Thursday, 3 August 2017

Winner of July's Creative Challenge

Hello
A huge thank you to everyone who joined in last month's challenge, which was black and white.
As usual it is always hard to pick a winner, so I get help from Mr. Random.org, and the winner this month is...


Congratulations, and please email me so you can choose your stamp.

We hope you will join in this month's challenge which is Anything Goes, and you can check out The Creative Team's creations here, and join in too.
We look forward to seeing your creativity.
Have a happy month
Jennie x

Tuesday, 1 August 2017

August's Creative Challenge - Anything Goes

Hi
 A Big thank you to everyone who joined in last month's challenge. Loved all of the black and white creations . 

 This month's challenge is Anything Goes and can be interpreted any way you like, as long as it has rubber stamping in it.
 

To join in with this challenge (we are limiting the challenge entries to 3 per person), is simple; all we would like you to do is, make a piece of artwork, making sure that you include the theme and some rubber stamping. Pop back here to link up using the Inklinkz at the bottom of this post, so that we can see what you've made and then, leave us a comment to let us know you have joined in with the challenge.
 As always, there will be candy for one randomly picked entrant - the winner will receive a stamp of their choice from The Artistic Stamper .

In addition, you can enter the same challenge on Facebook!

To join us on just go to our new Facebook group, and send us a request to join..  There will be a prize for the Facebook challenge, as well as the blog challenge!
And don't forget....if you use The Artistic Stamper stamps on your entry, you will entered into the draw, twice! To get you started here are creations from some of the team....

Looking forward to seeing everyone's entries for this months ANYTHING GOES challenge. For my inspirational design team piece, I have decorated a canvas. I used the lovely Butterfly plate, Honeycomb mask, and a Calligraphy mat to create this piece. Please pop along to my blog to find out more.


I created this little wall hanging using the girls stamps from Garden 1.  I put several layers of white Embossing powder onto a piece of card, and stamped into it with Black Archival. Attach it to another piece of card, and add wire and lace . Add some gold ink to the edge. 


Debs
I created this tag using a size 10 Kraft tag, a brayer and three Amsterdam Paints, Journaling Words 3 and Swirls, Splats and Dots A4 & A5 sizes as both sets compliment each other adding a bit of depth and then added on some of the new thin washi tapes in stock and stamped the statue from the Architecture Stamp set onto tissue.


We hope that you will join in this month's challenge, and also join us on Facebook too.

We look forward to seeing your creations. Don't forget to add a comment when you have posted your entry.

Have a very creative month

Happy Creating

Jennie