Tuesday, 29 September 2015

Light Bulb Journal Page by Gemma


Hi All

 I love, love ,love the new limited set of PaperArtsy paints, The colours are Captain Peacock, Professor Plum, Granny Smith and Teresa Green. It doesn't hurt that the names are just awesome.


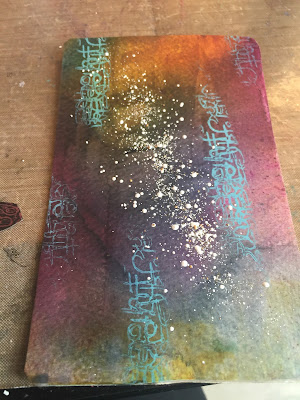
 For this page I used Captain Peacock and Professor Plum. I also some basic Buff Titan acrylic, with the three colours I just covered the pages, there was no method I just did not want to see white any more, once it was dry you could really see the brush marks in the paint, which was great. Using both the Captain Peacock and the Professor Plum I stamped over the top with both the dots and large random dots backgrounds. The paint underneath was still slightly wet, which moved and came up in places revealing the titan buff underneath.


Over this I made the black and white circles using Dylusion Paints and two different sized lids that I keep with the paints just to do this. I stamped out the light bulb on to a scrap bit of paper to use as a mask through which I painted Titan buff and then stamped the dancing girl and the word dance with black archival ink from the dance plate. I also stamped some more dots.


 To finish I stamped the light bulb three time onto acetate, with black ink, cut them out and glued them on top of the painted ones, using a black paint pen I drew around them and also drew lines to the top of the page.


Thanks for reading
Gemma (inkykitty) x

Products used from The Artistic Stamper

Saturday, 26 September 2015

Garden - Mixed Media Canvas by Shilpa

Hello Everyone,
Shilpa here,


I would like to share mini Garden canvas with you for which I've used Artistic stamper Katy Leitch designed Encyclopedia Botanica stamp set.


I created background with Prima Modeling paste and stencil. When it dried completely, I spritzed Ranger Distress stains Ground espresso and mermaid lagoon.


Flowers are stamped with Jet black archival ink and coloured with Cracked Pistachio Distress stain.
I did some text stamping in the background for more interest. 


Here is the final look of my mini canvas.

Thanks so much for stopping by.


Products used from Artistic stamper:


Thursday, 24 September 2015

Gibson Girls can Fly!!

Hi Everyone

Hope you are all enjoying this months challenge.  If you haven't entered yet, you still have a few days to go.  Here is my latest piece to hopefully inspire you!


I took a 6X6 card and stamped the Gibson Girl in Archival Potting Soil and re-stamped onto a post-it note to use as a mask, cut out the mask and stuck it to cover the image. Inked up one of the wings from the Dance A5 set and stamped the first one and then moved the same stamp over slightly and stamped again.  Leaving the mask in place I stamped the flourish from the Borders A5 set.  

I then used the Swirl 6x6 Mask and using cut and dry sponge applied Rusty Hinge Distress Ink, I also coloured the Gibson Girl's dress with the same sponge.  I used the Calligraphy Mat 11 again in Archival to add to the background and the Flourish from the Swirls, Splats and Dots Mat.

I finished it all off with a bit of Rusty Hinge around the edge of the card and the Kisses stamp is from Grungy Greetings and was done on a separate piece to add an extra bit of dimension.

Don't forget you still have time to add a project to the challenge. 
Debs

Tuesday, 22 September 2015

Wings & Petals by Dee

Hi guy's I hope you are all well! I have the butterflies off 
the insect and butterflies plate.
I have used Adirondack colour washes to colour the background.
Neil Walkers alphabet soup boarder stamp coloured
with Fresco Finish Bora Bora paint.
The artistic stamper petals mask was used on the left hand 
side and 3D gel was put through and allowed to dry.
The Butterfly from the insects plate was stamped onto Adirondack 
Coloured card I then used crackle accents on the wings.
I sprinkled white embossing powder over and heat embossed
from underneath.
\
Turquoise wool was wrapped round.
Once the petals were dry I clipped with gold guiding wax.
Thank you for popping by and don't forget to let me 
know what you think.
Cheers Dee x
PRODUCTS USED
  1. Artistic Stamper Stamps used are the main butterfly of the Insects & Butterfly's plate, Neil Walkers Alphabet Soup, Artistic stamper mask petals.
  2. Adirondack Colour wash in the following colours:- Lettuce, Purple Twilight & Sunset Orange.
  3. Prima 3D Matt gel, and sequins from my stash.


Saturday, 19 September 2015

Titbelsoeur, yes YOU can !

Hello everybody,
Still using sardine cans, this one is rectangular.


Some beads from earrings, an English bus lucky charm, and... stamped images :

on to tissue paper : clock from Time and Keys on Time
on to cardboard : lady from 20's Ladies Plate 4 on  Costume


and on the top of the can, a perfume top, and  wings from Crowning Glory on Steampunk to meet the September Challenge.
And a light spot to sit the can :


And here it is !


Thanks so much for stopping by,
your comments are very much appreciated, 
here, on my blog, or on the Artistic Stamper's Facebook page.
I hope that my can did inspire you and that
you will participate in our September challenge
 to win some fabulous Artistic Stamper stamps.


Titbelsoeur

Wednesday, 16 September 2015

Journal Banner Dress by Gemma


Hi All

Its all about journal pages for me at the moment, they give me a freedom and a relaxed way to play, that is not present when I am constructing a album.


I started by covering the page with Gesso. Then using an old plastic card I scrapped Fresco Finish Granny Smith and Teresa Green over the whole page.Then using what is still a favourite of mine, good old Distress inks (Shabby Shutter and Pealed Paint) , I stamped over the top with Chevron Elements and Harlequin


Then out came the Geli plate, I have been a very naughty girl and cut mine up into smaller pieces, but anyway, using more of the new limited addition Fresco Finish paints (all four colours this time). I used the Gelli plate as a stamp and applied paint in sections, layering it up with stamps from Borders #1. Once dry I stamped out the bunting stamp from the same set five times and cut them out. 


On a separate sheet of card I drew a body and added some titan buff, and tan Acrylic paint, unfortunately, faces and heads are still a work in progress, I completely messed this one up, so off it came and I stamped one out from an old Dylusions set, I glued one of the borders across the top of the page, and cut the others down more to form the dress. I then stamped and glued some words from an old stamp set.


 I could not have her floating so I drew in some grass under her feet, and cut and glued small flowers from the left over bits of paper, I also added some wings that I paint with Professor Plum and stamped on with Calligraphy mat 11. To finish off I went around everything with a black paint pen and added some white with a paint pen to areas on the dress and chevrons.

Thanks for reading
Gemma (inkykitty)

Products used from The Artistic Stamper 


Sunday, 13 September 2015

Steampunk flowers and more...by Shilpa

Hello Everyone,

Today I would like to share with you a mixed media piece I created with Artistic stampers Steampunk flowers 


I've taken few photos while making this art piece...here we go..


I adhered Tim Holtz Postal tissue paper to the base. After that I stenciled with texture paste. I also applied crackle paste randomly on the surface.


Here you will find, I've applied thin layer of Raw umber, let it dry a bit and wiped it with baby wipe. So the dark colour remained in the grooves


I've done some texture stamping with Artistic stamper text stamp and Numbers stamps.


I stamped Artistic stamper Steampunk flowers and leaves with Distress inks and heat embossed them with clear embossing powder.


I assembled everything..on the main surface.

here are some of the close ups..


Hope you are inspired to try Artistic stamper Steampunk stamps.
Thanks so much for stopping by.

Products Used here:
Artistic stamper stamps : Tick Tock flowers and Inspiration Jars
Calligraphy mat 13
  Katy Leitch Numerical Plate


Friday, 11 September 2015

Winner of August's Creative Challenge

Hi!
Jennie here, late as always with the winner of last month's challenge. WOW! we had some amazing entries, and all of them deserve to be winners. Thank you for joining in.

The winner of our prize of £15 worth of The Artistic Stamper stamps is

with this lovely creation


Congratulations and please email me to claim your prize. 

Don't forget to join in our September's challenge which is Things with Wings. 
Have a creative day

{hugs}
Jennie


Thursday, 10 September 2015

Life is like.... by Debs

Hi All

Today I have done an altered book page for you. One of the benefits of living reasonably close to the shop is being able to go to Jennie's classes and one of my regular classes is the altered book club.  I would not have dreamt of altering a book before, but its so much fun!


Here is a brief how to


take a book and open it up - that bit always helps!


Randomly paint (using a dry brush) a dark colour i used Dylusions post box red paint


added some squeezed orange and then some lemon zest and a bit more red


Then some white, all done very randomly - the more random the better


I added on a couple of pieces of corrugated cardboard that were laying on my desk, one of which was nicely shaped for a corner.  Stamped a butterfly from Butterflies #2 in Black Soot Distress ink and embossed with Wow clear sparkle embossing powder and painted once cooled.

Stamped the words using the Decay letters  onto a piece of card and painted using the same colours. Added some background stamping to the page using the new background Fabric 2 stamp set using Archival black ink and the Calligraphic Mat 11 using Dylusions White Linen paint The Shadow effect around the butterfly and words was created using a charcoal pencil.

There have been some amazing entries so far for this months challenge so please do keep them coming we really do enjoy looking at all your creations.

Debs 

Monday, 7 September 2015

Titbelsoeur, yes she can !

Hello everybody !
Today, my project is to decorate a sardine can. I have collected some beads, shells and other stuff from my stash, I have painted the can with pink acrylics and stamped the clock and lady on to a tissue paper that I have then glued on the bottom of the can.


To have it stand, I have drilled 2 holes in the can and fixed a light bulb


and then glued two wings and a crown that I had stamped on a cardstock. And tadamm, here is my can :


Pink acrylic paint and Blue archival ink
Crown and Wings : Crowning glory from Steampunk
Clock : Tick tock from Time
Face : 20's Ladies Plate from Costume

Thanks so much for stopping by,
your comments are very much appreciated, 
here, on my blog, or on the Artistic Stamper's Facebook page.
I hope that my can did inspire you and that
you will participate in our September challenge
 to win some fabulous Artistic Stamper stamps.


Titbelsoeur

Friday, 4 September 2015

Mystical Bird Part 2 By Dee

Hi Everyone Dee here with the second part of The Birdz
wall plaque. I hope you are all well! and ready to
 join in with us here at the Artistic stamper for our
monthly challenge, which is
' Things With Wings'
 & on that note!
For this last plaque I used the second 
Rust board from my previous post
I triple embossed the mechanical bird from
Neil Walkers birdz plate.
I coloured the bird with the same alcohol inks
 as the previous post.
Next I used Pins and jump rings to attach the two
 plaques together.
More photo's
and some more,
I used items from my stash to join it all together.
I hope you have enjoyed this two part project and like the end result.
please feel free to let me know what you think!
take care see you soon.
Dee x


Products Used

  1. Artistic Stamper stamps used Neil Walkers Birdz Set A6 Decay Journaling Stamps #1.
  2. Deco Art Products used  Quinacridone Gold, Quinacrodine Burnt Orange, Prussian Blue Hue, Cerulean Blue, Cobalt Tourquoise Hue, Transparent Yellow Iron Oxide. Texture sand paste and crackle paste.
  3. Ranger crackle accents, Alcohol inks Terracotta,Stream, Ginger & Butterscotch.
  4. Inka Gold Gold.