Showing posts with label Archival Inks. Show all posts

Tuesday, 25 April 2017

Accordian Book by Debs

 Hi everyone


Here is an accordion book that i started a few weeks ago, using Kraft Card and Distress Oxides.
this is the back, i tried to keep each page on this side orange and yellow in some way

this is the front which i tried to keep red and pink

 I used a mix of papers and Kraft card adding stencilling and stamping with the Oxides

I gave myself a theme - one side is Butterflies and Dragon Flies. 
Using loads of different stamps and masks

 I have six pages on each side

 I had fun mixing the stamps up and creating backgrounds using some of the new mini background stamps, they are great to use for smaller projects like this
 Even the papers were stamped with background stamps

I do like the effect that Distress Oxide have on Kraft, you get great colour

As you may have guessed i do like a nice phrase or quote

Stamps used were a selection from Backgrounds
a selection from Florals and leaves
And assorted quotes from Words and Sayings

Take Care and Happy Crafting
Debs

Tuesday, 7 February 2017

He[art] Journal page by Ttibelsoeur

Hello happy Journalers, how are you doing ?
It was great to use these Artistic Stamper stamps to make a new art journal page.


The page was not blank in first place : I have gathered many monoprinted pages to make a new art journal. Hence the first layer, gelliprinted with Bamboo Open Texture Mat C156 © CaroLines
The second layer was made with the new Mini background stamps and assorted Distress inks. Then I stamped Decay forms and steampunk border from Borders A5 2 on the edges with black Archival ink. Some white marks made with white acrylic paint on bottle caps, and the background was done.

Then I stamped the 2 Inspiration Jars with black Archival Ink on a separate drawing paper, already colored with Distress Ink Pads (Mustard seed, Spiced Marmalade and Broken China), I added the new Mini Heart © Neil Walker on the blank jar, highlighted some details with a white pen, cut both out and glued both on my page.

I was just missing a title 😅... easy peasy, found it in the Journaling section !

Thank you so much for stopping by,
your comments are very much appreciated, 
here, on my blog, or on the Artistic Stamper's Facebook page.
Do not forget to participate in our monthly challenge
 to win some fabulous Artistic Stamper stamps.

Titbelsoeur

Wednesday, 7 December 2016

My last greeting cards by Titbelsoeur

Hi there,
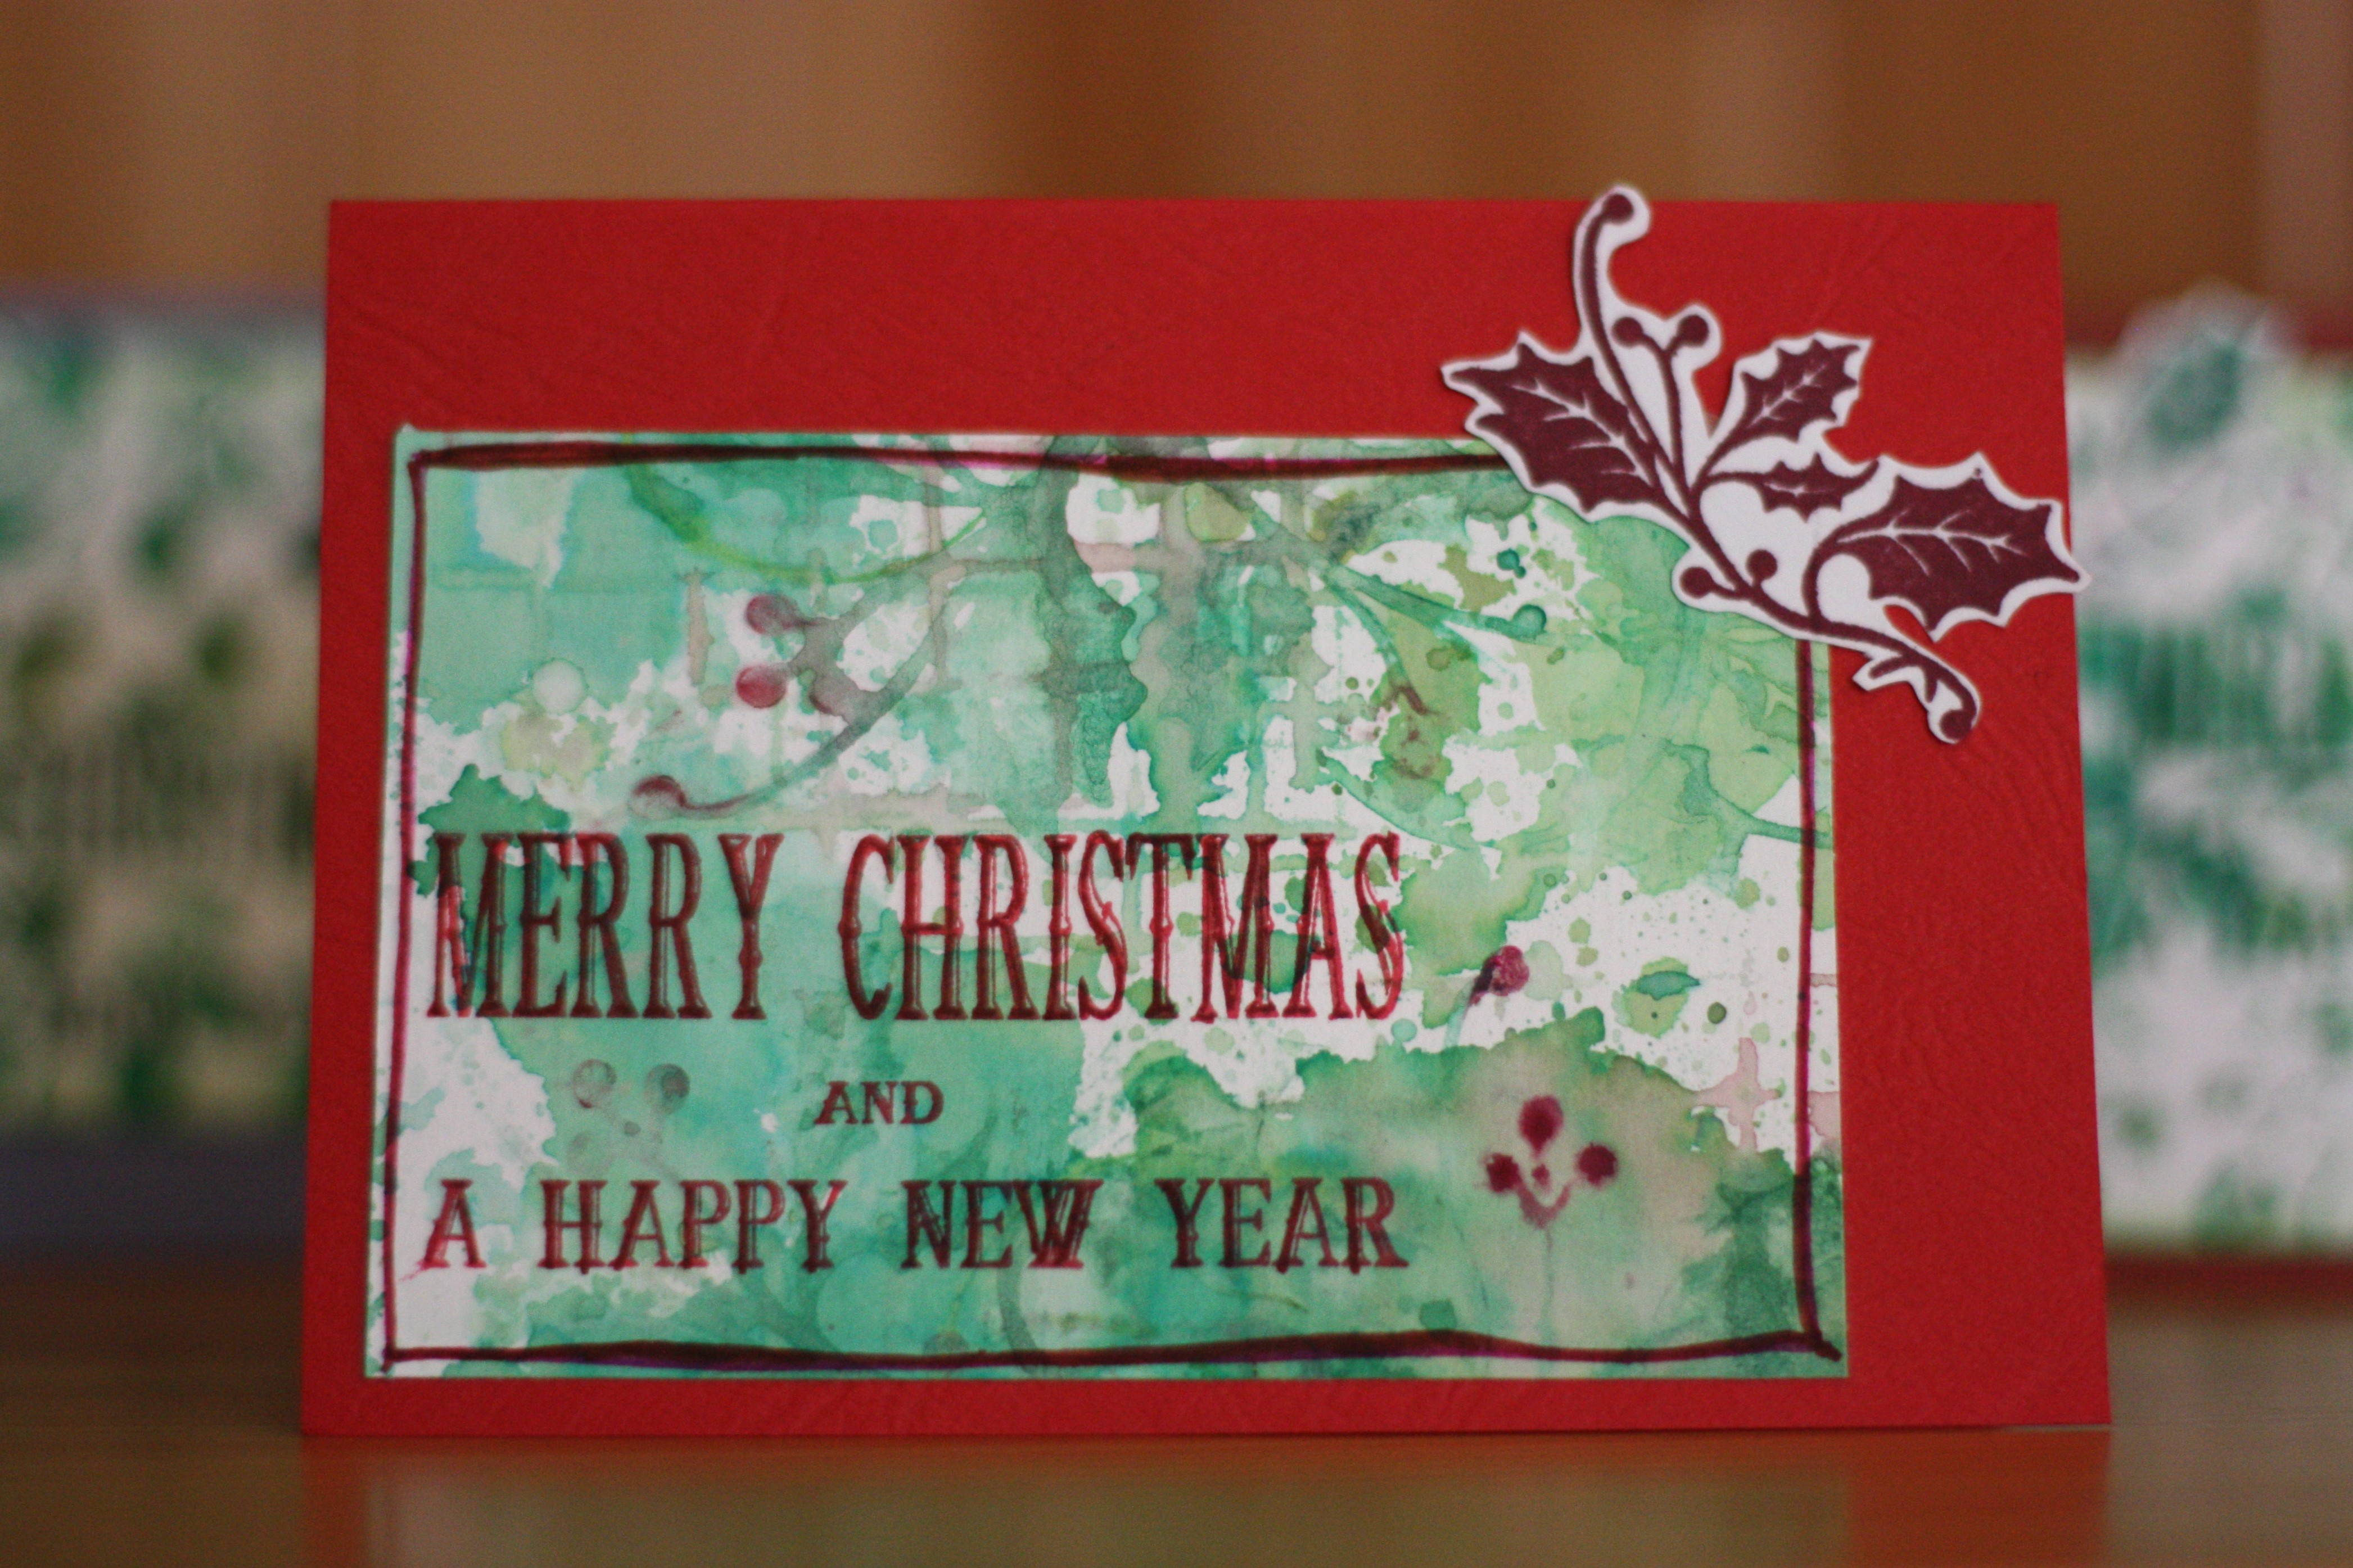
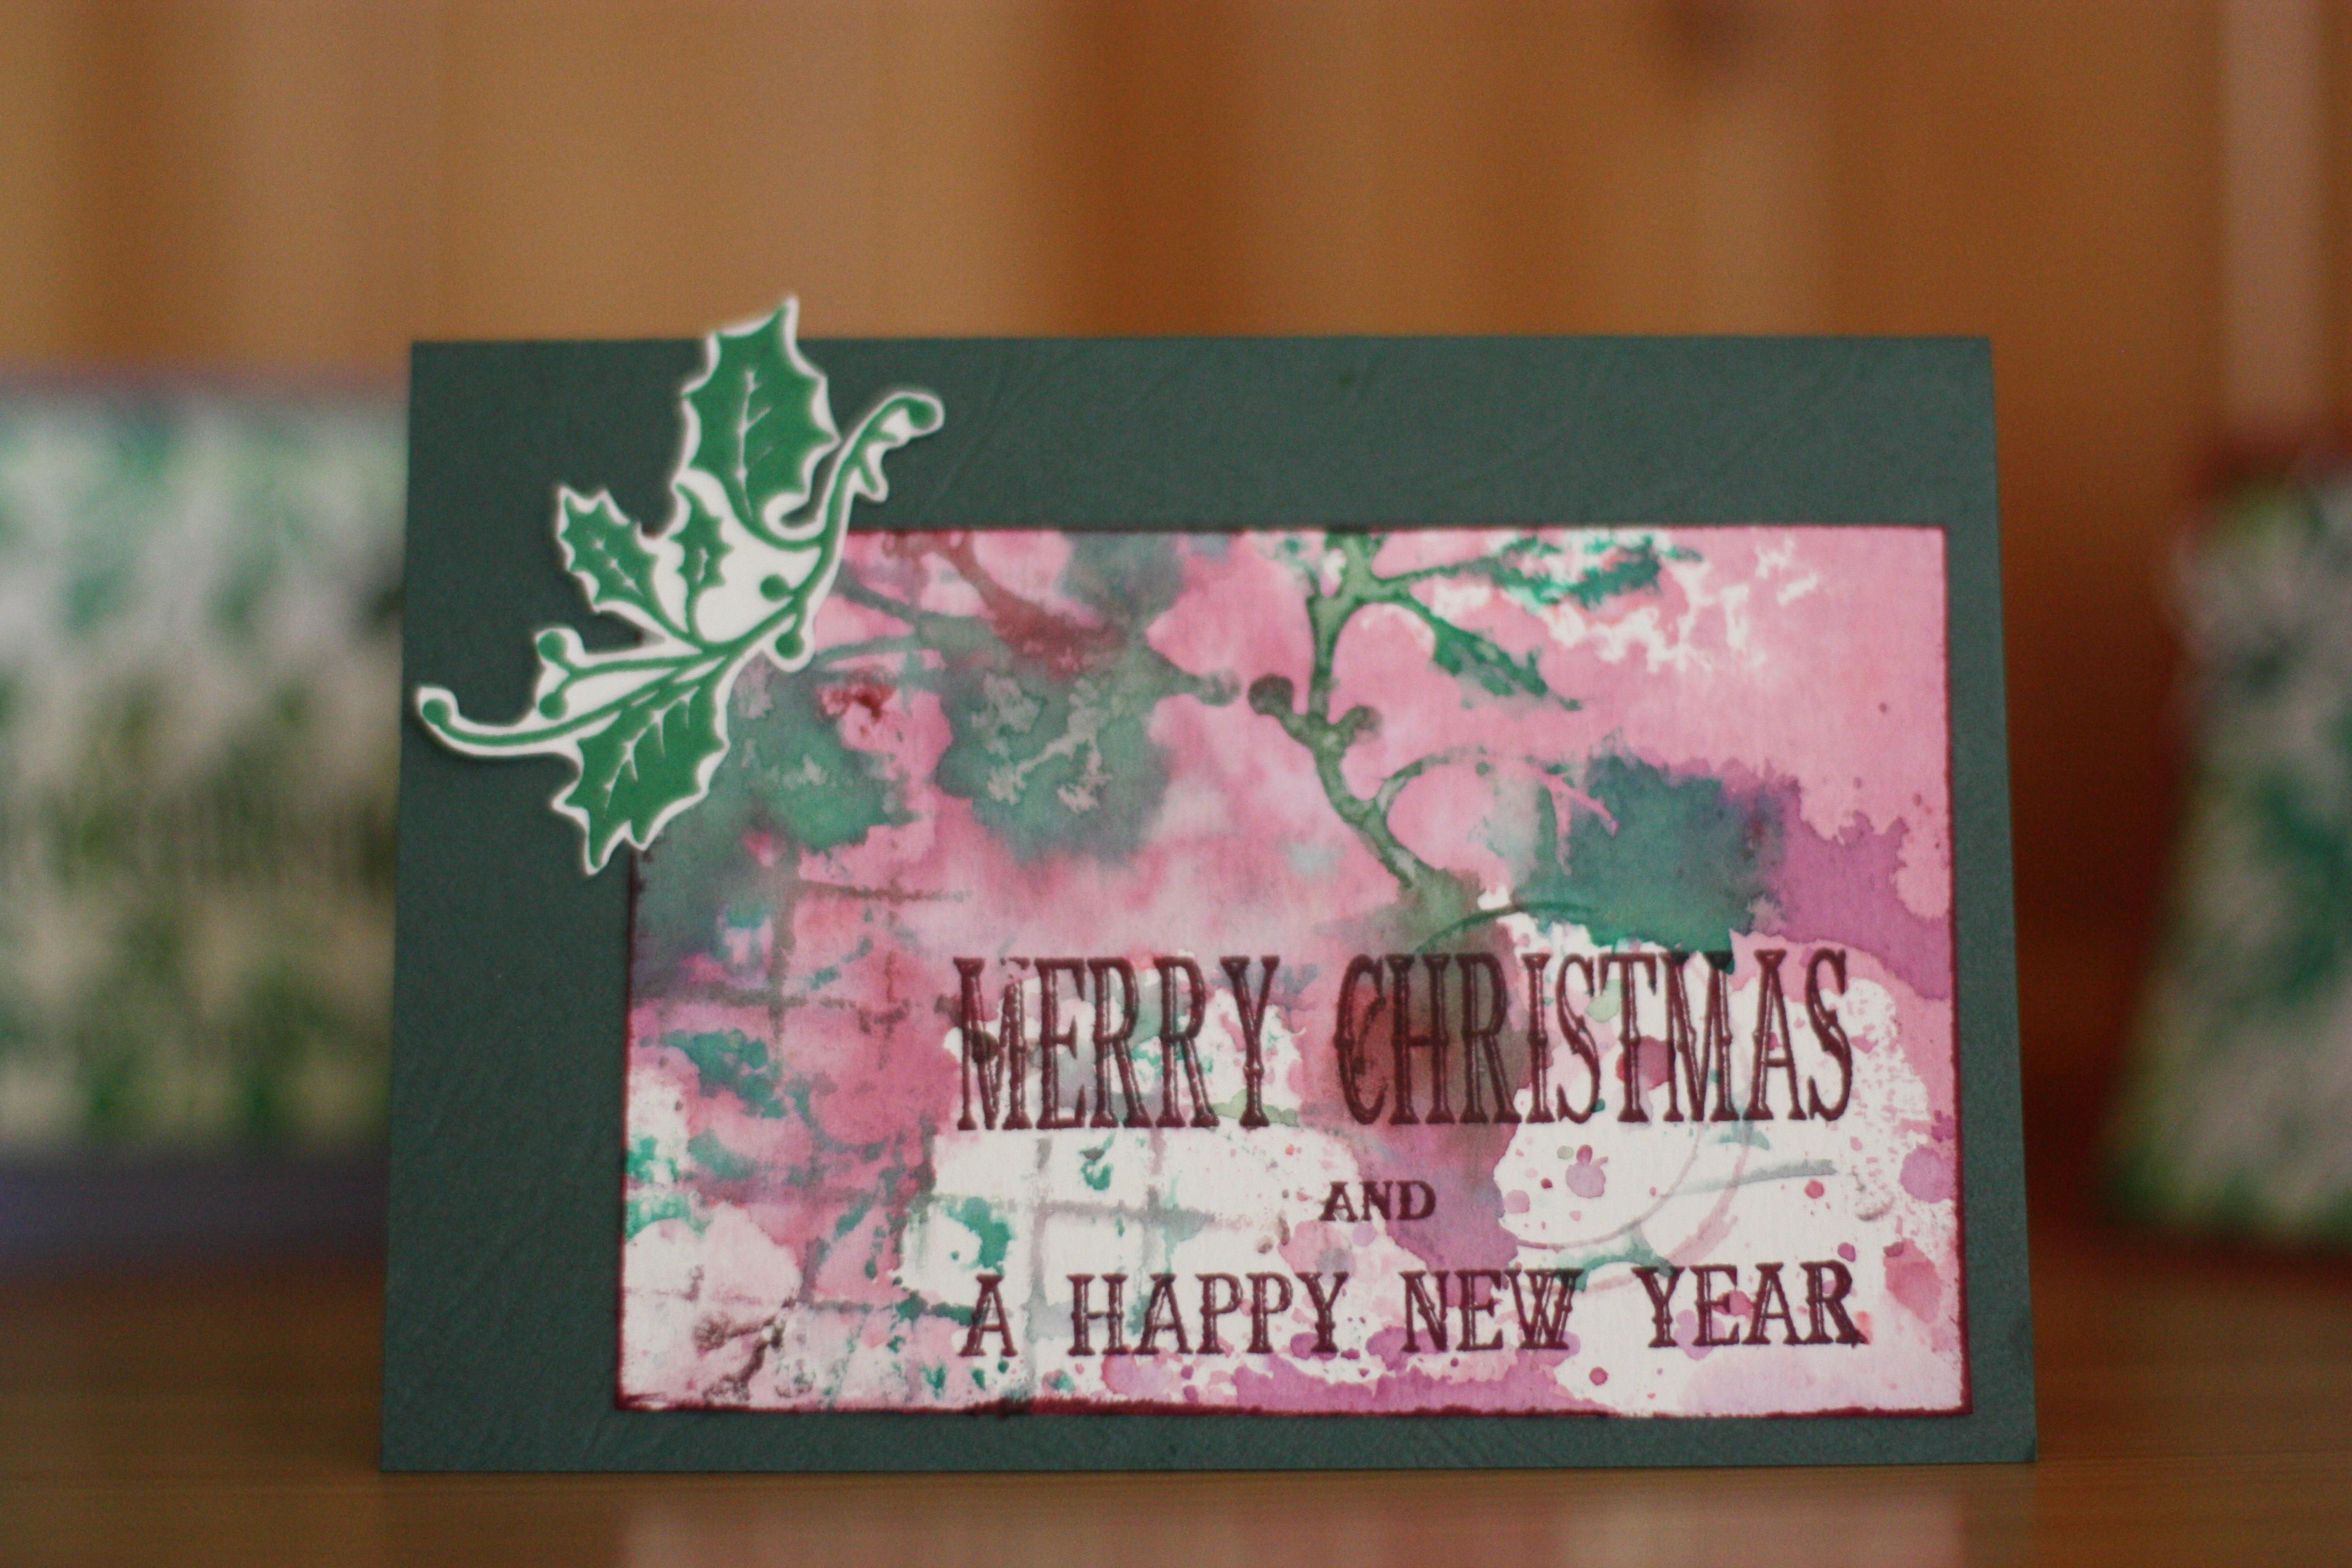
this is the last bunch of greeting cards I have to show you, with a more blurry background, these I like the most !
To make these, I have first put Distress ink pads on to a plastic sheet and sprayed with water, then put the drawing paper here and there. And stamped  Holly Background stamps and things from my stash like fish punnet, bottle caps... while it is still wet.
Then, while the paper dries, I stamped some holly branchs from the  Christmas Reindeer plate on another paper with Archival ink and cut them out.
And finally I cut the background in 8 pieces, stamped the sentiment with Archival ink and stuck them to the support with double-sided tape, then the branch.
And here they are !


Do not forget to participe in our

December's Creative Challenge- Christmas

 to win some fabulous Artistic Stamper stamps !

Titbelsoeur

Friday, 24 June 2016

Inspiration using red yellow and blue by Debs

Hi Everyone

Hope you are enjoying the challenge this month.  Such great colours!
Here is my latest piece of 'inspiration' for you 


I used a journal but this technique would work well on a card or on a canvas
I started by stamping some text using mini calligraphic mat 20 and calligraphic mat 11 with black archival

Then ripped up the text and stuck randomly onto the page and covered in white gesso

Next i added some grunge paste through the A4 Swirl Mask and then is started spraying


Nice and bright you might think!

This is exactly the same page after the ink has dried, dylusions reacts beautifully with gesso and immediately lightens the inks, giving you a much more subtle tone.


I stamped some of the shells from the Shells mat onto white tissue with brown archival and once glued in place i used a charcoal pencil to outline.  I then stamped inspiration from the Journaling words 3 mat

To finish i added a touch more gesso down the middle of the page

I shall look forward to looking through all of your project for this month and don't forget you still have a bit more time to still enter both on the blog or on the Facebook page


Wednesday, 13 April 2016

Textured Art Journal page - by Shilpa

Hello Everyone,
Shilpa here,

Today, I've a journal page to share with you!


I've created this mixed media textured journal page with Artistic stamper Gibson girls stamp.


To create this background, first I attached few old pages to the surface, and applied gesso on it with palette knife. Next layer was with stencil and modelling paste.
When it dried completely, I used acrylic paints in pink, orange ad red to create more layers.


I did some texture stamping with Artistic stamper background stamps and archival inks.


I added few feminine metal charms at the corner for interest.


Artistic stamper Gibson girl stamps are my favourite!!

Thanks so much for stopping by, hope you are inspired !!


Products used from Artistic stamper:
Stamps- Gibson Girl
Background stamps - Swirl background, Mini Backgrounds#1
Prima Modeling paste
Archival Ink - Jet black,Red gerenium

Thursday, 7 January 2016

Lots of love, by Titbelsoeur

Hello, Happy Crafters, and happy new year to you and people you love !

I have made these 2 cards with Gelatos, on the "red" one I have stamped the "empty" Lesley's flower with black Archival ink and colored it with Promarkers, then I colored the "full" flower with Gelatos, spritzed it and stamped it all around the card. Then I stamped the sentiment with Plum Archival ink.

I made the "blue" card differently : I first colored the background with Gelatos and diluted it with water, then I stamped the flowers and colored them with Promarkers, and to end I stamped the sentiment and the butterfly with black Archival ink, and added lines and circles with black acrylic paint on caps and credit card.


Here are the stamps I used to make these 2 cards :
Lesley's Flowers in New Stamps 
"Lots of love" from Grungy Greetings #1 in Words and sayings
Butterfly from Encyclopaedia Botanica in Katy Leitch


Thanks so much for stopping by,
your comments are very much appreciated, 
here, on my blog, or on the Artistic Stamper's Facebook page.
Do not forget to participate in our monthly challenge
 to win some fabulous Artistic Stamper stamps.


Titbelsoeur

Monday, 19 October 2015

Label by Titbelsoeur

Hello happy labellers ! 
Let me tell you the way I made this label :


First, I "watercolored" the background with 2 Distress inks, then I stamped words and clock from  Tick Tock A5 in Time with the same inks so that it is in matching shades.


After that, I stamped the dancer and the sentiment from Dance A5© Siuox Jenneys  in Dance with Plum Archival.

I glued it on to a cloth label to strengthen it and highlighted the dancer inside with white Posca and shaded it outside with a red pencil.


Thanks so much for stopping by,
your comments are very much appreciated, 
here, on my blog, or on the Artistic Stamper's Facebook page.
I hope that my label did inspire you and that
you will participate in our October challenge
 to win some fabulous Artistic Stamper stamps.


Titbelsoeur

Thursday, 13 August 2015

Youth is a Gift- Art Journal Page by Shilpa

Hello Everyone,
Shilpa here,
I've a face art journal page to share with you ..


I've used Artistic stamper 'Age' stamp, Gelli Plate, Small Tattered flower Sizzix die  and new distress ink colors.

I've created the background for this page with  Gelli Plate, here is small tutorial..


I took out Gel medium from the box with my palette knife on Gelli plate, as it is very sticky. Rolled it with my brayer.


I kept flower stencil on it, on that paper and took the Gel Medium print.
You need to wash your stencil immediately or it will get spoil. Or keep them in water until you finish your project.


 I applied Mowed lawn distress stain with its dauber. Its very easy to color big surfaces with distress stains. I like to add Picket fence distress stain in my other color to get color variations on the surface.


I cut out my standard size (6*6) for face journal page from that Gelli print . 


In this closeup view, you will find texture stamping and stenciling with Hickory smoke and Mermaid Lagoon distress inks.


And these cute little flowers are made with Sizzix Tiny Tattered flowers. If you are interested to how I made them...here is the link to Anna Karin's Video tutorial.


I stamped face with Wendy Vecchi Forget me not Archival ink.
Finally I adhered them all together on my small page.
hope you liked my today's project.
For more art journal pages... pls visit my blog Neon Diary.

Thanks so much for stopping by.


Friday, 19 June 2015

Hello Mr Postman !

And hello you Happy Crafters !
Since Summer is still on its way, I have made my second project for June to help you participate in the June challenge if you miss inspiration... and at the same time make your postman's day !

Always have 2 or 3 blank envelopes on your craft table to wipe your leftover paint or ink on stencils or stamps.

After using the Marbled 2 Background stamp with Broken China Distress ink, spray it up with water and wipe it on your envelope :

This will create a blurred wavy background. Let it dry.


Then you can stamp the Cogs Background here and there on the edges to leave room for the name and address, with Faded Jeans and Chipped Sapphire  

And stamp the wheel from the Seaside No. 1 # 018 plate with Cobalt Archival


Also you may stamp the tag from the Labels A6 plate just to help write name and address.

The Special Delivery stamp comes from the Carte Postale size A5 © Katy Fox plate
the seashell stamps come from the  Seaside No. 1 # 018 plate

Thanks so much for stopping by,
your comments are very much appreciated.
I hope you will participate in our June challenge
 to win some fabulous Artistic Stamper stamps.

Titbelsoeur

Thursday, 7 May 2015

Let's art journal in May by Titbelsoeur

Hello happy journalers !
You know that the May challenge at the Artistic Stamper is "Journaling your heART out!" and I have decided to make this page for you...

I started by gluing some pieces of "test" pages, this one to test Neil's stamp on to my home-made gelli plate :

or that one that was used to clean my A.S. Sequin mask up :


So here is the 1st layer background :


Some gesso here and there, then brown and green acrylic paint, with a brush or with a baby wipe through A.S. Sequin and Petals masks 


Then stamps as backgrounds : car, alphabet soup, dots with black Archival 


And to end, let's stamp words with black and brown Archival, paint some circles with a bottle cap and write some unreadable words in white and black, and here it is :


To make this page, I have used :
black and brown Archival inks
Large Sequin and Petals Artistic Stamper's masks 
Dots background stamp
Neil Walker's alphabet soup and fantasy background
Debbie Cotton's Linington's automotive Sales
Journaling Words #5, Imagine 4.5 cm, Creative 4.5 cm and Journaling Words 3 

Thanks so much for stopping by,
your comments are very much appreciated.
I hope you will participate in our May challenge
 to win some fabulous Artistic Stamper stamps.

Titbelsoeur