

I used one of the new Debbie Cotton stamps for my vocal image.

I started by creating my background papers, following a technique my blog friend Ingrid Kristina shared a while back on her blog, you can find it here:
She has done a brilliant step by step, so I will not repeat it all, I slightly adapted mine, but the principle is just the same. This is what you need:
A piece of printer paper
A piece of smooth card
Background stamps (I used the regency one and calligraphic mat 18)
Household bleach
Watercolour pencils
Twinkling H2Os
A brown paper bag, some twine, some matting card (I used Kraft core)
I followed Ingrid's instructions and landed up with a piece of printer paper that looked like this:

I wanted to use it for my leaf embellishments and I just love the effect of crumpling the paper before spraying it with Dylusions, it really looks like old leaves already, here's a close up:

This paper is used to create coloured impressions on the smooth card, I was a bit disappointed with the effect on mine, but that was soon solved with some inking using Distress Inks:
This is what it looked like first of all:

A bit too blotchy for my liking and too much green.
I trimmed the best part to about 4 x 6" and then inked around it with Mustard Seed, Ripe Permission and Aged Mahogany Distress Inks. I then used the Regency background stamp to do some bleach stamping. If you want to know how, please feel free to email me, but whatever you do, stick the stamp straight into water after you have used the bleach!! This is what it looked like now:

All the rest was simple: I stamped the vocal stamp, cut it with a Spellbinder die and while still in the die inked around it. I then coloured the image with watercolour pencils and some twinkling H2Os and matted it first onto Kraftcore and then by background paper.
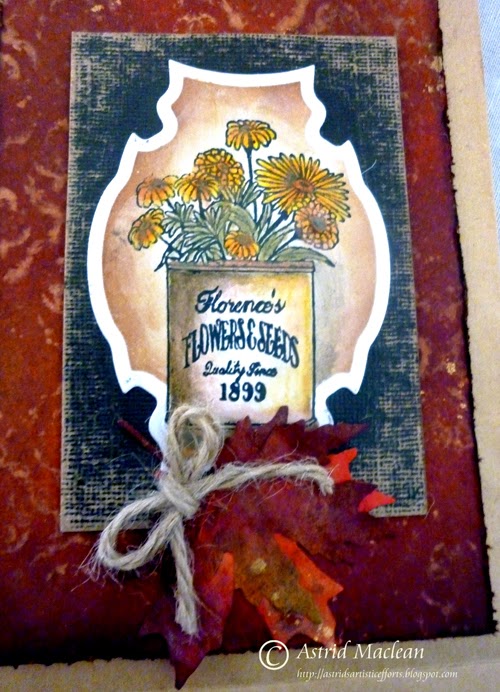
I cut a tag from the remaining background paper, stamped in bleach, this time with a script stamp and then embellished both the bag and the tag with leaves which I had die-cut from the original bit of copy paper. I also used Distress inks to deepen the colours on those.
Here is the tag:

And here the final project surrounded with some of the leaves.
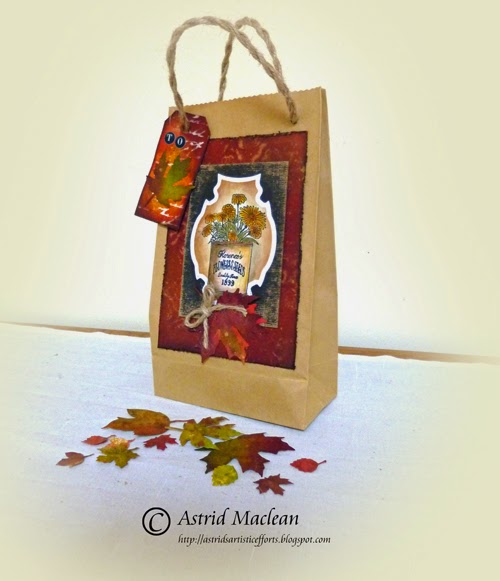
This was a fun project to do, and of course the techniques can be used for lots of different projects too.
Thank you Ingrid Kristina for your brilliant step by step, I know I will come back to it again and again!
Thanks for visiting here today


