Showing posts with label Fresco Finish Paints. Show all posts

Sunday, 29 April 2018

Busy Bee Tag by Gemma

Hello

I have a tag to share with you all today, I made this tag using Artistic Stamper stamps, PaperArtsy paints, and chipboard.


My Process


Thank you
Gemma

Monday, 16 May 2016

Bird Canvas by Gemma


Hello Everyone


This canvas roughly measures 5 x 6.5 inches. The background for this canvas changed a lot while I was working on it. I started off by tearing two pieces of patterned paper and gluing them to the canvas with a gel medium, over that I scraped some crackle paste and paint. I was fairly unhappy with the results and ended up going over the top with gesso, but some of the texture can still be seen underneath.


On the bottom third of the canvas I stuck bits of washi tape, and as the gesso was still wet I blended in blue acrylic. I then watered down some Teresa Green Fresco Finish paints and wiped it over the washi tape. I dried off those layers and then stamped over the blue paint with a slightly darker shade of blue and the honeycomb stamp. I stamped over the washi tape with a darker shade of green and the petal stamp.


On a sheet of white card I stamped out two birds and nine circles using black archival ink. I painted them using Tangerine Twist, Banana, Tango and Cherry Red Fresco Finish paints. I stamped over the top of the circle with the petal stamp using the same colour paints.


I then cut them out and using gel medium I glued the bird in place and the circles layering them up largest to smallest.


 I brushed some ground espresso distress ink around the edges, and then using a black pen I drew in the stems of the flowers. I edged everything with the same black pen and drew in few leaves on the stems.


There is still plenty of time to join in this months challenge both on the blog and on the facebook page here

Thank you for reading
Gemma (inkykitty)


Friday, 29 January 2016

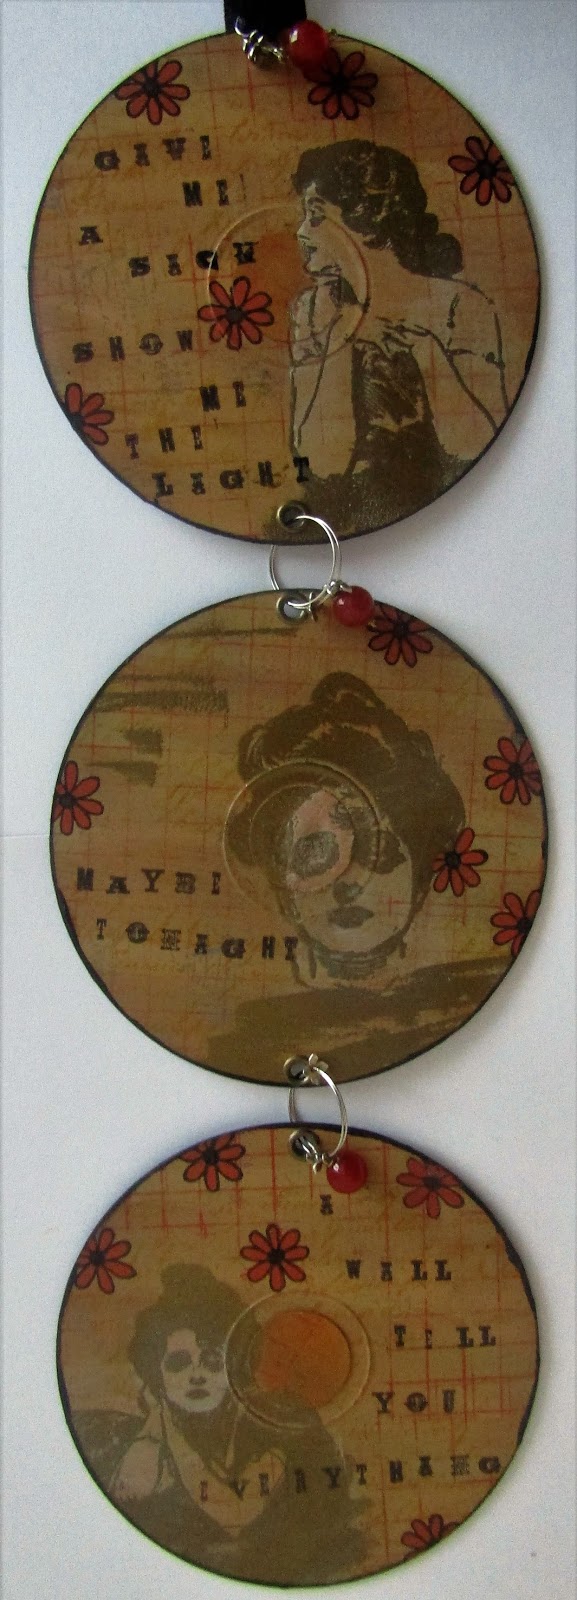
Gibson Girl Door Hanging by Gemma

Hi Everyone

I really like reusing my old, no longer loved stuff, at the moment its my old CDs. A while ago I put most of my music on my computer, and could not bring myself to throw the CDs away. slowly, very slowly I am painting them.


 I prepared three CDs by covering them with gesso and punching holes in them so I could link them together once I had finished decorating them. Them I painted over the top with various shades of brown paint mostly from the paperartsy fresco finish line.


The background of the CDs was decorated using the Grid, Lace and a Calligraphy matt stamps and more paint.


Once that was completely dry I stamped out three of the Gibson Girl stamps with versa mark ink, one on each CD and then heat embossed the images using a detailed embossing powder. I also added bits of embossing in other areas.


I added a small amount of white paint to the girls to help highlight them from the background without covering all the paint and stamping underneath them. 


I then stamped the small flower from Lesley's flowers, which I painted and then went over with a black paint pen. To finish I added words from a favourite song, linked them together using wire rings and added a couple of beads from my stash.


Thank you for reading
Please comment, follow and join in the challenges, we really do appreciate all your input. 

Gemma (inkykitty)

Wednesday, 24 June 2015

Not Just An Ordinary Jam Jar by Debs

Hi All

Hope you are all enjoying the sun.  I thought I would show you a stamped and decorated Jam Jar for this post


I started by pouring some Fresco Finish paint into the jam jar, i used two colours (vanilla and tangerine) and swilled it around until the inside was completely covered. With the paint that was left over after tipping out the excess.  I painted the lid and two journal pages - think I may have put a tad too much in!!

Once the jar was dry inside, I inked up The Artistic Stamper swirls stamp with Teal Stazon.  I then  rolled the jar across the stamp,  rather than stamping onto the jar, this way it eliminated any slippage.  Whilst Stazon does dry quickly I did leave it to dry properly, so that it wouldn't smudge.  When it was dry I then took The Artistic Stamper daisy stencil and wrapped it around the jar, holding it as tightly as I could, I pushed grunge paste through and left it to dry.  Whilst waiting for it to dry I stamped butterflies from the butterfly set that was recently released onto shrink plastic with teal Stazon. I stamped four different ones for the middle and then three all of the same for the lid, coloured them in, cut them out and then heated the shrink plastic with heat gun to shrink.


To get the butterflies to stick together on the lid once they were coloured and shrunk I re-heated the edges and once warmed up added glossy accents and held until they fused together.  Whilst waiting for the butterflies to fuse I painted the grunge paste daisies orange around the jar and on the lid. 
 
Close up of lid
 
Thanks for joining in the fun and don't forget there is still a few days left to show us your creations.  We really would love to see them.

Thanks for looking
Debs
notationsofacrafter-debs.blogspot.co.uk

Products used


Friday, 22 May 2015

Pods & Butterflies

Hi everyone I hope you are well and enjoying crafting.
I have been having a play with some new idea's
this is a result.


Firstly I inked up the Neil Walker Stamp with versamark ink and stamped 
it onto black card  & clear embossed it. I used Deco art
 antiquing cream over the embossed image (you can use fresco finish).
 I took a baby wipe and removed most of it, during the 
process it coloured the margins so that they
 look chalked.


Next I mixed Fresco finish paint on a craft mat and swooshed 
it about then placed the fantasy plate stamp into the 
paint and stamped it onto black card.


I then covered in clear embossing powder and heat set.


I had a die cut clock frame that I rusted up and a large die cut cog that 
I also rusted up. I stamped the small clock off the tick tock plate
onto craft card.


I cut out three of the plumes from the fresco finish embossed image 
and them arranged it amongst the cogs and clock.


I cut out other pieces from the image and  offset them against
the main image.


I stamped the butterfly twice once in gold and then in 
pale blue and gold.


Finally I added gold sequins to the top and bottom.


Backed it all onto craft card and distressed the edge's which I coloured 
with ink. I hope you all enjoyed my post and don't forget to
 let me know what you think.
Cheers Dee x


Wednesday, 10 December 2014

Snowy Tree

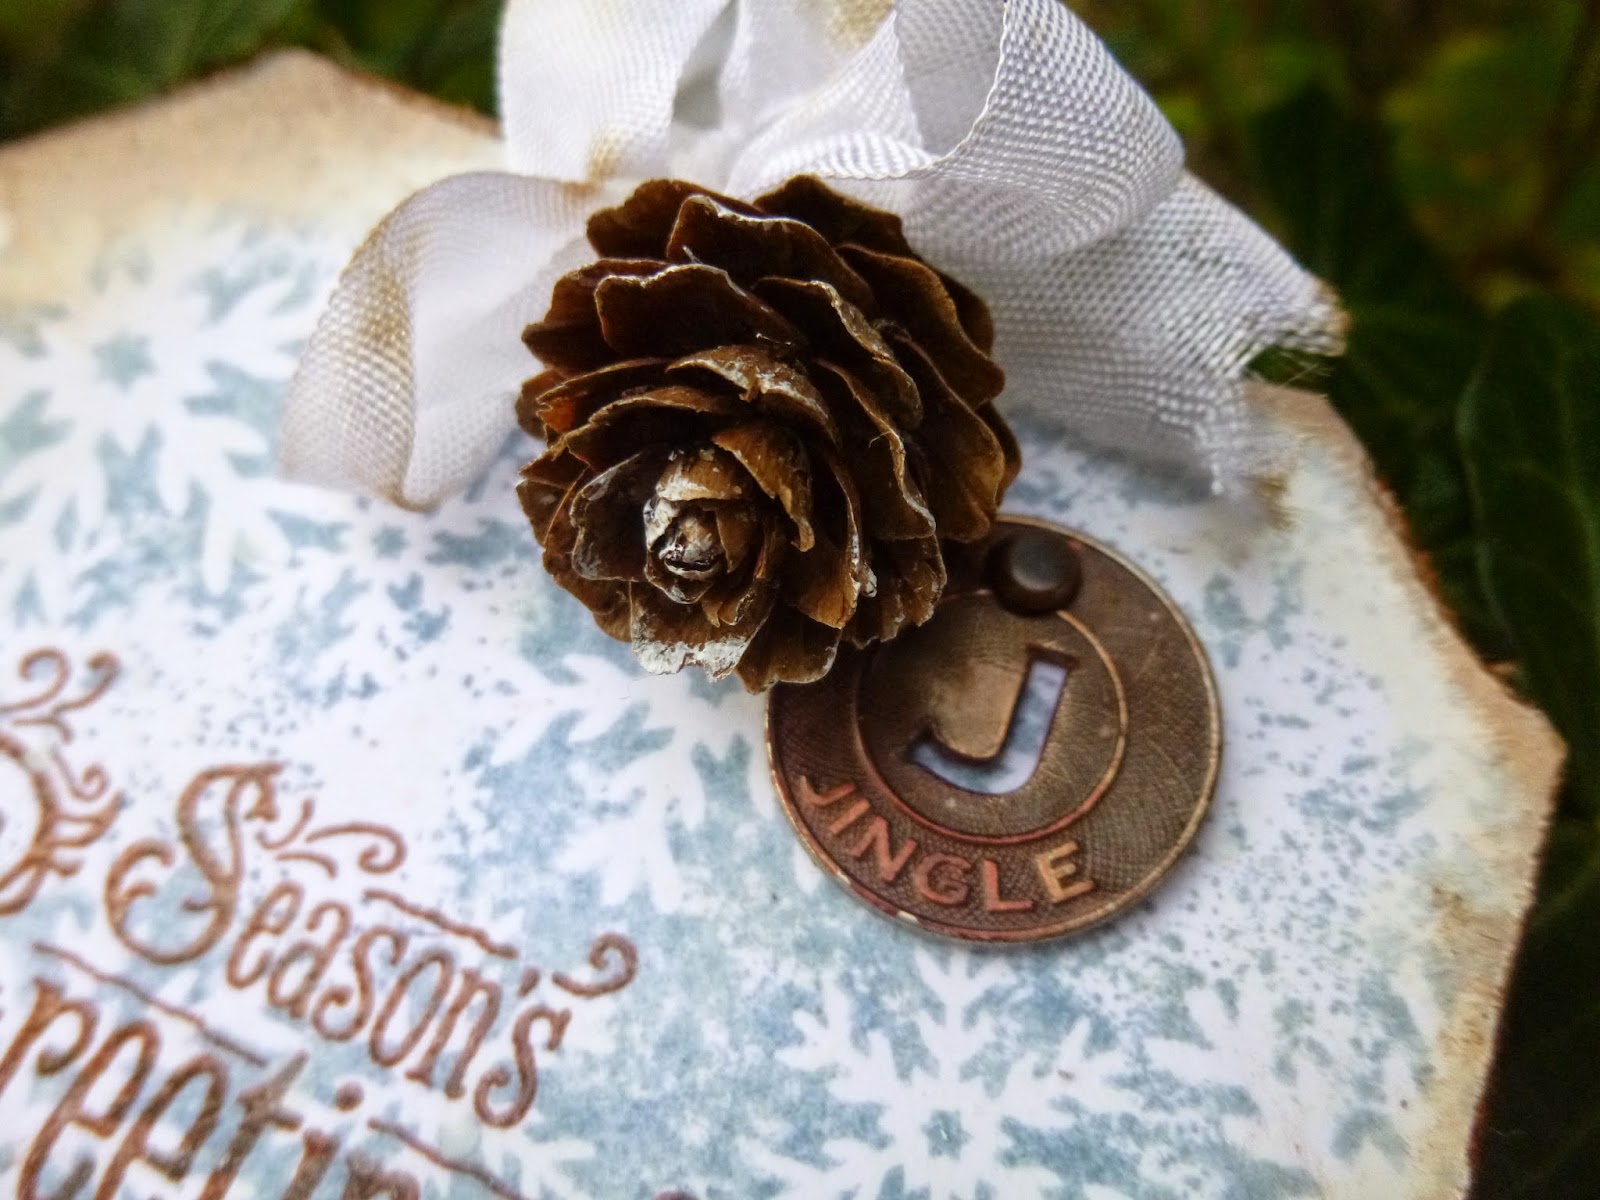
Hello everyone, Alison (butterfly) here with a wintry tag for you.  There's snow forecast for the UK this week, so it may well fit perfectly with the weather for some of you.  You can click on any of the product links in the text if you need to go shopping right now!!


From the moment I saw the large Snowflakes Backgrounds by CaroLines, I had plans for them!  This tag uses the Palette Snowflakes as the background.


I stamped it onto a whitewashed tag using Stormy Sky and Weathered Wood Distress Inks.  I gave it a slight spritz of water beforehand, which is why you get that nice watercolour splatter effect in places.


The other new winter stamp here at The Artistic Stamper which really caught my attention was this beautiful Pine Tree, also CaroLines.


It's stamped in Potting Soil Archival Ink (or maybe Coffee - sorry, can't quite remember, but it's bound to be one of the two!), and clear embossed with SuperFine powder to make it really pop against the snowy blizzard in the background.


The sentiment comes from the Christmas Greetings #1 plate, and got the same treatment.


I cut the figures using a Tim Holtz die from some "rusted" card leftover from another project.  The effect is created using some of the new DecoArt Mixed Media line.  You'd need the Carbon spray and Quinacridone Gold.


I used Ginger and Rust alcohol inks to alter my metal Idea-ology Findings - the Muse Token here, and the Word Band below.


And once the inks were dry, I smeared Picket Fence Distress Paint onto the Word Band and wiped it back, leaving the lettering highlighted.  Despite being dry, the alcohol inks seeped into the colour, but I rather like the distressed look.


I brushed some Chalk Fresco paint (part of the new JOFY Limited Edition) onto the edges of the tag to draw the eye inward and give a softer, snowier look.  I blended on some Vintage Photo Distress Ink too, to tie in to the rusty accents of the tag.


The whole thing is finished off with a couple of my tiny pine cones (UPDATE: sorry for any confusion - they are real pine cones, not "mine" as in I made them!!) and some seam binding which has just had a tiny touch of Vintage Photo Distress Ink to shabby it up (down?).  And a splatter of Chalk paint at the very end...


So there you have it... I hope that you are staying safe and warm if it's snowing where you are.  And if the weather is keeping you indoors, why not use the time to come and play in our Anything Goes challenge this month at The Artistic Stamper.  You don't have to use Artistic Stamper stamps to enter, but if you do you get two entries in the prize draw.

Thanks so much for stopping by today, and I'll see you again soon.

Alison xx

Monday, 24 November 2014

I am... journalling again

Hello all, Alison (butterfly) here with a journal page for you today.


This one started a while back, and got as far as having all the texture in place and a sharp monochromatic look.  But then it got a bit stuck, wondering where to go next.


Then the new Distress Stain Sprays appeared, and suddenly the game was on!  Faded Jeans and Vintage Photo and we're away.  I'll show you some close-ups of my favourite bits as I let you in on the steps I took to get here.


I started with strips of tissue tape across the page and added crackle paste in various areas.


I spread it quite thinly so that the crackle would be very fine.


The large heart was created with a hand-torn stencil shape, through which I first spread texture paste and then added a coat of crackle once that was dry.  I wanted a really thick, dimensional look, and that's what I got.


I embedded the pen nibs before the crackle heart had set, so no need for glue.


This was the point at which things ground to a halt.  However, once I knew there was spraying in the offing I gave the whole thing a wash of Fresco paint in Chalk.  It's part of one of the JOFY Limited Edition sets.  As well as muting the tape, it gives a lovely warm base colour.


In order to really add depth to the crackles of the heart, I splodged Black Soot Distress Stain over it, then wiped it back, leaving it just in the cracks.  Then I let loose with the two chosen Distress Stain Sprays.  It's such a delight finally to have sprays in the Distress colours without having to tip my Distress Stains into spritzers.  Perfectly possible, yes, but fiddly and always with the risk I'd knock the lidless stain over and lose it all!!


I added some of the fabulous Katy Leitch splodges and blots from the Messy Art plate, stamped in Coffee Archival.


And I used the I am... stamp from the Journalling Words #5 set on a Chalk-washed tag also stamped in Coffee Archival.


It wasn't quite popping enough, so I drew around the edges with a PITT pen and used an embossing ink pen to fill in the letters, followed by clear embossing powder to give it a hint of shine.


As you can see, I also used Treasure Gold to add a touch of warmth and glamour.  It also helps to highlight all that texture.


So there you have it.  I am... rather happy with this one.  It pleases me, and I'm looking forward to lots more Distress spritzing!


Thanks so much for stopping by today.  It's always lovely to hear what you think.

You've still got a week or so to come and play in our Christmas is Coming challenge.  You don't have to use Artistic Stamper stamps, but if you do you get two entries in the prize draw.  Hope to see you there.

Ingredients used:
Artistic Stamper stamps: Journalling Words #5Katy Leitch Messy Art
Distress Stain Sprays - Faded Jeans, Vintage Photo
Fresco Paints - Chalk (JOFY Limited Edition Autumn 2014)
Coffee Archival Ink
Croco Crackling Colour - White
DecoArt Crackle Paint
Idea-ology Tissue Tape
PITT pen
Inkssentials Embossing Pen
Clear Embossing Powder
Treasure Gold - Florentine