Showing posts with label Jenny Marples. Show all posts

Thursday, 28 March 2013

Passport to Inspiration by Buttons

Hi everyone, and thank you for joining my for my last post as Guest Designer here at The Artistic Stamper Creative Team blog. I want to start by thanking the team for inviting me to contribute this month. A huge thank you as well to Emma who has been so supportive and encouraging throughout this time.


So I wanted to do something a bit different for my final piece and I suspect this may be a first here at The Artistic Stamper. Why? Well how many things are posted unfinished? Shock, horror!! What's the matter with you woman?! Actually it is designed to be a permanent 'work in progress'. Let me explain as I show you the completed pages.


Recently a few people have posted things they've created to get their mojo working when it takes an untimely break. Lots of these use words or products, but I'm the type who easily forgets 'recipes' for backgrounds and tends to respond to visual stimuli. So I decided to make a Passport to Inspiration to help me when the fog descends.


I used several stamp sets from The Artistic Stamper range, going for a 'personal travel through time' theme throughout the book. These are listed at the bottom of this post, but I would like to make special mention of one - Journalling Mini Words. That's the one I've used on the first and fourth journal pages. I'm not sure if it is supposed to be used as individual words, but I was inspired by some of the altered dictionary/book pages I've seen recently which have highlighted one/several significant words from a page. So I kept it as a complete background stamp and used different portions of it depending on the words required.


The pages are actually they are wage packets which have been strung together at the unopened end and have inbuilt pockets to hold tags with recipes on them. Obviously each page is completely different but I try to ensure those which are paired are 'complimentary' so as not to spoil the look/feel.

Some of the pages (which measure 4" by 3.5") are more sparsely embellished than others. That may well change as time goes on but I wanted to make sure the background was the most visible thing. The one clear exception to this is the page above with the viewfinder die cut - I wanted to test my suspicion that the little stamp/postmark stamps were the perfect size to show through the windows - and they were!

As the pages are simply tied together there is plenty of room for expansion, and the plan is that if a background works I'll make an extra portion to put in the book. Then if I have an image/theme/embellishment without a background there will be somewhere to start in future.

I could have listed the 'ingredients' for each of these initial pages but to be honest thought that could be boring, so if you interested to find out more about any of them just leave me a comment or contact me on FB and I'll be glad to help out. Suffice to say I used a combination of Distress Paints, Distress Inks, Alcohol Inks, Archival Inks, my favourite Glue n Seal, WOW embossing powders (they are so good at picking up detail) Sizzix embossing folders, and Vintaj Patinas. The kitchen sink was also on standby to clean up regularly!!!
So there you have it. I would highly recommend taking a good look through the stamps which are unique to The Artistic Stamper (amongst the other things of course!) I have and will continue to find them extremely useful not just as focal elements but just as importantly for creating backgrounds. Once again many thanks to the team for inviting me to join them this month and thank you for your wonderful feedback.

Jenny Marples

Thursday, 14 March 2013

Boxing Clever by Buttons

Hi everyone, and welcome to my second GDT piece. My offering this time produced fingers which needed some serious scrubbing but the end results were definitely worth it.
The stamps I used for this one were the small but beautiful Gibson Girls set available from The Artistic Stamper. These elegant ladies were perfect for adding some well needed refinement to my texture-filled boxes as you will see from the following images.
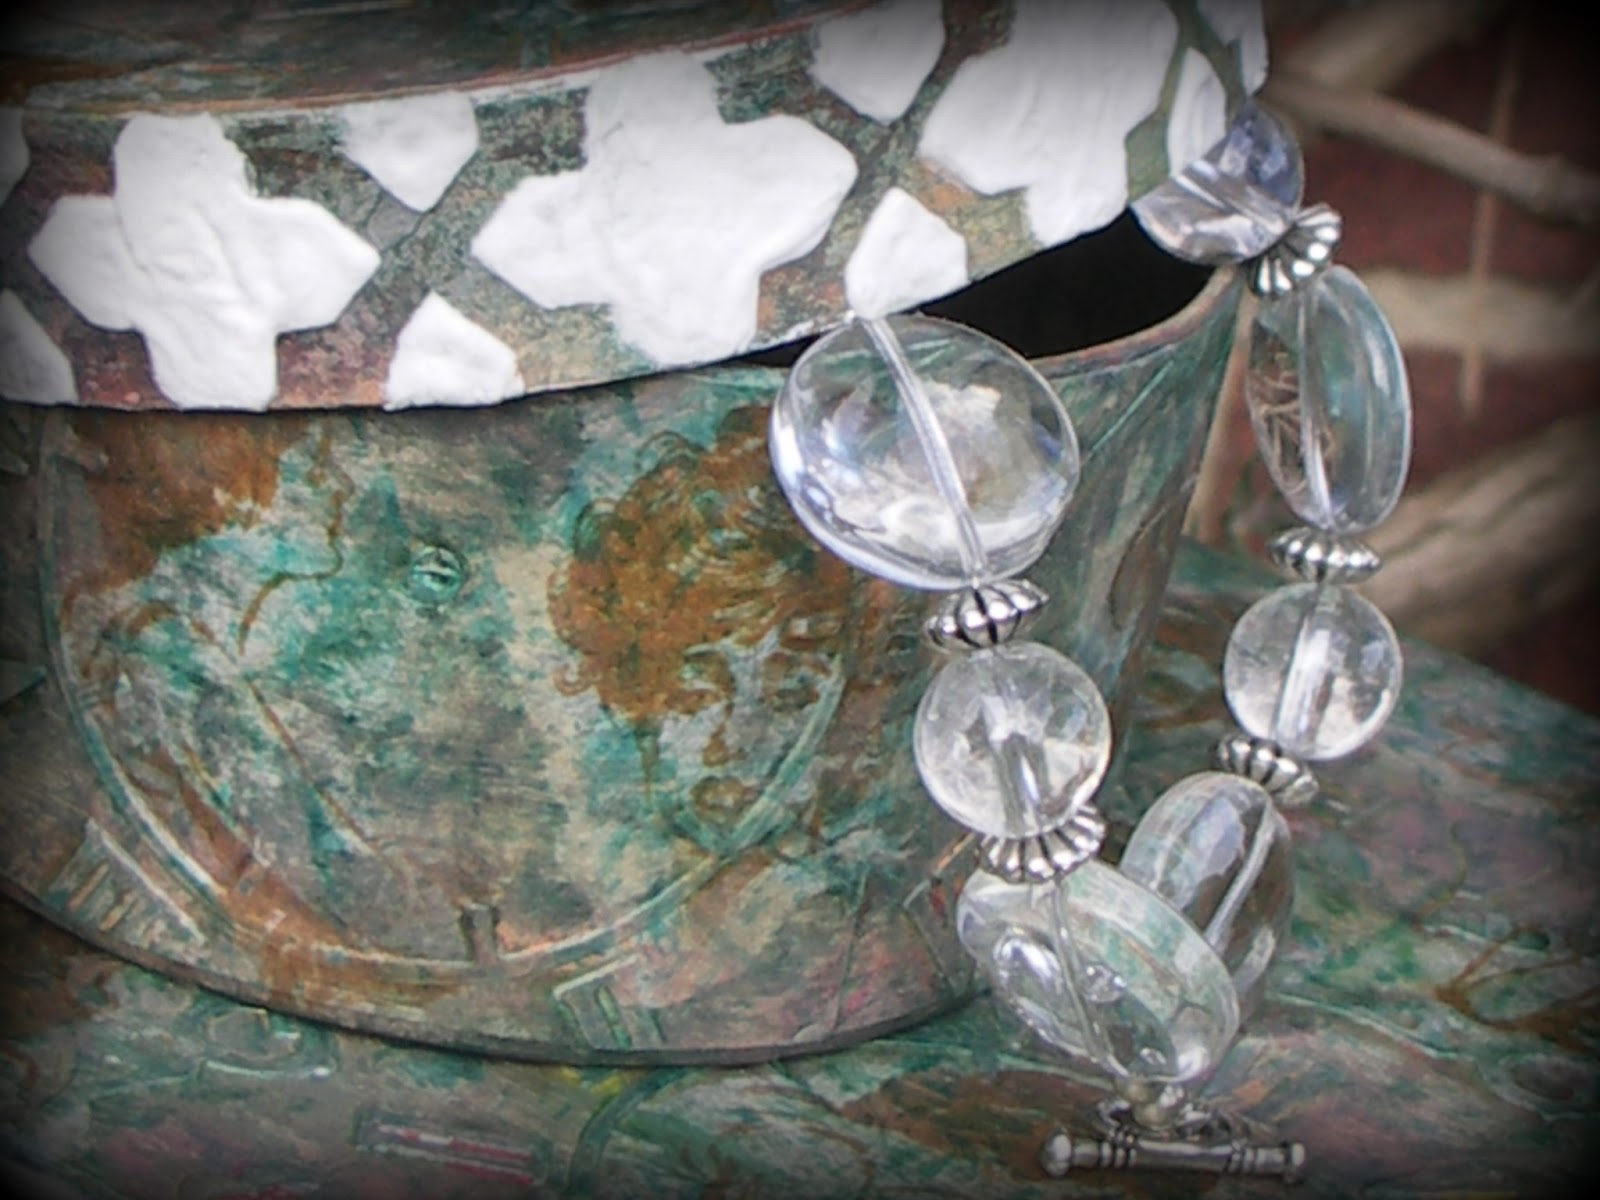
Now the original plan was to decorate a small round paper substrate box to house my bracelet collection. I had an idea in my head about the sort of look I wanted to achieve but it took a fair bit of experimenting to get there.
It all started with embossing metal foil sheets applied to the box. This was then covered roughly in a mix of blue and green alcohol inks to give it a slight verdigris feel.
Next came a layer of Distress Paints - red, yellow and orange all mixed together over the top of the inks (with fingers!!) with particular attention paid to the embossed areas. By then attacking it all with wire wool I finally had a real rusted/verdigris look.
After some extra dabs of alcohol inks I stamped out the Gibson Girls images with Coffee Archival Ink onto tissue paper. They were torn apart carefully and applied to the box with Glue n Seal. It was important to ensure that the more delicate features (in particular the eyes) were placed in areas where the embossing would not distort them. Using these smaller images meant this was far easier to achieve.
To finish a little extra ink and paint were applied over the top to help blend the tissue in further. Next, attention turned to the box rim. I used a mask and white texture paste (with a heat gun - what can I say? I'm impatient!) Finally for the little box I added a small ribbon pull.
As this process worked so well on my bracelet box, attention turned to a larger suitcase housing my (rather large) nail polish collection - well, although it did the job well the purple/black/white/green pattern wasn't the most fetching!
Obviously this involved covering a far larger area, so planning where to place the faces was important. The handle and other metalwork also needed attention. I turned again to the same alcohol ink mix and twisted ribbon around the handle to make it far nicer to use and look at.
And so both boxes were completed, coordinated and could now be proudly displayed here (and in my bedroom!) I hope you like them as much as I now do. I've got one final GDT post for you later this month so I hope you'll join me for that. For now, keep crafting!
Jenny Marples
Pushing The Right Buttons
Stamps used - Small But Beautiful Gibson Girls

Saturday, 2 March 2013

Let's Dance by Buttons

Hi everyone! Jenny Marples (still known as 'Buttons' by many of you) reporting for duty - and you have no idea how thrilled I am to be here! Much like Alison it didn't take any thinking about when I was asked to be Guest Designer for The Artistic Stamper during March. Enough of the introductions, I can here you thinking "cut to the chase and show us what you've done!"
Thought I'd start my month with one of my trademark cards. There are a lot of photos coming up to show you the details as a lot of processes have gone into creating this.
First the music background - some of you who follow my blog will know I did a lot of experimenting with texture paste and embossing folders.
In this case I used white paste which reacted with the water and became beautifully distressed at the edges. Swipes of Archival and Distress inks helped to highlight the score even further.
The next layer made use of the background stamp which the talented Sioux Jenneys created for her dance stamps set. Love this SO much as it is based on a dictionary entry and stamps really clearly.
I started by swilling my cardstock around in various shades of blue and brown Distress Paint - the colours were chosen to emulate those used by Edgar Degas who painted the most amazing works depicting ballerinas in rehearsal. The text was stamped on top using Archival Ink to keep it crisp.
Distressing the edges complimented the music score panel and provided a contrast with the clean edges of the vellum and antique gold cardstock.
I love adding faux pearls as an accent (made from drops of PVA glimmer glue.)
This delicate lace had Distress Ink blended onto the top and ribbon layered over it.
And now for the dancer herself. Or is she? The brilliant Sioux had the ingenious idea of including wings in her set of dancer stamps, so for those who don't have ballerinas in the family you can create fairies instead!
Having stamped her onto card it was time to layer Ferro metallic texture paste on top to give her some depth. . Some heating and moulding, and a layer of Ranger Snowflake embossing powder (to add twinkle/more texture) and she was ready for painting. I created a mask so that the head, arms and legs could be covered in Antique Linen Distress Paint and the dress in Picket Fence Distress Paint.
Her wings were made by using white/blue pearl embossing powder on vellum so they would be delicate and would catch the light in the sun. And finally another genius move by Sioux - there is an outline version of the dancer included in the set so I could use that to create the beginnings of the faux shadow. By stamping this outline with Walnut Stain Distress Paint over all the layers on the card I was able to fill it in accurately regardless of the difficult textures that could have been a problem.
So there you have it. Hope you've enjoyed my first (lengthy) project. There's more from me to share this month so I hope you'll be back to take a look. For now take care and enjoy crafting.
Jenny Marples
Stamps used - Dance Stamps