Showing posts with label Mini Christmas 1. Show all posts

Saturday, 7 December 2019

Christmas cards by Titbelsoeur


This is time to make our Christmas cards. There are many beautiful stamps in our Christmas cards folder here. For the occasion, I have made square cards. They are super-easy to make so you can make a bunch of them in one go, and still have some variation in them.
I have first divided a A4 watercolour sheet by 12 squares and stamped a Season's greetings from Mini Christmas 1 or Christmas Greetings # 1 A5 with black ink on each of them :
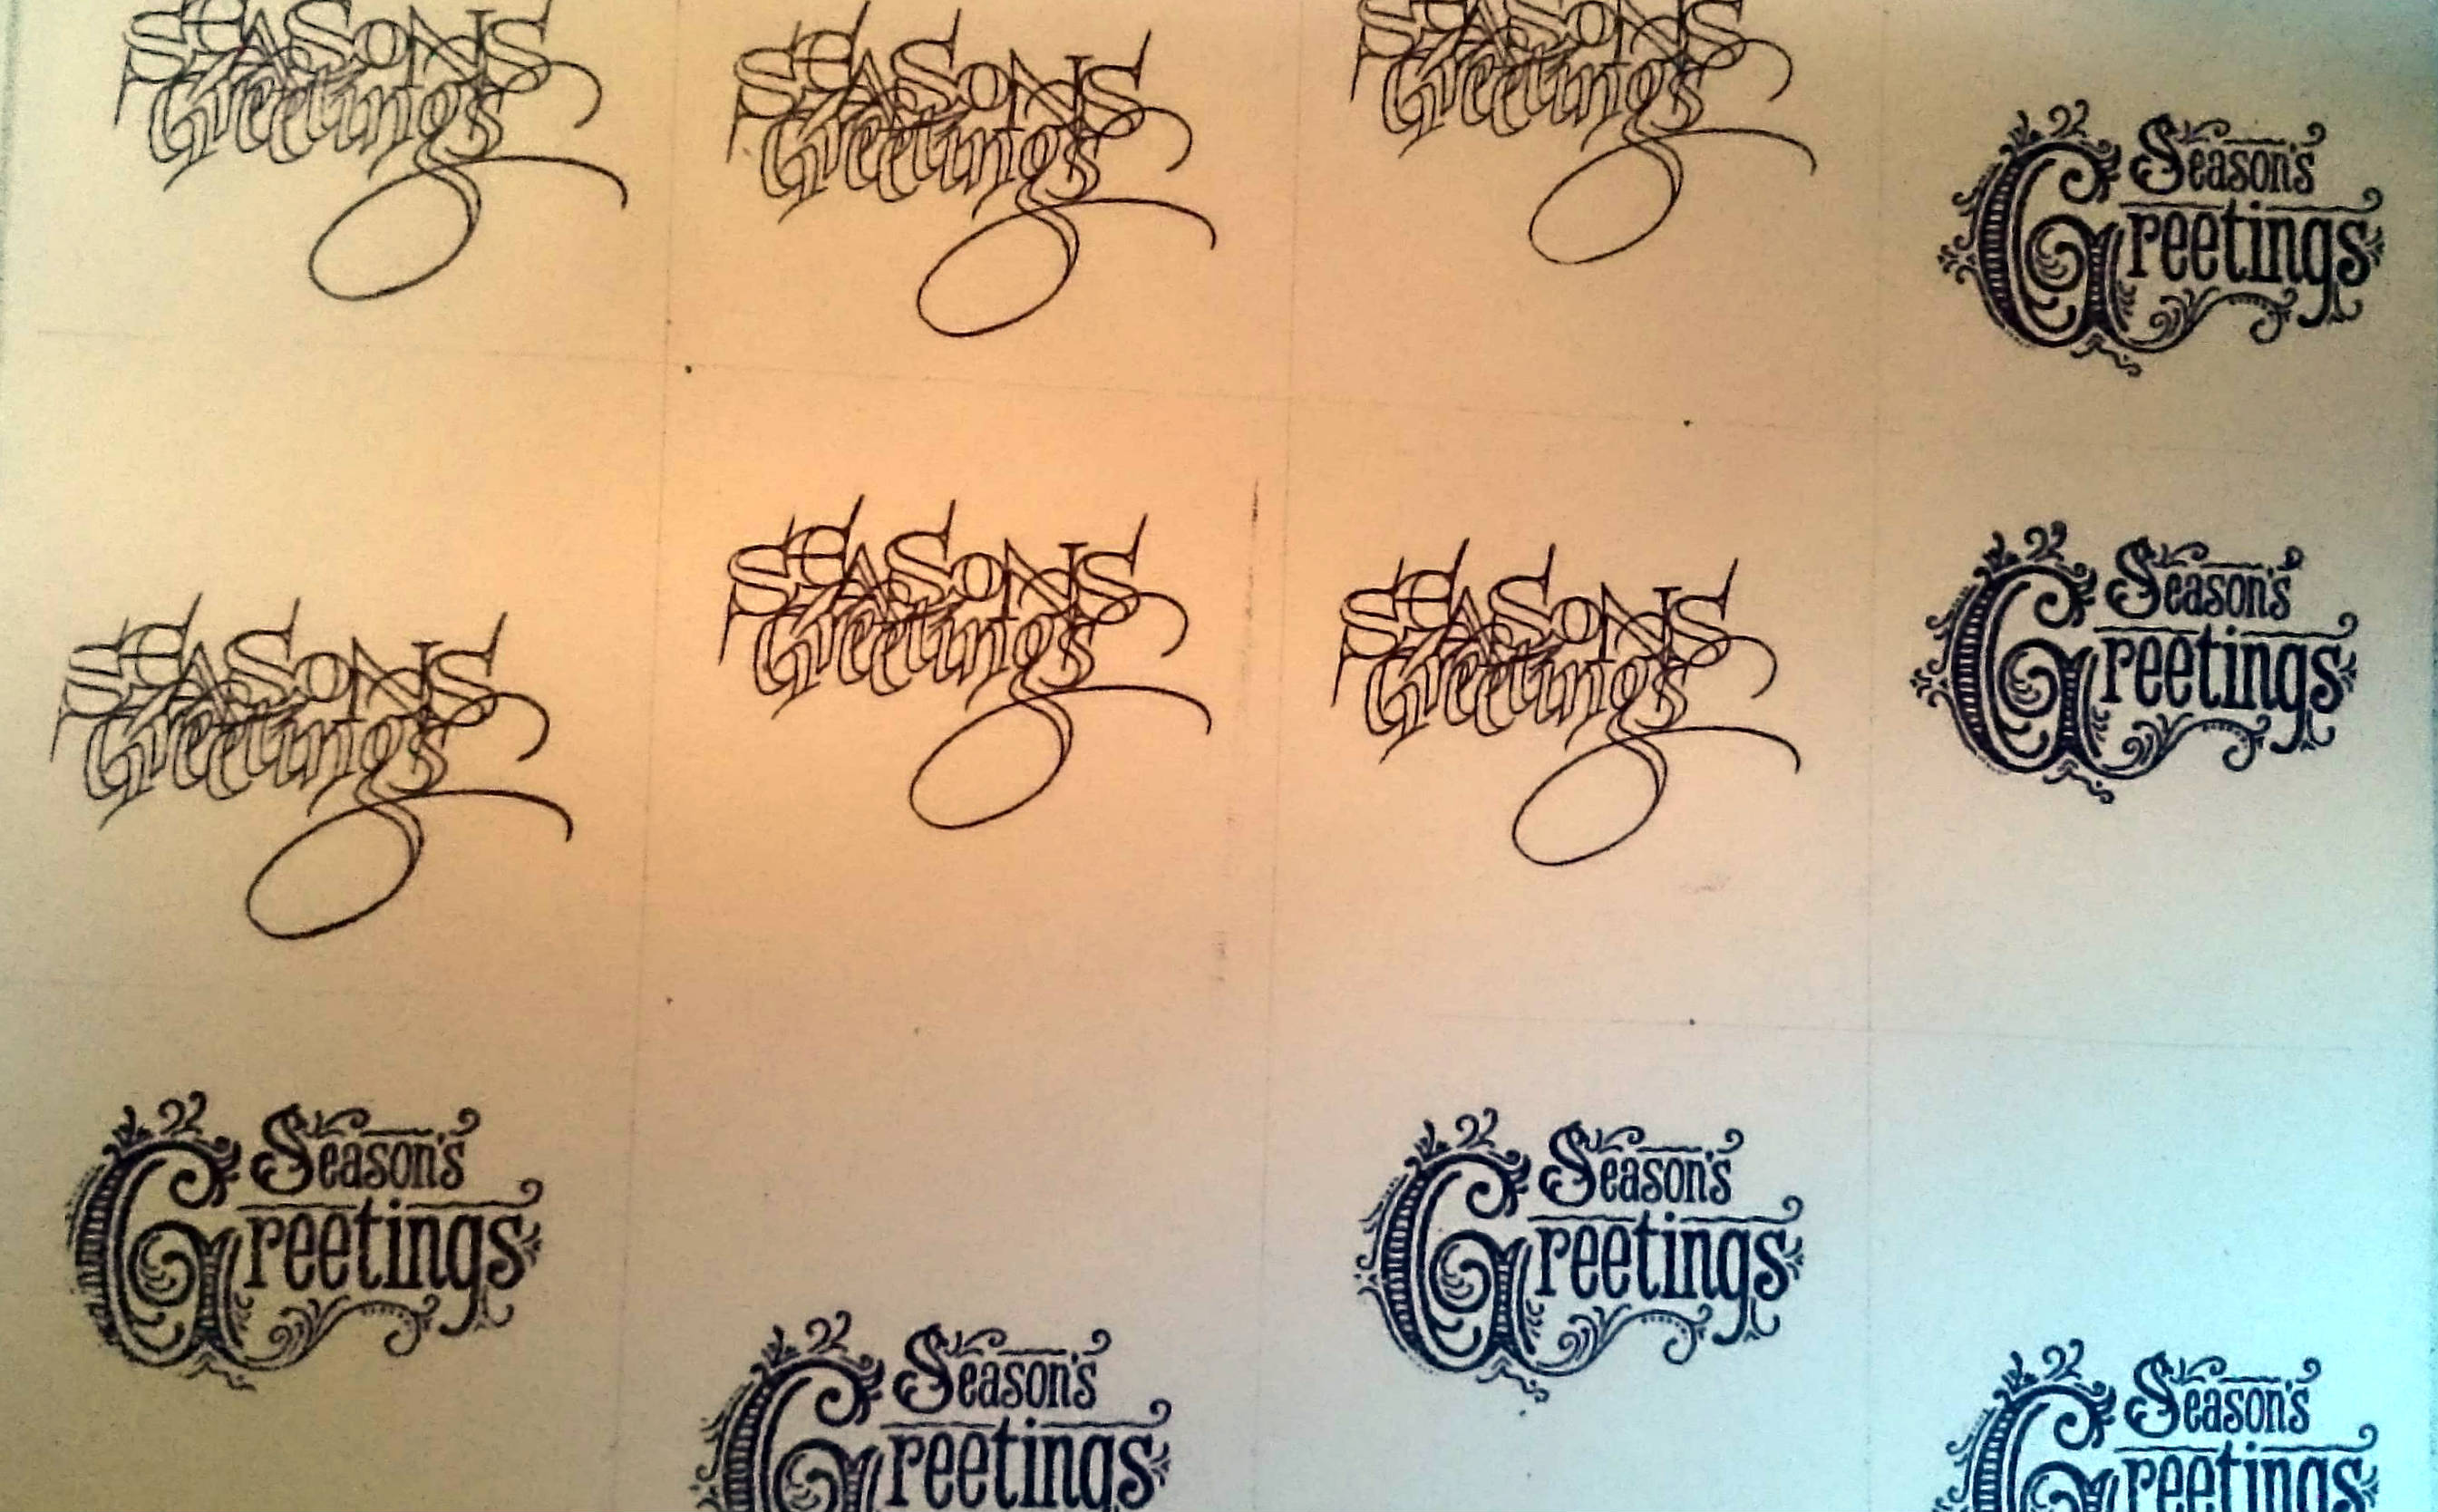

Once dried, I have stamped Happy new year! from Christmas Greetings # 2 A5 with water-based ink such as Distress everywhere on the page with various colours from blue to red :


Added a snowflake from Modern Christmas # 1 A5 on each, then cut out the squares and inked the edges, glue each one on to their card, et voilĂ  !


I hope these cards give you inspiration to participate in our 

for 3 chances to win some of these fabulous
Artistic Samper stamps !
Thank you so much for stopping by.
You may visit my folder : 
I will be happy to read your comments about it !
Your comments are very much appreciated here, on my blog
Bye for now and happy creating. 
Titbelsoeur


Wednesday, 3 December 2014

A Trio Of Christmas Tags

Hi hope you are all well, and have done all your Christmas prep! Craft work aside 
I tend to be last minute dot com when it comes to Christmas.
Today I bring you three tags from the Artistic Stamper's
Christmas selection of stamps.
My products used are
Crafty notion guiding flakes in Autumn gold, craft card (mine is the back of a box of Pepsi packaging),  
3 x tags, black card. 


Firstly I coloured the three tags with blending wild honey, spiced marmalade & 
aged mahogany distress ink onto the tags. 


I then stamped the snowflakes and the merry christmas on to them with fired brick and chipped sapphire. I covered the tag in gloss multi medium and pressed them all against each 
other to create a texture into the medium.


 I then sprinkled glass beads onto them and also crafty notions guilding flakes, and allowed to dry
once dry I sprayed each tag with the delusions sprays and allowed to dry.


Tag 1
For this tag I used the snow flake stamp,  the season greetings from the Victorian 2, 
 and the little girl at the fireplace from the mini Christmas plate. I stamped them in 
black archival onto craft card tags. The wooden snowflake coloured with distress
 ink and coated in media crackle glaze. The top star was black fimo clay stamped with the bauble pattern and a star shaped cutter was used to cut it out, once baked it was highlighted with treasure gold.


Tag 2
Father Christmas of the mini Christmas 2 plate and the snowflake stamp.
Wooden snow flake same as above merry Christmas stamped into 
black fimo clay baked and highlighted with treasure gold.


Tag 3
Same as above for snowflakes and stars stamps used were snowflake stamp, merry Christmas of the Christmas greetings and father Christmas of the Victorian Christmas plate 2. string on the tags was swiped with fired brick distress stains. All tags were glued on using my hot glue gun as had trouble fixing them on with other glues. 
they were all attached with a mini attacher to the back of Pepsi packaging which had had the sides  treated with distressing blade and then finished with walnut stain distressing ink.

I have done it again I must try to make much simpler posts with less products. Thank for popping by
and don't forget to leave a comment or two.
Cheers Dee x


Wednesday, 11 December 2013

Seasons Greetings by Emma


Hello everyone!

Today, is my turn to share here at The Artistic Stamper and for my piece, I've created a hanging ornament. As an alternative to the traditional Christmas colours, I thought it would be nice to have something a little bit different and because I love the look of chalkboard, that's what came to mind and here it is, my hanging chalkboard ornament ~ hope you like it!
To create this, I gave an MDF bauble two coats of Black Soot Distress Paint, allowing it to dry between coats each time. Next, and using the Seasons Greetings and Holly bough stamp from the Mini Christmas 1 stamp plate, I stamped directly onto the painted bauble with Versamark ink and applied white embossing powder over the top, then heat embossed, until it was molten and shiny.
I used a piece of chalk to create the chalkboard effect onto the black paint and then added some Snowflake Fresco Finish paint around the edges before sealing the whole bauble with a coat of Mod Podge. 
 I created my poinsettia with Tim Holtz's Tattered Poinsettia die from Sizzix and added some glass glitter into the centre. I used some die cut foliage which I coloured with Iced Spruce Distress Ink and then sprinkled with Rock Candy Distress Glitter. To complete the bauble, I added some rusty wire and distressed some seam binding, which I added with some twine to create the hanger.
So, that's it from me for today and I'll see you again later in the month.
Thank you so much for stopping by and I'm looking forward to reading your comments.
Love Emma x

Tuesday, 26 November 2013

Christmas is coming......

Well, as if you didn't know that....
Hi everyone, thanks for dropping in,  Astrid here and yes, - Christmas is now less than a month away, - eek.
Anyway, here is my first Christmas project, a gift card holder, for that special person who is so hard to please....

These are the stamps and products I used:
Mini Christmas 1
Christmas Plate 3
Size 10 Manila tag
Kraft Resist Seasonal (Tim Holtz)
Hinge Clips
Distress Stains, Iced Spruce, Salty Ocean, Stormy Sky and Brushed Pewter, Picket Fence
Distress Inks,  Iced Spruce, Salty Ocean, Stormy Sky, Walnut Stain
Archival Ink Potting soil
From my stash: Flowers, embossing folder, gold embossing powder, hand dyed cheese cloth and ribbon, various dies and punches Treasure Gold in White Fire Core'dinations and smooth white card, scrapbook paper scraps.
 This is how I made the booklet and gift-card holder:
I folded my size 10 tag in half and trimmed the two corner pieces at one end. I then coloured the tag by swooshing it through my chosen colours of stains which I had squeezed onto my craft-mat. I darkened it and blended further with Distress Inks. Next I ran it through an embossing folder. I then crumpled the whole tag up and then unfolded it again to get even more texture.
My chosen stamps were stamped on smooth white card and then layered up with fussy cutting, dies and embellishments as you can see from the photos.


The inside had become very messy, so I covered it with a piece of the Kraft Seasonal papers, which I had first blended some Picket Fence Distress Stain over to tone it down a bit. I created the pocket with the help of the Sizzix Distressed Doily die cut from Core' dinations Kraft Core.
And here you can see what the message and little gift card envelope looks like.


And here they are all tucked in place:
Hope I have not made it too long winded and that you got the basic idea.
Thanks so much for visiting and see you next time
.

Saturday, 23 November 2013

Christmas Surprise by Emma


Hi everyone...

Hope you've all had a great week and looking forward to the weekend. Well, if you're looking for inspiration for your Christmas cards or gifts, then I hope that I can inspire you with the piece I'm sharing today ~ my little altered matchbox, with a big surprise when you open it up! As always, I hope you love it...

To begin with I made my own matchbox from kraft card, measuring approx 7 x 11.5cm in size. I then cut pieces of cream card to fit the outside of the box, inked them with Old Paper DI and stamped each piece with the Music Background stamp. I distressed the edges of the paper with Walnut Stain DI before attaching them to the outside of my box. I then added a Idea-Ology Hitch Fastener on the front of the drawer, to enable you to pull the box out of the cover easily.
I then cut more cream card to fit the base and the sides of the box and again inked them with Old Paper DI before stamping the Santa image from the Mini Christmas 1 stamp set onto the base card. 
I coloured the image with Distress Marker Pens and then inked up the Snowflake stamp with Tumbled Glass DI and stamped the flakes onto all my pieces of card before attaching them to the inside.
I then raided my own stash of dies and used the Festive Greenery and the Tattered Pine Cone die from Tim Holtz for Sizzix to die cut card and coloured each individual die cut with Distress Inks, adding highlights of Rock Candy Distress Dry Glitter to each piece. I then added these to decorate the inside of my box, together with a small Bottle Brush tree and some fake snow before finishing the inside with a couple of Tim Holtz Chit Chat stickers.


To decorate the outside of my matchbox, I used the Tattered Poinsettia die from Tim Holtz, again from my stash and made a large bloom from cream card, inked around the edges with Distress Ink and spritzed with Biscotti Perfect Pearls Mists. 
I attached the flower to my box and added die cut holly leaves, inked with Iced Spruce Distress Ink and rusty wire coils, smeared some Rock Candy Distress Stickles over the top of the leaves and then die cut the number 25, painted it with PaperArtsy Snowflake Fresco Finish paint and covered the numerals with Rock Candy Distress Glitter.  

So, that's it from me for today...thank you so much for stopping by and I'll look forward to reading your comments! Don't forget we still have our Christmas challenge running until the end of the month, so if you would like to enter, with a chance to be the lucky winner, then just click HERE for all the details.

See you again soon...Emma x