Friday, 10 October 2014

Layered Journal cover

Hello Everyone,
Shilpa here,
I got plain Art Journal for myself recently. And when I decided to make cover for that, I  could not think other than my lovely Artistic Stamper stamps. And I used many to create this Vintage Journal cover.


I started with stamping some images
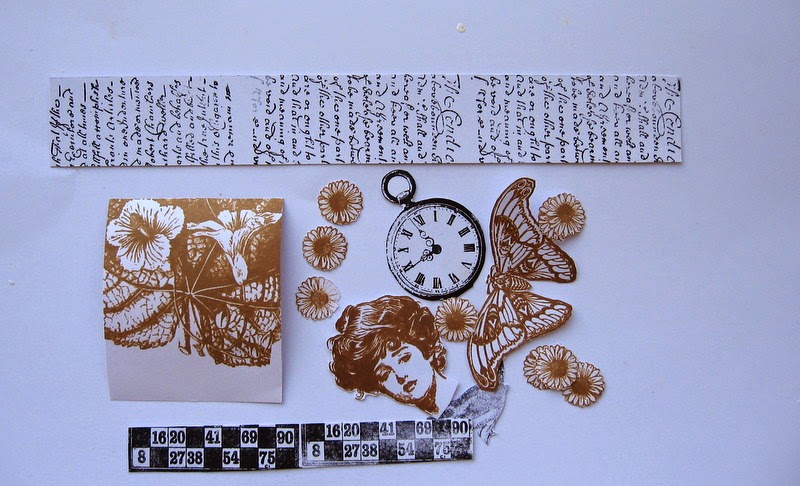

I've used Gibson girl plate # 1stamp, Waches, large Butterfly stamp from Insects and Butterfly N0 1 , my favourite small bird from Birds of Feather set,
I stamped them with black and Coffee Ranger Archival Inks.


I took design paper from Prima Vintage Journey paper pad. Applied gesso and dried it with heat tool. With crafters workshop stencil and Clear Crackle embossing paste I created texture. If you click on this photo you can see beautiful crackles. Then, I spritzed Lindy's stamp gang inks in various blue, red and brown colors, created some drips. They made beautiful layers.


Here also you will see the background texture and layers.


Next on the base I created layers with stamped images, design papers from Graphic 45 couture pad, diecut doily, Tag. I gave these paper vintage look with spraying inks and applying Distress inks - Vintage photo, Broken China, Walnut stain. I distresses edges with Tim Holtz Paper Distresser.


Here you will see cute lil' birdie, vintage charm, wooden button and  flowers as my embellishments.


I am totally in love with these Gibson Girls stamp set. Images are lovely and we can add them on any project. I adhered the stamped image of this girl on diecut frame, which I distressed before with broken china distress ink. Other than flowers, you will see Prima jute trim which is perfected suited here. And colored butterfly is perfect fit in the corner, it has beautiful design on it.


In the middle, I've created tile with floral stamp. I colored it again with distress inks - Peeled paint and Broken china, vintage photo.


And this is the final look of my Journal cover. Do you like it? Let me know in your comments.
The theme of this Month's challenge at Artistic Stamper is 'Memories'. Use your favourite Rubber stamps and Distress Inks to create something beautiful from your memories. 
Thanks so much for your visit today.
Supplies Used:
Artistic Stamper Stamps: 
  Gibson girl plate # 1stamp Waches,  Insects and Butterfly N0 ,  Birds of Feather set,


Wednesday, 8 October 2014

Inky Wishes by Alison Hall

Hello Stampers! I have a bright & cheery birthday card to share with you today.


Here's What I Used...

Prima Paper Flowers
Pearl Brads

Here's What I Did...

1. I started by cutting two pieces of 6x6ins water colour card.

2. I spritzed one piece of the 6x6 ins card with water, then with lemon zest Dylusions ink. Then I laid the other 6x6 ins card on the top to mop up some of the ink, and then dried both pieces with a heat gun.

3. Next, I laid the Retro Bursts template on one piece of card, spritzed with fresh lime Dylusions ink, then laid the other card on top to pick up the ink on the stencil. So, after drying, I ended up with two nice inky backgrounds.


4. I took the left hand background, and used aquamarine archival ink to stamp Calligraphic Mat 13 on it.

5. I used jet black archival ink to stamp 'Happy Birthday' from Grungy Greetings Plate No. 1, onto the right hand background. I cut my greeting out, then matted it onto water colour card, coloured with calypso teal Dylusions Ink.

6. I glued my greeting to the background, added some co-ordinating paper flowers & brads, matted it on calypso teal inked card, then attached it to a 7x7 ins card, to finish.


My other half has nabbed this card for his sister's birthday this month! :-)

Thanks for dropping by,
Alison xxx

Monday, 6 October 2014

Guess what...

... the background of my card is made of...


Actually, Jennibellie showed us the technique on her forum, and I had a try (just like I try all weird techniques I view !). You just want to take 4 or 5 kitchen roll used sheets, glue 2 of them together, then another one on top of it and one or 2 again. The glue must completely wet the towels, thus you either want to use your home-made glue (with rice or flour), or add the same volume of water to your glue and mix.
Once dry, here are your sheets, all different and unique :


Now you want to stamp on the sheets :
Handstamped 


Encyclopaedia Botanica Size A5 © Katy Fox  
 outlined with white pen to highlight the stamped images


Encyclopaedia Botanica Size A5 © Katy Fox  


And then I stamped the
Grungy Greetings #1 
on to a watercolor paper


 And Grungy Greetings #1   on to school book pages I glued on the inside of the card for the sender to write down some sentiment !

Please let me know whether this technique did interest you, I am looking forward to reading from you ! And don't forget to participate in the Artistic Stamper monthly challenge... talking about memories !
See you !

Friday, 3 October 2014

Post Card from Maida.Hill


Hi everyone hope you are all well. Today I am bringing to you a 
project using the lovely Carte Postale plate from the 
Artistic Stamper 


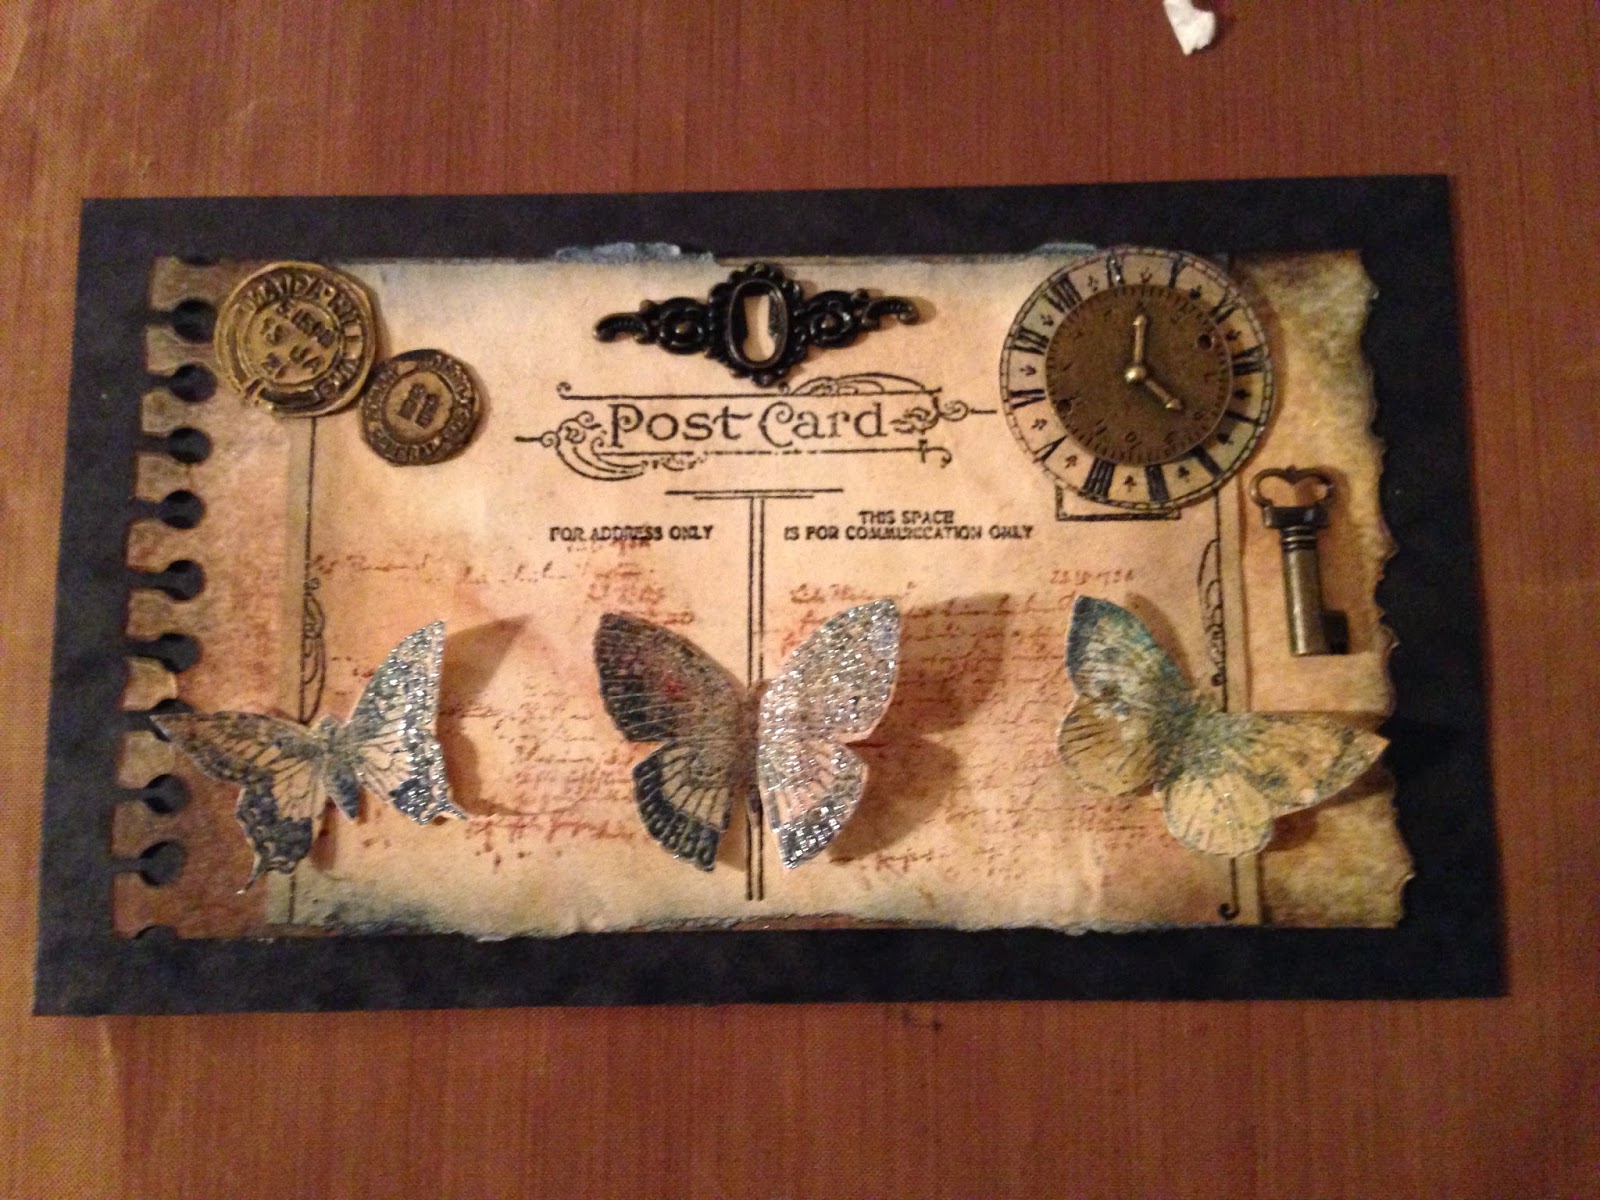
I also used the butterflies from the insects & butterflies plate and the small
 clock from the tick tock plate.


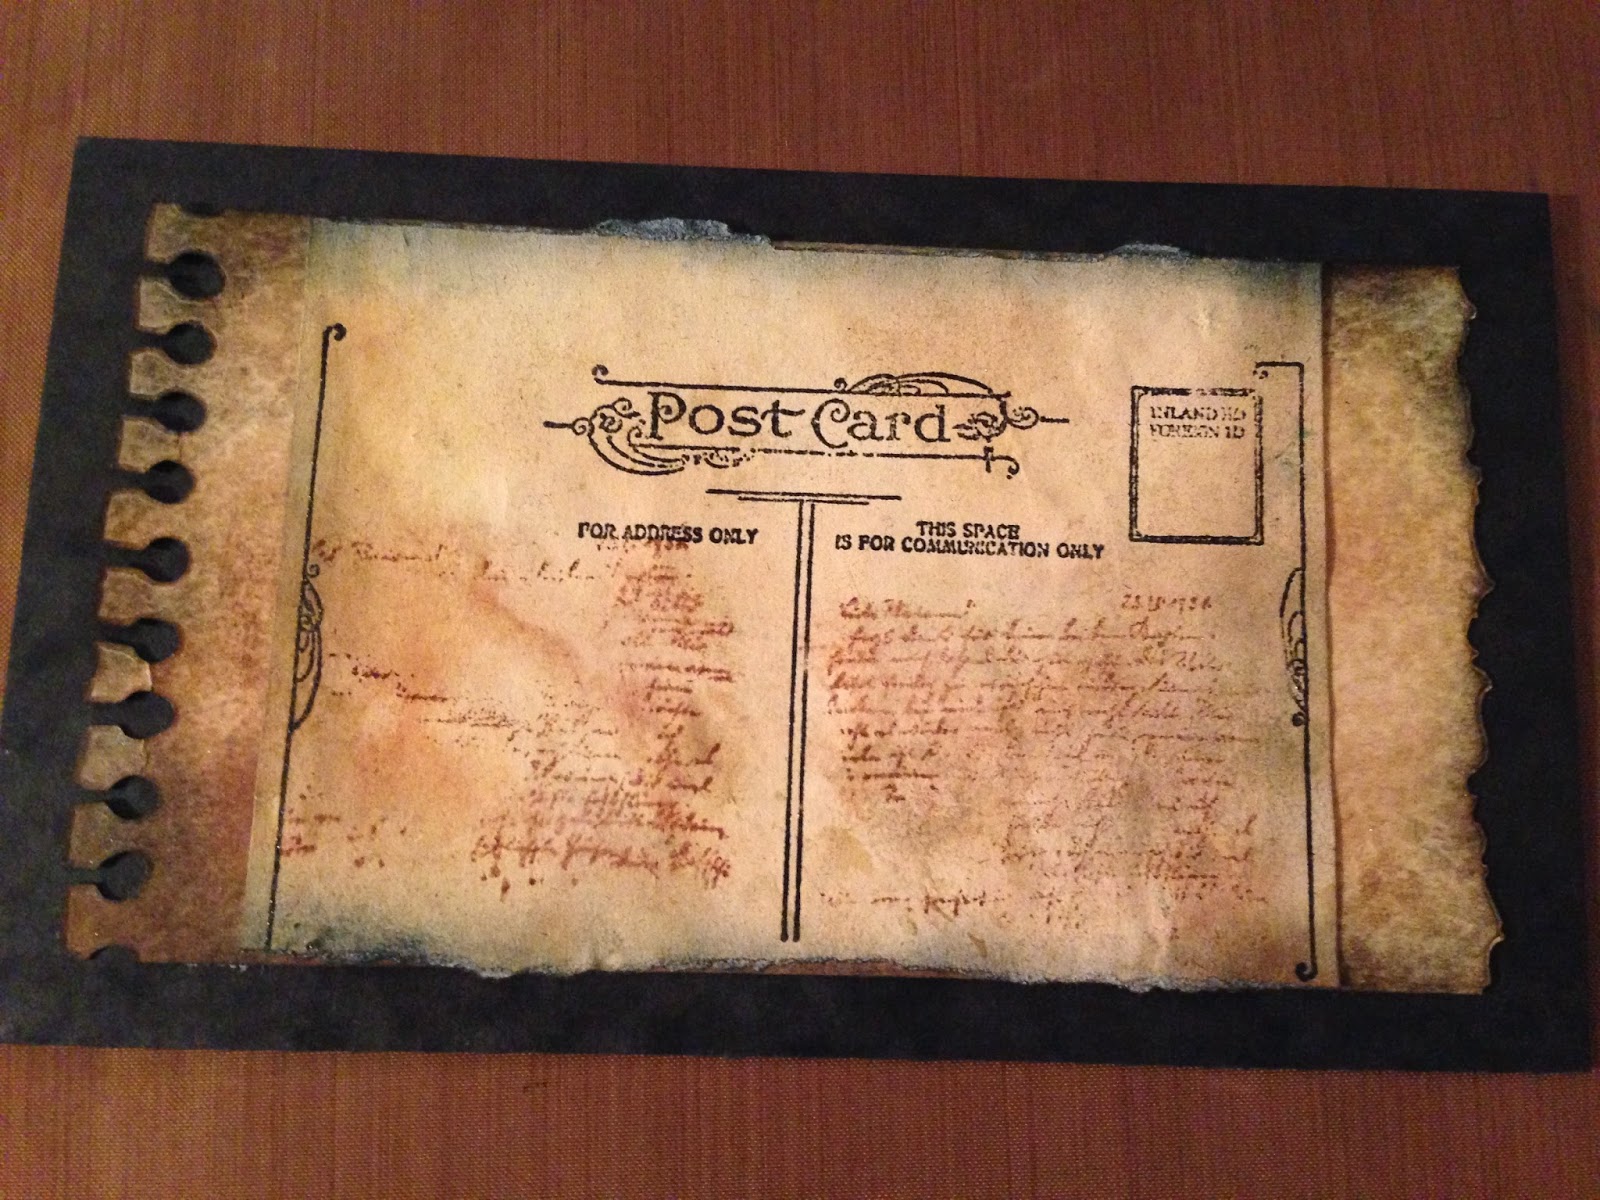
Firstly I coloured a lightweight card with distress inks in 
scattered straw, antique linen with a bit of
Vintage photo.


I die cut a piece of thicker card with Tim Holtz on the edge die torn notebook.
I coloured a second piece with the same colours and edged
 with black soot distress ink.


I stamped the post card stamp onto the lighter card in versafine onyx black
and clear embossed it 


Next I stamped the script from the carte postal stamp in 
vintage photo.


I knocked it back a bit with a baby wipe.


The clock face was stamped onto distress coloured card 
and clear embossed the butterflies were stamped in 
chipped Sapphire distress inks and clear embossed
then gently sprayed with mica spray. 


The post marks were triple embossed with gold embossing powder,
and then cut out and fixed. 


Finally I added a brass clock to sit over the clock face, a final sweep
with black soot distress ink, a keyhole and key 
glued it all onto black card to 
complete the project.


Thank you for stopping by hope this project inspires you to 
dig out your distress inks and have a play.
Have a great day!
Cheers Dee x


Thursday, 2 October 2014

Winner of September's Challenge

Hi!
Thank you to everyone for joining in with our Autumn Colours Challenge. It was fabulous to see all the gorgeous creations :)
I have to choose a winner, and Mr Random.org helped me out by choosing no 22!
Congratulations to
with this stunning card


Please email me to arrange your prize.

Don't forget to join in this month's challenge which is Memories, and can be found here.

Have a creative day
{hugs}
Jennie

Wednesday, 1 October 2014

October Challenge- Memories

Hi to all of our blog readers

A BIG thank you to everyone who joined in September's Challenge, We loved all of the entries.
Our new challenge for October is Memories. You can interpret this anyway you like :) as long as it has rubber stamping in it.

We are  looking forward to seeing all your artwork and stamped projects that you submit in relation to this theme. To join in with this challenge (and you can join in as many times as you want), is simple; all we would like you to do is, make a piece of artwork, making sure that you include the theme and some rubber stamping. Pop back here to link up using the Inklinkz at the bottom of this post, so that we can see what you've made and then, leave us a comment to let us know you have joined in with the challenge. As always, there will be candy for one randomly picked entrant - the winner will receive £15 worth of The Artistic Stamper stamps of your choice. And don't forget....if you use Artistic Stamper stamps on your entry, you will entered into the draw, twice!!!! You can also enter as many times as you like!

 
Some of the team have created more fabulous artwork for you to be inspired by....


I created a pendant, using Girl With Flower In Hair, colouring with Distress Inks, then adding an inked piece of paper doily & the stamped word from Journaling Mini Words. I cut my art to 2 ins square, inserted it in a Ranger Memory Frame, then finished off with some lace & Idea-ology Ball Chain.


Titbelsoeur

I made a tag, stamping Blossoms Small size from Debbie Cotton and Journaling Words on to used tea bags, then colouring another blossoms

 
After that, I added stuff on my tag : a sardine can, piece of a map, pinecone, card, film roll, etc etc..


This LO is for my friend, it's made with her daughter's photo. There are only stamps, piece of paper and hand drawn letters))) And of course watercolour for colouring the stamps.


We hope that you will join in this month's challenge and look forward to seeing your creations. Don't forget to add a comment when you have posted your entry.
 
I will be back tomorrow with the winner of September's Challenge.
Have a very creative month
{hugs}
Jennie

Saturday, 27 September 2014

Autumn colour Tag

September has come to end, have you participated in our Autumn Colours Challenge yet? 
The winner will get fabulous Artistic stamper Stamp set.
If not, here is one more inspiration!!

Hello Everyone,
Shilpa here,
Today, I made a tag with lovely autumn colours and Botanical stamps from Artistic stamper


I've stamped the floral image with Botanical Plate 2 stamp set and Leaf Green Archival Ink


To create the interest, I've adhered chipboard design at the edges of the tag. I heat embossed (twice) with Wow Olive green opaque embossing powder.
Diecuts and flowers are from stash. And orange background paper is from Graphic 45.


Don't forget to join the challenge this month. 
Link is here.
Thanks so much for stopping by.

Supplies used:
Artistic stamper stamps - Botanical plate 2
Flowers and die cuts from my stash