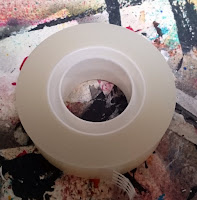
I have started using our fabulous new Artifacts stamps. First of all, I would like to present you this technique I have imagined : I make my own masking tape with "magic" tape in placing the sticky face to the inked stamp :
Quick tip : you want to place the tape from the top to the bottom to avoid the image to be blurry.
This way, the inked image cannot flow, since it is captured under the tape :
You can use these long stamps to make your own masking tape, this time I have sticked duct tape bits to a plastic surface and put the stamps to the non-sticky face, here is what it looks like :
And to make a very quick and simple tag, I have peeled a cardboard piece, then applied some gesso with my fingers, and stuck the tape on it. I could have sprayed ink to colour it, but I didn't.
I also had a try with tea bags (one of my favourite supports). Same quick tip : do not press the bag on top and bottom at the same time but from the top to the bottom.
Here is the result :
Then I wanted to add a dressmaker in the middle : I stamped it to the teabag, and cut out the same image to hide it, and then stamped the artifact stamp on to it :
Here is my finished tag, to make it I have used
- distresse cardboard,
- home made masking tape,
- stamped teabag,
- lace, thread and fabric,
- text artifact stamped half to jeans fabric, half to paper
I used the following stamps :
Artifacts - Describe her Text (cut out and mounted on cling foam)Artifacts - A Stitch in TIme (cut out and mounted on cling foam)Artifacts - Button Border (cut out and mounted on cling foam)
Artifacts - Spirit of Adventure (cut out and mounted on cling foam)
Dressmaking No. 1 A5 (cut out and mounted on cling cushioning)
Do not forget that you can win these fabulous stamps, just participating in our challenge
May's Creative Challenge - Backgrounds
for 3 chances to win !
Thank you so much for stopping by.
Your comments are very much appreciated here, on my blog
Bye for now and happy creating.
Titbelsoeur


No comments:
Post a Comment