Showing posts with label Alcohol Inks. Show all posts

Friday, 22 January 2016

Ohh!! I Do Love a Dragon fly By Dee

Hi Everyone I hope you are all well I have the beautiful Dragon fly
from the Butterflies #2 size A5 plate.
I started out with a cream tag that has some crackle paint on it in places.
Next I used the Calligraphic Mat 12 
 I swiped it through mat sealer and stamped onto the tag.
I then spritzed the distress paint with water then swiped the tag
 through the paint. Knock back the area's that had the script stamp 
stamped on it.
Next I took a square beer mat and cut the Tag up and assembled it to 
fit.
Crackle paste was put round the edges of the mat then antiquing cream
in black and patina were applied once paste was dried.
Iridescent turquoise paint was.
For the dragon fly I used pewter embossing powder and ultra thick embossing
powder followed by silver.
I stamped the dragon fly twice into the hot embossing powder.
I cut it out and then trimmed the top one back.
I threaded the beads with wire to make the main body and the antennae.
The base was coloured with the alcohol ink.
A close up of the dragon fly 

Well that's it for today I hope you all enjoyed my post 
please feel free to let me know what you think.
Cheers Dee x

Products Used
Alcohol inkCrackle Paste, embossing powder, Iridescent turquoise paint.

Friday, 4 September 2015

Mystical Bird Part 2 By Dee

Hi Everyone Dee here with the second part of The Birdz
wall plaque. I hope you are all well! and ready to
 join in with us here at the Artistic stamper for our
monthly challenge, which is
' Things With Wings'
 & on that note!
For this last plaque I used the second 
Rust board from my previous post
I triple embossed the mechanical bird from
Neil Walkers birdz plate.
I coloured the bird with the same alcohol inks
 as the previous post.
Next I used Pins and jump rings to attach the two
 plaques together.
More photo's
and some more,
I used items from my stash to join it all together.
I hope you have enjoyed this two part project and like the end result.
please feel free to let me know what you think!
take care see you soon.
Dee x


Products Used

  1. Artistic Stamper stamps used Neil Walkers Birdz Set A6 Decay Journaling Stamps #1.
  2. Deco Art Products used  Quinacridone Gold, Quinacrodine Burnt Orange, Prussian Blue Hue, Cerulean Blue, Cobalt Tourquoise Hue, Transparent Yellow Iron Oxide. Texture sand paste and crackle paste.
  3. Ranger crackle accents, Alcohol inks Terracotta,Stream, Ginger & Butterscotch.
  4. Inka Gold Gold. 

Thursday, 4 June 2015

Golden Flourish's

Hi everyone hope you are all well! I have for you today
a tag which  falls into the Challenge title which is 
'Summer is on its way'. Why not play along 
with us this month.


My tag today has been created by using the following Artistic
 Stamper Stamps, Flourish background, insects and
 butterflies & calligraphy mat 12.


I used the thinlets die to cut the shapes into a craft tag.
I had coloured a piece of card with adirondack washes 
then sprayed lightly with water to blend.


Next I tripple embossed using two coats of gold embossing powders 
and one of clear utee. I then stamped the flourish
stamp into the hot embossing powder.


I coloured the die cut craft tag with distress ink which I blended 
of the craft mat.  I spritzed with water to activate it.


Next I sprinkled gold embossing powder over it and heat set
from underneath to stop it blowing away.


I sprayed gently picket fence distress stain spray over that.


I used the same method to make the butterfly but I stamped it twice
and then built the butterfly up. Alcohol ink was
applied till I was happy
with the result.


Next I used glossy accents in the die cuts to highlight area's prior
to it drying fully I lightly sprinkled gold embossing
 powder & heat set. 


I matted it to lime green card then black I hope you have all 
enjoyed my post today and feel inspired to join 
with us this month in our challenge. 
As always I would love to know 
what you think.
Cheers Dee x

Products used
  1. Artistic stamper stamps flourish background, insects and butterflies, Calligraphy mat 12.
  2. Adriondack colour wash's stream, denim & lettuce
  3. Distress ink's chipped sapphire, pine needles & peeled paint.
  4. Alcohol ink's denim, stream & lettuce.
  5. Embossing powders utee & gold
  6. Glossy accents, distress stain spray picket fence


Tuesday, 24 March 2015

With a Light Flourish!

Hello everyone, Alison (butterfly) here, this time with a candle lantern.  Take one old jam jar, some alcohol inks, gilding flakes and the fabulous new Artistic Stamper Flourish Background stamp, and here's what you get.


Let me take you through some of the steps it took to get here...


I started by applying various blue/green alcohol inks to the exterior of the jar... The new colours Mermaid and Botanical are in there, as well as Meadow, Stream and Denim.


I just kept dabbing until I was happy with the effect - I love it on the inside too!  This would be a good place to stop if you just want a really simple way to light your summer garden evenings.


I debated doing some powder embossing with the flourish stamp, but in the end decided it was way too long since I'd played with the gilding flakes I bought way back when I started this whole crafting hoo-ha.  No idea any longer what colour mix this is - and I may even have mixed in various colourways together in my little plastic box.


As you can see, I didn't quite get a clean stamping with the Flitterglu on most of the sides of the jar (wouldn't want to attempt this on a round jar, by the way!), but I actually don't mind that, on two counts.  One: it means you get a really distressed look, like the lantern has been around the block a few times, and has some history...


Two: it means you get a proper look at the alcohol ink patterns in lots of places, which are attractive in themselves.


Again it was pretty cool from the inside...


... but since the flakes were multi-coloured, I found it a bit hard to tell what was going on with only the very translucent alcohol inks underneath.  It was too translucent... I think you can see what I mean here.


So I decided it needed an internal coat of colour too - South Pacific Fresco paint, painted onto the inside of the jar - just to give a slightly stronger background for the flourishes to show against.


I dyed some seam binding with Rusty Hinge Distress Ink and wound some gold and beige satin ribbons together with it to create the finishing touch at the top.


It's a bit wild and extravagant, but I thought it suited the rococo style of the candle lantern itself.


As usual, it's been difficult to capture a photograph of how it looks with the candlelight illuminating it from within, but I hope this gives you a slight idea of the glow.


Thanks so much for stopping by today.  You've still got about a week to come and play in our Spring is Coming challenge here at The Artistic Stamper.  You have to include some stamping, but you don't have to use Artistic Stamper stamps for that... although if you do, you automatically get a double-entry to the prize draw.  Hope to see you there!

Ingredients used:
Artistic Stamper stamps - Flourish Background
Alcohol Inks - Mermaid, Botanical, Stream, Meadow, Denim
Seam Binding
Distress Inks - Rusty Hinge
Gilding Flakes - probably a mixture of various colours
From my stash - Jam Jar, Satin Ribbon (but there are plenty of options here too)

Sunday, 22 March 2015

A Colour Explosion!

Hi everyone I am here today with a product that I love! & still 
experimenting with its called Brusho. 


It is worth just having a play with this until you are happy as different
types of application give different results.


For this one I shook the pots over the card before spraying lightly with water.


Triple embossing on the butterfly from the new Artistic Stamper butterflies plate,
with gold embossing powder.


                                           Alcohol inks in Currant, Red Pepper and Butterscotch.


Gems from my stash were wired together to make the butterfly's body.


Shabby White frantage embossing powder was shaken over the card and heat 
set from underneath the card. You could use any white embossing
 powder with a bit of gold sprinkled through it.


All Matted onto black card.


I love the effects from brusho and I want to try bister as well thats next on my 
wish list to get.
Please let me know what you think 
Cheers Dee x

Products Used
  1. Brusho in ost Red, black & Prussian Blue.
  2. Alcohol inks Red Pepper, Currant & Butterscotch.
  3. Artistic Stamper stamps Butterflies 2.
  4. Embossing Powder.


Wednesday, 4 March 2015

Golden Rain of The Dragonfly & Butterfly


Hi every one, I hope you are all well and are playing and being very crafty.  Today I 
have a project that I started a while ago that I added bits to each day. Well as
 you know The Artistic Stamper has released New Stamps
 this is what I created with the NEW! Butterflies plate.


I picked up a two wooden box's at a boot sale as I thought they were perfect for altering.
I am trying not to waffle so I will TRY!!! to give brief account of how I achieved 
this result. 


I covered the box in Gesso then once dry I used Deco art crackle paste through a Memory 
Box stencil, on the top I used plain texture paste through the same
 stencil & the Tim Holtz crocodile layering stencil. 
I allowed it all to dry over night 


I painted the entire box with Deco art Americana Desert Turquoise
and used Raw Umber on the edges. 
Left to dry over night.


Next I used the triple emboss technique with gold embossing powder
and stamped the Butterfly & dragonfly
X 2 on black card.


As in my previous post's I used alcohol ink to colour the butterfly &
dragonfly.


Once the box was dry I got out my Deco art Media misters and started spraying
everything! including whatever was on my desk and the 
floor lovely mess.


I highlighted the embossing on the insects. slightly with treasure gold


I embellished with cogs and beads from my stash.


All I can say about the Deco art misters is that they are really intense compared
to other brands and the turquoise shimmer is my new love it is
amazing I think this photo captures it beautifully.


The golden rain was a technique picked up on one of my blog catch up days and I 
changed it slightly I think it was called how to make your own pearl drops 
or something so I tried it and wasn't that happy so used
 treasure gold as well as the mica powder.


It is basically the melted glue from your hot glue gun brushed with mica 
powder and in my case treasure gold.


I attached the ornate lock.  


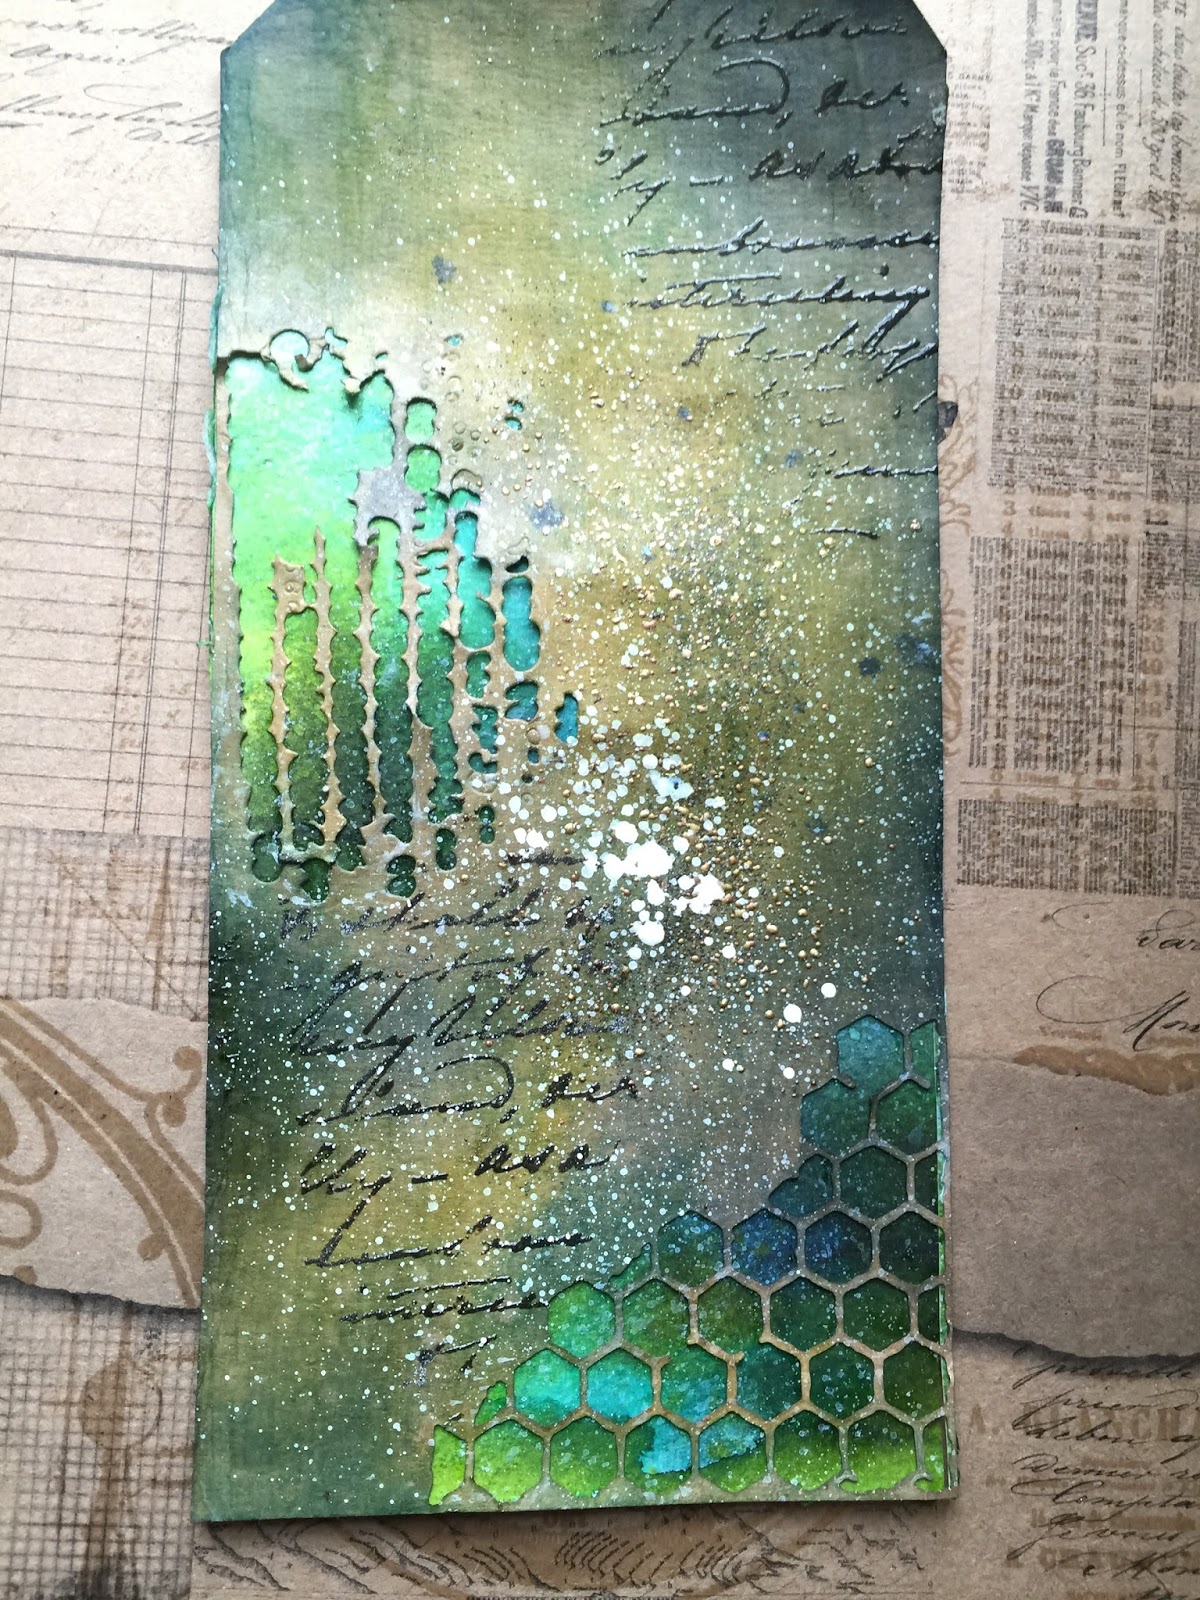
Luminarte H20's in the following colours key lime, Teal Zircon, Moss Agate, 
Sky Blue & Dutch Iris the pots were sprayed with water from a mini mister.
 I then used my finger to rub the colours over the surface until I was 
happy with the results. I brushed the treasure gold over the rest
 of the box to highlight the pattern.


I hope I didn't bore you all! I have tried to keep it as short as possible if you have 
any questions please feel free to ask.   

Products Used
  1. Deco Art Media line crackle paste, Misters in the following colours Yellow Green, Primary Cyan & Shimmer mister in Turquoise. Americana Desert Turquoise.
  2. Luminart H2o's Moss Agate, Sky Blue, Dutch Iris, Teal Zircon & Key Lime.
  3. Stencils Tim's layering stencil crocodile & memory box
  4. Alcohol Inks in lettuce, stream, and denim.
  5. Treasure Gold Spanish Topaz
  6. Texture paste
  7. Gesso 
  8. Embossing powders
  9. Artistic Stamper Butterflies 2
I really love the new stamps from the Artistic stamper so don't forget to have a look.
remember when you are out at a boot sale look beyond and imagine 
what that item could look like altered.
Let me know what you think.

Cheers Dee x