Sunday 29 April 2018

Busy Bee Tag by Gemma

Hello

I have a tag to share with you all today, I made this tag using Artistic Stamper stamps, PaperArtsy paints, and chipboard.


My Process


Thank you
Gemma

Wednesday 25 April 2018

Birds and Bees month - with a twist...

Hello, Lisa here with another inspirational look at April's theme - Birds and Bees. 
But with a twist... I've used butterflies.

I used The Artistic Stamper A5 Insects and Butterflies stamp set, which has a gorgeous collection of winged creatures. 

My previous creations for this theme included bees and birds. So, this time I went with a more pretty version of a winged creature - butterflies. 

Of course, there is no limit to what winged creature you could have using this technique. 

Here is my creation...


I coloured a piece of white card with Distress Inks using Mustard Seed, Cracked Pistachio and Blueprint Sketch. I then sprayed the inked background with water and left to dry.


I used The Artistic Stamper 3 x 3 Harlequin Mask with the same colours of ink to add some depth.


I then stamped the butterflies and coloured them them with Carved Pumpkin, Wilted Violet and Picked Raspberry Distress Inks.


I stamped the word 'fly' using black ink then 
over-stamped with Carved Pumpkin Distress Ink, and lightly brushed Blueprint Sketch ink over the top. 


To finish, I matted the background on to Kraft Card.


Thanks for popping by.
Toodles for now,
Lisa xxx


The stamps and stencil I have used are available on The Artistic Stamper website


Insects and Butterflies 1 A5  (cut out and mounted on cling cushioning)   The Artistic Stamper Mask Harlequin 3" X 3"      Decay Alphabet lower case size A5 (cut out and mounted on cling cushioning)

Saturday 21 April 2018

Free As A Bird

Hi Guys, JANE here again with my take on this months "Birds and Bees" challenge.


I started off with a nice easy background, using the SMALL DOTS mask... by spritzing it then turning it over onto my paper, the SEQUIN WASTE OPEN background stamp, and the A4 SWIRL MASK.
I then stamped the bird and the cage from the FREE AS A BIRD stamp set, added the sentiment...et voila!!!
I am loving seeing your entries for our challenge, and you still have time to enter to win a stamp set, hope to see you THERE. xx

Thursday 19 April 2018

Tag customization by Titbelsoeur

Hello there,
A quick idea to customize small tags like those of the Flow calendar : stamp Gibson girls with a tone on tone ink, just a bit bolder, an opportunity to use these delightful stamps.
Here are some templates :


Here you will find the stamps I have used :  Gibson Girls

Do not forget that you can win these fabulous stamps, just participating in our challenge 

BIRDS AND THE BEES


 for 3 chances to win !

Thank you so much for stopping by.
Your comments are very much appreciated here, on my blog
Bye for now and happy creating. 

Titbelsoeur

Monday 16 April 2018

Owl Tag by Gemma

 I am in love again with all thing crafty and tag related, so I have one to share with you all today that fits in with our challenge theme of Birds and Bees. You can join in the challenge here on the blog or over on the facebook page. 


What I did 😀


I started by placing blobs of Slate, Caramel, and gesso onto my mat. I picked up the paint with a small card and scrapped it onto the tag. sometimes I only picked up one colour and other times all three. I kept layering until I was pleased with the result.


I then stamped over the top with one of my all-time favorite stamps Chicken Wire and Hazelnut coloured ink. When I stamped this I wanted it to be 'bitty' I like the areas of missing ink and different colour intensity. 


Then I spread a thin layer of Purple Rain over my mat and used that to stamp the smallest bee stamp from the set repeatedly over the tag. I stamped quite a lot of bees over the tag I wanted it to be busy but not uniform.


While that was drying I painted some chipboard from my stash scarlet and then stamped over the top with the Honeycomb background stamp and slate paint. I spread the slate onto my mat as I had done with the bees but this time after stamping in Slate I mixed the paint with small amounts of gesso and restamped, I did this a couple of times, before drying and gluing the chipboard to my tag.


To finish I just added some flowers, beads and the metal owl from my stash before gluing in place I stamped onto the flowers with the honeycomb stamp and more paint.

xx Gemma xx

Friday 13 April 2018

Bee-utiful Day by Lesley Mackenzie

Hi All, For This months challenge of ''Birds and Bees'' I have created an Art Journal page.

 I have used Paper Artsy Acrylic Paints for the background and the following Artistic Stamper stamp sets :
Honeycomb Background and Free Bees -
Small But Beautiful Birds

Step 1:

Using a roller I applied paints to create the background. I then stamped on the green area using the Honeycomb Background stamp in green ink. I then stamped and embossed the birds in white in the sky. Using a white pencil I outlined a free hand flower.

 Step 2:
I filled in the flower with white gesso and when dry painted the flower detail. I applied the thickly to give he flower definition and texture , and blended the colours while they were still wet.
 Step 3:
I decided the background needed more white embossed birds. I also stamped and embossed in black 2 bees. I stamped and embossed  2 more bees onto white card and coloured them adding clear glitter to the wings. I cut them but only the bodies and wings then stuck them over the stamped images on the main page. I then created highlighted and doodled on the flower, gave dimension to the images by adding shadowing under the birds, bees and flower. Finally I added hand written text and a doodled border.


The stamps used this month are very versatile and if you would like to check out The Artistic Stamper Creative Challenge on Facebook you will see I created a set of 6 ATCs using distress Oxides for the backgrounds.


Tuesday 10 April 2018

Birdz with Lisa

Hi lovely stampers! Lisa here and a huge welcome to today's blog post for The Artistic Stamper

This month's theme is 'Birds and Bees'. 


The stamps I used from The Artistic Stamper were Neil Walker's A6 Birdz set and Mini Backgrounds #3.

Birdz Set A6  © Neil Walker (cut out and mounted on cling cushioning)MIni Backgrounds # 3 size A6  ( cut and  mounted on cling cushioning )


And here is my creation...


I started with a white piece of card and added colour using Gelatos. Then stamped one of the mini background stamps from set #3 using black Ink. 


I stamped the birds on to white card with black ink and heat embossed with black embossing powder. Then fussy cut them out.


Thanks for popping by. If you would like to pop over to my blog for a toot, the link is here ---> Lisa's Blog
Toodles for now,
Lisa xxx

If you would like to join in with the challenge, 


Saturday 7 April 2018

Bees by Titbelsoeur

Hello everyone,
This is a canvas I have first covered with corrugated cardboard, gessoed and painted it. Then added a piece of an old pair of jeans, and a stamped page of a book.
On both sides, I have sticked pieces of a very special masking tape, that you won't find in any shop. Why ? because I have made it on my own, with 2 Artistic Stamper stamps that fit very well to it :


this one from Ephemera 1 A5


and that one from Labels A6


I also could have used stamps from The Open Road 1 A5  but I did not.

I first stamped the book page with the small bee from Honeycomb Background & Free Bees, using a lot of Versa and Izink inks, to have a multicolor background. I stamped the queen and hid her to protect when stamping the honeycomb. .


Here is the finished project :


Do not forget that you can win these fabulous stamps, just participating in our challenge 

BIRDS AND THE BEES


 for 3 chances to win !

Thank you so much for stopping by.
Your comments are very much appreciated here, on my blog
Bye for now and happy creating. 

Titbelsoeur

Wednesday 4 April 2018

The Pigeon and the Statue!!

Hi there all you Artistic Stamper Fans!!..Well the snow has gone...hopefully never to return, and it looks like spring is finally here...well there are reassuring signs when I look out of my kitchen window and see the sure signs of my plants starting to spring to life...yaaaaay!!.
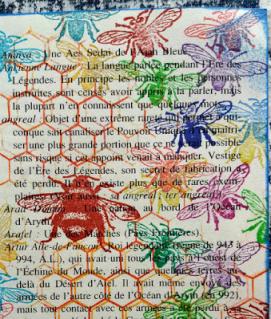
Sooooo....for my first card for this months challenge, which is "Birds and Bees", I thought I would make a card that would hopefully put a little smile to your face....


.....it made me kinda chuckle when I got the idea....or maybe I'm just a bit nuts!! lol,...anyway, when I saw the statues from the ARCHITECTURE stamp set, it reminded me of every statue you ever see....full of pigeon poop!!!...
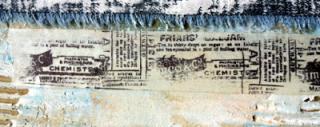
The background was super easy, I was messing around with some watercolour paints and had plenty still left on my craft mat, so I picked it up with the polystyrene base that you get from supermarket pizzas and just dabbed it on some card..
I then stamped one of the statues, cut it out and added some white paint drips on the head and shoulders..
I then stuck it on my card, added a column which is taken from the same fabulous stamp set, then I stamped out the little birds from the FREE AS A BIRD stamp set, cut them out and added them to the statue. The quote is computer generated... I think it is very apt!!!!
I look forward to seeing all your entries in our April "Birds and Bees" challenge.


Tuesday 3 April 2018

Winner of March's Challenge

Hi!
Thank you to everyone who joined in our Stencil and Mask challenge last month. Some stunning entires .
As always I have chosen by random a winner, and if
 could step up to the podium, congratulations and please email me so we can arrange your prize.

Don't forget this month's challenge is The Birds and the Bees and all the details can be found here
Have a creative month
Jennie x

Sunday 1 April 2018

April's Creative Challenge - The Birds & the Bees

Hi!
Welcome to the April challenge. Almost summer (well ok it's a while away, but the daffodils are coming up, and the birds have taken up singing, so what better time than to welcome the good weather than with a challenge using birds and bees. It can be interpreted any way you like, as long as it has rubber stamps on it. 

Thank you to everyone who joined in last month's challenge. Gorgeous entries :)
 

To join in with this challenge (we are limiting the challenge entries to 3 per person), is simple; all we would like you to do is, make a piece of artwork, making sure that you include the theme and some rubber stamping. Pop back here to link up using the Inklinkz at the bottom of this post, so that we can see what you've made and then, leave us a comment to let us know you have joined in with the challenge.
 As always, there will be candy for one randomly picked entrant - the winner will receive a stamp of their choice from The Artistic Stamper .

In addition, you can enter the same challenge on Facebook!

To join us on just go to our new Facebook group, and send us a request to join..  There will be a prize for the Facebook challenge, as well as the blog challenge!
And don't forget....if you use The Artistic Stamper stamps on your entry, you will entered into the draw, twice! To get you started here are creations from three of the team...

Titbelsoeur


To make this strange bird, I have used a tin cap, a drink can, a piece of drawing paper, and an old necklace.
I have glued a piece of a page of magazine on to the tin cap, then stamped the Junior Bird size 70mm x 50mm ©Neil Walker with black Archival ink : head to the drawing paper and the tail twice on the can I had first opened. Then I cut out the watercoloured head and the 2 tails I have used as wings. I sticked all parts (head, wings, necklace to represent the legs) with hot glue.


I used a background stamp, a calligraphic mat and the lovely free as a bird stamps set along with some PaperArtsy paints to create this tag, Pop over to my blog for more details.


Lisa 


I used the Honeycomb Background stamp with Distress Inks to create the background. Then used the same stamp stamped in black ink and coloured with Distress Inks to create the top layer. I applied 6 layers of clear embossing powder over the top then cracked the embossed layer to create texture. I cut in to 1 inch sections and mounted on to black card. 
I then stamped one of the bees in the stamp set, fussy cut and stuck with 3D foam dots. To finish I added a sticker sentiment.

We hope that you will join in this month's challenge, and also join us on Facebook too.

We look forward to seeing your creations. Don't forget to add a comment when you have posted your entry.

Have a very creative  month

Jennie xx