Tuesday 29 May 2018

Mini Notebook by Gemma Hynes

I have a sweet little 4x4 notebook to share with you all today, There is something I really enjoy about the process of making books of any kind. The mix between the precise measurements of the book construction and the messy relaxed decoration that comes after. 


 Steps


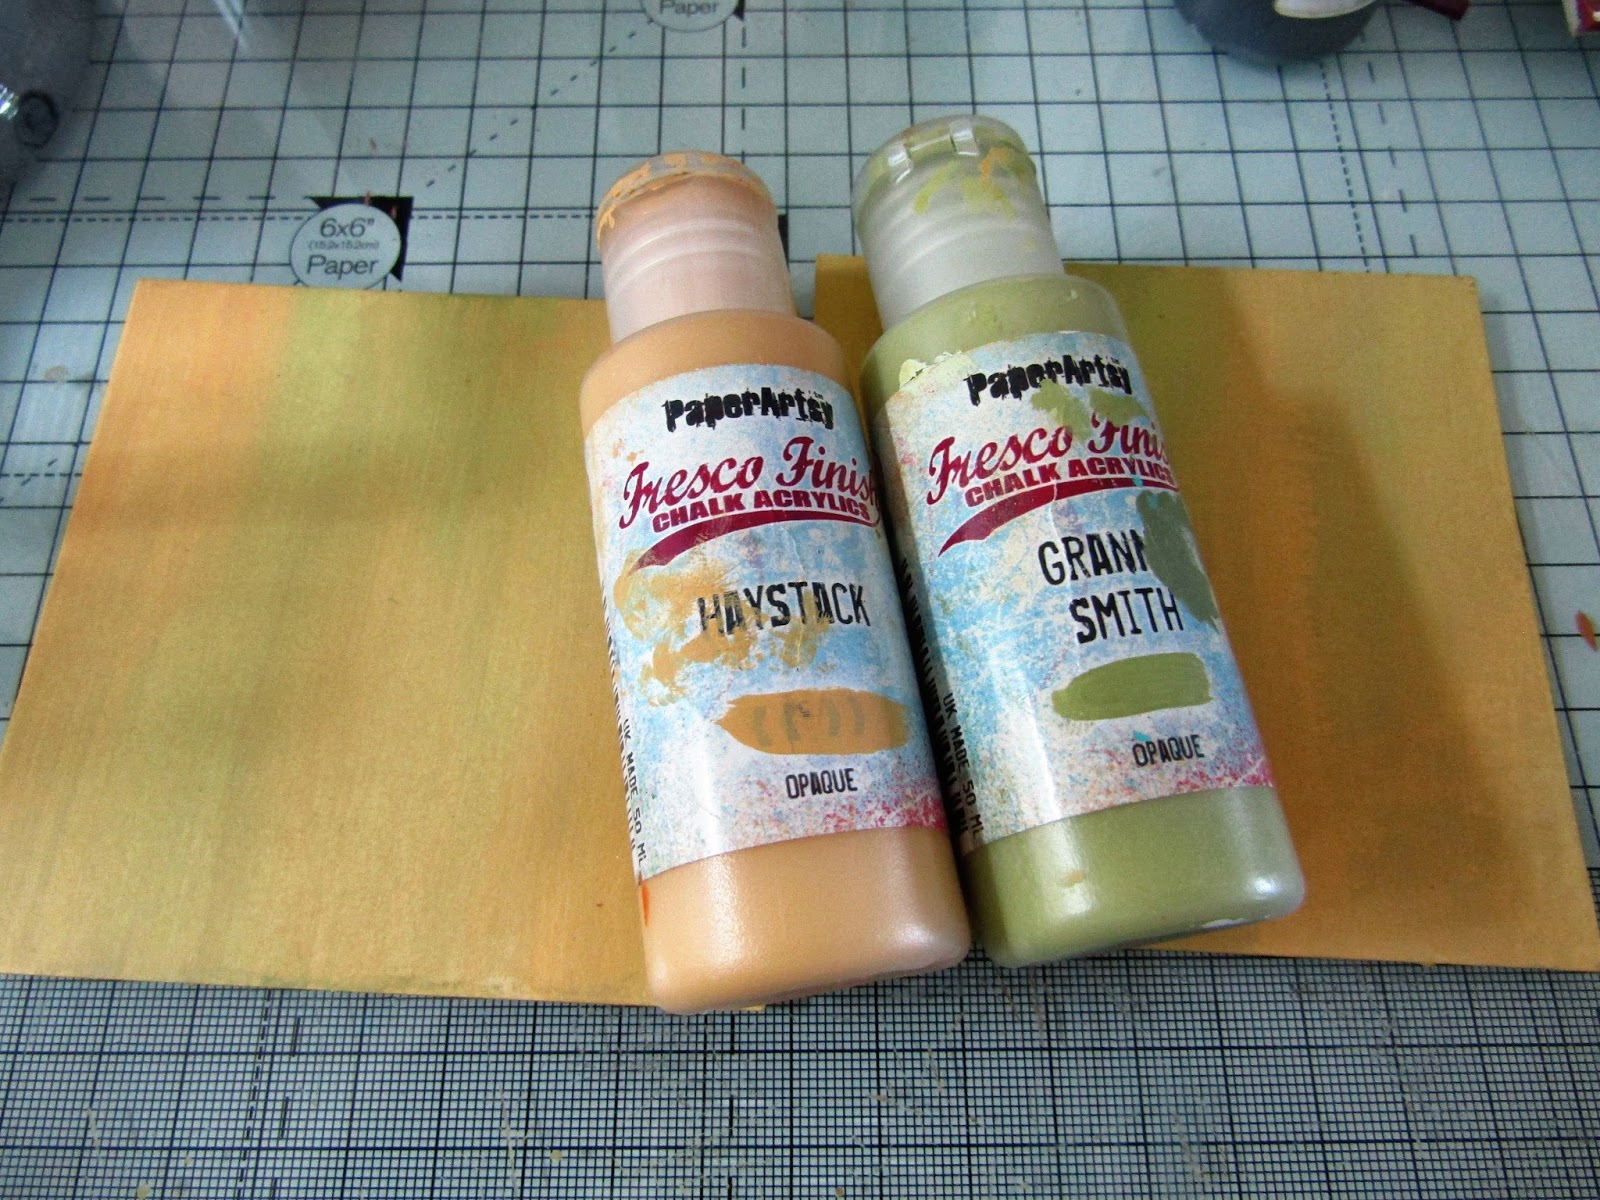
I brushed layers of Haystack and Granny Smith PaperArtsy paints over 4x4 bits of board that are the covers of my book. When layering I made sure the paints were still wet so the colors would blend easily together.


Over the top, I stamped a calligraphy mat with caramel paint, When I stamp I try to roll the stamp from one side to the other so I get an incomplete print. 


Over that, I stamped the honeycomb background stamp with Slate paint, still rolling not pressing the whole stamp down for an incomplete print. 


I painted a little chipboard bird from my stash blue and stamped the word Hugs from the greeting stamps set in black Archival Ink. 


I also painted two little hearts from my stash in red before stamping over the top with the Chicken Wire background stamp.  When everything was dry I wrapped some string around the covers and glued the hearts into place. 


I then painted some white duct tape blue and used that to bind the covers together before gluing the bird to the front cover. To finish the book off I added some elastic for a closure and attached the pages to the inside.

xx Gemma xx


Thursday 24 May 2018

Tracy's Background with Lisa

Hello folks, Lisa here and welcome to my latest creation for The Artistic Stamper. This month, our theme is 'backgrounds'.
Each member of TAS Design Team are working with the new collection of Tracy Scott background stamps. I used #8 in the collection. 


I started with some white card cut to 7" square and coloured it with a couple of different yellow Distress Oxide inks.


I cut a piece of white card to 4.5" square and used a couple of red Oxides and did the same with a rectangle piece of card with orange Oxides.


I used Tracy's Background #8 stamp and stamped the three pieces of card with the Oxides. 
I also used Mini Backgrounds #1 stamp set on the yellow piece of card which I stamped using a selection of the Oxide colours. 


I adhered the red square on to the yellow background. I used foam pads to attach the orange rectangle to add some depth.


I then stamped 'hello' in the bottom right corner with the A5 Decay Alphabet lowercase stamp set.


To finish, I mounted the large background on to a white 7.5" square. 

Thanks for popping by the blog today, please leave a comment if you wish, I love to hear your thoughts.
Toodles for now,
Lisa xxx 


Here are the stamps I used... which are available on The Artistic Stamper website.

Tracy Scott Background 8 (cut out & mounted on cling cushioning)       Mini Backgrounds #1  size A6 (cut out and mounted on cling cushioning)      Decay Alphabet lower case size A5 (cut out and mounted on cling cushioning)

Monday 21 May 2018

Tribute to Tracy

Hi all, JANE here. Well I am sure by now that you have seen the new set of stamps released, a collection of background stamps designed by the amazing Tracy Scott, her work is so inspiring, vivid, and alive, I just adore her style. So I have made a tag in homage to Tracy's kinda style....lots of vibrant colour, I used the dylusions paint, and I have used one of her new background stamps too, you will find all eight of them HERE, I have used the background 6, I love love love it, I also used the dragonflies from the INSECTS AND BUTTERFLIES set, and the verse from the DRAGONFLY WORDS stamp. I hope you can join in the fun of this months background challenge, you can download your entry HERE.


Saturday 19 May 2018

Tags with new stamps by Titbelsoeur

Hello everyone !
I have started using our fabulous new Artifacts stamps. First of all, I would like to present you this technique I have imagined : I make my own masking tape with "magic" tape in placing the sticky face to the inked stamp :


Quick tip : you want to place the tape from the top to the bottom to avoid the image to be blurry.


This way, the inked image cannot flow, since it is captured under the tape :


You can use these long stamps to make your own masking tape, this time I have sticked duct tape bits to a plastic surface and put the stamps to the non-sticky face, here is what it looks like :


And to make a very quick and simple tag, I have peeled a cardboard piece, then applied some gesso with my fingers, and stuck the tape on it. I could have sprayed ink to colour it, but I didn't.


I also had a try with tea bags (one of my favourite supports). Same quick tip : do not press the bag on top and bottom at the same time but from the top to the bottom.


Here is the result :


Then I wanted to add a dressmaker in the middle : I stamped it to the teabag, and cut out the same image to hide it, and then stamped the artifact stamp on to it :


Here is my finished tag, to make it I have used 
- distresse cardboard,
- home made masking tape,
- stamped teabag,
- lace, thread and fabric,
-  text artifact stamped half to jeans fabric, half to paper


I used the following stamps :
Artifacts - Spirit of Adventure (cut out and mounted on cling foam)
Dressmaking No. 1 A5 (cut out and mounted on cling cushioning)


Do not forget that you can win these fabulous stamps, just participating in our challenge 

May's Creative Challenge - Backgrounds


 for 3 chances to win !

Thank you so much for stopping by.
Your comments are very much appreciated here, on my blog
Bye for now and happy creating. 

Titbelsoeur

Wednesday 16 May 2018

Fun Flower Canvas by Gemma

Hello

It is midway through the month and there is still plenty of time to join the challenge here on the blog and on the Facebook page. I am loving the entries so far and can not wait to see more of them.

I have a bright green canvas to share with you all today. The focus was the bright green background made with a calligraphy mat and Harlequin mask 


What I did 😊


I started by applying texture paste through the Harlequin mask. Once that was dry I applied layers of green paint, some I mixed with water for a thinner consistency, and some I added white paint to for a different tint of green, while they were still wet I wiped the paint away on some of the Harlequin patterns.


Once dry I repositioned the Harlequin mask back over the texture paste and applied a very small amount of very watered down paint. When I did this I made sure not to completely cover the layers underneath knocking it back with a wipe if I needed to.
The background was finished off by stamping in a brown ink with a calligraphy mat stamp.
Then I doodled the flowers on and a border around the edges.

Thanks for reading

Gemma

Sunday 13 May 2018

"Believe in yourself" tag by Angie Coomber

Hi, Angie here with a tag for this month's Background Challenge.

First of all I coloured my tag with Distress Oxides (Cracked Pistachio, Twisted Citron, Seedless Preserves, Peacock Feathers). I swiped some ink on my craft mat, spritzed with water and then mopped up the ink with the tag. I did this a number of times until I had the colours I wanted, drying in between applications. I also added some additional colour with a blending tool at the end to intensify the colours. (Please excuse the bad photos - I was working in the garden and hadn't realised that they weren't great until it was too late to take more!)


Next I added some stencilling with The Artistic Stamper Stencils (using the same colours).


I also added some background stamping, again using the same colours, and a focal image (a Paperartsy Stamp by Tracy Scott) with black ink which I coloured  in with Neocolours II and a water brush.


Lastly, no project is complete for me without some white doodling and a quote, so I picked a fitting one from my quote collection.

I really hope you like it!

Thursday 10 May 2018

Backgrounds with Lisa - the mini version....

Hello folks! Lisa here and welcome to My post for The Artistic Stamper. This month's theme is 'backgrounds'.

The Artist Stamper have a fantastic collection of stamps which can be used for backgrounds. 
I love making my own backgrounds - starting with a white piece of card and adding colours, textures and layers to create a background. 

And this is what I did for this creation...


I started with a white piece of card - size 7" x 7" and coloured the white card with a selection of blues and purples Distress Ink.
I then added a couple of squirts of water and let the water run down the card. 

I used The Artistic Stamper Mini Backgrounds A6 stamp set, Mini Backgrounds A6 #1 and Mini Backgrounds A6 #2 by Neil Walker
(These stamps do all come as individual A5 stamps. But with the Mini Background set, there are 4 stamps in the set which I find gives me much more variety as I can never make up my mind which is my favourite...)

I used stamps from all three sets and stamped using the same Distress Inks, layering and overstamping the patterns.
I then stamped the butterfly from the Insects and Butterflies A5 stamp set on to the background with black ink. I then heat embossed it with clear embossing powder.
To finish I added a sentiment sticker.


Thanks for popping by the blog today.
Toodles for now,
Lisa xxx 

Here is everything I used...


Mini Backgrounds #1  size A6 (cut out and mounted on cling cushioning)       Mini Backgrounds # 2 size A6  ( cut and  mounted on cling cushioning )       Mini Backgrounds size A6  © Neil Walker (cut out and mounted on cling cushioning)   Insects and Butterflies 1 A5  (cut out and mounted on cling cushioning)      


Monday 7 May 2018

Canvas by Titbelsoeur

Hello everybody,
I have recently led a workshop in a retirement home, teaching trainees to make a mixed-media canvas that would highlight a personal picture. And I have chosen to add a stamped image as my personal picture. Obviously, I have used a Gibson Girl stamp, which are kind of my favourite stamps at the Artistic Stamper ! 
I first wanted to add a customized tag, like those I have shown to you here : Tag customization by Titbelsoeur and here was the result :


but I decided to use another technique :
I have first stamped it on the canvas to make a shadow, then on a watercolor paper with Archival ink, that I cut out and sticked on to the stamped image, with a slight shift for more depth.


And here is the canvas :


Do not forget that you can win these fabulous stamps, just participating in our challenge 

Using Backgrounds


 for 3 chances to win !

Thank you so much for stopping by.
Your comments are very much appreciated here, on my blog
Bye for now and happy creating. 

Titbelsoeur