Showing posts with label Tags. Show all posts

Wednesday, 29 August 2018

Heart Tags by Gemma


I have a set of tags to share with you all today, decorated with circles, hearts, and doodles.


STEPS


I started off by applying Distress Inks and Oxides to some pre-made small tags.


I stamped over the tag with a script stamp and a small squiggly stamp for texture.


I stamped over the top with different sized circles and swirls. I made sure to overlap the circles and to stamp some of the images off the side of the tags.


I then stamped and coloured a few hearts with Distress Ink, before gluing them to the tags and adding extra interest with black and white pens.

xx Gemma xx


Saturday, 16 June 2018

Blue Star Card by Gemma


Loving the theme of this months challenge and there is still plenty of time to join in both here on the blog and on the Facebook group.

For my post today I have a card and tag to share with you all using Distress Inks and lots of Jennie's stamps


What I did


1- I cut card to the size of my card blank and covered it with a layer of Distress Ink


2- I then stamped one of the new designs by Tracy Scott over part of the card. I heat embossed this with a clear embossing powder. 


3- I filled the opposite side of the card with the small Scribble stamp


4- On a separate piece of card I stamped several different sized stars from the star set with black ink and heat embossed them before cutting them out.


5- I also stamped out and heat embossed the words Happy Birthday from Grungy Greeting 1


7- I coloured all of these pieces and an extra mat I cut with Distress Inks and Distress Oxides before gluing everything in place and adding doodles with both black and white pens. 

xx Gemma xx


Saturday, 19 May 2018

Tags with new stamps by Titbelsoeur

Hello everyone !
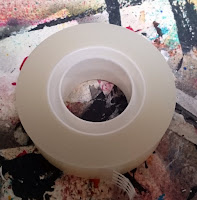
I have started using our fabulous new Artifacts stamps. First of all, I would like to present you this technique I have imagined : I make my own masking tape with "magic" tape in placing the sticky face to the inked stamp :


Quick tip : you want to place the tape from the top to the bottom to avoid the image to be blurry.


This way, the inked image cannot flow, since it is captured under the tape :


You can use these long stamps to make your own masking tape, this time I have sticked duct tape bits to a plastic surface and put the stamps to the non-sticky face, here is what it looks like :


And to make a very quick and simple tag, I have peeled a cardboard piece, then applied some gesso with my fingers, and stuck the tape on it. I could have sprayed ink to colour it, but I didn't.


I also had a try with tea bags (one of my favourite supports). Same quick tip : do not press the bag on top and bottom at the same time but from the top to the bottom.


Here is the result :


Then I wanted to add a dressmaker in the middle : I stamped it to the teabag, and cut out the same image to hide it, and then stamped the artifact stamp on to it :


Here is my finished tag, to make it I have used 
- distresse cardboard,
- home made masking tape,
- stamped teabag,
- lace, thread and fabric,
-  text artifact stamped half to jeans fabric, half to paper


I used the following stamps :
Artifacts - Spirit of Adventure (cut out and mounted on cling foam)
Dressmaking No. 1 A5 (cut out and mounted on cling cushioning)


Do not forget that you can win these fabulous stamps, just participating in our challenge 

May's Creative Challenge - Backgrounds


 for 3 chances to win !

Thank you so much for stopping by.
Your comments are very much appreciated here, on my blog
Bye for now and happy creating. 

Titbelsoeur

Sunday, 13 May 2018

"Believe in yourself" tag by Angie Coomber

Hi, Angie here with a tag for this month's Background Challenge.

First of all I coloured my tag with Distress Oxides (Cracked Pistachio, Twisted Citron, Seedless Preserves, Peacock Feathers). I swiped some ink on my craft mat, spritzed with water and then mopped up the ink with the tag. I did this a number of times until I had the colours I wanted, drying in between applications. I also added some additional colour with a blending tool at the end to intensify the colours. (Please excuse the bad photos - I was working in the garden and hadn't realised that they weren't great until it was too late to take more!)


Next I added some stencilling with The Artistic Stamper Stencils (using the same colours).


I also added some background stamping, again using the same colours, and a focal image (a Paperartsy Stamp by Tracy Scott) with black ink which I coloured  in with Neocolours II and a water brush.


Lastly, no project is complete for me without some white doodling and a quote, so I picked a fitting one from my quote collection.

I really hope you like it!

Monday, 16 April 2018

Owl Tag by Gemma

 I am in love again with all thing crafty and tag related, so I have one to share with you all today that fits in with our challenge theme of Birds and Bees. You can join in the challenge here on the blog or over on the facebook page. 


What I did 😀


I started by placing blobs of Slate, Caramel, and gesso onto my mat. I picked up the paint with a small card and scrapped it onto the tag. sometimes I only picked up one colour and other times all three. I kept layering until I was pleased with the result.


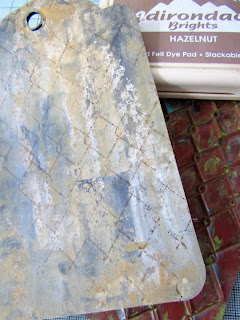
I then stamped over the top with one of my all-time favorite stamps Chicken Wire and Hazelnut coloured ink. When I stamped this I wanted it to be 'bitty' I like the areas of missing ink and different colour intensity. 


Then I spread a thin layer of Purple Rain over my mat and used that to stamp the smallest bee stamp from the set repeatedly over the tag. I stamped quite a lot of bees over the tag I wanted it to be busy but not uniform.


While that was drying I painted some chipboard from my stash scarlet and then stamped over the top with the Honeycomb background stamp and slate paint. I spread the slate onto my mat as I had done with the bees but this time after stamping in Slate I mixed the paint with small amounts of gesso and restamped, I did this a couple of times, before drying and gluing the chipboard to my tag.


To finish I just added some flowers, beads and the metal owl from my stash before gluing in place I stamped onto the flowers with the honeycomb stamp and more paint.

xx Gemma xx

Tuesday, 10 March 2015

Gardeners' Question Tags!

Hello all, Alison (butterfly) here with a set of gardeners' tags using some of the recent new releases here at Artistic Stamper.


They're very simple tags, as they're intended for practical use.  It occurred to me that (apart from crafters) there is a group of people for whom tags are useful, and that's gardeners, especially the novices amongst us.


They're useful for labelling plants, adding reminders of particular tasks or treatments an individual plant requires or enjoys; not to mention reminding yourself what's where or what's what (to avoid the horrible consequences of ignorance outlined in the quote I just had to include today!).


So the new Gardening Stamps seemed to be perfect combined with some of the small, cheap luggage labels in a nice earthy brown which were sitting in my stash.


I kept it simple with the stamping.  The images are stamped in Potting Soil (but of course!), and I added my favourite Calligraphy Mat #19 in Rusty Hinge to prompt the idea that the gardener should add some of her or his own writing to these tags on the back, with whatever information is needed.


I did a bit of inking, both with Potting Soil and Rusty Hinge, and finally added a couple of splatters of Ground Coffee Dylusions - again encouraging whoever's using them to get them good and mucky - no need to keep them pristine!


Some simple garden twine - what else? - to attach them with and we're done.  Thanks so much for stopping by today.  Perhaps these gardeners' tags will have put you in the mood to come and play in our Spring is Coming challenge here at The Artistic Stamper this month... we'd love to see you there.

When weeding, the best way to make sure you are removing a weed and not a valuable plant is to pull on it.  If it comes out of the ground easily, it is a valuable plant.
Anonymous
(Hence the need for good labelling with tags!)


Ingredients used:
Artistic Stamper stamps - Garden Plates #1 and #2, Calligraphy Mat #19
Archival Inks - Potting Soil
Distress Inks - Rusty Hinge
Dylusions - Ground Coffee
From my stash - small luggage tags, garden twine

Sunday, 10 August 2014

Tea Time Cards

Hello all!  Alison (butterfly) here with some more flowery cards - yes, cards!  This time rather than blues and greens, we're living in neutrals land with kraft card and tea/coffee stained tags.


I soaked my manila tags in a mixture of tea and coffee, and then did my stamping in Sepia Archival ink.  I stamped a medium tag and a tiny matching one with each stamp, and then inked and spritzed and flicked them.


There wasn't a fixed plan at this point... maybe cards and matching gift tags?

The flowers come from various Katy Leitch sets...


I did like the earthy kraft card bases on my simple watercolour cards a few weeks back, so I decided to go that way again.  And I can never resist book pages, torn and inked, layered into the look.


I used the Tim Holtz Simple Sayings to create my greetings.  I stamped them onto a page from the same book, so that they would match.


They're backed onto more kraft card to make them a little more sturdy,


and mounted on padded tape for a pop of dimension.


Rustic twine through the top of the tags adds extra texture and dimension too.  I added lots of delicate splatter...


...and some stencilling through the Tim Holtz Lattice Layering Stencil.


And in the end, I decided the tiny tags would be quite cool inside the cards...


... so you get an immediate echo when you open the card to read the greeting.


So, some more simple cards for you - this is starting to become a habit!  I hope you like them.


There's still plenty of time to come along and play in our Anything Goes August Challenge - no need to use Artistic Stamper stamps, but if you do you get two entries into the prize draw - hope to see you there!  Thanks so much for stopping by.

Ingredients used:
Artistic Stamps - various Katy Leitch sets: Encyclopaedia Botanica, Botanical 2, Jumbo Flowering Branch, Jumbo Bouvardia
Tim Holtz Simple Sayings - the Hashtags would also work really well
Kraft Card
Manila Tags
Book Pages
Tim Holtz Layering Stencils - Lattice
Twine
Distress Ink - Vintage Photo, Gathered Twigs
Archival Ink - Sepia
Padded Tape