Showing posts with label Steampunk. Show all posts

Thursday, 19 March 2020

Steampunk cigar box by Titbelsoeur

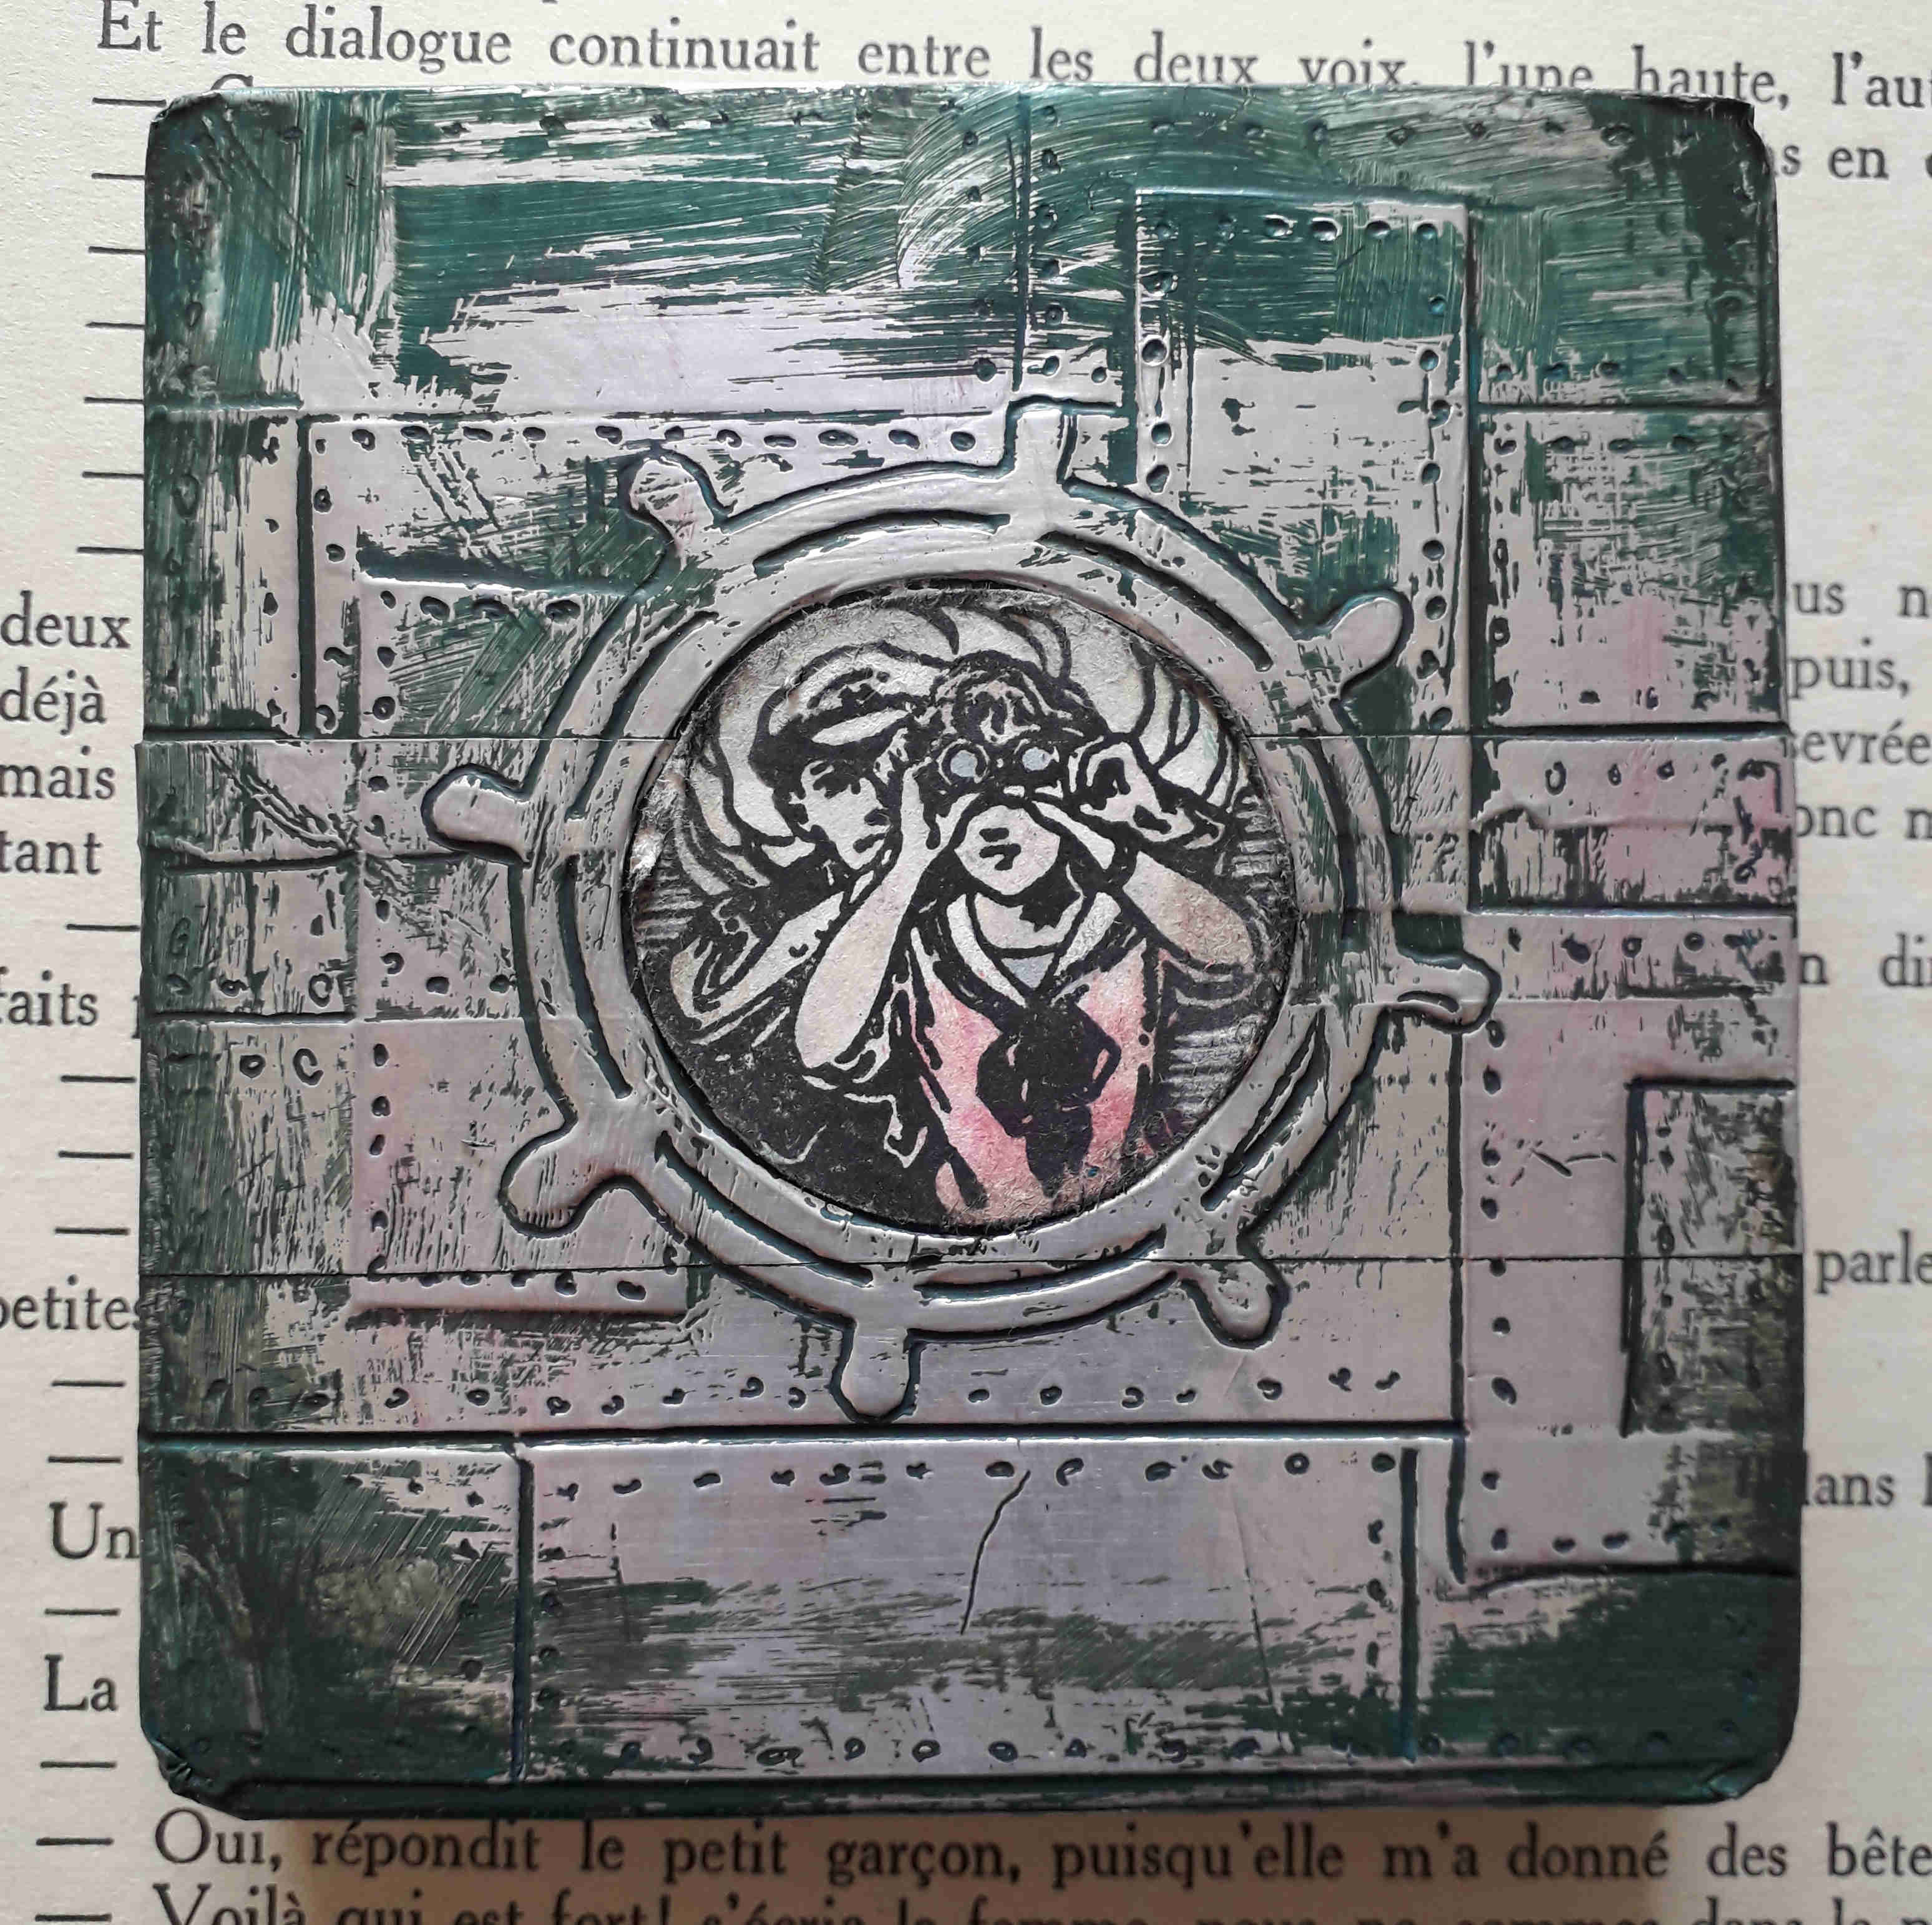
Hello ! Titbelsoeur today with a steampunk cigar box.
I have glued some rectangles and the wheel of Seaside No. 1. Then I covered the whole with metallic adhesive and marked the edges. Then I painted black, turquoise and brown acrylics and rubbed it when dry with a piece of fabric. I coloured the boy and girl and glued it in the wheel to figure a window.


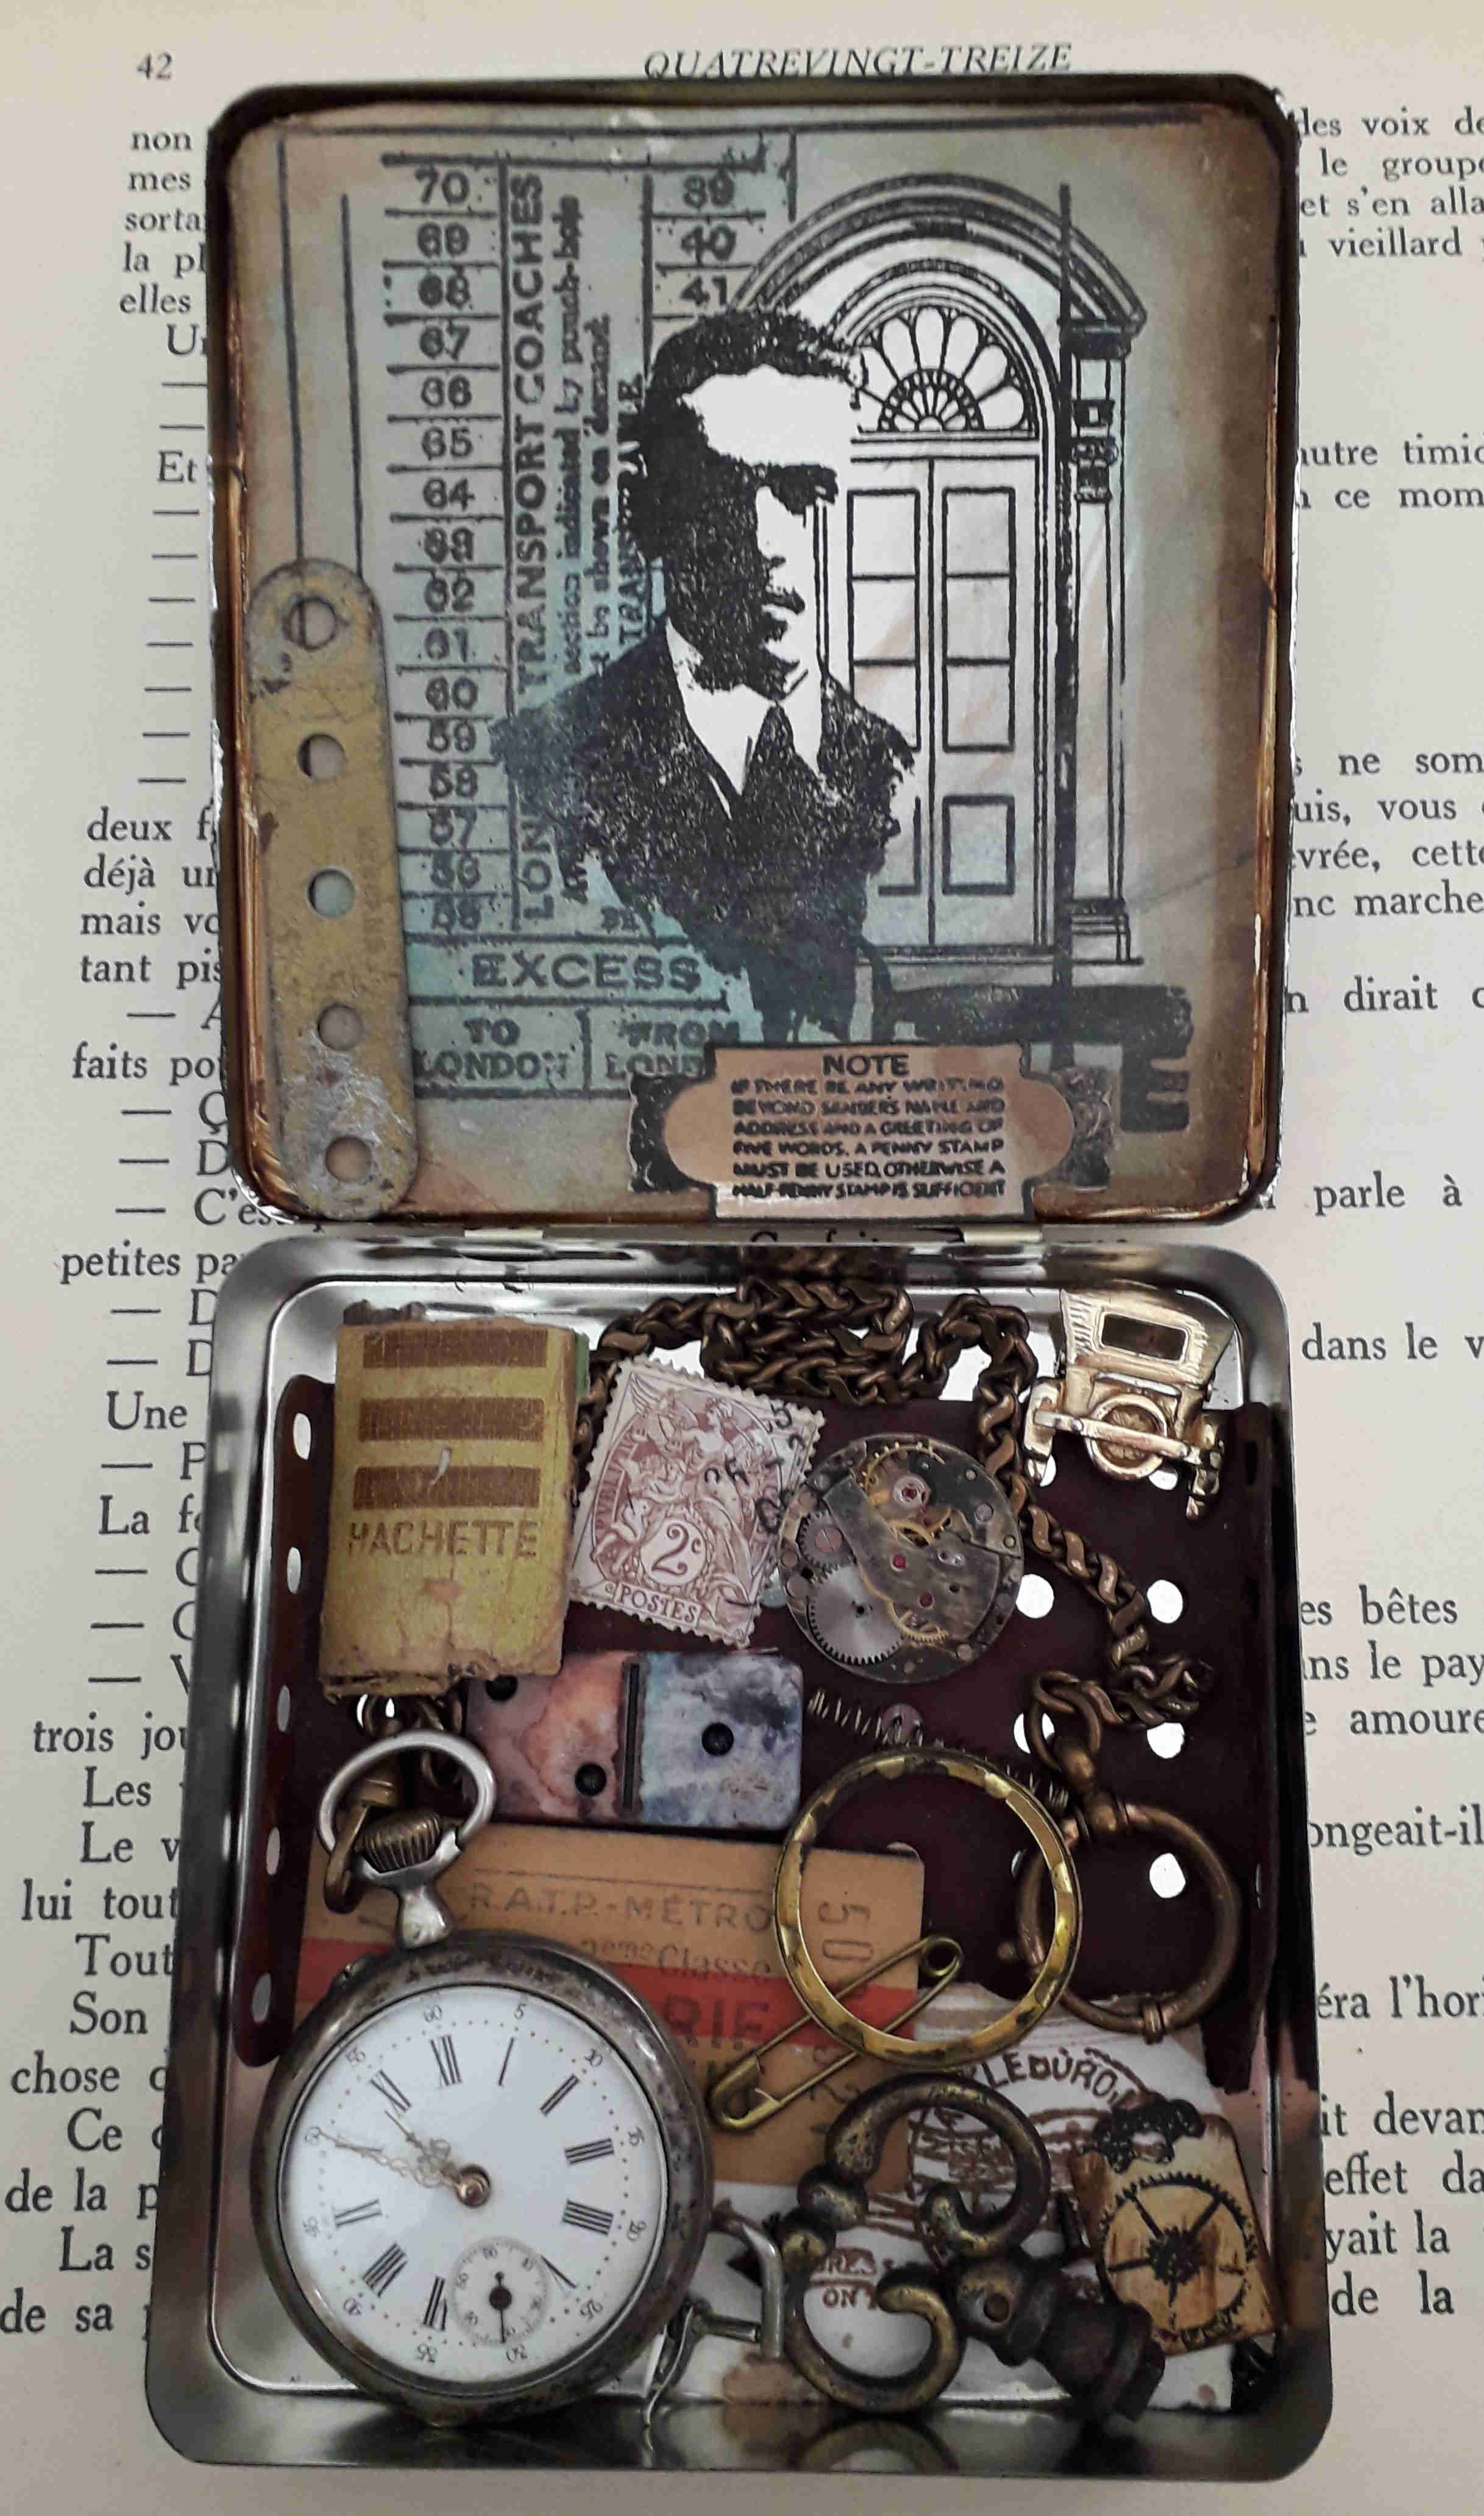
I stamped the man from Collage Art 1 on to a drawing paper and coloured it with turquoise and brown acrylics on a baby wipe.


Hope it gives you inspiration to participate in our 
for 3 chances to win some of these fabulous
Artistic Samper stamps !
AND
 an opportunity to join our Creative Team for a month, and get to use The Artistic Stamper stamps, and be posted on this blog, and on social media.

Thank you so much for stopping by.
You may visit my folder : 
I will be happy to read your comments about it !
Your comments are very much appreciated here, on my blog
Bye for now and happy creating. 
Titbelsoeur

Saturday, 7 March 2020

Steampunk tag by Titbelsoeur

Hi this is Titbelsoeur today.
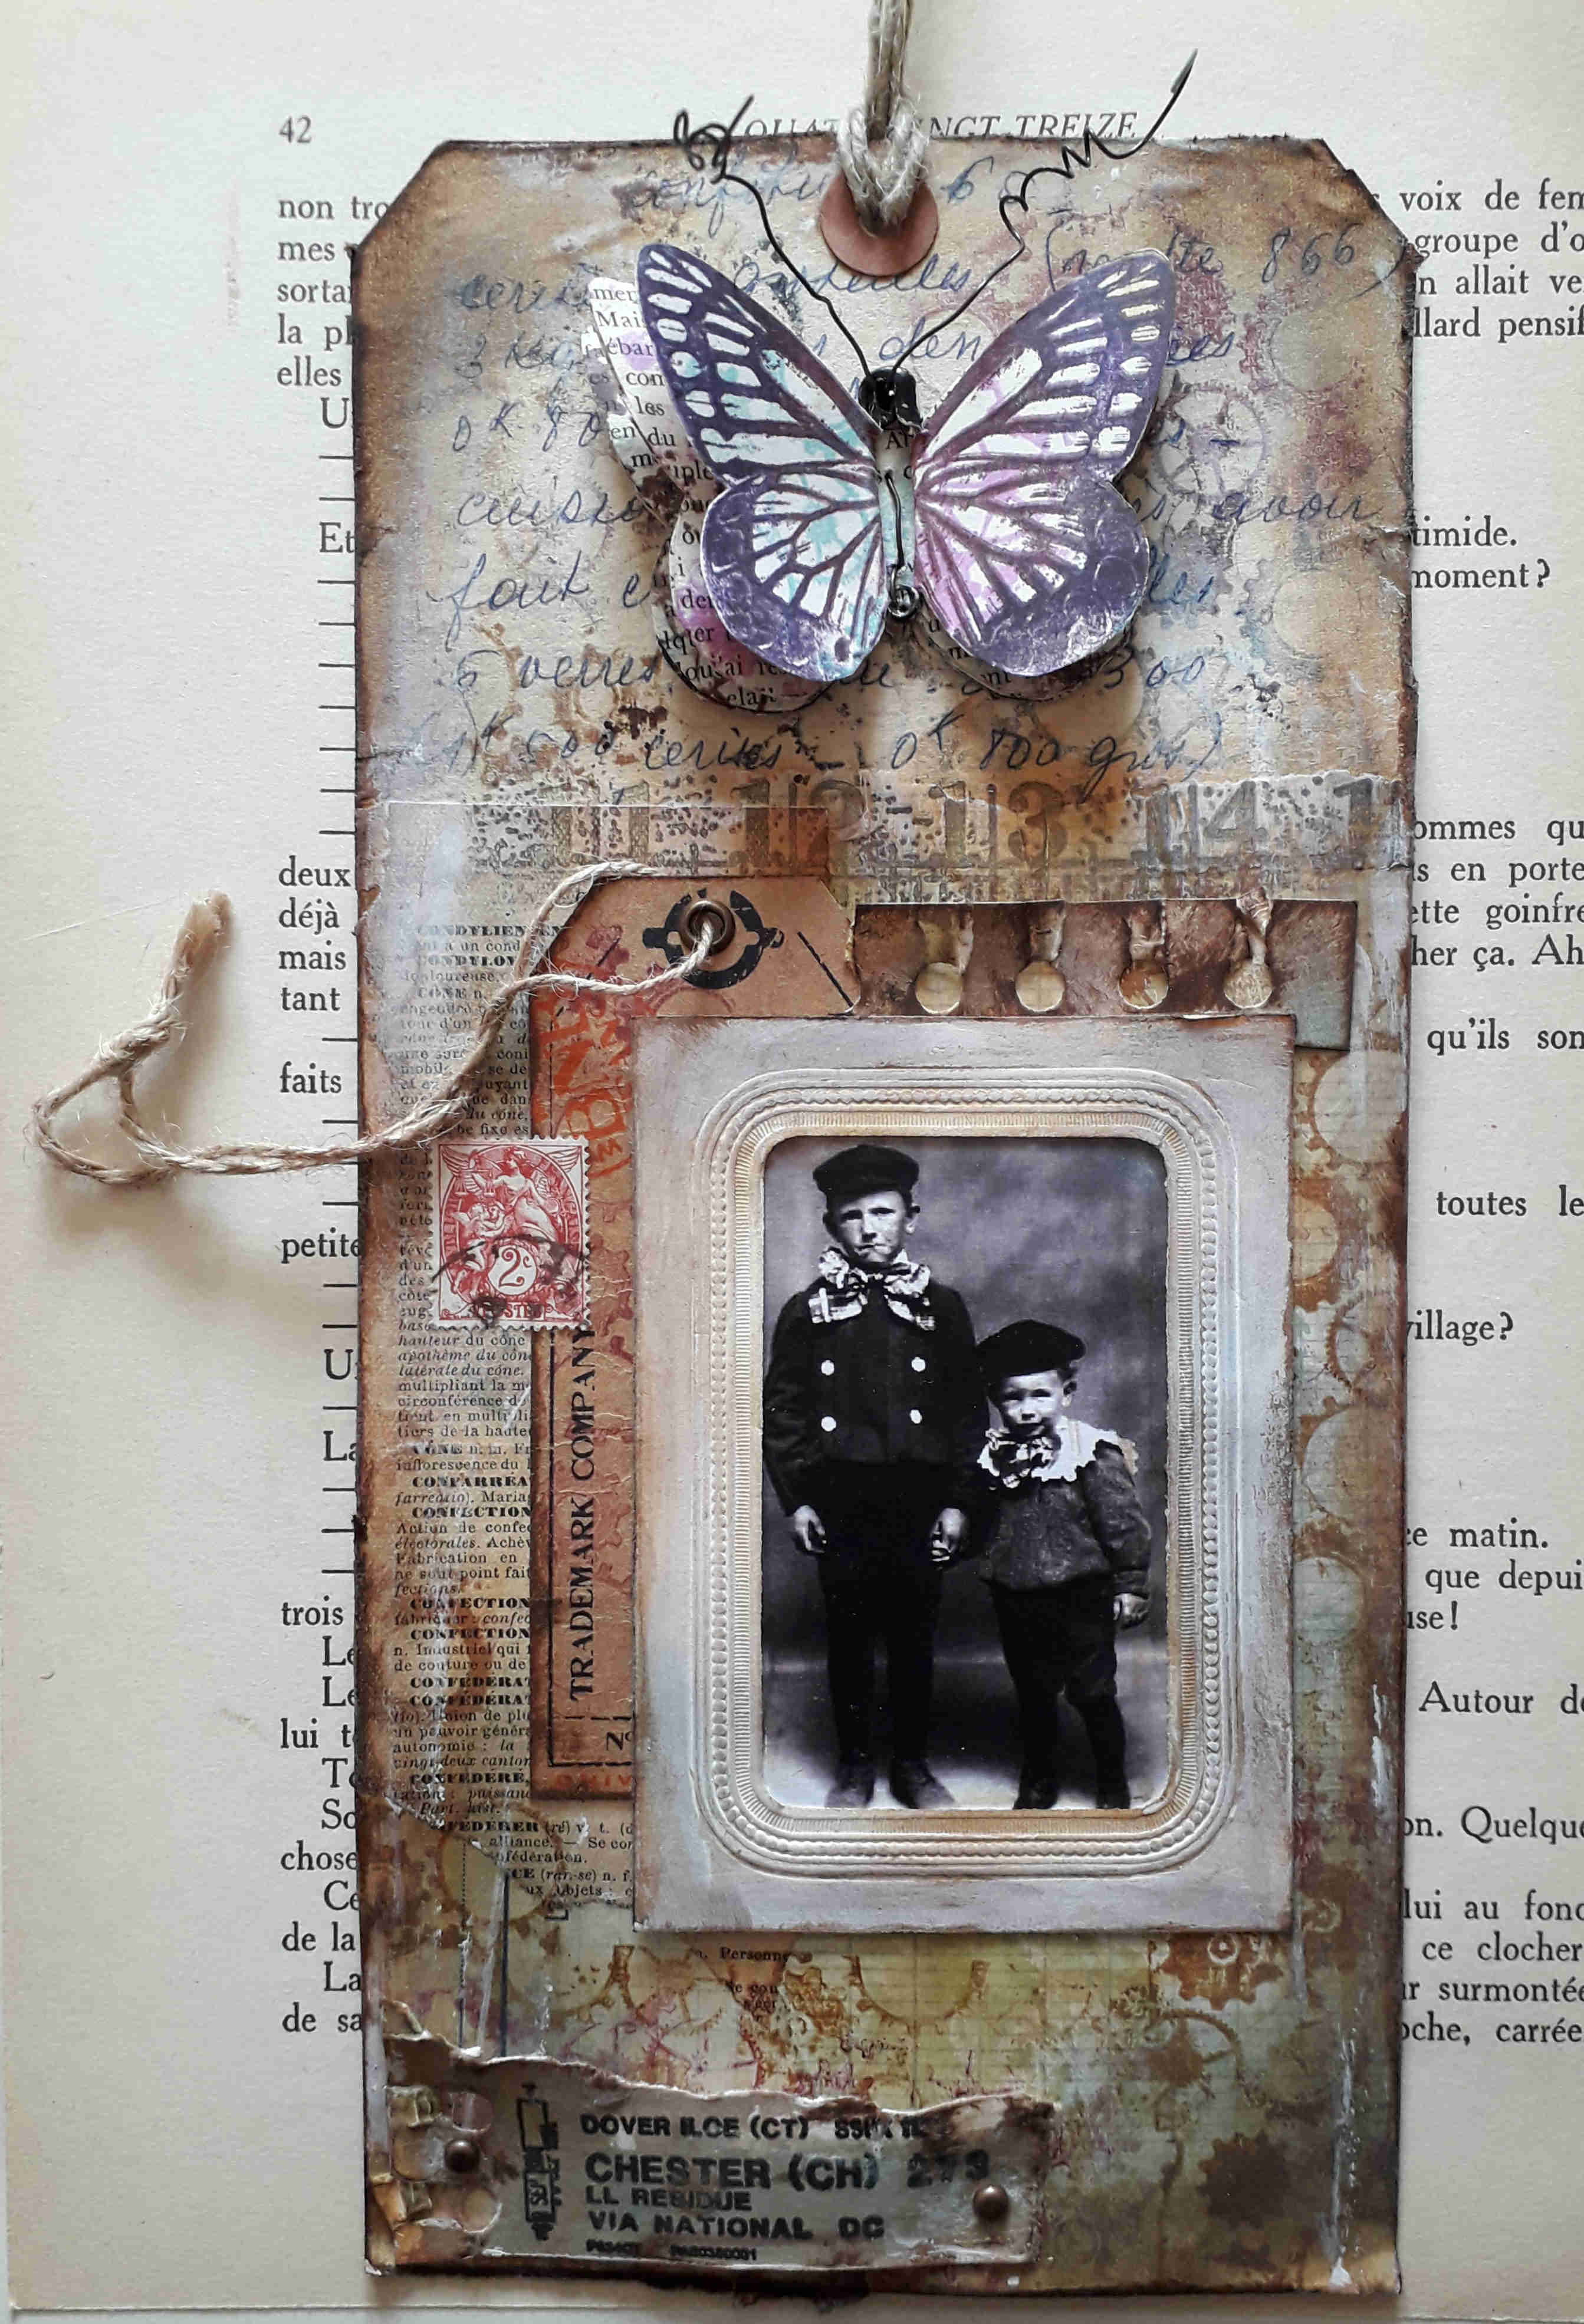
A big tag to give you inspiration for our Steampunk challenge.


I have used a big tag and glued old papers on it. Stamped it with Gears Background and the rule from the Ephemera 1 plate. Used a cloth tag, an old photo and ancient poststamp and frame.

Here is a snapshot on the steampunk butterfly from Butterflies 2 , body made with a safety pin painted in black and wire as antennas :


Steampunk épisode 2

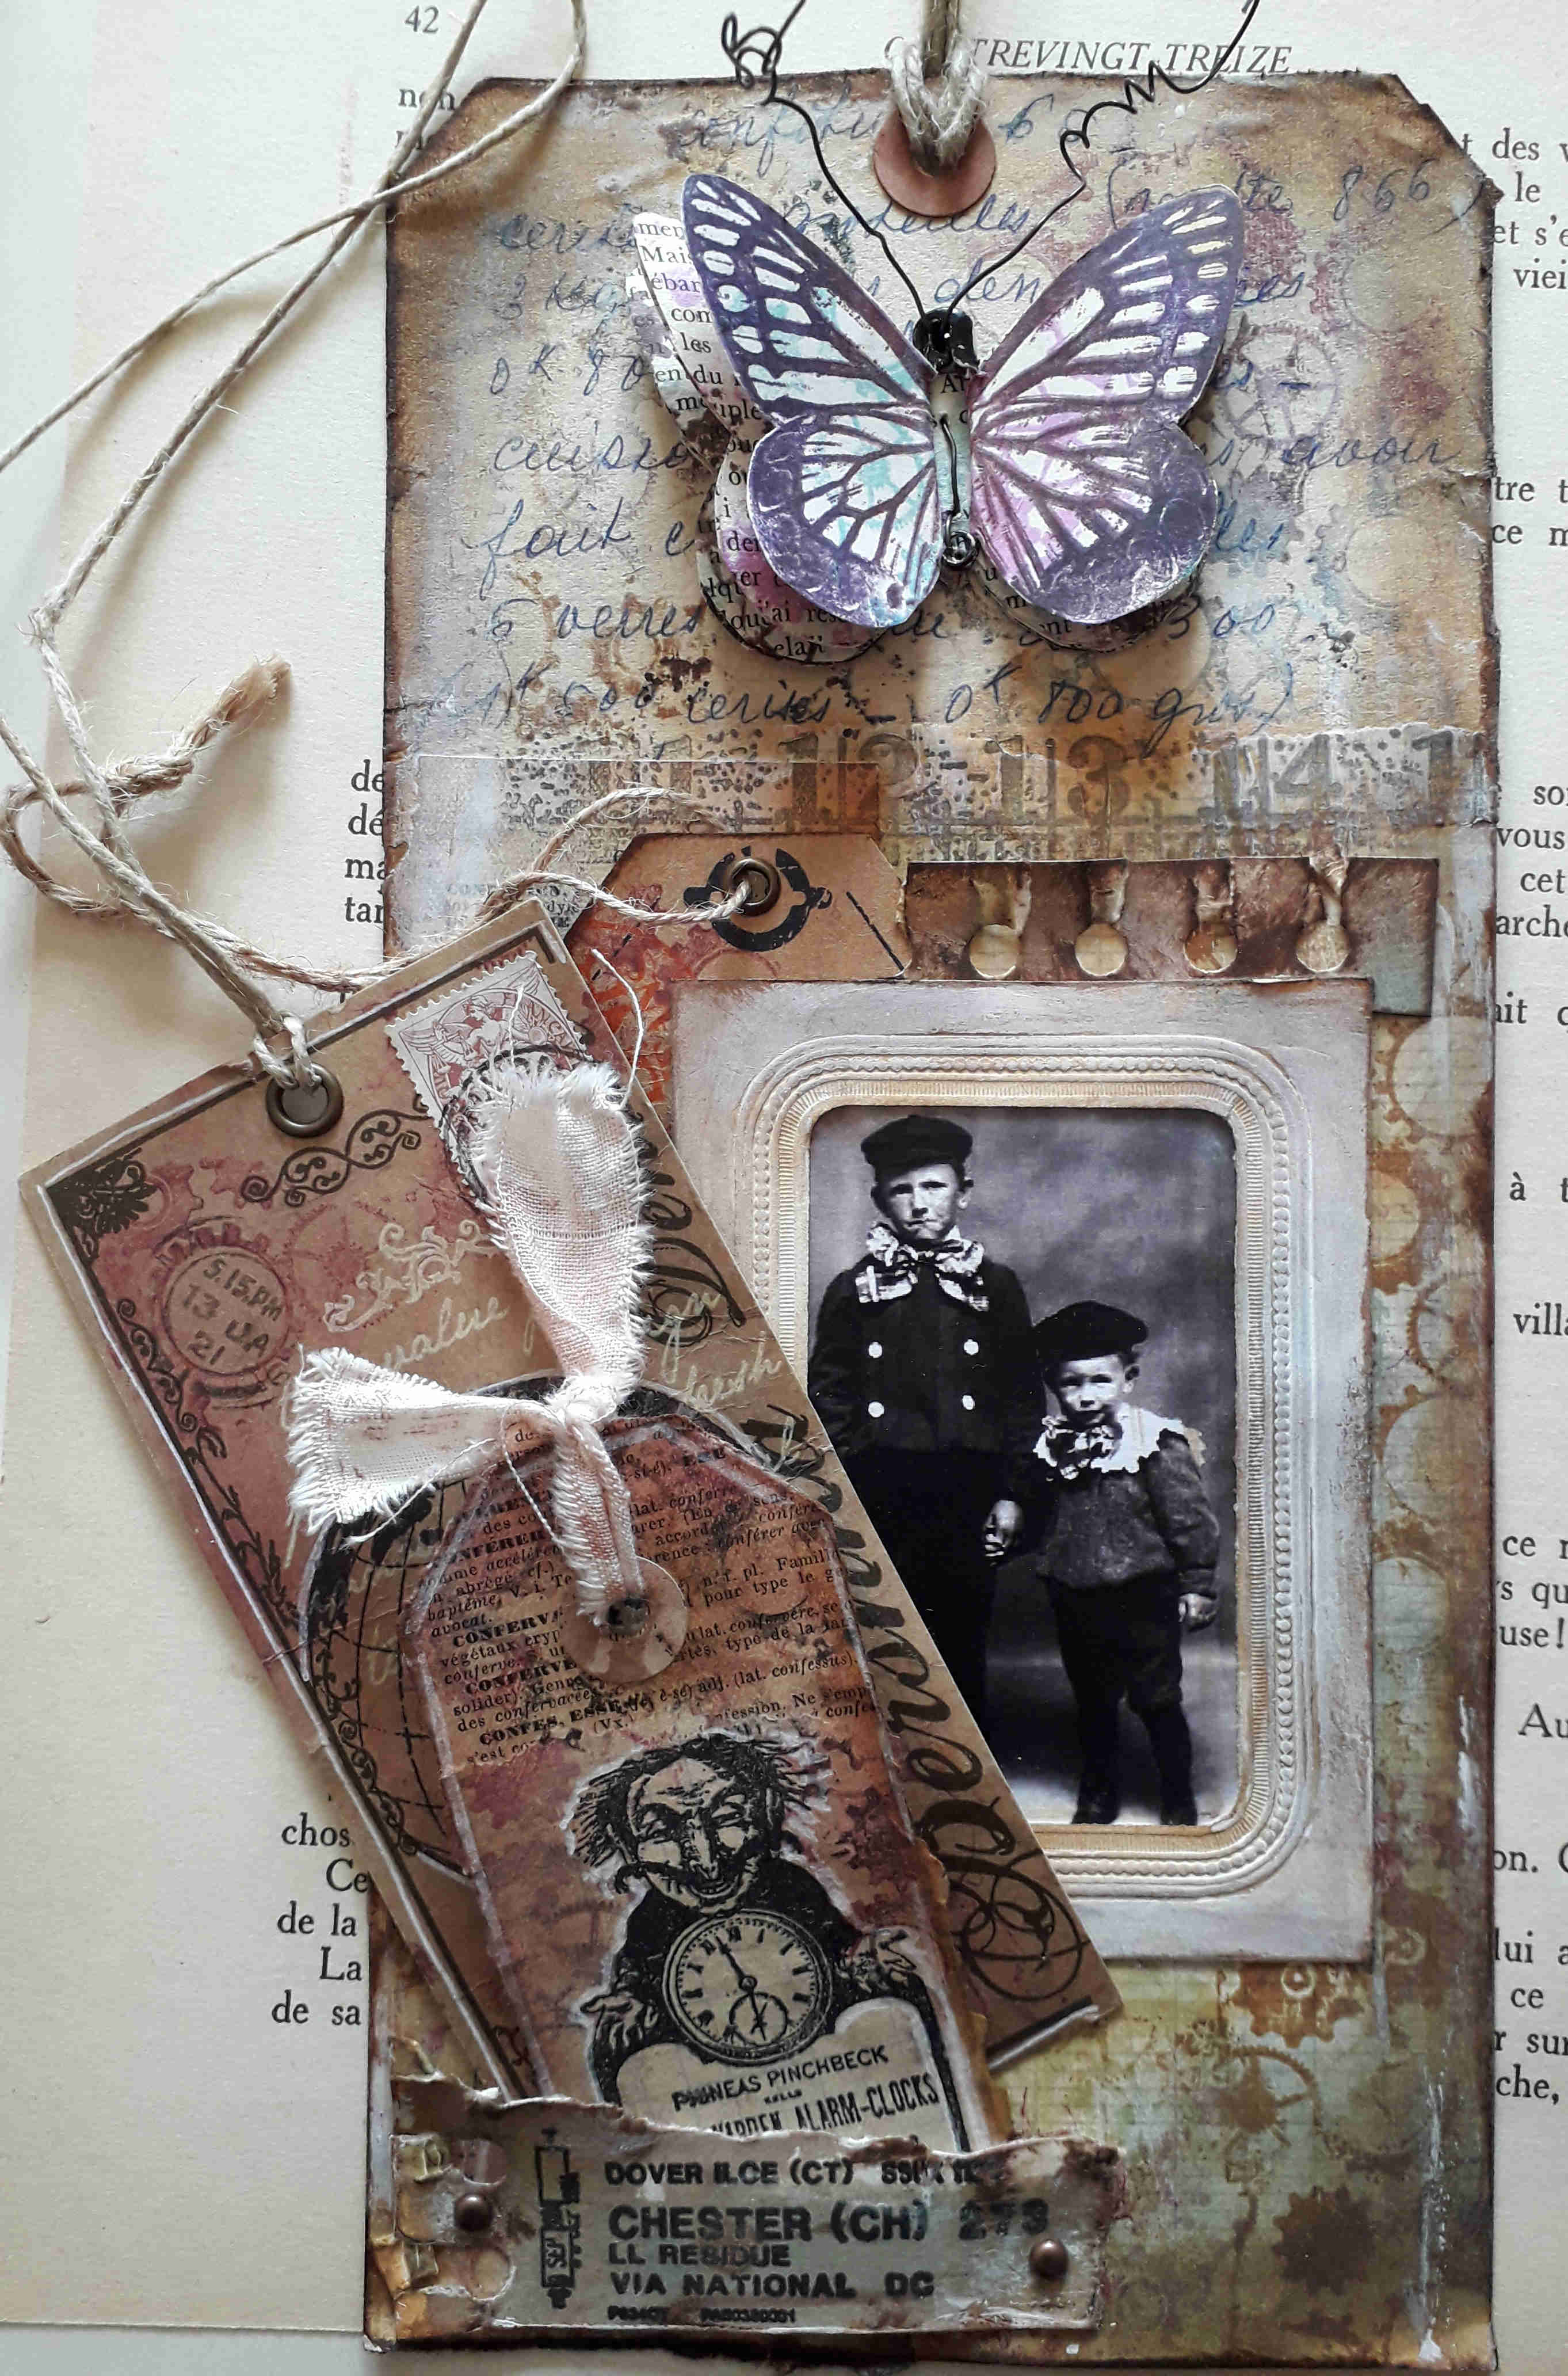
The 2 tags of last week's post have found their place on this big one :

Steampunk épisode 2

Hope it gives you inspiration to participate in our 
for 3 chances to win some of these fabulous
Artistic Samper stamps !
AND
 an opportunity to join our Creative Team for a month, and get to use The Artistic Stamper stamps, and be posted on this blog, and on social media.

Thank you so much for stopping by.
You may visit my folder : 
I will be happy to read your comments about it !
Your comments are very much appreciated here, on my blog
Bye for now and happy creating. 
Titbelsoeur

Sunday, 1 March 2020

March Creative Challenge - Steampunk

Hello,and welcome to March's challenge, with a brand NEW prize!
This month and for the next four months, we are giving YOU an opportunity to join our Creative Team for a month, and get to use The Artistic Stamper stamps, and be posted on this blog, and on social media. Come and create and be in it to win it!

This month the theme is Steampunk and can be interpreted any way you like, as long as it has rubber stamps on it.

To join in with this challenge (we are limiting the challenge entries to 3 per person), is simple; all we would like you to do is, make a piece of artwork, making sure that you include the theme and some rubber stamping. Pop back here to link up using the Inklinkz at the bottom of this post, so that we can see what you've made and then, leave us a comment to let us know you have joined in with the challenge.

We will pick a winner early next month from the entries, so get your thinking caps on, bring out your inks and stamps, and join in!

In addition, you can enter the same challenge on Facebook just for fun.
To join us on just go to our new Facebook group, and send us a request to join.

For inspiration, this is some of team's Steampunk creations.


Hello, this is Titbelsoeur today for our "Steampunk" challenge. I have made 2 different tags, the left one's support is a cloth label. I have just stamped Round the World on it and franked the real stamp with Postage No. 1. I made the background of the right one with old papers (dictionnary and notebook) and stamped Phineas Pinchbeck on it.
Then I have aged both with Vintage Photo Distress ink and stamped Gears Background here and there with different colours.


You may visit my folder : Titbelsoeur stamps @ the Artistic Stamper
I will be happy to read your comments about it !
Bye for now and happy creating.
Titbelsoeur
my blog
my pinterest
my facebook page


Hi, Jennie here with a Steampunk Tag, and like Tit above i have used Phineas Pinchbeck, plus a little watch face from our vintage watch pieces bags.

Loving my Gel Plate at the moment, so the background is gel printed, and the same for the words.


We hope that you will join in this month's challenge, and also join us on Facebook too.
We look forward to seeing your creations. Don't forget to add a comment when you have posted your entry. 
Have a Happy Creative Month 
Jennie x

You are invited to the Inlinkz link party!
Click here to enter

Friday, 20 October 2017

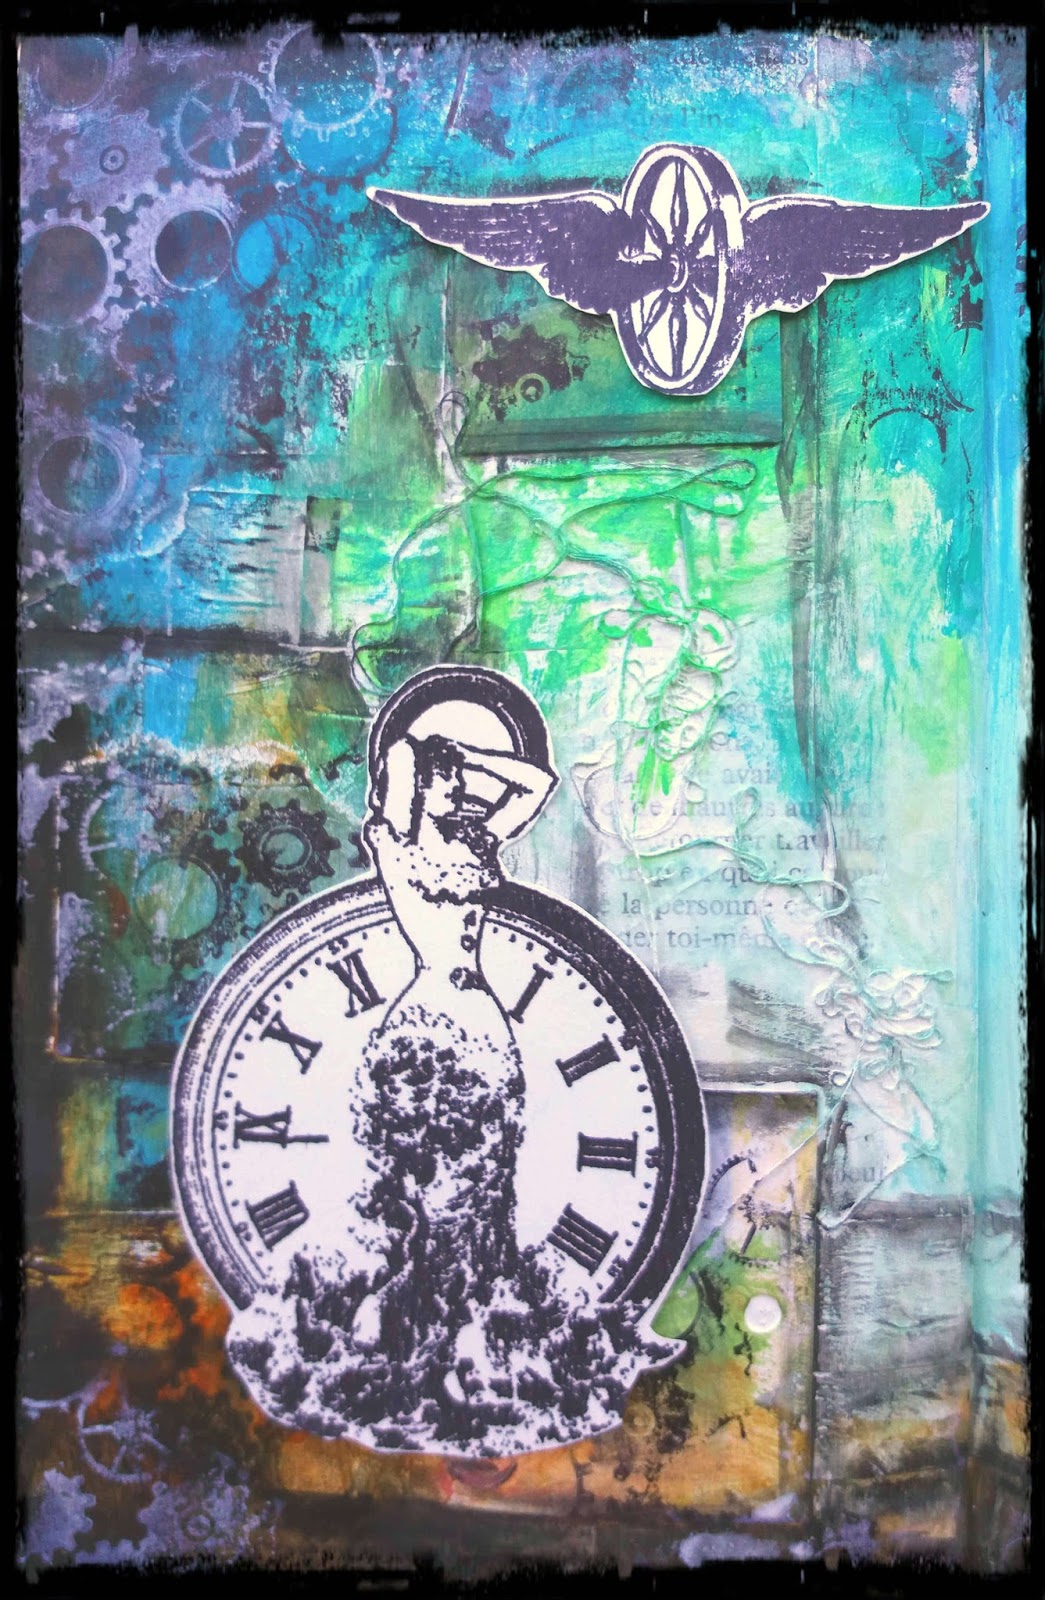
Steampunk art journal page by Titbelsoeur

Hi there,

The background of the art journal page I want to share with you today was inspired by Maremi, a Polish artist. 


Once the background done, I have stamped the Gears Background and Watches background on the edges with 2 different inks, black and white.


Then I have stamped 4 steampunk images on to white drawing paper, and I have decided to keep these images black & white to bring them out :


Winged Wheel
Girl with clock


Would you like to win these fabulous stamps ? Easy : just participate in our challenge "Steampunked" for 3 chances to win !

Thank you so much for stopping by.
Your comments are very much appreciated here, on my blog

Titbelsoeur

Friday, 13 October 2017

Gentleman Jim - by Lesley Mackenzie

Hi all,

This months theme of 'SteamPunk' was a real challenge for me as this is not my preferred style. However once I got going I had great fun and will be doing more!
I decided to up-cycle an old CD gift box to create a man's gift box. 

The materials used:
Artistic Stamper stamps - Time and Keys and Ornate Flourish #3
Artistic Stamper stencils - Harlequin 3" x 3"
Number stencil - designer unknown
Pebeo Studio Acrylics 356 Violet Blue
DecoArt Spun Gold acrylic
DecoArt Black Gesso
DecoArt Crackle Glaze
Black StazOn ink
Black Embossing powder
Black and White Posca pens
Magazine image of man in a suit

Step 1 .
 I gave the box lid 2 coats of black gesso and then I stencilled the lid using the Violet Blue and Gold acrylics. As the box base was already gold I did not have to paint it.  When the lid was dry I gave it a coat of crackle glaze and left if to dry naturally. Once dry I painted with gold acrylic and while still wet wiped it back using a baby wipe so the gold filled the crackles only.


Step 2
  Next  I created 'Gentleman Jim'. For his body I used an image cut from a mail order catalogue and promptly cut his head off! I then  applied a coat of crackle glaze and left to dry. For the head
I stamped the smaller clock face using black StazOn. and painted the clockface with diluted silver paint, once dry I applied a coat of crackle glaze and left to dry.  For the wings I stamped a pair of the flourishes, painted with diluted gold and a coat of crackle glaze. I hand cut a top hat which I embossed black.


Step 3
Once the crackle glaze was dry I highlighted the crackle by applying and  wiping back black paint for the head and wings, and gold paint on the body. Next I glued all the elements on a piece of 150g card stock and cut out the completed image that a edged in black pen. It was then easier to glue the one image to  the box lid. To make the image pop against the dark background I outlined in white Posca pen .  I added a small clock embellishment and a band of ribbon to his hat, and a  little stamping on the background in gold for a final flourish.


I hope you enjoyed this project and if like me are new to the 'Steam Punk' style why not give it a go, it's great fun.

Sunday, 1 October 2017

October's Creative Challenge- Steampunked

Hi
 A Big thank you to everyone who joined in last month's challenge. There were some fantastic creations.
 This month's challenge is Steampunked and can be interpreted any way you like, as long as it has rubber stamping in it.
 

To join in with this challenge (we are limiting the challenge entries to 3 per person), is simple; all we would like you to do is, make a piece of artwork, making sure that you include the theme and some rubber stamping. Pop back here to link up using the Inklinkz at the bottom of this post, so that we can see what you've made and then, leave us a comment to let us know you have joined in with the challenge.
 As always, there will be candy for one randomly picked entrant - the winner will receive a stamp of their choice from The Artistic Stamper .


In addition, you can enter the same challenge on Facebook!
To join us on just go to our new Facebook group, and send us a request to join..  There will be a prize for the Facebook challenge, as well as the blog challenge!
And don't forget....if you use The Artistic Stamper stamps on your entry, you will entered into the draw, twice! To get you started here are creations from some of the team....


Debs - Bug Life


Distress Oxides were used to create the background. Distress Pens to colour
Stamps used 
All stamps were stamped with Archival Potting Soil
I shall look forward to seeing all of your lovely steampunkery!
Happy crafting 
Debs x

Jennie

I have made a little wooden plaque. I painted and added the random dot stencil to the background. I then stamped Phineas Pinchbeck in Black Archival and coloured him with Distress Oxides, before adding a vintage watch face. 

We hope that you will join in this month's challenge, and also join us on Facebook too.

We look forward to seeing your creations. Don't forget to add a comment when you have posted your entry.

Have a very creative month

Jennie


Sunday, 13 December 2015

Christmas Tag by Shilpa

Hello Everyone,
Shilpa here,
I made this quick tag for Christmas.


Here are the steps of making:
  • Apply Vintage photo distress paint on the surface, let it dry.
  • Cut out harlequin design with die and adhere it at the corner. 
  • Give next coat of color with broken china distress paint. Heat set it.
  • For the next layer I applied tarnished bass distress paint. 
  • On the other white cardstock, stamp steampunk baubles and Merry Christmas sentiment  with Archival ink.Cut it to adhere on tag.
  • Cut out holidays leaves with Tim Holtz die.
  • Arrange everything on the surface and tag is ready.
Hope I inspired you to create your own tags for this season.
Don't forget to join us for this month's challenge -theme is Christmas

Thanks so much for stopping by.


Products from Artistic Stamper Used here:


Thursday, 6 November 2014

Let's start making our season's greetings cards

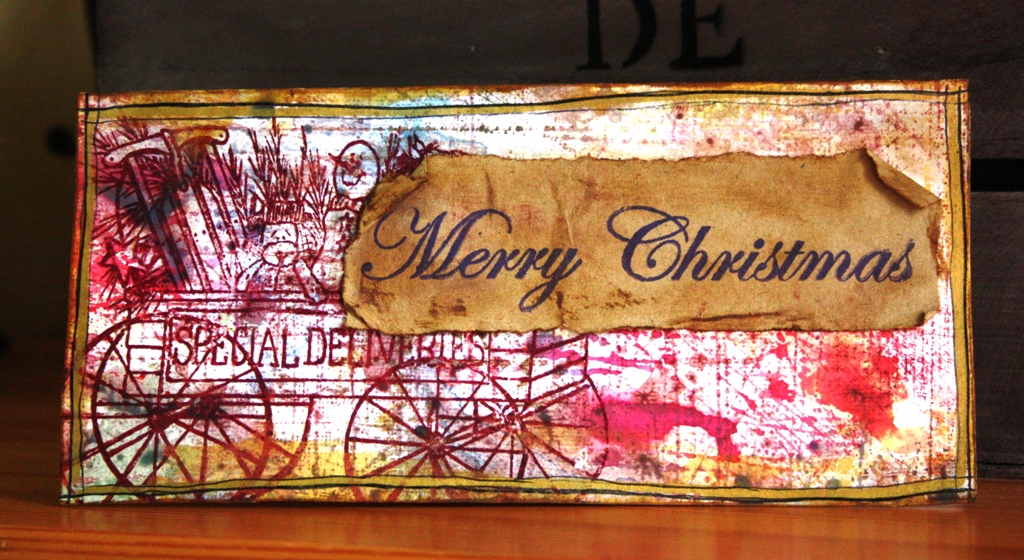
Hello there, this is Titbelsoeur showing you today my very first Christmas card of the year !
I have made the background with this amazing tool I will demonstrate at my Nov. 11 workshop, then I have stamped the Special Deliveries stamp on it with Plum Archival.
Merry Christmas was stamped on a kraft junk envelope and torn :


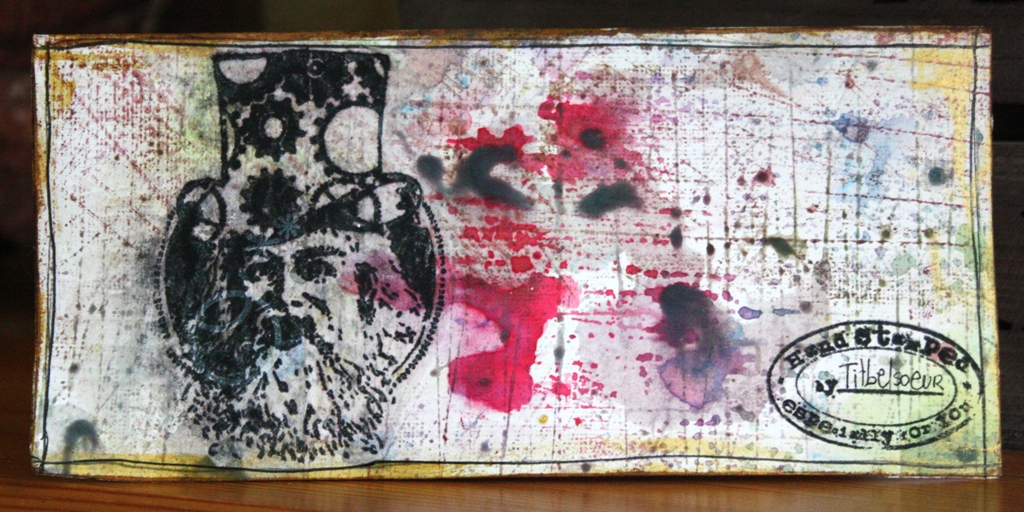
On the back, I glued the Steampunk Santa that was stamped on wrapping tissue to keep transparency, and I added my signature on the Hand stamped mark.


Isn't it an easy peasy card to do ? I hope you will enjoy it and want to make a lot of same ones !
Anyway, thank you so much for stopping by, I can't wait to read your comments !
See ya,
Titbelsoeur

Wednesday, 27 August 2014

Mixed Media Canvas - You & Me

Hello Everyone,
Shilpa here,
Today, I've a Mixed Media Canvas to share with you.


In my this canvas I made 'the Light bulb stamp'  as a  focal point. Those stamps are from Artistic Stamper 'Steampunk' Collection stamps.


It all started with layers of design papers and graph papers from stash. I attached flowers, shells, buttons, small light bulbs,small wooden heart with 'love' carved on it, paper clips, small cloth clips as my second layer. Applied gesso, as I wanted to get uniform colour on them. When it dried  completely, I stared layering my ink colours.


I've used blue , green and yellow from Lindys stamp gang spray inks. I stamped text with Artistic stamper calligraphy mat 4.


I stamped the Light bulbs with Artistic stamper Inspiration Light bulb and Ranger Archival Inks. Fussy cut them and attached them with foam tabs.


It is always fun to mix and match crafty and artsy ingredients to create something beautiful. I hope you liked my adventure here. Waiting for your comments!!
Thanks so much for stopping by today.

Supplies used:
Lindys stamp gang ink sprays
Design papers from my stash


Wednesday, 26 June 2013

Shabby Steampunk by Astrid

Hello everyone, lovely to see you here. For my project today I wanted to see whether it is possible to combine Steampunk with Shabby Chic. The sad truth is, that it may well be possible, but I don't think I have quite managed to achieve it.... Anyway, - here is a hanger, which was my attempt, - hope you like it even so....
I started by cutting both the large and the small Tim Holtz Baroque die out of mount board. (Just a little tip, if you are after cheap mount board, call into your local frame shop and ask them for off cuts. I got an enormous bag for £5 and I know some shops even give it away for free).

I coloured the large one with  Distress Paint in Walnut Stain. When dry I added some crackle glaze and then added a coat of Antique Linen. After the crackles appeared I then went around the edges with Frayed Burlap.
I did the same with the smaller die but also added some picket Fence. When dry I stamped the little Steampunk clock, which was an Artistic Stamper freebie that came with the May issue of the Craft Stamper Magazine all over it in Weathered Wood and Gathered Twigs and then added a few spritzes of Dylusions in White Linen, to tone it down a bit.
Next I took some stamping card, coloured it with Antique Linen, Weathered Wood and Gathered Twigs Distress Inks and then stamped the large butterfly from the Tick Tock Butterflies set in Coffee Archival Ink. I stamped it a second time in Jet Black archival and cut out just the body part for a bit more contrast.
I made a flower out of card coloured with the same colours of Distess Paints, using a Spellbinders Die, (Blossoms 5) and finished by adding one of the Tim Holtz Chit Chat stickers and one of the Baubles, and that was it.

Well, hope you like this little hanger, even though it is not quite Shabby Chic or very Steampunk. Thank you for visiting and see you next time.

Friday, 2 November 2012

Steampunk in October... by Joanna King

Hello! My name is Joanna (aka Asia King) from Under a Creative Spell and I am super excited to play this month with the Artistic Stamper Creative Team!

My first guest design project was inspired by Kate Crane’s monthly calendar challenge. I must admit, I haven’t been very disciplined to keep up with all the months but after seeing this amazing range of stamps, my hands were immediately itching to start crafting!

For my calendar pages I used water colour paper, which I first painted with gesso. Then all the fun began! Using purple, orange and white acrylic paints I painted the pages, smearing and overlapping the colours as I went.

Then to start building layers I randomly sponged the paints through a mask with a collage of numbers. When the paint was dry, I stamped layers of images from Large Dotty Closed Background and Punk Plaid Background and added some paint accents through sequin waste.
Using an embossing ink I stamped the 'bubbles' from the Borders A5 #2 plate and heat embossed them with Stampendous Aged Wine embossing enamel. Then, with white, black and gold paints I stamped a number of circles with plastic bottle tops and I added a few black lines with Ranger's craft scraper.
To 'frame' my page I used the tiny dots and gears from the Borders A5 #2 plate which were stamped with Pumpkin and Jet Black StazOn inks.
My calendar days were punched from scraps of patterned paper and the edges were distressed with  Spiced Marmalade and Dusty Concord distress inks. The Steampunk butterflies and the snail are from the Tick Tock Butterflies set, which I stamped onto patterned paper and coloured in with the distress inks.

To finish the page I added some black rub ons. I hope you've enjoyed reading about this project and I look really look forward to sharing my next project with you!

TTFN!

Thursday, 11 October 2012

Happy Halloween by Emma


Hi everyone! Once again, time has flown by and it's already that time of the month for me to share my first piece with you all and I really hope you like it!
Here's how I created the piece...

Firstly, I used Tim's faux metal riveted technique that he used for his September tag, in the 12 tags of 2012 series and covered a Manila tag. I then covered the tag with Hazelnut, Eggplant and Gold Mixative Alcohol Inks before sanding the surface.

Next, I used the Tim Holtz Gadget Gears Alteration Die to die cut some chipboard which I then painted with the gold Adirondack Paint Dabber. Once the paint was dry, I applied the black paint dabber over the top and then, gently wiped away some of the paint. I then die cut the '31' from the Gothic Boo die and applied black paint over the numerals, before brushing the edges with gold paint.
Next, I blended a piece of white card with Old Paper Distress Ink, added Black Soot around the edges and distressed the paper slightly. I then stamped the image of Phineas Pinchbeck onto the card and I also stamped the Happy Halloween Ticket from Tim's Odds and Ends Stamp set.
I added all the die cut and stamped elements onto my tag, together with the a piece of the Film Strip Ribbon, attached with the Tiny Attacher and some Sprocket Gears, with the Game Spinners attached to the centre.
Finally, I added Glossy Accents onto the clock on the stamped image and threaded seam binding through the top of the tag and tied it into a bow.
Here's a list of what I used:

Thank you for stopping by to take a look at my little tag and I can't wait to read all your comments!
That's it from me for now but I'll see you all again, soon!
Emma x