Showing posts with label Idea-ology. Show all posts

Saturday, 22 February 2020

The Dragonfly by Jane

Here is another card that I have made to hopefully inspire you to join in this months challenge where the pompt is "words". I so wish you could see how vibrant this card is in real life, but as with any bling or neon colours, it is so hard to capture on a photo.


The Artistic Stamper products used:

Happy crafting lovely people


Tuesday, 24 February 2015

Golden Gibson Girl

Hello everyone!  Alison (butterfly) with you here again today, and I'm back in the journals again, I'm afraid... but with a whole new colour palette for me.  I'm here today with a Golden Gibson Girl!


This page came about from playing with the fabulous new Background Flourish stamp.  It's A6 sized, so I was able to stamp it twice - in Wild Honey, Scattered Straw and Pumice Stone - and cover the whole page.  I gave the inked stamp a tiny spritz of water for a softer look in places.


The details in the flourishes are gorgeous.  I stamped some of my favourite script stamp - Calligraphy Mat #6, as I now have the large size too - also in Pumice Stone to add another layer.


I can't resist a bit of crackle, as you know, so I applied some crackle paste through the Tim Holtz Harlequin stencil and left it to get on with crackling.


With all the vintage flourishing going on, I found myself reaching for one of the Gibson Girl stamps as a complementary focal point.  I stamped her on watercolour paper and used Distress Stains and some Tattered Angels Glimmer Glaze to tint the background.  I toyed with colouring her in, but decided I like how the image really pops in its "naked" state.


Once the Harlequins were crackled I used the same Distress Stains and Glimmer Glaze to add colour to them too.


I think Ripe Persimmon, Dried Marigold and Spiced Marmalade are all in there, as well as the Scattered Straw and Wild Honey, and the Glimmer Glaze was the slightly innappropriately-named Flirty (it looks to me as though flirting is pretty much the last thing on her mind at the moment).


I also used my Pumice Stone Distress Marker to add some shading to the diamonds...


... and the final touch was to add some Treasure Gold in White Fire and Florentine to highlight the crackled texture.


A simple WordBand provides the thought for the page, picked out in Chalk Fresco Paint - a reminder for her not to get dragged down by reality's limitations, but to dare to make the leap of imagination and break free.


And of course there's lots of splatter!


So it's stamping plus crackle plus colour - a step outside the normal colour zone, for sure, but still essentially playing in the journals with my favourite things.  I hope you like it.

Thanks so much for stopping by.  There's still a week or so to come and play in our Love challenge this February.  You don't have to use Artistic Stamper stamps, but if you do you get a double entry in the prize draw.  Hope to see you there!

Ingredients used:
Distress Inks - Pumice Stone, Scattered Straw, Wild Honey, Spiced Marmalade, Ripe Persimmon
Distress Stains - Scattered Straw, Wild Honey, Spiced Marmalade, Ripe Persimmon
Distress Marker - Pumice Stone
Idea-ology WordBands
Treasure Gold

Saturday, 24 January 2015

A few of my favourite things...

Hello all!  Alison (butterfly) here to share another journalling page with you.  This one centres around a vintage photo and one of my favourite Katy Leitch flower stamps.  Cups of coffee at the ready?  Let's dive in...


I started by layering torn book pages and heavy gesso into a kraft-paper journal (still working through the pages carved out of my candle niche!).


The next step was some stamping... the Encyclopedia Botanica flower and one of my favourite Calligraphy Mats, number #4, stamped in Sepia, and with clear-embossing for the flower to give extra definition.


I then started playing around with ephemera and embellishments and it all came together without me really thinking very hard.


This wonderful young woman from the Darkroom Door Photobooth sheets was really the catalyst.  (Since I'm having to be patient about getting my hands on the new Tim Holtz Photobooth release, I'm playing with these for now!)


The determined set of her mouth and the humorous gleam in her eyes drew me to her at once.  Here's someone setting out into the world with her head screwed on straight and ready to pursue her desires.


She's layered up over some Tim Holtz ephemera, some shabby lace and some stained calico from when I did my last rusting session (a long time ago... there needs to be another one very soon).


The journey she takes will undoubtedly be full of twists and turns, but you can bet your bottom dollar she'll grit her teeth and come out smiling in the end.  This word from Journalling Words #2 seemed the right one for her.  The layers here include some more of the rusty calico as well as some tea and coffee-stained tissue paper.


You'll recognise the book page Frameworks Trellis pieces (they put in an appearance on my New Leaf tag as well as my Russian Love Is In The Air hanging)... 


Here they've had lots of shading (with Inktense pencils and a water brush) to embed them in the page.


I found when I was looking at some of the photos that I couldn't make my eyes see them properly - they kept either sinking in to the page or sticking out - a sign that the shading for dimension is doing its job, I suppose.


It was while I was creating the shadows around the Frameworks and the other ephemera - with various blue and grey Inktense pencils - that I decided the flowers might look good with some "sky" around them.


I'm really pleased with how it makes the image pop.


The other elements which made an early appearance in the plans were the wooden butterflies.


I already like them in "naked" wood, but for this page I decided they should be crackled.


I used the Croco Crackling in White again (as on my last journalling page here).


And then added splodges of Black Soot, Gathered Twigs and Vintage Photo Distress Stains, wiping back and adding more until I was happy with the grungy look.


The little wooden buttons I did leave naked - though they did get caught in the splatter fire!


You'll have spotted the metal accents - some Idea-ology pieces that worked with my young woman... business-like cogs and paper clips, and the Muse Token which is definitely hers by rights.  I sanded it back to give it an extra burnished glow.


So that's today's bit of fun.  The journalling does seem to have taken hold, and I'm enjoying the freedom it's giving me to play.  I'm hoping you're still enjoying the results!


Thanks so much for stopping by today - it's always lovely to hear what you think.  Oh, and there's still almost a week to come and play in our New Beginnings challenge... hope to see you there.

Ingredients used:
Artistic Stamper stamps: Katy Leitch - Encyclopedia Botanica, Journalling Words #2, Calligraphy Mat #4
Archival Ink - Sepia
Distress Stains - Black Soot, Vintage Photo, Gathered Twigs
Idea-ology Findings - Muse Tokens and Gears
From my stash: gesso, wooden butterflies and buttons, book pages, rusty calico, tissue paper (plus tea and coffee), lace, Sizzix Frameworks Trellis, Tim Holtz Ephemera (but there are similar things here), Inktense pencils

Saturday, 10 January 2015

The Brighter Side of Journalling

Hello all, Alison (butterfly) here with you again... and with some more art journalling.  But rather than the wintry pages over at Words and Pictures, this is an altogether lighter and brighter bit of journalling!


It does make me smile though to see how similar elements seem to have bobbed up on this very different page.


I'm definitely having a thing with circles at the moment - and here there are two layers of them.  First, some Distress Spray spritzed large circles using the Large Sequin Waste mask, and over that I spread a very thin layer of the Viva Decor Croco Crackling Colour through the Large Dot mask and left it to get on with cracking while I went off to do something else.


When the large dots were dry, I did some stamping with Distress Inks in my Jan/Feb colours of vivid blues and greens.  There's the Sequin Waste background stamp in Mowed Lawn and the Mini Polka Dots in Broken China and Peacock Feathers.


Once stamped, I gave them a spritz of water to let the Distress Ink do its magic wicking thing, softening the look.


And I used Distress Stains to add some colour to the large dots, wiping away the excess so that the crackle is highlighted.


So, like the winter pages, there's lots of crackle too.


For my focal point, I chose the word from Journaling Words #5 (oh, for the missing L!  Ah well, the Americans will like it).  I stamped it in the matching Distress Ink colours and clear embossed it on a whitewashed book page.


It's layered up over some wire mesh, tea-dyed tissue paper (transparent - so you can see the stamping and the text through it - love it!) and another book page.


I had great fun with my metal pieces.  The Idea-ology flower is altered with Distress Paint, while the skeleton leaves have had a dose of my Ten Seconds Verday Paint (weathered patinas, until now only really used on dollshouse work).


I used a combination of the Verday Copper finish as well as some Distress Paint in Mowed Lawn and Salty Ocean to get the finished effect, and I love it.


And I edged the page with Vintage Photo and Walnut Stain to pick up the rusty colours of the central layers, so we also have - at heart - the blues and browns of my winter pages, but transformed to a brighter version.


So having set out to do something completely different from the recent art journalling shared over at Words and Pictures, I have got something different, but somehow very closely related!

Thanks so much for stopping by today - it's always lovely to hear what you think.  And do come and play along in our New Beginnings challenge for a chance to win a gift voucher here at The Artistic Stamper - hope to see you there!

Ingredients used:
Artistic Stamper stamps: Journaling Words #5, Mini Polka Dots, Sequin Waste Open
Artistic Stamper masks: Large Sequin Waste, Large Dot
Distress Spray Stains: Broken China, Peacock Feathers
Distress Inks: Mowed Lawn, Broken China, Peacock Feathers, Vintage Photo, Walnut Stain
Distress Paints: Salty Ocean, Mowed Lawn
Distress Stains: Mowed Lawn, Broken China, Peacock Feathers
Clear Embossing Powder
Viva Croco Crackling Colour - White
From my stash - gesso, wire mesh, tissue paper, book pages, metal flower and skeleton leaves, tea(!)

Wednesday, 10 December 2014

Snowy Tree

Hello everyone, Alison (butterfly) here with a wintry tag for you.  There's snow forecast for the UK this week, so it may well fit perfectly with the weather for some of you.  You can click on any of the product links in the text if you need to go shopping right now!!


From the moment I saw the large Snowflakes Backgrounds by CaroLines, I had plans for them!  This tag uses the Palette Snowflakes as the background.


I stamped it onto a whitewashed tag using Stormy Sky and Weathered Wood Distress Inks.  I gave it a slight spritz of water beforehand, which is why you get that nice watercolour splatter effect in places.


The other new winter stamp here at The Artistic Stamper which really caught my attention was this beautiful Pine Tree, also CaroLines.


It's stamped in Potting Soil Archival Ink (or maybe Coffee - sorry, can't quite remember, but it's bound to be one of the two!), and clear embossed with SuperFine powder to make it really pop against the snowy blizzard in the background.


The sentiment comes from the Christmas Greetings #1 plate, and got the same treatment.


I cut the figures using a Tim Holtz die from some "rusted" card leftover from another project.  The effect is created using some of the new DecoArt Mixed Media line.  You'd need the Carbon spray and Quinacridone Gold.


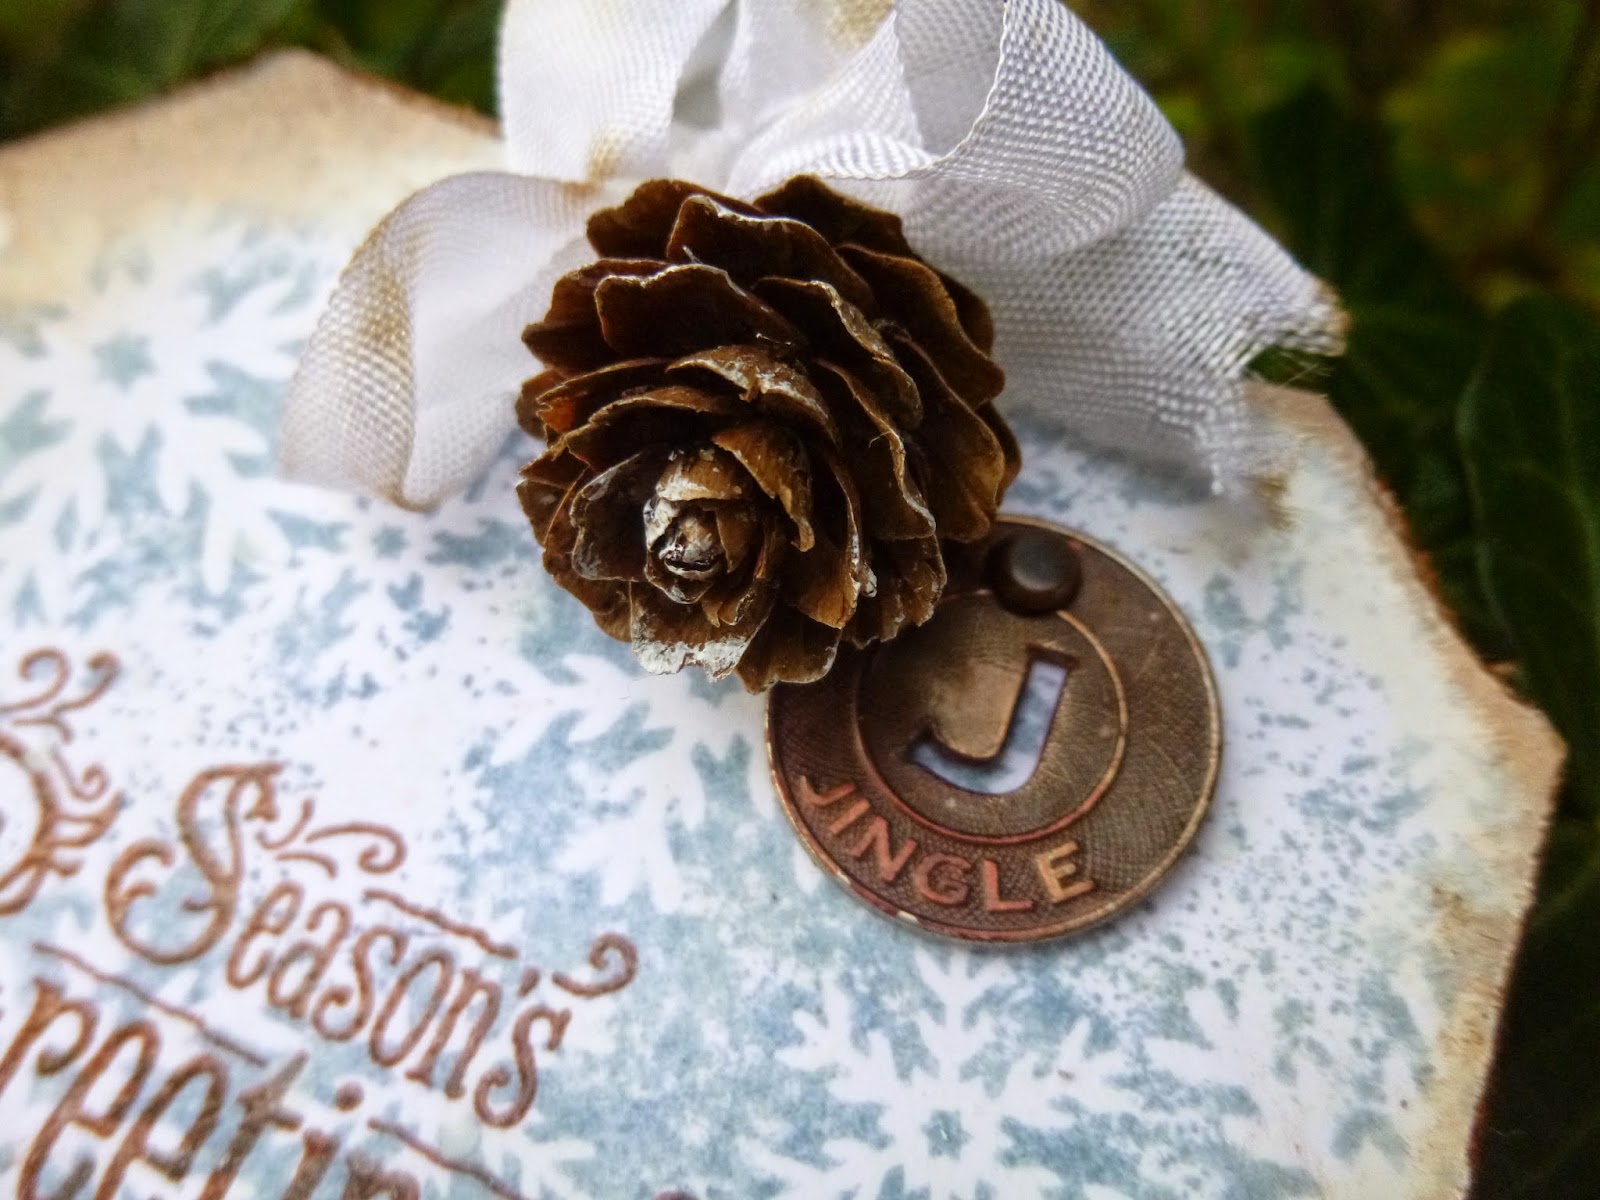
I used Ginger and Rust alcohol inks to alter my metal Idea-ology Findings - the Muse Token here, and the Word Band below.


And once the inks were dry, I smeared Picket Fence Distress Paint onto the Word Band and wiped it back, leaving the lettering highlighted.  Despite being dry, the alcohol inks seeped into the colour, but I rather like the distressed look.


I brushed some Chalk Fresco paint (part of the new JOFY Limited Edition) onto the edges of the tag to draw the eye inward and give a softer, snowier look.  I blended on some Vintage Photo Distress Ink too, to tie in to the rusty accents of the tag.


The whole thing is finished off with a couple of my tiny pine cones (UPDATE: sorry for any confusion - they are real pine cones, not "mine" as in I made them!!) and some seam binding which has just had a tiny touch of Vintage Photo Distress Ink to shabby it up (down?).  And a splatter of Chalk paint at the very end...


So there you have it... I hope that you are staying safe and warm if it's snowing where you are.  And if the weather is keeping you indoors, why not use the time to come and play in our Anything Goes challenge this month at The Artistic Stamper.  You don't have to use Artistic Stamper stamps to enter, but if you do you get two entries in the prize draw.

Thanks so much for stopping by today, and I'll see you again soon.

Alison xx