

Hello my lovelies, Minxy here for my second visit of the month
Today i'm sharing a little altered wooden icon..
Today i'm sharing a little altered wooden icon..
And as I went a bit mad with the photo's you can make one too if you like!
***
For this piece you will obviously need 1 blank Wooden icon
Then gather together the following:
Traditional tan studio paint, A mini-mister, antique linen distress re-inker and heirloom gold from the perfect pearls aged patina set, {or you could use a distress pad and perfect pearl mist spray}, coffee and black archival inkpads, heat gun,
accoutrements and baubles={WHICH ARE STILL ON SALE BTW} metal photo corners, cotton twine, white gloss card, And the following Artistic Stamper stamps:
Before you start painting, notch out 2 holes where you're buttons will sit to allow the backs to sit in and make them a little more secure when gluing.

Apply 2 coats of studio traditional tan paint.

Then spray with an antique linen and heirloom gold mini mister mix and heat set using a heat gun straight away to get the speckled effect.

Use coffee archival to randomly stamp some calligraphy script, doing some places lighter than others by stamping off first. {stamping off is when you ink your stamp and stamp a piece of scrap paper before stamping your real piece so you get a lighter more faded image}
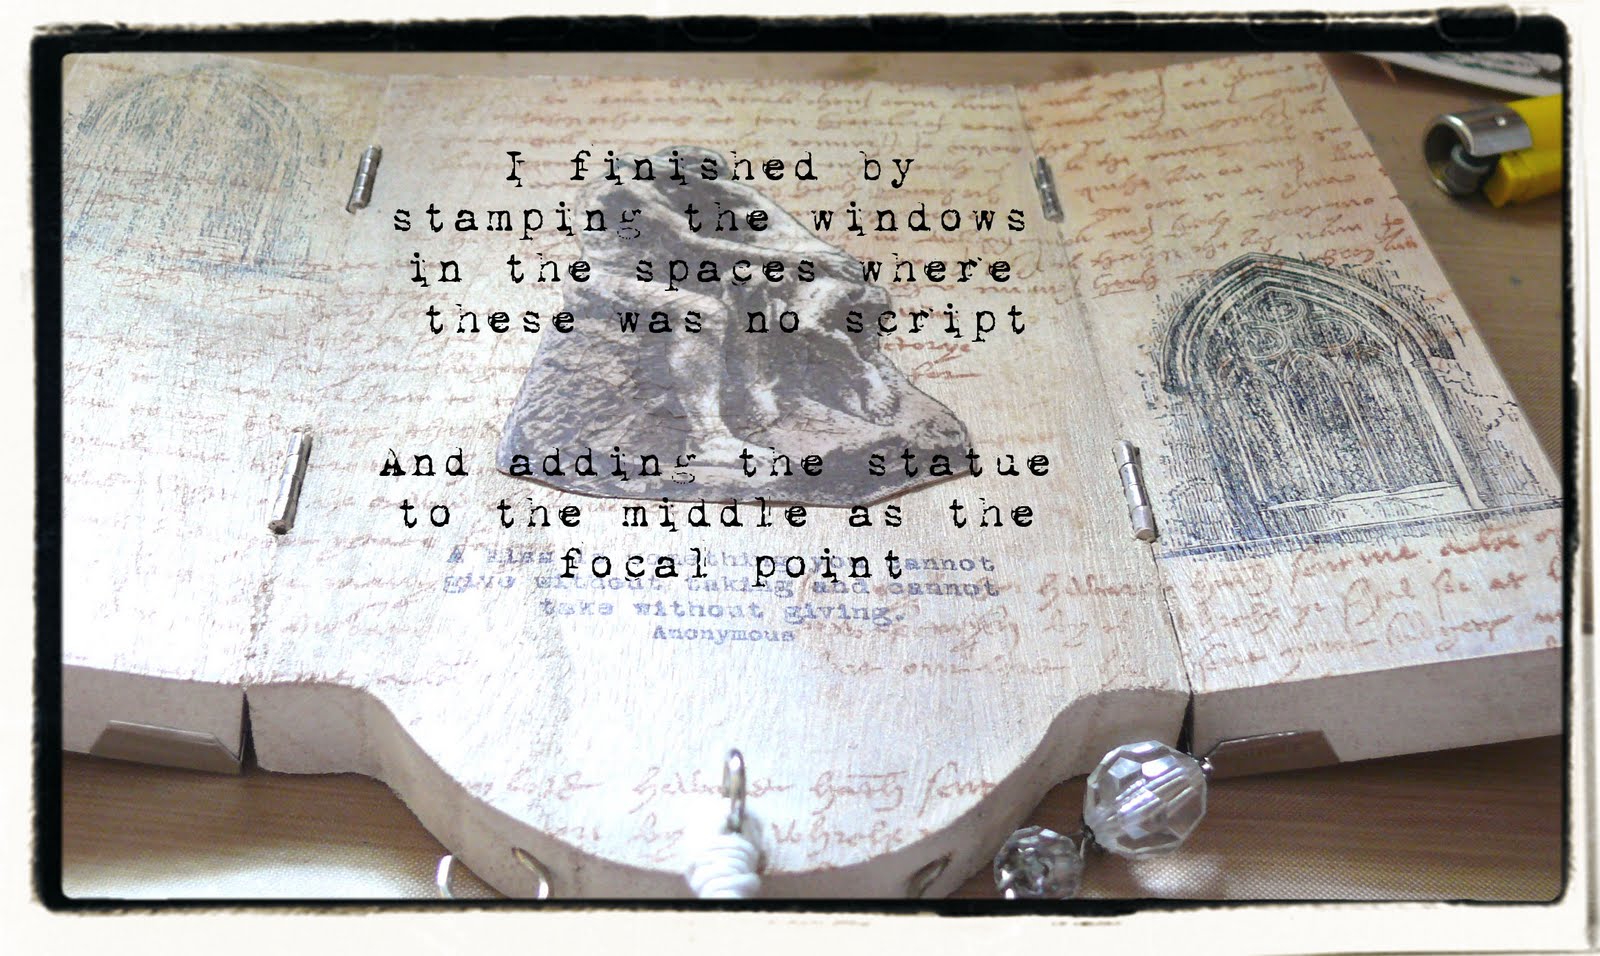
Stamp the window from the Architecture 1 plate in black archival in areas where there is little or no script

Stamp the 'The Kiss' statue onto white gloss card in coffee archival ink, and cut out.
I coated with matt accents as I didn't like the gloss look, {but you don't have too} when it was dry I straightened it out as it had curled a bit and this caused the accents to crack a little but that actually added to the statues look which was a happy accident!
I stuck the image straight in the middle of the icon and stamped the phrase straight below it in black archival ink.

The treatment of the outside was very much the same as the inside only I didn't use any pearl mist because I wanted it to stay a little lighter.
I used one of the fancy sconces from the architecture 1 plate to add an almost hinge like effect before gluing the accouterments fanciful buttons on, I also added a piece of cotten twine round each button so the doors are easier to open.

I used silver-plated metal photo corners to give the front a nice finish.
flattening one side with pliers so it sat flush {ish lol}
You can also see in the pic I used some ball chain to hang the piece by cutting out a small groove for the chain to sit in and gluing in place. {I used E600}
I added some mini hooks to the bottom to make it useful, so I could hang earrings and chains on the piece, but for display purposes i've added some twine & baubles for show.
And there you have it
I hope you've enjoyed todays art
I'll see you again soon but till then..
Stay Inky

14 comments:
Nicky, this is is lovely - in fact my craftless husband saw it and admired it too so that is incredibly high praise indeed! Feel the need to make my own one now!
Great icon, and that kiss certainly is! lol
TFS xx
Awesome piece Nicky! I'm totally in love with it!! xxx
I love this, great tutorial Nicky!
Beautiful, classy piece of artwork Nicki, .... love it!
JoZarty x
Amazing piece of artwork Nicky x Hilda
fab work Nicky x
Love the softness in the colour and the way you have used the icon shrine, fab mrs xx
Great tutorial! I feel the need to follow this blog now!
Fabulous piece! Love the details.
Nicky, this is utterly gorgeous & thank you for the great tutorial.
Great way to decorate the icon and useful too ;)
xoxo Sioux
this is fab,
love the nuteral colour pallet,
Kat.
This is glorious, Minxy, so soft and elegant,
Lucy x
Post a Comment