Showing posts with label Altered Canvas. Show all posts

Wednesday, 16 May 2018

Fun Flower Canvas by Gemma

Hello

It is midway through the month and there is still plenty of time to join the challenge here on the blog and on the Facebook page. I am loving the entries so far and can not wait to see more of them.

I have a bright green canvas to share with you all today. The focus was the bright green background made with a calligraphy mat and Harlequin mask 


What I did 😊


I started by applying texture paste through the Harlequin mask. Once that was dry I applied layers of green paint, some I mixed with water for a thinner consistency, and some I added white paint to for a different tint of green, while they were still wet I wiped the paint away on some of the Harlequin patterns.


Once dry I repositioned the Harlequin mask back over the texture paste and applied a very small amount of very watered down paint. When I did this I made sure not to completely cover the layers underneath knocking it back with a wipe if I needed to.
The background was finished off by stamping in a brown ink with a calligraphy mat stamp.
Then I doodled the flowers on and a border around the edges.

Thanks for reading

Gemma

Monday, 7 May 2018

Canvas by Titbelsoeur

Hello everybody,
I have recently led a workshop in a retirement home, teaching trainees to make a mixed-media canvas that would highlight a personal picture. And I have chosen to add a stamped image as my personal picture. Obviously, I have used a Gibson Girl stamp, which are kind of my favourite stamps at the Artistic Stamper ! 
I first wanted to add a customized tag, like those I have shown to you here : Tag customization by Titbelsoeur and here was the result :


but I decided to use another technique :
I have first stamped it on the canvas to make a shadow, then on a watercolor paper with Archival ink, that I cut out and sticked on to the stamped image, with a slight shift for more depth.


And here is the canvas :


Do not forget that you can win these fabulous stamps, just participating in our challenge 

Using Backgrounds


 for 3 chances to win !

Thank you so much for stopping by.
Your comments are very much appreciated here, on my blog
Bye for now and happy creating. 

Titbelsoeur

Saturday, 7 April 2018

Bees by Titbelsoeur

Hello everyone,
This is a canvas I have first covered with corrugated cardboard, gessoed and painted it. Then added a piece of an old pair of jeans, and a stamped page of a book.
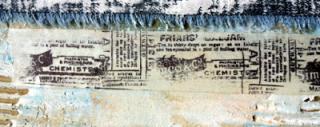
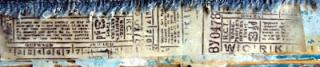
On both sides, I have sticked pieces of a very special masking tape, that you won't find in any shop. Why ? because I have made it on my own, with 2 Artistic Stamper stamps that fit very well to it :


this one from Ephemera 1 A5


and that one from Labels A6


I also could have used stamps from The Open Road 1 A5  but I did not.

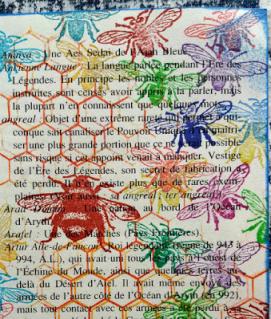
I first stamped the book page with the small bee from Honeycomb Background & Free Bees, using a lot of Versa and Izink inks, to have a multicolor background. I stamped the queen and hid her to protect when stamping the honeycomb. .


Here is the finished project :


Do not forget that you can win these fabulous stamps, just participating in our challenge 

BIRDS AND THE BEES


 for 3 chances to win !

Thank you so much for stopping by.
Your comments are very much appreciated here, on my blog
Bye for now and happy creating. 

Titbelsoeur

Monday, 19 March 2018

Canvas by Titbelsoeur

Hello everyone,
To make this altered canvas, I  first cut and corrugated cardboard pieces, then I applied gesso with my fingers, sprayed some ink and stamped Ephemera 1 A5 with black ink :


Then I added some ink on pieces of fabric and stamped garden tools, bees, butterfly and mushroom with black Archival ink. I also glued tissue paper on to my canvas and added some white gesso on it. Then sticked fabric on to cardboards and cardboards on to the canvas. 
Snapshots :


Here is the finished piece :


You will find the stamps I used here :
Ephemera 1 A5 Butterflies 2 size A5Honeycomb Background & Free Bees Garden #2 size A6Mushrooms A5 Plate © Tit Belsoeur 

Do not forget that you can win these fabulous stamps, just participating in our March challenge :  Stencils & Masks


 for 3 chances to win !

Thank you so much for stopping by.
Your comments are very much appreciated here, on my blog
Bye for now and happy creating. 

Titbelsoeur

Tuesday, 8 October 2013

Vintage canvas by Titbelsoeur

Salut les Patouilleuses, c'est Titbelsoeur qui vous parle !

I do not often make canvas like the one I am showing you today... I tried to get out of my comfort zone with colors and style I am not used to... YOU will tell me whether it was a good idea !
I am sorry I forgot to take step by step pictures, I always start taking some, then I add this and that, and at the end I realize I have not taken other pics ! 
Anyway, I will try to explain a bit the way I made it, not really difficult actually...

I first glued some thin tissue on the canvas to make texture, gessoed it and added some paint with my fingers. I darkened a book page I had first folded here and there and wiped my gessoed fingers on to, with Vintage photo Distress ink on a piece of cut n'dry (not sure my explanation is really clear ?).


From the  A Stitch in Time plate, I stamped the thread card on kraft paper and the tape measure on drawing paper :


And this Gibson Girl I love so much on drawing paper as well, edges distressed :


I then glued lace, buttons and flowers among other stuff, and tadaaaaam, here it is :


Sooo boyz'n'gals, I hope you like my canvas,

thanks for stopping by, 

I am looking forward to reading your comments! 

A la prochaine !


Thursday, 11 July 2013

Running Like Clockwork by Emma


Hello everyone!! Well, it looks as if summer has finally arrived in the UK and July seems to be disappearing quicker than any month so far this year and I can't believe it's already time for me to share my first post of the month...

...and here it is, my clockwork canvas and as always, there's lots of pics to show all the detail and I really hope you like my canvas!
To begin with I used a 5" square box canvas and I added PaperArtsy Grunge Paste around the edges to give a stippled, vintage effect to the piece. I covered the front and sides of the canvas using Distress Paints in Antique Linen, Frayed Burlap, Weathered Wood, Metallic Antiqued Bronze and a smidge of Black Soot, which I knocked back with some Picket Fence.
I then stamped the left and right hand sides of my box canvas with black Archival Ink, using the using the cogs border stamp from the Borders A6 #2 stamp plate and then added more Distress Paint to build up the colour. On the top edge of the canvas, I used the cog stamp from the Tick Tock A5 stamp plate.
Next, I stamped random areas on the front of the canvas using the Calligraphic Mat 11. Once this was done, I started to create a smaller canvas to mount onto the larger box one, so...I used some of Claudine Hellmuth's sticky back canvas and covered a small rectangle of chipboard. I then applied Distress Paint over the top of the canvas and added Walnut Stain Distress Ink around the edges, which I frayed slightly. I then stamped Phineas Pinchbeck onto the small canvas and it gave me a distressed faded look, that I loved. I added a rub on from Tim's Elements Remnants Rubs and popped a small screw brad into the corner.
The next part was to create the cogs using Tim's Gadget Gears die from Sizzix. I stuck sticky back aluminium onto chipboard and then ran it through the die cutting machine before applying Alcohol Inks over the surface to give a coppery metallic look to the cogs.

I adhered the cogs to my background using Matte Medium before then layering my Phineas Pinchbeck canvas over the top.

Next, I added some Idea-ology Mini Gears onto my canvas, clustering them together with my chipboard cogs and some Sprocket Gears, attaching Spinners into the centres.
I then added a Muse Token which I hung from a Ring Fastener.
 On the top of the box canvas, I used a Clock Key.
Finally, to complete my piece, I filled one of the Corked Vials with old watch parts and then added a Chit Chat sticker onto the bottle.
  
So, that's it from me for this today and I hope I've inspired you with what I've created, I can't wait to read all your comments. Don't forget that we have our "Ladies Day" challenge running at the moment and we would love you all to join in. For details of the challenge, just click HERE!

See you very soon and hope you all have a great day!
Bye for now...Emma x

Tuesday, 2 July 2013

Create, Love, Joy. by Mark Gould

Good morning all and what an honour it is to be here as A Guest Designer for the Month of July amoung such talented artists.For those of you who do not know me I am Mark from Speshink
 To get the ball rolling I have A 9''x 9'' canvas, I knew I wanted to create a canvas and knew a few of the elements I wanted to include but was not sure what the finished project would look like. I don't know about you but most of the time I have a good idea of how things will look before I start out, this time round I just went with the flow.
 I started by stamping with black archival ink using the big ledger style stamp from the Numerical Plate A5 by Katy Fox straight onto the canvas,then I used some Decoart Gel Stain in Maple and painted that over the top in a random fashion and wiped it back, this is a translucent stain so the stamp shows through, the rest of the canvas was painted with Decoart acrylic paints, I used three shades of green and worked them into each other and over the edges of  the maple stain to form my base coat.
Again from the Numerical Plate Set I used the larger numbers and stamped the canvas with some embossing ink and covered with some Frantage embossing powder in an antique white and was really surprised at how well it worked.
 The next couple of stamps are from Neil Walkers range, Kiki and Franswar
 This is where the fun started, I broke out the melt pot and wax. Kiki was stamped onto some of the Tim Holtz Idea-ology tissue wrap terminology paper  again with archival ink and Franswar was stamped on to plain white tissue paper, both were positioned and covered with wax, the wax was sitting a little heavy and the paper could still be seen so it was given a blast with the heat gun, doing this gave the wax a chance to seep under and through the papers making them translucent and really brining out the stamped images.
 The words are from the Journaling Words II Set
and have been given the same treatment as Kiki and Franswar, I used archival again but Inspire was stamped with Coffee to tie in with the Gel Stain.
 More wax was added and pulled into place whilst being re heated with the heat gun to frame the characters. I highlighted the raised areas with some Treasure Gold in Topaz.
 You can just see the ledger style stamp and the tissue paper text through the Franswar image here.
 Whilst the melt pot was out I thought I would try out a new silicon mold with some black Wow embossing powder. As you can see the mold is an alphabet mold and the letters come out like scrabble tiles with the letter being raised.
After the powder had cooled I popped them out and used some of the Treasure Gold to hi light the letters and also a little around the edges, I am really pleased with how they came out, they have an old painted cast iron feel about them. I made enough for the words Joy and Love, they seemed to fit quite well with the other sentiments on the canvas.
In the final pic you can see how the letters are raised above the canvas. I used some pinflare to attach them.
 Thanks for stopping by, I will be back latter in the month with something new. xx


Sunday, 23 June 2013

Let The Sun Shine by Emma


Hi everyone, and welcome to my second post in June.
Well, here in the UK, summer seems to be very stubborn at the moment and not really want to show it's sunny side, so I thought I'd bring some sunshine into our lives with this canvas. As always, I hope you like it...
To begin with, I applied some PaperArtsy Grunge Paste, onto my 7" x 5" canvas, through the Wendy Vecchi Brick Wall stencil from my stash. This paste dries so quickly, it's perfect for impatient people like me but just to be sure, I gave it a blast with the heat gun. I then covered the entire canvas with Wild Honey, Barn Door and Vintage Photo Distress Paints. Blending them together with a spritz of water and then a blast of heat to dry them. I then added a touch of gilding wax from my stash to highlight the brick work, which you can see just poking through from under the flowers, in these pics.

Once, I was happy with the colour, I then started stamping onto the canvas, firstly with black Archival Ink, using the Sequin Waste Open Size A5 Stamp, then I used white acrylic paint to stamp the Dots Background and the circles from the Swirls, Splats and Dots A5 stamp.

I stamped the bee from the Insects and Butterflies plate and also the quote from Katy Fox's Encyclopaedia Botanica plate onto tissue paper and then applied these to the canvas with Claudine Hellmuth's Multi Matte Medium.

To complete the background of my canvas, I used Black Soot Distress Paint around the edges.

Now for the huge flowers, and I created these using Tim Holtz's Tattered Florals die and coloured them with Dylusions Pure Sunshine and Squeezed Orange Ink Sprays. I then used Walnut Stain Distress Ink on the edges of the flowers.
I added my flowers to the canvas, together with some die cut leaves and some seam binding that I dyed using Antique Linen Distress Stain.
I added some wire coils through the centres of buttons and popped those into the middles of my flowers and a few more coils sticking out from the flowers.
Finally, I added some metal embellishments from my stash to complete the canvas.
So, that's it from me for today and I hope I did manage to bring just a little bit of sunshine into your day with my bright canvas.

I'll see you all again very soon but until then, thank you so much for visiting today and I can't wait to read all your comments. Don't forget you still have some time to enter our monthly challenge, Makes for Men and we'd love to see your creations.
Hope you all have a wonderful crafty week ahead...
Emma x

Monday, 26 November 2012

Let it Snow...


Hello everyone, Astrid here with my second project for November.

I seem to have fallen in love with the colours blue and brown, not exactly traditional for Christmas projects, but for some reason I can't seem to get away from them.....
For my second project this month  I decided to make a piece of Christmas wall art.
I used the following stamps for my project:
Mini Christmas 1
Christmas Greetings 1 and
Music# 011
I started by taking a piece of 5.5 by 4" smooth white card and coloured it by putting some Distress Stains in Tarnished Brass, Bundles Sage and Picket Fence on my craft sheet and swiping my card stock through it several times. I then coloured it further  with some  Distress Inks in Chipped Sapphire, Vintage Photo and Scattered Straw. I  crumpled it all up, roughly flattened it again and then dried it with my heatgun. I then ran it through an embossing folder from my stash and darkened the embossed bits some more.
The next step was to colour a small canvas board with Pains Grey acrylic paint, it's called grey but is actually blue. I'm pretty sure you would get a very similar effect with Sapphire Blue Distress Stains, but I don't have that one. Before it had dried I dabbed it with a piece of kitchen towel to get a textured effect and when it was dry I  stamped some of the little snowflakes from the Christmas Greetings 1 plate in white by using the Picket Fence Distress Marker. Love how they slowly start to appear against the dark background. I embellished the background with a strip of canvas tape, stamped with the music stamp and some lace.
The final steps were to stamp some of the Christmas stamps from the two plates I used on smooth card, cutting them out and colouring them with the same colours of Distress Inks. Next I cut theTim Holtz Decorative Snowflake Rosette Die, slightly inked and glittered with some Diamond Stickles. I ran the topper through a little snowflake embossing folder in my stash to give it some more texture and then I put it all together as you can see on the photo.
Thank you for dropping by, - I hope you liked my project and feel inspired to use some of the wonderful Artistic Stamper Christmas stamps for your own Christmas projects.