Showing posts with label Leaves Background. Show all posts

Friday, 19 October 2018

Fall scene by Titbelsoeur

Hello happy crafters !
To make this fall scene, I have first collected a lot of ephemeral stuff in the forest : moss, leaves, chestnuts and burs, acorns, pine cones etc etc and kept a wooden box that did contain mandarins one day...
Then I stamped Leaves Background C89 ©CaroLines with various inks on a paper to make the background :

I made mud colours, mixing blue, yellow and red watercolours, then dropping water. When it was dry, I stamped Mushrooms A5 Plate © Tit Belsoeur here and there on this page :

I cut them out and highlighted with a white pen : 
Here is a focus on the way I have made the scene with real elements and stamped mushrooms :

 And here is the scene :

I hope you all will participate in our 

October's Creative Challenge - Inktober


for 3 chances to win !

Thank you so much for stopping by.
Your comments are very much appreciated here, on my blog
Bye for now and happy creating. 

Titbelsoeur


Sunday, 19 November 2017

Autumn card by Titbelsoeur

Hello happy crafters !
You have still one week left to participate in our monthly challenge "use a quote". To help you find inspiration, I have made a fall card.
I have first coloured the paper with Distress inks spritzed with water, then stamped the quote "seize the moment" from the Journaling Words 3 size A5 plate.I hid it with paper and stamped Leaves Background C89 ©CaroLines all around. And in the end, I stamped a mushroom from this plate : Mushrooms A5 Plate © Tit Belsoeur


Would you like to win these fabulous stamps ? Easy : just participate in our challenge 

November's Creative Challenge - Use a Quote

 for 3 chances to win !

Thank you so much for stopping by.
Your comments are very much appreciated here, on my blog

Titbelsoeur

Friday, 24 April 2015

Butterfly's Farewell

Hello all, Alison (butterfly) here, and I'm very sad to say it's my last official posting as part of the Artistic Stamper team.  As many of you will know, life's been getting busier, and "something's gotta give"!

I've had an amazing time creating with the Artistic Stamper stamps (and the stencils too) over the last two years, and I'm so grateful to Jennie for her generosity and good humoured leadership, and for the chance to work with her fantastic designs.  (My textured tags last time didn't use the words "With Thanks" by accident!)  It's been a real privilege and pleasure to play alongside such a wonderful team of creative designers too, both past and present.

So, this final post is a chance to revisit some favourite projects created over the last two years.  You'll notice some of my go-to stamps occurring more than once - the Katy Leitch flowers, the fabulous Journalling Words, the Gibson Girls, and of course my much-loved background staples - the Calligraphy Plates, the Mini Polka Dots - as well as many others.  I hope you'll enjoy the little trip down Memory Lane...  (You can of course click on the links if you need to see more!)

Some of the birds get to fly free, but will the woman ever break out of her cage? Pay a visit to see the tiny cracked hearts and the background layers.

One of my favourite layered backgrounds, stamping and embossing and paint and ink, behind the Encyclopedia Botanica flowers.

The new Flourish Background, a despondent Gibson Girl and an unusual colour palette for me - oh, and lots of crackle of course.

A simple tag with the recent Gardening stamps - but it made me happy to create and makes me happy to look at!

My first offering as a full-blown team member, and one of my earliest journalling efforts.  Those Gibson Girls always seem to turn up when I'm in a melancholy mood.

Autumnal fun with a little book of leaves and a book box to keep it in - and the Dates and Journalling Words also put in an appearance.

Journalling words at the heart of this textural page too... (Is there such a thing as "too much crackle"?  I'm going with "no"!)

... and they're the main feature on this gift wallet along with some lovely postal designs - pay a visit to see what happens when you flip over to the other side.

Another early creation - butterflies and Botanica, blue and brown - my obsessions were clear right from the start!

The piece that started it all off - my first creation as a Guest Designer, but it remains a favourite - worth a visit as it's not easy to capture in one photo!


The melancholy Gibson Girls start talking to you when you flip these tags over - and you should see the suitcase they travel in (well, tags are luggage labels, after all).

Another favourite background, and another play with Katy Leitch's fabulous flowers - and more shades of blue and brown.  A creature of habit... who, me?!

A round dozen for you there (plus a couple of cheaty extras over at Words and Pictures today, just to decorate the post!), and that's where I'll have to love you and leave you - with immense and grateful thanks for all your wonderful visits and comments here over the last couple of years.

I know you'll keep dropping by to enjoy the inspirational work of the rest of the team, and I'll see you out there in Craftyblogland I'm sure.  Happy Crafting all!

Wednesday, 26 February 2014

Shrink to fit....

Hello everyone, Astrid here with my latest project. Quite a simple one but fun to do, and I quite like the result even if I say so myself.....
Apart from the stamps I have used several Distress products, as this month's challenge theme is "Use Distress".
Here is the list of what I used:
Stamps:
Leaves by Katie Fox
Leaves Background

Other products
Shrink Plastic
Distress Stain Gathered Twigs
Distress Inks: Bundled Sage, Pine Needles, Aged Mahogany, Rusty Hinge, Walnut Stain, Seedless Preserves
Archival Ink: Potting Soil
Seambinding
Heat tool

From my stash:
Treasure Gold, small piece of Hessian, embossing folder, Kraft card, home made mica spray, eyelet and setting tool small leaf charm

I started by stamping one of the leaves with Potting Soil archival onto some shrink plastic three times, I then cut them out and  shrunk the leaves with my heat tool. I love the detail you get. Here you can see it (after I had mounted them and rubbed some treasure gold around the edges).
I created a little panel to be the vocal point of my bookmark, it measure about 1 1/4 by 3 3/4". I coloured with Aged Mahogany, Rusty Hinge and Seedless Preserves Distress Inks and gave it a few spritzes of a home made gold mica spray.

Next I created the background panel, it measures exactly 2 by 6". I coloured it with some Bundled Sage Distress Ink and a tiny bit of Walnut Stain around the edges. Then I stamped the Leaves background in Pine Needles Distress Ink.. I ran the bottom part through an embossing folder and then highlighted the raised bits with the Treasure Gold and Walnut Stain Distress Ink.

 I then mounted the central panel on a piece of hessian and adhered that to the background panel. This was then adhered to a piece of Kraft card.
I died some seam binding to tone in with my central panel. I used a mix of Gathered Twigs Distress Stain and Seedless Preserves Distress Ink, rubbed straight onto the seem binding and then sprayed with lots of water.
I punched a whole and set an eyelet at the top of the bookmark and added a little charm.

And that was it, - project complete.
Hope you like my bookmark, they are quick and easy to do and make great little gifts. Perhaps I have even inspired you to use some stamps on shrink plastic. It is a great way to use large stamps on small projects!

And don't forget, there are just a few days left to join in our challenge, all the detail can be found HERE

Have a creative week and thank you so much for visiting!!

Sunday, 24 November 2013

Take a leaf out of my book...

Hello all, Alison (butterfly) here with an autumn mini-journal for you.  There's time for a last breath of autumn before we kick into gear for Christmas, isn't there?!


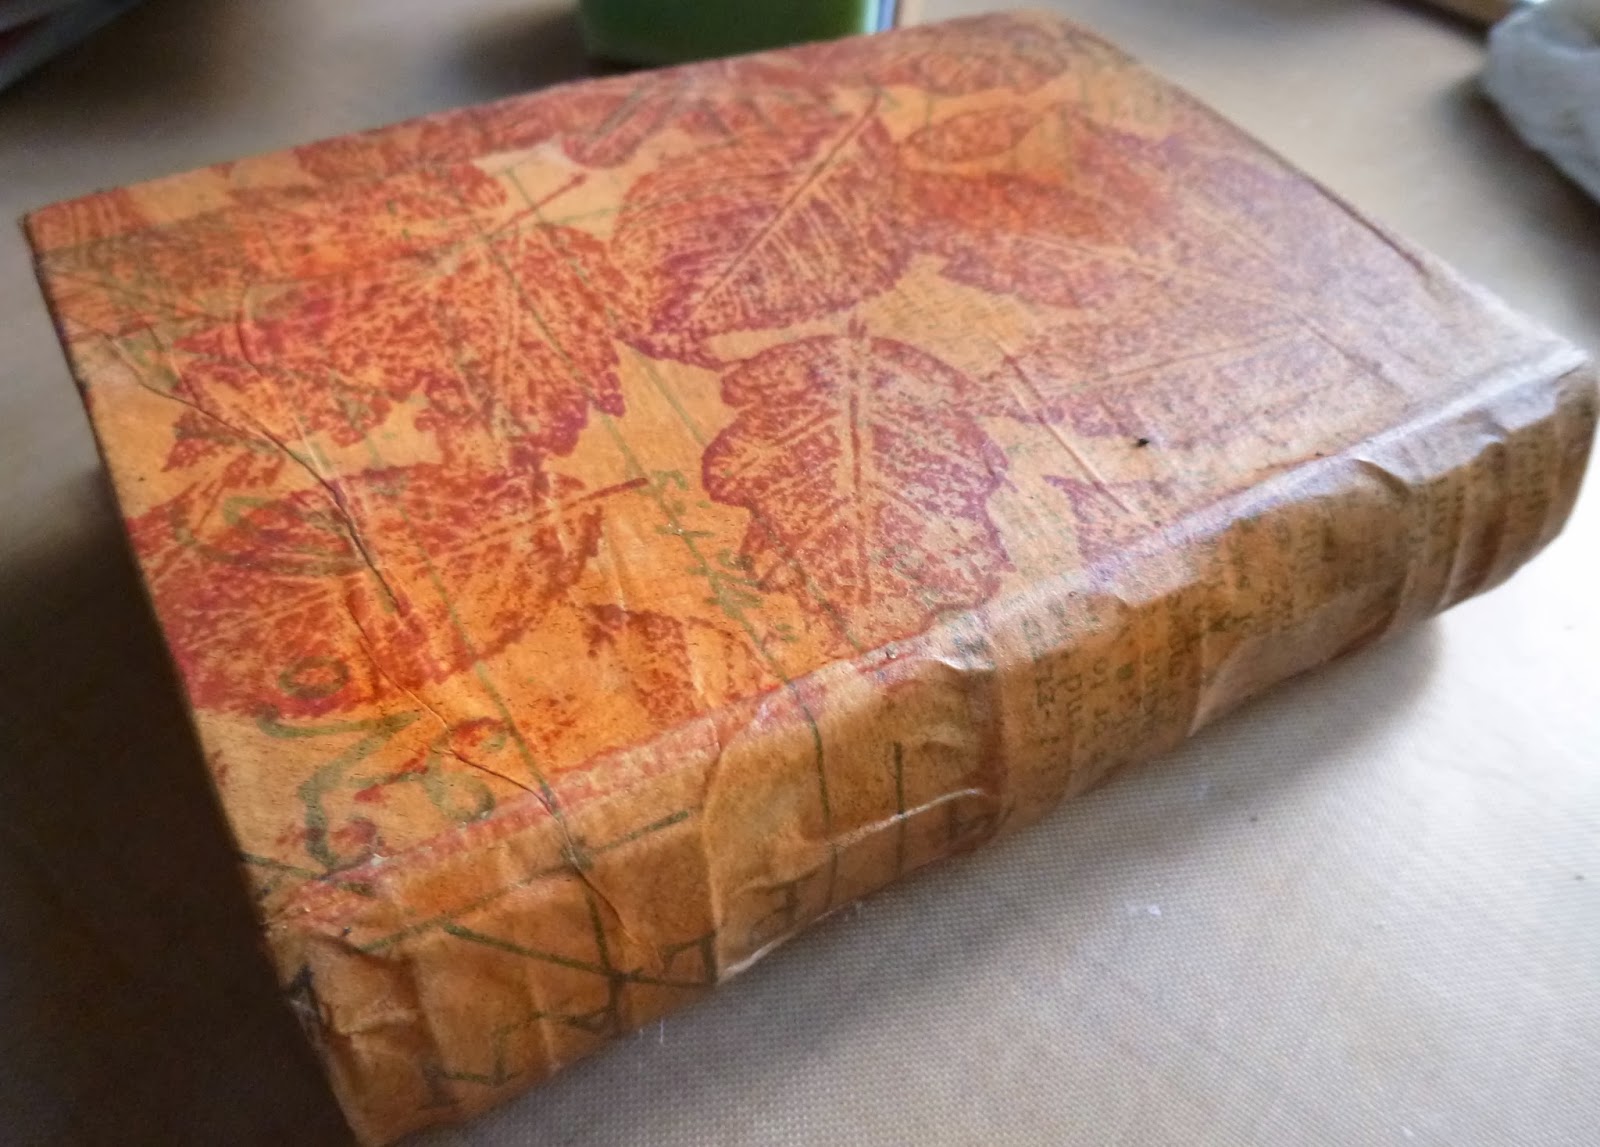
I had great fun altering this little papier mâché book (8 x 11cm, and there's an even tinier one still to come), and creating a mini-album to go inside.


I started by covering it with some Tim Holtz tissue wrap, leaving the "edges of the pages" just with a coat of gesso (thick enough and on a hard bristled brush, so you get some "pages" showing - I'll see if I can find a picture showing that later).


Next step was to stamp the new Leaves Background onto the front and back covers.  I used lots of Archival inks on the stamp: Sepia, Sienna, Coffee and Plum, all blended on there.


Distress Inks next: Vintage Photo, Gathered Twigs, and probably some Rusty Hinge if I remember correctly.


I ended up giving it a coat of medium to seal it, which meant some of the Distress Inks faded a bit with the brush strokes, but I'm fine with that, as it brought the leaves to the fore again.


Time to create what's going inside.  I cut some pages to size (pretty much ATC-size) and did some wrinkle-free distress technique with lots of warm golden brown inks and stains.  I also added a couple of spritzes of Perfect Pearls Heirloom Gold to the craft mat before smooshing through with the pages, so you get a lovely golden shimmer in places.


I used the gorgeous new Journalling Words #5, one per page - it's the US version of "journaling" with one "l", but I guess I can work with that!  Just love all those fonts.


On the reverse sides I used some of the new Katy Fox stamps - the Leaves...


... and the Dates, again stamped in Archival inks, mainly Coffee and Sepia.  Apologies, this was all done after dark - how early is it getting dark already?! - so these are flash photos.

So, enough of the process, let's see some photos of the finished thing by daylight, shall we?


I love that the spine looks like a real old leather volume, burnished with age.


I added some Tim Holtz Remnant Rubs to the cover.


And look how the mini-album nestles just inside the book.


Here's a close-up of that cover, also using the leaves background and some Rock Candy crackle paint.

More crackle paint inside the cover of the box, with layers of autumnal paint shades.


And here are some of the internal pages.  I interleaved them with some hand-made paper pages, and added some stamping using my all-time favourite Calligraphy Mat, number 19!


Oh, almost forgot... here's the promised shot of the "pages" - click for a close-up if you need to!


So that's probably my farewell to autumnal crafting for this year - it's always a sheer pleasure to play with these colours and images, but with the temperature dropping rapidly and Advent Sunday almost upon us, it's probably time to let go soon!


Thank you for stopping by, and I hope you enjoyed taking a leaf out of my book (sorry, appalling pun, but it tickled me!).  If you've already moved on to sparklier times, you could come and play along in our Christmas challenge this month at The Artistic Stamper - you've still got about a week to go.  Hope to see you there!

Ingredients used:
Artistic Stamper Stamps: Katy Fox - Leaves, Dates; Backgrounds - Leaves; Calligraphy Mat #19;
Tim Holtz Remnant Rubs
Distress Inks - Vintage Photo, Gathered Twigs, Rusty Hinge
Archival Inks - Sepia, Coffee, Sienna, Plum
Perfect Pearls Mist - Heirloom Gold
Tim Holtz Tissue Wrap
Claudine Hellmuth - Multi-Medium and Gesso