Well here we are at the end of May and my last project. Thank you all so much for your wonderful comments both here and on my own blog - you have all been so wonderfully supportive and encouraging and I have really appreciated it.
Some of you will know that I love making mini books and as I also love making collage style ATCS I was sure that the wonderful Gibson Girls plate would make a great vintage style accordian book. This is quite a long post so you may want to grab a cuppa before reading it all!
To create my series of ATCs I gathered my supplies:
Stamps:
Gibson Girls Plate
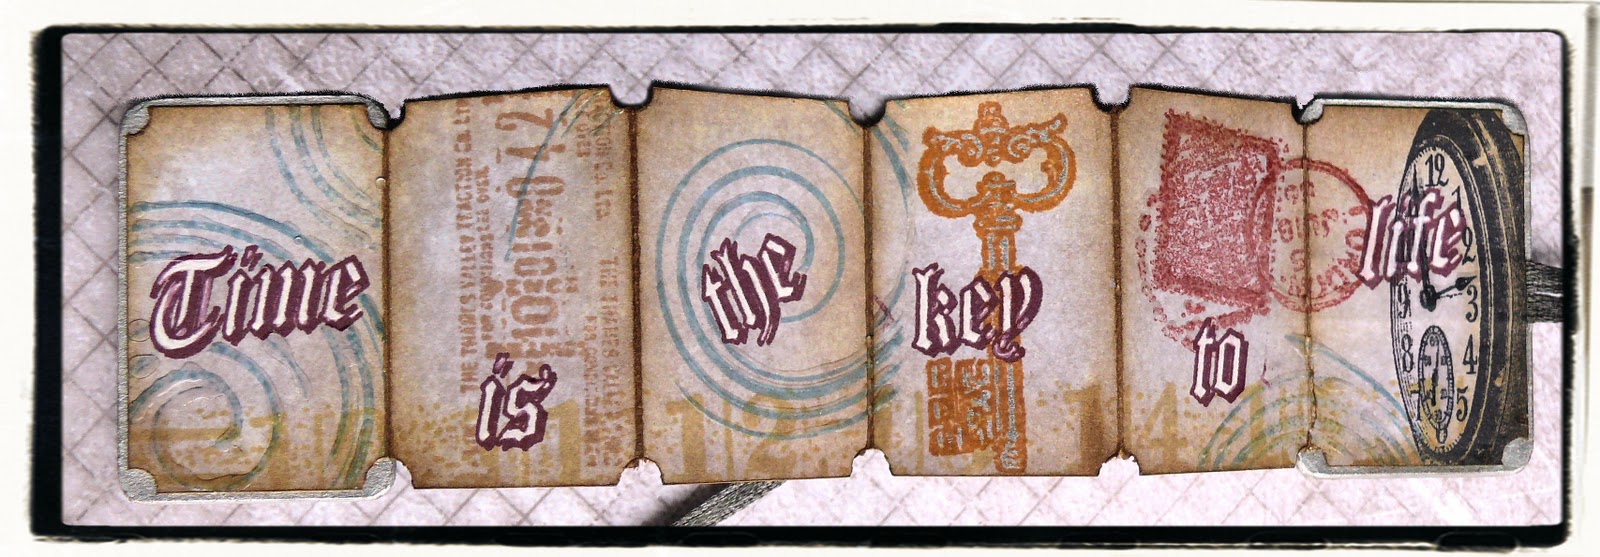
Time Plate
Calligraphy Plate
Hold Fast to Your Dreams Sentiment
Distress Inks: Broken China and Vintage Photo
Archival Ink: Coffee and Black
Glossy Card ATCs
I made my ATC backgrounds using the Tim Holtz Wrinkle Free Distress technique rubbing the two distress inks onto my craft sheet, misting them with water and then pressing the ATCs into the watery ink until I was happy with the look. I love the way the glossy card picks up the ink, quite differently to smooth card. Blending some Vintage Photo around the edges just finishes them off.
Next I made some text paper, stamping the Calligraphy Plate on a sheet of A4 white cardstock with Coffee Arcival ink. I cut out four rectangles and blended Vintage Photo around the edges and dragged a gold calligraphy pen around the edges to create a border and give a little depth when stuck down. I tore a couple of small pieces and again blended Vintage Photo around the edges. The sentiment was stamped onto cream cardstock and cut up into various pieces to fit across the five ATCs and then mounted on to Kraft cardstock.
Then the wonderful ladies! I stamped them on cream cardstock with Black Archival Ink and cut them out. I then painted the hair and dresses with watery Vintage Photo, building up the layers until I was happy with the colours.
Then making sure I sought out supplies in the same colour palette I made my six ATCs. I used the large clock and cogs from the Time Plate, punched a butterfly, and from my stash added some Tim Holtz tags, tape measure ribbon, magic mesh and pearl gems. I made sure the layers were quite flat so that they would allow the book to close.
So then to the book - inspired by by friend Penny Bennington (A Penny for Your Thoughts). I used some heavy watercolour paper which I bought from my local artshop and tore a strip 21" long and 4" wide (this is the paper they keep in the large drawers in art shops - so don't be afraid to ask!).
I scored it from the right hand side at 4" intervals to make six panels and a 1/2" spine. The cover is embossed using a Cuttlebug embossing folder and to get the lovely vintage look I painted the whole book, both sides, with cold tea.
Making some slots in the card I threaded around 28" seam binding ribbon (pre-dyed with Vintage Photo). I finished the cover with another small piece of my torn text paper and a handmade flower using the
Power Flower stamps and Vintage Photo Distress Ink (details are
HERE on my blog).
You can click the link HERE where Penny has a detailed tutorial on how to make the book.
I hope this project will inspire you to have a go at making a mini-book - they really are great fun to make and a great way to showcase your favourite ATCs or photographs and make lovely presents for family and friends. ATCs also make wonderful toppers for cards and scrapbook pages and are just great fun to make.
I have had a really fantastic time sharing these projects with you and using a selection of Jennie's wonderful stamps. My thanks to Jennie and Emma for inviting me to be here with you this month and thanks to Emma for all her help and guidance. And and big thank you to all of you for looking at my projects and taking the time to write such lovely comments.
Best wishes and happy crafting!
Jennie x