Showing posts with label Crowning Glory. Show all posts

Saturday, 19 September 2015

Titbelsoeur, yes YOU can !

Hello everybody,
Still using sardine cans, this one is rectangular.


Some beads from earrings, an English bus lucky charm, and... stamped images :

on to tissue paper : clock from Time and Keys on Time
on to cardboard : lady from 20's Ladies Plate 4 on  Costume
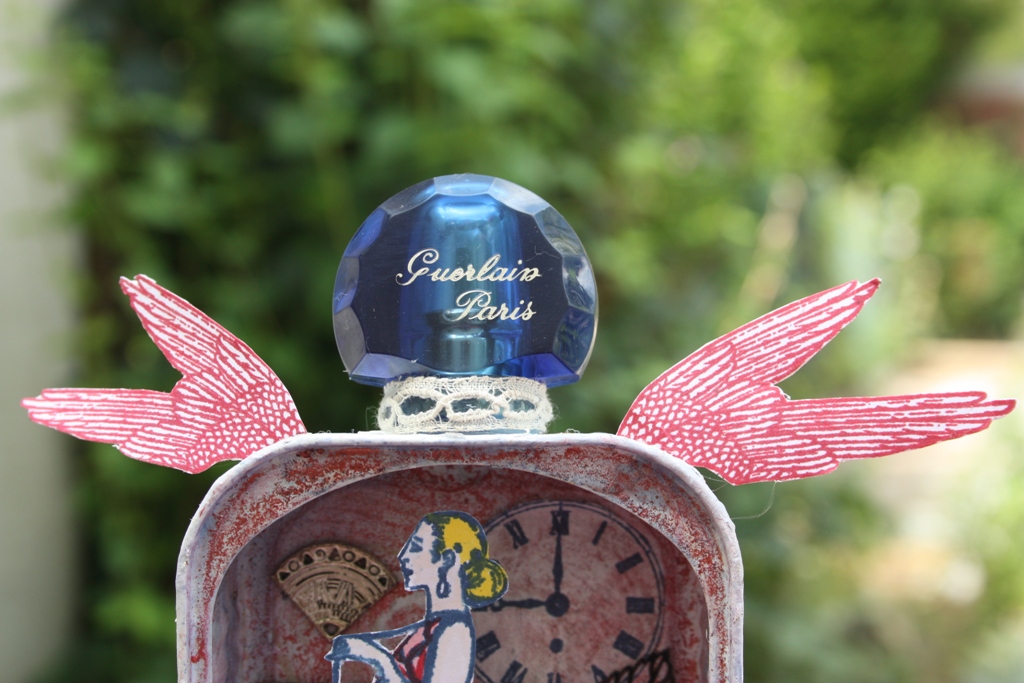


and on the top of the can, a perfume top, and  wings from Crowning Glory on Steampunk to meet the September Challenge.
And a light spot to sit the can :


And here it is !


Thanks so much for stopping by,
your comments are very much appreciated, 
here, on my blog, or on the Artistic Stamper's Facebook page.
I hope that my can did inspire you and that
you will participate in our September challenge
 to win some fabulous Artistic Stamper stamps.


Titbelsoeur

Monday, 7 September 2015

Titbelsoeur, yes she can !

Hello everybody !
Today, my project is to decorate a sardine can. I have collected some beads, shells and other stuff from my stash, I have painted the can with pink acrylics and stamped the clock and lady on to a tissue paper that I have then glued on the bottom of the can.


To have it stand, I have drilled 2 holes in the can and fixed a light bulb


and then glued two wings and a crown that I had stamped on a cardstock. And tadamm, here is my can :


Pink acrylic paint and Blue archival ink
Crown and Wings : Crowning glory from Steampunk
Clock : Tick tock from Time
Face : 20's Ladies Plate from Costume

Thanks so much for stopping by,
your comments are very much appreciated, 
here, on my blog, or on the Artistic Stamper's Facebook page.
I hope that my can did inspire you and that
you will participate in our September challenge
 to win some fabulous Artistic Stamper stamps.


Titbelsoeur

Monday, 3 November 2014

Phineas Pinchbeck

I loved the Phineas Pinchbeck stamp from the moment I saw it. For this
 project I used the following Artistic stamper stamps, Numerical plate, 
glory and Ephemera 1. Tim Holtz cargo stencil  & 
 photo and scattered straw.  


Firstly I painted grey board with fresco finish paints in stone, nougat,
and mushroom, through a honeycone stencil I put squid ink
paint that I then knocked back with nougat. 


I stamped the two sets of numbers off the Numerical 
plate in chocolate pudding.


The two stamps of the postal plate were stamped in claret
 and baltic blue. The ruler of the Ephemera plate was 
stamped in archival ink. 


Grunge paste was put through the cargo stencil numerical 
once dry this was coloured with 
geletoes and treasure gold. 


Gauze was coloured with claret fresco finish paint then darkened 
with black soot distress ink.


Card coloured with distress inks was stamped with the Phineas
 stamp and the crown from crowning glory which I 
then highlighted with liquid pearls.


The clock face x 2 from Phineas stamp was covered in crackle 
accents. this was layered up with the clock faces of the 
time and keys plate. I used a cog die that I had in
my stash.


The sign at the bottom was hand written with white gel pen on 
black card and then backed onto kraft card.


I then backed it onto burlap and black card and finished off with 
 four gold brads on all corners. Thank you for stopping by 
please feel free to leave your comments as your
comments help to inspire me.
Cheers Dee


Sunday, 13 January 2013

Happy Memories

Hello everyone, Astrid here with my first post for 2013. So let me start with wishing you all the most wonderful, happy and creative New Year!!
For my first post this month I decided to make a little tag book, that can be used to keep some happy memories of a journey or other special occasion.


These are the stamps and products I used:
Stamps:
Travelling Words
Labels
Postage No 1
Crowning Glory
Journaling Words 2
Ephemera 1
Tim Holtz Papillon
Other Products:
Distress Stains Variety of colours
Distress Inks in colours to match the stains
Claudine Hellmuth Multi Medium Matte
From my stash:
Smooth white paper
scrap book paper
Kraft Card
Dies
Flowers
Vintage Ephemera
Postage Stamps
Seam binding

The booklet is made up out of 5 different tags, each made in a very similar way:
1. Squeeze some Distress Stains onto your craft mat, include either some Picket Fence or a Metallic Stain as these are more opaque and give some "body" to your background.
2. Once you are happy add some further depth of colour by blending Distress Inks in matching colours over the stains.
3. Stamp a background stamp in a matching colour of Distress Inks. I used the Ephemera 1 stamp for each of mine.
4. Stamp some of the other label and postage stamps on white paper (I used matte photo paper), cut out and colour with distress inks.
5. Collage your cut out images, other ephemera and postage stamps onto your tags using the matte medium
Here are my 5 tags:


I kept the back of my tags quite plain, just covering them with scrapbook papers and creating a pocket here and there to keep notes and other bits and bobs picked up during travel.
One of the backs with a little pocket and journaling tag

Two further pockets made out of mini envelopes covered with paper and then coloured and stamped like the tags.

The covers were made in a very similar way.  I cut two pieces of vanilla coloured card, slightly larger than the tags, I then added some Kraft card between the stamped front and the scrapbook paper back. I used the Tim Holtz Papillon stamp as vocal image after creating my background like on the tags.
Front cover
Back Cover
 Here are some of the pages still after I bound them together:


Well, I hope you liked this project and sorry for all the many photos, but I hope you have enjoyed it and feel inspired to make something similar yourself. I love making little books like this, they are small enough to fit in a hand bag and great to keep memories of a journey!