Wednesday 28 February 2018

Neil Walker Butterfly Tag by Gemma

It's the end of February already the mornings are starting to get nice and bright here, which always makes me feel better and we have a new challenge starting on the blog soon I am looking forward to seeing all the entries. 

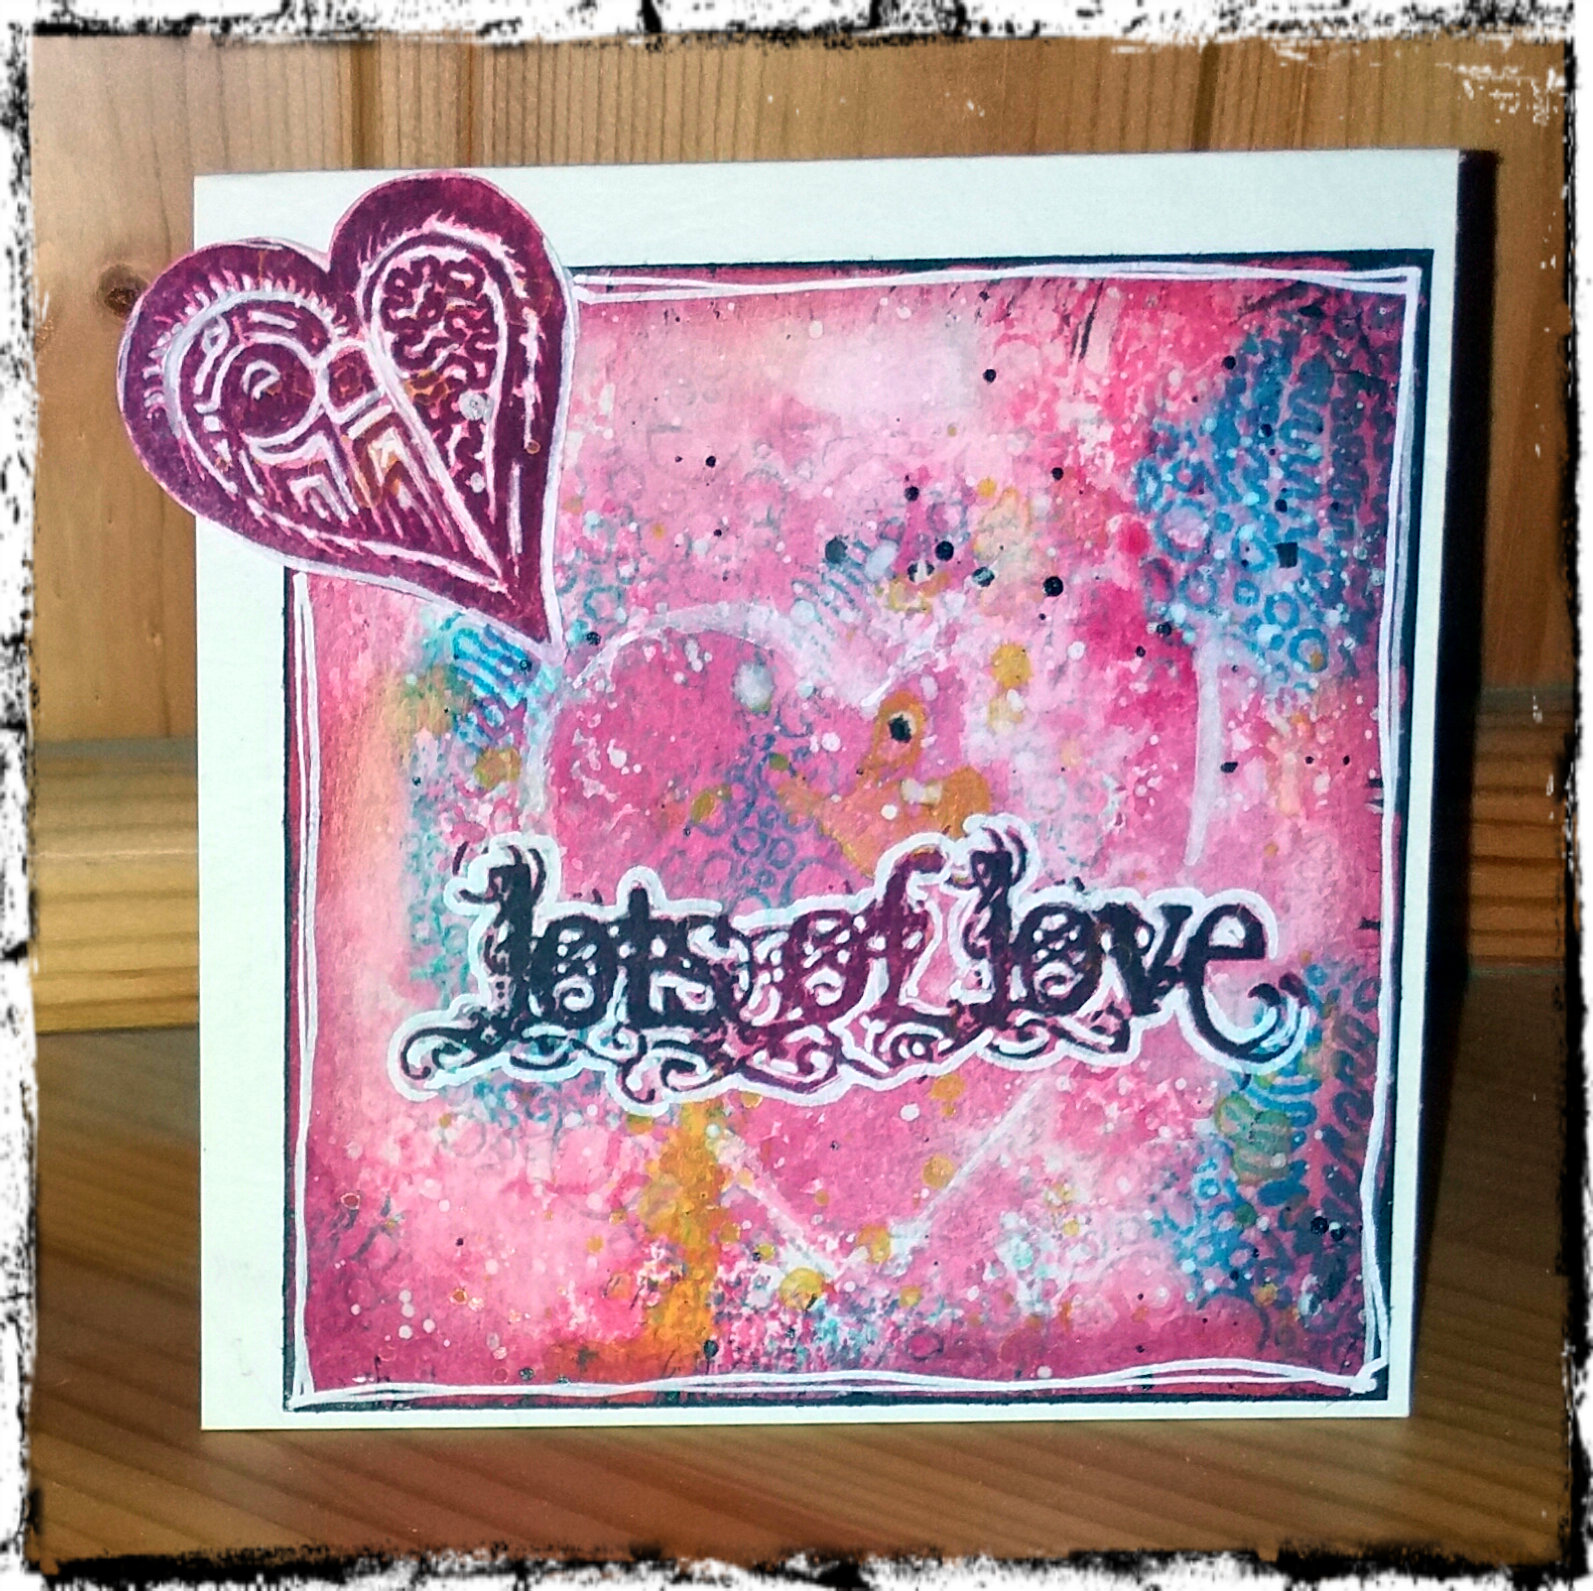
I have a tag to share with you all today created using Distress Inks, a mask, and stamps from The Artistic Stamper.  


 Steps


1- Apply a thick layer of gel medium through a stencil on one corner of the tag, this will take a while to dry.
2- Apply a thinner scrapping of gel medium through the same mask in a small area on the opposite corner of the tag.


3- Spread three colours of Distress ink onto a glass mat, spritz with water and push the tag into the ink, dry between layers, 
4- Use a brush to help apply ink over the thick gel medium and continue layering until happy with the result.
5- Using a wet wipe or damp cloth remove the ink from the gel medium.


6- Using one of the inks from the first layer apply more ink through the same mask in two or three areas.
7- Stamp over the top of the tag with one or two different background stamps for added interest.


8- Stamp a focal image in the bottom corner and the top of the tag using archival ink. I have used a butterfly stamp designed by Neil Walker, ensure the image is overhanging the tag. 
9- Wipe off any ink from the gel medium.


xx Gemma xx


Saturday 24 February 2018

Love Heart Heart with Lisa

Hi folks and welcome to my post for 
This month's theme is 'Red' and this week I went for a home deco project.


Here is my creation...


I had a rummage around my 'things to alter' box in my craft room and dug out a metal heart Christmas decoration.

I painted the heart with a good couple of coats of white gesso to give it some texture.Next, I added  crackle paint around the edges on the surface of the heart then painted it with acrylic paints.


I then stamped the Heart stamp from The Artistic Stamper directly on to the metal heart. 


To finish, I added some jute string to the top of the heart. 


Thanks for popping by to see my blog post today, please leave a comment if you like, I love to hear what you think.

Toodles for now,
Lisa xxx


Wednesday 21 February 2018

Big Red Flowerby Jane France

Hi Guys, JANE here again.  Well... I wonder how many of you had a nice Valentines Day!!!.. I got my usual bottle of champagne from my other half, I tell him not to get me flowers....I hate cut flowers, much prefer to see them growing in soil or a pot, anyway....I would much rather receive a bottle of bubbly, a bit of luxury now and then.....yummmm. 
We are still on with the "Roses are Red" challenge, so I was inspired to make this card using one of the huuuuuge flowers from the DOG ROSE A4 stencil. 


 I started by making a background using the GRID BACKGROUNDSEQUIN WASTE, and CALLIGRAPHY MAT 12 stamps, then spritzed with a few inks. I then  thickly applied some red paint through the large flower on one half of the A4 stencil, then heating it up with my heat gun til it bubbled to achieve some texture. The centre of the flower is done by using my newest addition to my craft stash... some pebeo vittrail and fantasy moon paints....oh my word...I'm in heaven playing with these beauts!!!. I then added a sentiment before matting and layering. 
There is still time to join in this fabulous challenge, so I look forward to seeing your own interpretations. 

Monday 19 February 2018

Love card by Titbelsoeur

Hello there,
Today I am sharing a card with you. I have made the background with the new fabulous square stamp Neil Walker Heart Square & Border
coloured with watercolours here and there to have a blurry heart. On top of it, I have stamped the hearts from the border with blue ink. Then added a few drops of black and white acrylic paint.
I stamped the sentiment from Grungy Greetings #1 with 3 different inks and highlighted it with a white pen.
As a final touch, I have added the Mini Heart © Neil Walker stamped on another paper.


My picture is not very good, sorry about that but we have had such an ugly weather these last weeks that I could not take it with sun light...

Do not forget that you can win these fabulous stamps, just participating in our challenge 

February's Creative Challenge - "Roses are Red"( use the colour Red)


 for 3 chances to win !

Thank you so much for stopping by.
Your comments are very much appreciated here, on my blog
Bye for now and happy creating. 

Titbelsoeur


Friday 16 February 2018

My Little Book of Love by Gemma

I have created a little accordion book to share with you all today. I love how cute and colourful it turned out with those little splashes of orange against the red, and it had so much space inside for little pictures and messages for the special person in my life. 


How to


1- Spread Distress Oxides on your craft mat and spray with water
2- Press a large sheet of cardstock into the ink puddles. Drying between layers keep going until the card is mostly covered and you are happy with the look.


3- Using the same colours stamp over the top with different stamps and stencils.


4- Add extra details by stamping over the top with black and white acrylic paints.


5- Cut the cardstock into strips and score them to create the valley and mountain folds, and glue them together.


6- Cut two pieces of kraft card for the front and back covers and ink the edges
7- Decorate the covers by cutting white card to fit the covers and inking them with Distress Oxides.


8- Stamp some hearts onto leftover bits from the large sheet of cardstock you created for the inside and cut them out
9- Stamp out some text on kraft card and then glue all the elements together, add some string for the closure.

Gemma


Tuesday 13 February 2018

Roses are Red Stencil Folder by Lesley


Hello everyone, are you an avid on-line shopper like me? I really hate to waste the cardboard packaging and have decided I need to recycle more, no not in the recycle bin but try to re-use what I can. Why buy folders when you can alter one.


Artistic Stamper Stamps used:
Decay Journal Plate #1
Ivy by Lesley Matthewson
Mini Backgrounds #1 and #2
Calligraphic Mat #4

Other Materials Used:
Red and Gold Acrylic Paint
Recycled card envelope packaging
White Gesso
Black embossing ink
Gold embossing ink
Black and Gold embossing powders

Step 1
I have re-used an A4 sized cardboard envelope I received in the post to make the stencil folder. The envelope opening was on the longest side so I stuck down the envelope flap on the inside, and cut a notched section on the other side to make it easier to access and remove the stencils. 


Step 2
I gave the envelope a quick coat of gesso on both sides taking the gesso about 2" deep inside the opening as this will show . The gesso provides a good base for the acrylic paints, it doesn't have to be perfect as there are more layers to come.


Step 3

Using a roller to spread the paint  I covered the envelope on both sides with layers of gold and red, as you can see white space is still showing through, the more patchy the colours the better. If you haven't got a roller try scraping paint on using and old credit or gift card.


Step 4
Using the roller  I spread white gesso on a gelli plate (or craft mat) , I could then tap the ivy, text and Decay Journal stamps into the white paint and stamp randomly over the folder. It is very important to take time to wash your stamps immediately after use to remove the paint before it dries, otherwise they could get damaged. 


Step 5
I then stamped and embossed in gold and black to add contrast.


To finish off I added stick-on cardboard letters from my stash to the front.


Finally my stencil folder was complete and ready to be filled.


A fun and easy project that is great for decorating manila folders, box files,  recycled boxes, envelopes, packaging etc.  Why not co-ordinate all your office/craft folders. Go on give it a try, have fun!

Saturday 10 February 2018

Roses are Red with Lisa

Hi folks, Lisa here and welcome to my post for The Artistic Stamper. This weeks theme is "Roses are Red" as of course, Valentine's Day is around the corner.

Personally, I am not a lover of the commercial aspect of Valentine's Day. I prefer a nice card with some heartfelt handwritten words rather than a typical bunch of dwindling red roses. (I've never been a follower of tradition...) 

So, for this project I used the Neil Walker Heart stamp and the Mini Backgrounds #1 set 


Here is my creation...


I took a piece of card and coloured it with Distress Oxide Inks - Candied Apple, Abandoned Coral and Fired Brick then stamped the Heart stamp using Oxide Black Soot multiple times over the card. 

I then fussy cut all the hearts out and added some 3D foam just down the centre on the back of the hearts. 


I stamped the dots from the Mini Background #1 set on to white card and cut out two leaf shapes and a stem shape. I crumpled the leaf shapes to give them a more realistic look. 


I took a piece of 7" x 7" white card and inked the edges with Candied Apple Oxide ink. I adhered the stem and the leaves to the card. Then adhered the hearts on top of each other, layering them to give the look of petals.


For the sentiment, I used the Decay Alphabet - lower case stamp set and stamped 'For You' on a separate piece of card in Black Soot Oxide ink and inked the edges with Candied Apple and Fired Brick Oxide ink


Thanks for popping by, leave a comment if you wish, I love to hear your thoughts.

Toodles for now,
Lisa xxx


Here are the stamps I used on my creation which are available from The Artistic Stamper website.

Wednesday 7 February 2018

Red Hearts Tag by Titbelsoeur


Hello happy stampers !
To meet our challenge theme, and to use our new fabulous stamps Neil Walker Heart Square & Border
I have made this tag. The border is stamped with blue, yellow and red inks, then edges are distressed. And the Framed Words #1 are stamped and embossed.


Do not forget that you can win these fabulous stamps, just participating in our challenge 

February's Creative Challenge - "Roses are Red"( use the colour Red)


 for 3 chances to win !

Thank you so much for stopping by.
Your comments are very much appreciated here, on my blog
Bye for now and happy creating. 

Titbelsoeur

Sunday 4 February 2018

The Year Of The Woman

Hi Guys!!, Well my card for today is so simple but....crikey!!!... whoever said that  clean and simple cards are hard to do...were spot on!!!.... a week of thinking....twenty minutes of doing!!!


I kinda like it, but had to do several attempts before I was happy, I kept on throwing more things on it but it took your eye away from the fabulous woman stamp...taken from the NUDES stamp set, this is a fabulous set of stamps and includes the words too. 
The Challenge for this month is "RED", interpreting  it any way you choose, to join in just download your works of art HERE.. I look forward to seeing your makes.

Friday 2 February 2018

Winner of January's Creative Challenge

Welcome to my post where I get the pleasure of announcing last month's winner of our Creative Challenge.
Thank you to everyone who joined in. Always lovely to see such diverse creations when we do an Anything Goes.
The winner this month is
with this lovely card.

Congratulations, and please email me so we can arrange your prize.

Don't forget our new challenge is now up for looking, and the Team have done a marvellously creative job with The Colour Red....
 Have a very creative month
Jennie x

Thursday 1 February 2018

February's Creative Challenge - "Roses are Red"( use the colour Red)

Hi!
 A Big thank you to everyone who joined in last month's challenge.Everyone's challenge pieces were amazing.
February's challenge is Roses are Red ( using the colour red)  , and can be interpreted any way you like, as long as it has rubber stamping in it.
 

To join in with this challenge (we are limiting the challenge entries to 3 per person), is simple; all we would like you to do is, make a piece of artwork, making sure that you include the theme and some rubber stamping. Pop back here to link up using the Inklinkz at the bottom of this post, so that we can see what you've made and then, leave us a comment to let us know you have joined in with the challenge.
 As always, there will be candy for one randomly picked entrant - the winner will receive a stamp of their choice from The Artistic Stamper .
In addition, you can enter the same challenge on Facebook!
To join us on just go to our new Facebook group, and send us a request to join..  There will be a prize for the Facebook challenge, as well as the blog challenge!
And don't forget....if you use The Artistic Stamper stamps on your entry, you will entered into the draw, twice! To get you started here are creations from some of the team...

Angie Coomber
For this card I used kraft card which I decorated with a paper doily, Graphic 45 paper, the Artistic Stamper Heart Background and the Artistic Stamper postcard stamp. I also used distress inks as well as embossing powder around the edges, and ribbon and crystals for the finishing touches.


Titbelsoeur


To make this card, I have stamped this very new Neil Walker Heart Square & Border with Archival ink, then painted it with watercolours. Then I used this basic watercolour technique, in French we say "ouvrir les blancs", meaning you pass your wet paintbrush in the circles and wipe with a paper towel.
And I have embossed the words "with love" from Grungy Greetings #2


To make my flowers I decorated a sheet of A3 card. I started my layering different colours of Distress Oxides onto the card. Once those layers were dry I continued adding layers with stamps and a stencil from The Artistic Stamper ( Harlequin Background stamp, Calligraphy Mat 15Harlequin mask ) before dies cutting lots of petals and gluing and shaping them to form flowers.  Please pop along to my blog for more details.


Lisa Winnard


I cut a piece of 350gsm white card to 7" x 7" and used Distress Oxide Inks - Candied Apple, Abandoned Coral and Fired Brick to ink the background. I applied the inks with ink blending brushes to have a nice covered area of colour. I then went around the edges with Black Soot Distress Oxide ink. I used the Mini Background #1 stamp set with the 3 colours of red Distress Oxide to add some patterns to the background. I tore 3 squares from the white card just bigger than the heart stamp, then inked the the same way as the background. I then stamped the heart on to the three torn squares using black VersaFine ink and adhered them to the background. I used the Decay Alphabet - lower case to stamp the words directly on to the background. To finish, I mounted the card on to a piece of 7.5" x 7.5" black card.


We hope that you will join in this month's challenge, and also join us on Facebook too.

We look forward to seeing your creations. Don't forget to add a comment when you have posted your entry.

Have a very creative  month

Jennie xx