Showing posts with label Tag. Show all posts

Monday, 19 October 2020

Travel tag by Titbelsoeur

 Hello there, Titbelsoeur with you today.

This is a tag I have made with corrugated cardboard painted with Gesso and blue acrylic paint. I glued on it a piece of monoprinted paper I had stamped a clock on. And I stamped, water-coloured and cut out the Beetle from the plate I designed, and sticked it with 3D sticks. I also cut out the word "memories"


The stamps I used come from the following plates :

Travel © Tit Belsoeur

Time and Keys

Framed Words

Thank you so much for visiting, I hope I have given you some inspiration to 
participate in our 
Happy creating and thank you for your comments,

Titbelsoeur


Saturday, 7 March 2020

Steampunk tag by Titbelsoeur

Hi this is Titbelsoeur today.
A big tag to give you inspiration for our Steampunk challenge.


I have used a big tag and glued old papers on it. Stamped it with Gears Background and the rule from the Ephemera 1 plate. Used a cloth tag, an old photo and ancient poststamp and frame.

Here is a snapshot on the steampunk butterfly from Butterflies 2 , body made with a safety pin painted in black and wire as antennas :


Steampunk épisode 2

The 2 tags of last week's post have found their place on this big one :

Steampunk épisode 2

Hope it gives you inspiration to participate in our 
for 3 chances to win some of these fabulous
Artistic Samper stamps !
AND
 an opportunity to join our Creative Team for a month, and get to use The Artistic Stamper stamps, and be posted on this blog, and on social media.

Thank you so much for stopping by.
You may visit my folder : 
I will be happy to read your comments about it !
Your comments are very much appreciated here, on my blog
Bye for now and happy creating. 
Titbelsoeur

Wednesday, 19 February 2020

Watercolour paint recycled to tags by Titbelsoeur

Hi there !
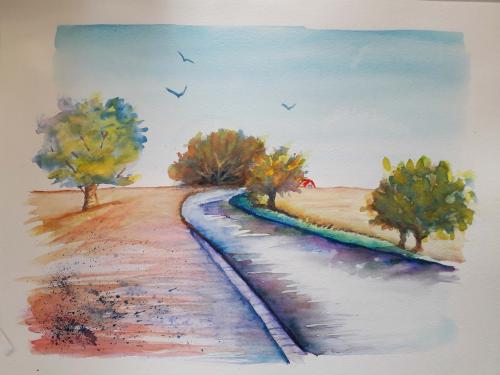
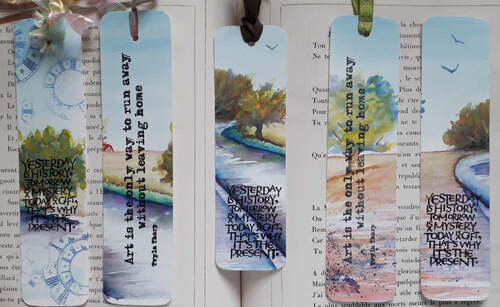
Let me show you how I repurpose some watercolour paints that I don't really like.


I cut 5 cm large tags from it, stamp each one with words to meet our February challenge, and tadammm :


Here they are !

The stamps I used come from the following plates :

Journaling Words 3 

Quotes & Sayings 1 by Debs Smith


Hope it gives you inspiration to participate in our 

for 3 chances to win some of these fabulous
Artistic Samper stamps !
AND
 an opportunity to join our Creative Team for a month, and get to use The Artistic Stamper stamps, and be posted on this blog, and on social media.

Thank you so much for stopping by.
You may visit my folder : 
I will be happy to read your comments about it !
Your comments are very much appreciated here, on my blog
Bye for now and happy creating. 
Titbelsoeur

Tuesday, 7 May 2019

Recycling labels by Titbelsoeur

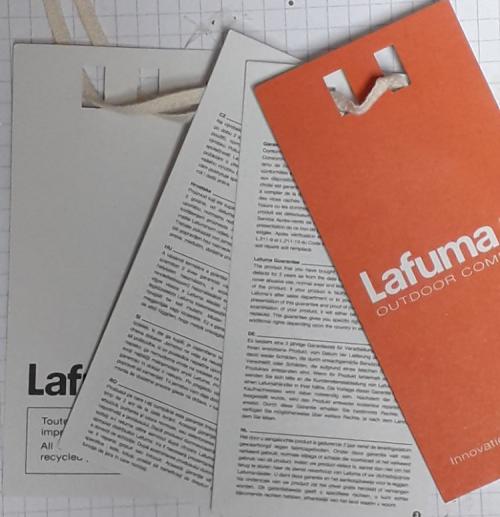
How to make tags with cloth labels ?
Take a sets of labels :


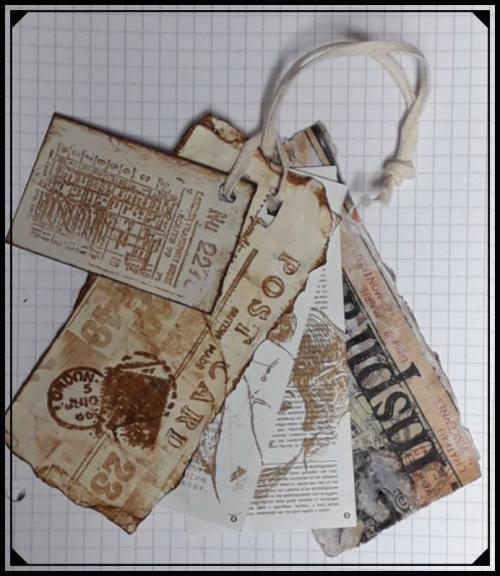
Split them up, take the book-like printed ones and stamp Gibson girls on them, not much, for a simple vintage look :


On the other labels, just stick paper like a piece of a notebook page or an old map, distress them with Vintage Photo Distress ink or walnut stain, and stamp some vintage stamps on them :


then gather all of them again with the original string, and here it is :


I hope my flag gives you inspiration to participate in our 

for 3 chances to win some of these fabulous Artistic Samper stamps !
Thank you so much for stopping by.
Your comments are very much appreciated here, on my blog
Bye for now and happy creating. 
Titbelsoeur


Tuesday, 19 March 2019

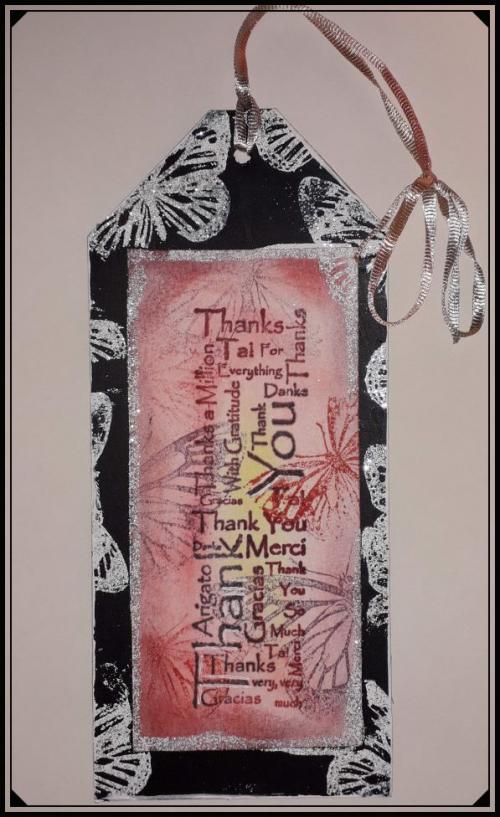
Thank you tag by Titbelsoeur

Hello there, I want to show you today a Thank-You tag I have made for a friend of mine who reads a lot of books. I have first stamped this beautiful Butterfly from Butterflies 2 size A5 on the piece of paper I had first coloured in pink with Distress ink. Then I stamped Artifacts - Thank you Text with various Archival inks. When I have sticked the paper to the tag, I have embossed the Butterfly on the edges.


I hope my tag gives you inspiration to participate in our 


for 3 chances to win Artistic Samper stamps !
Thank you so much for stopping by.
Your comments are very much appreciated here, on my blog
Bye for now and happy creating. 
Titbelsoeur

Wednesday, 29 August 2018

Heart Tags by Gemma


I have a set of tags to share with you all today, decorated with circles, hearts, and doodles.


STEPS


I started off by applying Distress Inks and Oxides to some pre-made small tags.


I stamped over the tag with a script stamp and a small squiggly stamp for texture.


I stamped over the top with different sized circles and swirls. I made sure to overlap the circles and to stamp some of the images off the side of the tags.


I then stamped and coloured a few hearts with Distress Ink, before gluing them to the tags and adding extra interest with black and white pens.

xx Gemma xx


Sunday, 29 April 2018

Busy Bee Tag by Gemma

Hello

I have a tag to share with you all today, I made this tag using Artistic Stamper stamps, PaperArtsy paints, and chipboard.


My Process


Thank you
Gemma

Wednesday, 7 February 2018

Red Hearts Tag by Titbelsoeur


Hello happy stampers !
To meet our challenge theme, and to use our new fabulous stamps Neil Walker Heart Square & Border
I have made this tag. The border is stamped with blue, yellow and red inks, then edges are distressed. And the Framed Words #1 are stamped and embossed.


Do not forget that you can win these fabulous stamps, just participating in our challenge 

February's Creative Challenge - "Roses are Red"( use the colour Red)


 for 3 chances to win !

Thank you so much for stopping by.
Your comments are very much appreciated here, on my blog
Bye for now and happy creating. 

Titbelsoeur

Sunday, 16 July 2017

Hearts Tag by Gemma


 Sharing a fun and messy tag today that I made with a piece of black card cut to shape, lots of black and white paint and a mixture of stamps and masks. 
There is still plenty of time to check out this month challenge here on the blog andFacebookbook for a chance to win.


 Step by Step

- Drag black and white acrylic paint over a sheet of cardstock using an old store card or palette knife. Make sure to overlap the black and white paint in areas to mix different shades of gray.
- Before it completely dries (here is the messy part) take some different stamps and/or masks and randomly stamp over the top. You want this to be fairly busy as it will be ripped into small sections.


- Cut a tag measuring 9 x 21 cm from black cardstock, also cut some of the painted cardstock down to the rough size and shape needed to fit the tag.
- Stamp two of Neil Walkers Mini Hearts and the word imagine from the framed words set onto white card and cut then out.


- Stamp onto the tag with white ink and a calligraphy mat, edge the tag with the same ink and scrape some black paint over the top through a mask for added interest.
- Rip around all the edges of the painted pieces of card and lay them onto of the tag. Change the sizes until you are pleased and add more black or white paint in places to make your layers stand out from each other. 
- Glue everything into place adding the hearts and text last.


Thanks for reading
Gemma