Monday, 10 February 2014

One day I'll fly away...

Hello everyone, Alison (butterfly) here with some journalling pages created in a small hardback book.  (Remember you can always click on a photo for a close-up.)


If you've come from my Words and Pictures sneak peek, you'll already know it's not a happy love story being told here.  If you're all loved up for Valentine's Day, you might want to skip it!  I might as well issue a long post warning too while I'm at it.  Cups of tea (or maybe shots of whisky) at the ready...


I've used stamps from the Birds of a Feather plate to express the need of this woman to break out of the relationship which is keeping her caged up.


All she wants is to be set free, to be allowed to fly high and alone.


There are little hearts all around the page, but if you look closely you'll see that many are actually slightly broken, cracked hearts (a touch of Crackle Accents over the Grunge Paste).


And although the cage is a beautiful one it's still a prison...


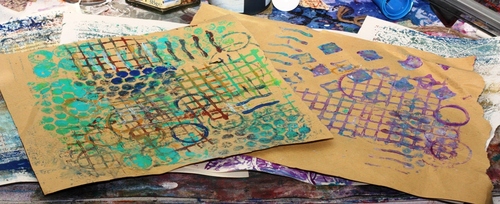
I started with some torn strips torn from the Tim Holtz Kraft Resist Paper Stash, stuck down with medium.


I started playing with the elements I wanted to include, the stamped and fussy cut bird and cage, and the little vintage photo.


Next I swept some paint over them, working from the spine outwards.  I used Grunge Paste to add the tiny hearts through a stencil, and finally added some splatters of Espresso Color Wash.


But I wanted some blue to add a melancholy feel - so I dabbled and spritzed Stormy Sky Distress Stain across the pages.


I added some extra stamping - the words from Katy Fox's Carte Postale set and some postmarks from the same set.


And having worked out the positions with the fussy cut versions, I now stamped the birds direct to the page using Sepia Archival ink.


I outlined some of the hearts with a PITT pen, and later added Crackle Accents to those ones.


Some Vintage Photo Distress Ink swiped over the whole page warms the tone of the papers again and highlights textures, including the little hearts.


I just had to use my new Spring Greenery die to add the ivy trailing across the pages - I hope it will be amongst Jennie's new CHA stock soon!  It's cut from Kraft Core in the 12 x 2.5 inch size - exactly right for cutting Decorative Strip Dies.


I sanded it and then inked over with Stormy Sky and Vintage Photo Distress Stains to give it the weathered look.


And I added one of the Idea-ology Compass Coins, dabbed with Stormy Sky... which way will she go once she is free?


Both she and the bird cage are layered over some torn book pages, edged with Distress Ink.


And the little bird has had a touch of penwork just to bring him into focus.


And the final touch was to add a couple of woodcut meadow grasses, inked with Stormy Sky Distress Stain... no more wandering in the meadows with her lover for this woman.


These mementos will now lie, forgotten, between the pages of a book.


So there are my pages for you - a walk on the darker side of love in the run-up to Valentine's Day.


What can I say?  Not everyone enjoys the 14th February...


Thank you so much for stopping by.  Come and play along with our February challenge - all you have to do is Use Distress.  But you don't have to be distressed to do it, and I wish those that celebrate it a very happy Valentine's Day!


The only whole heart is a broken one, because it lets the light in.
David J. Wolpe

Ingredients used:
Artistic Stamper stamps: Birds of a Feather, Carte Postale
Idea-ology Compass Coins
Idea-ology Kraft Resist Paper Stash
Core-dinations 12 x 2.5
Grunge Paste
DecoArt paint: Titanium White
Fresco paint: Stone
Distress Stains: Stormy Sky, Vintage Photo
Distress Inks: Gathered Twigs, Vintage Photo
Adirondack Color Wash Spray: Espresso
Archival Inks: Sepia, Coffee
Crackle Accents
PITT pens

Saturday, 8 February 2014

Baroque Memories by Alison (Craftytrog)

Hello Stampers! I have some vintage-style hanging art to share with you today.
First I die-cut my base from mountboard, using the Sizzix Alterations Baroque die.
I inked it with Vintage Photo Distress, then stamped the Regency Background with the same ink. I inked the edges with Black Soot Distress.
I used Potting Soil Archival Ink to stamp the watch from the Time & Keys plate, & Jet Black Archival Ink to stamp the mini Gibson Girl, both onto glossy card. I cut them out & used Glossy Accents to adhere them to the base, together with lace, a red ribbon bow & a pearl drop. I inked & added a Chit Chat Sticker.
To finish, I added some eyelets to the top, & a piece of  Lace Chain.
Thanks for visiting,
Alison xxx

Thursday, 6 February 2014

Hugs and Kisses by Titbelsoeur

Hi there, this is Titbelsoeur today showing you my last card... not really classic, should I say !


You know now how I hate to do things a classic way ! another proof of it today !
I started with a light coat of gesso on the cart, then I added a thicker coat through magic mesh (sort of), let it dry and then sprayed Distress ink here and there. 


After that, I stamped the table from Numerical plate size A5© Katy Fox and added black paint on a bottle cap and a credit card.


And then I stamped the words HUGS and KISSES from the Grungy Greetings #1 plate on a sheet of kraft paper I had wiped my home made stamps on to the day I tested a home-made gelli plate :

And to finalize the whole thing, I underlined the words with a white pen.


I would be very happy if my card does inspire you, 
thank you so much for stopping by, 
I am looking forward to reading your comments !

A tout bientôt,


Tuesday, 4 February 2014

Winner of January's Challenge

Hi!  I am back again with the winner of January's Challenge which was Love is in The Air! We had an amazing number of entries, and of course they were all so creative. I can never choose, so Mr Random.org came into play and he chose no #45

 with this fabulous card :)


Congratulations and please email me so we can arrange your prize.

A BIG thank you to everyone who joined in, and this month's challenge is
 Use Distress, which is a great challenge and has so many possibilities. We would love to see your entry!

Have a very creative day
{hugs}
Jennie

Sunday, 2 February 2014

Whispering Woods by Laura Bomber

Hi everyone!

I am so thrilled and very proud to be invited to be Guest Designer here at The Artistic Stamper - Thank you so much, it is a huge honour! I spent ages trying to decide what to make and several times the projects evolved, but that is all part of the creative journey and definitely a major part of the fun!
 
My first creation I am bringing you today started out as just some packaging - plain corrugated cardboard. I now save every piece of cardboard intending to turn it into something. Torn cardboard packaging might be a very humble beginning - but it can turn into a very beautiful creation.

 I wanted to create a very earthy, grungy creation and started by tearing the corrugated cardboard and leaving some of the edges looking very torn and ragged.

 I dry brushed Gesso all over the cardboard and then began to just randomly spray Adirondack Colour wash over it using the Butterscotch and Espresso colours. After drying the spray I began to dab the cardboard with Walnut Stain Distress ink.

The Adirondack spray gave a lovely textured effect and the result was very much looking like rotted wood - sounds disgusting- doesn't it? - but it was a really lovely organic looking canvas - which is just what I wanted.

Here you can see the wonderful speckled effect created by the ink sprays
The base of the hanging was randomly stamped with the Calligraphic mat in Potting Soil Archival ink
 
I made three panels as decoration for the hanging .One was stamped with butterflies using Coffee Archival ink. The images were then masked before being stamped with a script stamp. I blended some Distress inks over the stamped image - Brushed Corduroy, Walnut Stain and Vintage Photo. I then dabbed some embossing ink over the panel, covered it with UTEE and melted it to resemble glass.
After a second layer of UTEE I put it in the freezer for about 5 minutes. After this it was much easier to bend and snap. I then dabbed it with some Walnut Stain Distress ink to highlight the cracks.
 This panel was wrapped in twine which was then tied into a bow

The other two panels were covered in Gesso and then dabbed with Distress inks like the base.

Waxed Kraft paper was ripped into strips and used on the panels
The butterfly quote was stamped with Coffee Archival ink and edged with Walnut Stain Distress ink. I purposely caught the edges of the stamp with the archival ink to give a more vivid edged effect.
The Tim Holtz Bookplate was used with a chitchat sticker attached to a piece of card covered in Gathered Twigs Distress Ink
This panel was covered with a calligraphic script in Potting Soil Archival ink

This panel was stamped with one of the Insect and Butterflies stamps in Potting Soil Archival ink and the calligraphic stamp was used around this image.
Burlap sheets and trimmings were used to decorate the hanging, along with crochet lace that had been dabbed with Vintage Photo Distress ink
 
Several paper flowers were soaked with watered down Distress Stain in Frayed Burlap and Vintage Photo.
Tim Holtz Hinge fasteners were used at the top of the panel and twine was tied around then so that it could be hung up.

 
Thank you so much for being here to see my first guest design creation - I loved making this and I do hope you like it! I'll be back later this month to share with you some more creations - I do hope you will come back to see them.

Happy Crafting!
Laura xxxx

Artistic Stamper stamps:
Calligraphic Mat 6
Butterfly words
Insects and Butterflies No.1

Other items used:
Distress Stains - Frayed Burlap and Vintage Photo
Distress Inks - Gathered Twigs, Vintage Photo, Brushed Corduroy and Walnut Stain
Adirondack Colour Wash - Butterscotch and Espresso
Archival Inks - Coffee and Potting Soil
Claudine Hellmuth Studio - Gesso
Tim Holtz - Hinge fasteners

Saturday, 1 February 2014

February 2014 Challenge- Use Distress

Hi to all of our blog readers

We do have to say a BIG thank you to everyone who joined in January's challenge, and I will be announcing the winner later in the month.
This month, we have another very talented guest joining us at The Artistic Stamper, Laura Bomber and you can see the first of Laura's  posts tomorrow.

Our new challenge for February is USE DISTRESS
 The whole team are really looking forward to seeing all your fabulous artwork and stamped projects that you submit in relation to this theme. To join in with this challenge (and you can join in as many times as you want), is simple; all we would like you to do is, make a piece of artwork, making sure that you include the theme and some rubberstamping. Pop back here to link up using the Froggy at the bottom of this post, so that we can see what you've made and then, leave us a comment to let us know you have joined in with the challenge. As always, there will be candy for one randomly picked entrant - the winner will receive £15 worth of The Artistic Stamper stamps of your choice. And don't forget....if you use Artistic Stamper stamps on your entry, you will entered into the draw, twice!!!!

To get you in the mood  here are some gorgeous makes from myself and Astrid.

Astrid
 For this challenge I decided to make a so called ATB (Artist Trading Block). There has been a lot of buzz about these and there is now even a die available from Sizzix to cut them. Really they are cubes, giving you 6 sides to have fun with, and for this challenge I used lots of Distress products of course. As the die is not yet available in the UK, I just cut my own. I will post instructions of how to do this on my own blog in a few days time. Meanwhile, here you can see some of it:


I used Distress Stains, Distress Inks, lots of lovely Ideaology Findings and of course stamps: Chicken wire background, Calligraphic Mat 12 and Winged Wheel

Jennie
I have altered a mini board book with Distress paints to use as a mini journal. I put lots of Distress paint on the cover and sprayed it with water to get it to smoosh around.


Allow it to dry thoroughly or heat dry. I love the Distress paints as they will cover a multitude of sins, and are very opaque. Perfect for covering up. I used some of Tim's rub-ons to add detail, and used The Artistic Stamper Masks with paint too. Add the paint to a blending tool foam to get more accuracy when using a mask. Stamp the journaling stamp with Archival in various colours.


This little book is perfect for when you have the need to spend a little time journaling :)
I used Distress paints, The Artistic Stamper masks, Journaling Words #5, Archival Inks, Idea-ology Rub-ons, and chitchat stickers


We hope you will join in this month's challenge and look forward to seeing you creations. Don't forget to add a comment when you have posted your entry.
Have a very creative month
{hugs}
Jennie