Showing posts with label Numerical plate. Show all posts

Saturday, 4 April 2015

A Vintage Motor

Hi everyone hope you are all well!  & enjoying the Easter weekend. 
I have a vintage piece for you today. 


I started with swiping distress paint vintage photo, gathered twigs 
& walnut stain onto a craft mat and sprayed with
water from a mini mister.


I swiped my card through and paint and sprayed with the mini mister as I dried
it so the paints blended together. I sealed it all with a matt 
medium.


I inked up the Debbie Cotton car stamp Earls Automotive with 
Black onyx versafine & clear embossed it. Next I painted 
the entire card bar the car with cream acrylic paint.


I used blended distress inks in the following colours vintage photo,
walnut stain & scattered straw to colour spare card stock. 


Onto this I stamped images from the following stamps winged wheel &
 numerical plate. The numbers were stamped in 
archival ink cornflower blue.


The clock was an old one I had done previously from the 
Time & keys plate that had been covered in glossy 
accents and a curtain ring was attached.


I used ripped pages & glued them to the main image. I used two die cuts
which I stamped with the ruler stamp of the Empemera plate 
and I used this to frame the project.


I backed it all onto ripped cardboard that I had swiped walnut stain
paint. Please let me know what you think.
Cheers Dee x

Products used
  1. Distress paints Walnut Stain, Gathered Twigs & Vintage Photo
  2. Distress ink in Scattered Straw, Vintage Photo & Walnut Stain.
  3. Inks:- Black Oynx Versafine, Cornflower Blue & Black Archival.
  4. Artistic Stamper Stamps:- Debbie Cottons Earls Automotive, Numerical plate, winged wheel, ephemera & time & Keys.
  5. Rangers Glossy Accents. 


Monday, 3 November 2014

Phineas Pinchbeck

I loved the Phineas Pinchbeck stamp from the moment I saw it. For this
 project I used the following Artistic stamper stamps, Numerical plate, 
glory and Ephemera 1. Tim Holtz cargo stencil  & 
 photo and scattered straw.  


Firstly I painted grey board with fresco finish paints in stone, nougat,
and mushroom, through a honeycone stencil I put squid ink
paint that I then knocked back with nougat. 


I stamped the two sets of numbers off the Numerical 
plate in chocolate pudding.


The two stamps of the postal plate were stamped in claret
 and baltic blue. The ruler of the Ephemera plate was 
stamped in archival ink. 


Grunge paste was put through the cargo stencil numerical 
once dry this was coloured with 
geletoes and treasure gold. 


Gauze was coloured with claret fresco finish paint then darkened 
with black soot distress ink.


Card coloured with distress inks was stamped with the Phineas
 stamp and the crown from crowning glory which I 
then highlighted with liquid pearls.


The clock face x 2 from Phineas stamp was covered in crackle 
accents. this was layered up with the clock faces of the 
time and keys plate. I used a cog die that I had in
my stash.


The sign at the bottom was hand written with white gel pen on 
black card and then backed onto kraft card.


I then backed it onto burlap and black card and finished off with 
 four gold brads on all corners. Thank you for stopping by 
please feel free to leave your comments as your
comments help to inspire me.
Cheers Dee


Monday, 6 October 2014

Guess what...

... the background of my card is made of...


Actually, Jennibellie showed us the technique on her forum, and I had a try (just like I try all weird techniques I view !). You just want to take 4 or 5 kitchen roll used sheets, glue 2 of them together, then another one on top of it and one or 2 again. The glue must completely wet the towels, thus you either want to use your home-made glue (with rice or flour), or add the same volume of water to your glue and mix.
Once dry, here are your sheets, all different and unique :


Now you want to stamp on the sheets :
Handstamped 


Encyclopaedia Botanica Size A5 © Katy Fox  
 outlined with white pen to highlight the stamped images


Encyclopaedia Botanica Size A5 © Katy Fox  


And then I stamped the
Grungy Greetings #1 
on to a watercolor paper


 And Grungy Greetings #1   on to school book pages I glued on the inside of the card for the sender to write down some sentiment !

Please let me know whether this technique did interest you, I am looking forward to reading from you ! And don't forget to participate in the Artistic Stamper monthly challenge... talking about memories !
See you !

Wednesday, 10 September 2014

Measured Time.


Hi Everyone Dee here again with my passion clocks, this is actually 
a two piece blog as it started out as a tag and I wasn't 
happy with it but loved the colours, So it developed
 into two pieces. So here it is
 Part 1


I love paint splats and had seen a lovely tag that just had paint or ink 
splats on it & was very effective. So I started by flicking 
water colour paint across the tag.


I wasn't happy with this so I got my distress inks out and blended 
spiced marmalade and broken china across the tag.


I stamped the numbers from the Numerical plate in fired brick distress ink,
down one side and at the bottom of the Tag. 


I stamped the Tape measure from the Ephemera Plate down the bottom in 
black versa fine and clear embossed, I also stamped it on the opposite
 side to the numbers and gold embossed it. 


The centre was stamped with the Clock of the Tick Tock plate and 
gold embossed. I stamped the graph  paper stamp in dove grey 
so it only hinted that it was there.


Texture crackle paste was put through the Artistic stamper mask The large
splat & swirl at the top and the bottle top at the bottom.
I then cut the top third of the Tag off.


On scrap card coloured with distress inks I stamped clocks from
The Time and keys plate also the tick tock 
plate I cut them out.


I then layered the clocks and embossed some of the edges with
gold and placed others on top.


I placed glass embellishments on them, along with cogs
and I also used distress crackle paint rock candy
on one of the faces. of coarse a little bit
of gilding wax, to highlight.


I backed it all onto black card. I hope you like this piece 
and come back to view part two. Please feel free to 
let me know what you think.
Cheers Dee x


Thursday, 6 February 2014

Hugs and Kisses by Titbelsoeur

Hi there, this is Titbelsoeur today showing you my last card... not really classic, should I say !


You know now how I hate to do things a classic way ! another proof of it today !
I started with a light coat of gesso on the cart, then I added a thicker coat through magic mesh (sort of), let it dry and then sprayed Distress ink here and there. 


After that, I stamped the table from Numerical plate size A5© Katy Fox and added black paint on a bottle cap and a credit card.


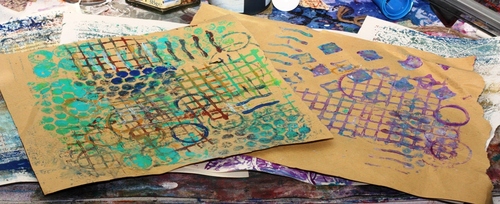
And then I stamped the words HUGS and KISSES from the Grungy Greetings #1 plate on a sheet of kraft paper I had wiped my home made stamps on to the day I tested a home-made gelli plate :

And to finalize the whole thing, I underlined the words with a white pen.


I would be very happy if my card does inspire you, 
thank you so much for stopping by, 
I am looking forward to reading your comments !

A tout bientôt,


Monday, 6 January 2014

2014 first resolution !

Bonne année tout le monde !! 

I am glad to "open" the 2014 Artistic Stamper creative year with an interpretation of my first resolution (that may be the only one this year, by the way, so that I am sure I will stick to it anyways ;-) which is stamp, stamp, stamp !
To illustrate this resolution, I have used a Ranger kraft tag as a support and I glued some scrapped papers here and there (book/phone book pages), then sprayed ink on 2 Artistic stamper's masks :  Chevron Mask and Large Sequin Waste Mask to have a colored background.
Then I started stamping... on the background, on a book page, on a cloth label... everywhere I could stamp !!
I hope this first make of the year will tempt you to stamp again and again all over the year !
 

Here are the stamps I have used :
Katy Fox's Handstamped size , Numerical plate and  Messy Art 
Sioux Jenney's dancers 
Journaling Words #5 
Time and Keys 

Thanks for being here, I am looking forward to reading your comments !
Happy stamping !
A tout bientôt !

Sunday, 8 December 2013

I feel it in my fingers, I feel it in my toooooes....

Christmas is all around me, and so the feeling groooooows....

This is Titbelsoeur today, showing you 2 Christmas cards.

I made the first one with paint on the gessoed background, and on the Numerical stamp. I stamped my home-made gate stamp with gesso and the snowflakes and Merry Christmas stamps with archival ink. Then I highlighted the words with a white pen.


I made this one on a gessoed background, again, but used alcohol inks. Mixed them and let dry. The next day, I let white paint run down from the top, then inked the pines and snowflakes with paint as well. Stamped the Seasons greetings with archival ink on a phone book page and highlighted the letters with a marker pen.

I hope my cards will inspire you and I am looking forward to reading your comments !
Thank you for visiting, à tout bientôt !

Friday, 8 November 2013

Door hanger by Titbelsoeur

Hello there ! this is Titbelsoeur today showing you my very last door hanger.

To make it, I would first gather different things such as buttons, half of a vinyl record, lace, cardboard, a mini-clothespin, a perfume sample, and a double-clotheslabel that will be used as the hanger.

I have, like often, stamped the Gibson girl first and then hidden it to stamp the number columns from the Numerical Plate.
Thank you so much for stopping by, I hope you like my door hanger !
A la prochaine !

xxx

Thursday, 26 September 2013

Faded Glory....

Hello everyone, Astrid here with my next project. Thank you for dropping by! I love the colours of Autumn as slowly but surely the glory of the warm summer this year starts to fade around us in nature. This time I would like to share two little projects with you:
They are both cards and as you can see, the colours of Autumn are prevalent.

For the first one I  wanted to play around with some textures and paints.
I used just two stamp sets from the Artistic Stamper,
The new Leaves set and the Numerical set, both from Katie Fox. The sentiment is from the Tim Holtz Simple Sayings set.
I started by cutting a bit of mount board and adding some texture with Paper Artsy Grunge Paste.
Once that had dried I messed about with a variety of acrylic paints, including some Paper Artsy Fresco Finish paints, until I was more or less happy with the result. I
 highlighted the raised bits a bit and added some stamping from the numerical plate in Archival Jet Black ink. I stamped one of the leaves on a separate bit of thin card, cut it out and then finished my panel by adding a bit of string, the leaf and my sentiment, also stamped on a separate bit of card.

I finished the card by mounting the panel onto a folded bit of Kraftcard and that was it.
Hope you like it and I apologize for the glare on the photo but it was getting dark already when I took them.

For the second card, I used texture as an important feature again, but this time using a texture folder (one of the new Spellbinders 3D Mbossabilities). This time I just used the leaves set.

I ran my card through the folder and then coloured with various colours of Distress Inks in Autumnal colours. Mainly Rusty Hinge and Barn Door with a bit of Gathered Twigs. I also used some Adirondack Dye Inks in Cranberry and Espresso. I then stamped the leaves and sentiment, using a technique I describe on my blog here if you are interested.

I mounted them on the card base with foam tape and then matted first on white and then Kraftcard.

Thank you for visiting and don't forget, there are still a few days left to take part in our Challenge where the theme this month is Autumn too.