Wednesday, 13 August 2014

Autumnal ATB by Astrid

Hi everyone and thanks for dropping in here. After a little break in July, I am back with my first project for August.
Somehow, this being the middle of August already with the summer definitely slowly coming to an end, I was drawn towards Autumnal colours. Always being short of storage boxes for those little bits and pieces, I decided to make an ATB using the large Eileen Hull die. This Artist Trading Block, measure 3 x 3 x 3", so is a perfect size for little embellishments etc.
I started by cutting the die for my cube twice as per instructions, out of 480 grammes black card stock. Next I made a kind of master board to cut my panels from.

I took a piece of 12 x 12 plain card and splattered it with Dylusions Inks in Melted Chocolate and Fresh Lime, spritz with water and let it drip a bit. I then over stamped with the Marbelled Background stamp in Orange Blossom Archival ink. At this point I was just playing to see what would happen. Here is a close up:
I cut my background into five 2.75 by 2.75" (7 x 7 cm) squares, to cover the sides and top of my box.
I really did make 5 lol, even though there are only 4 in the photo, but they all pretty much look the same anyway. Next I went and darkened and blended each one with Distress Inks in Scattered Straw, Vintage Photo and Walnut Stain. This was starting to look a lot more like what I was after...
At last the fun of decorating each panel could begin:
For this one I used the Calligraphic Mat 12 , stamped in Antique Linen Distress Paint, a honey comb stencil from my stash and a stamp from the Katie Leitch "Hand Stamped" set. The diecut was a gift from a friend.
This one was just stenciled with  the Tim Holtz  Eye Chart stencil, it's my least favourite so I decided to use it for the top as I knew it would be covered over.
The next two panels use stamps from the Katie Leitch  Leaves set.

The final panel uses a stamp from the Hand Stamped set again. I also used the Chicken Wire background stamp


Time to put it all together. I decided to add a little figure to the top of my box to add as a vocal point:
This is from the Tim Holtz found relative cards, the smallest of the 3 cowboys. The rest of the lid was decorated with some bits and pieces from my stash:
For the closure of my box I used one of the little metal fasteners, altered with some Espresso Alcohol Ink.
Well, hope you like my little box, these ATBs are so much fun and make great decorative pieces as well as being useful storage boxes.

Thank you for visiting and enjoy the rest of the week!

Sunday, 10 August 2014

Tea Time Cards

Hello all!  Alison (butterfly) here with some more flowery cards - yes, cards!  This time rather than blues and greens, we're living in neutrals land with kraft card and tea/coffee stained tags.


I soaked my manila tags in a mixture of tea and coffee, and then did my stamping in Sepia Archival ink.  I stamped a medium tag and a tiny matching one with each stamp, and then inked and spritzed and flicked them.


There wasn't a fixed plan at this point... maybe cards and matching gift tags?

The flowers come from various Katy Leitch sets...


I did like the earthy kraft card bases on my simple watercolour cards a few weeks back, so I decided to go that way again.  And I can never resist book pages, torn and inked, layered into the look.


I used the Tim Holtz Simple Sayings to create my greetings.  I stamped them onto a page from the same book, so that they would match.


They're backed onto more kraft card to make them a little more sturdy,


and mounted on padded tape for a pop of dimension.


Rustic twine through the top of the tags adds extra texture and dimension too.  I added lots of delicate splatter...


...and some stencilling through the Tim Holtz Lattice Layering Stencil.


And in the end, I decided the tiny tags would be quite cool inside the cards...


... so you get an immediate echo when you open the card to read the greeting.


So, some more simple cards for you - this is starting to become a habit!  I hope you like them.


There's still plenty of time to come along and play in our Anything Goes August Challenge - no need to use Artistic Stamper stamps, but if you do you get two entries into the prize draw - hope to see you there!  Thanks so much for stopping by.

Ingredients used:
Artistic Stamps - various Katy Leitch sets: Encyclopaedia Botanica, Botanical 2, Jumbo Flowering Branch, Jumbo Bouvardia
Tim Holtz Simple Sayings - the Hashtags would also work really well
Kraft Card
Manila Tags
Book Pages
Tim Holtz Layering Stencils - Lattice
Twine
Distress Ink - Vintage Photo, Gathered Twigs
Archival Ink - Sepia
Padded Tape

Friday, 8 August 2014

Silver Automobile Card by Alison Hall

Hello Stampers! I've been playing with Debbie Cotton's fabulous new stamps and metal foil, and I have a shiny card to share with you today.


Here's what I used...

Debbie Cotton Stamp - Linington's Automotive Sales
Bubble Wrap
Black Card
6x6ins white card
Tools for metal

Here's how I made my card...

1. I created a Gelli print background, using blue paints & bubble wrap, then cut a piece 5.5x5.5ins square. I used jet black Stazon ink to stamp the Europe Map background in the four corners. I didn't use a stamp block, as I wasn't worried about getting the whole print.
2. I inked the edges of my background, using blending foam & walnut stain distress ink, then matted onto black card, & attached it to a 6x6ins card blank.


3. I stuck a sheet of sticky back aluminium sheet to black card, then used jet black stazon to stamp the words & car from the Linington's Automotive Sales stamp set. I cut around the words & car, then used metal tools to outline & add detail.
4. I finished my card by gluing the metal car & words to the background, using glossy accents.

I hope that my card has inspired you.

Alison xxx


Wednesday, 6 August 2014

Sardine can by Titbelsoeur

Hello happy Readers !
My project of today is an altered sardine can. I have started stamping a very old envelope with stamps from the Ephemera 1 and Carte Postale plates to make my background


Here are the items I was planning to add to my project, I haven't used all of them. 
I have stamped the Gibson girl from the 2nd plate and colored it with watercolors :


I have sticked it on the top of the can to make volume :


And made a garland with book pages that I glued to the back of the can :


Thank you so much for stopping by, I am looking forward to reading your comments below...
Wishing you a very good summer time !
A tout bientôt !

Sunday, 3 August 2014

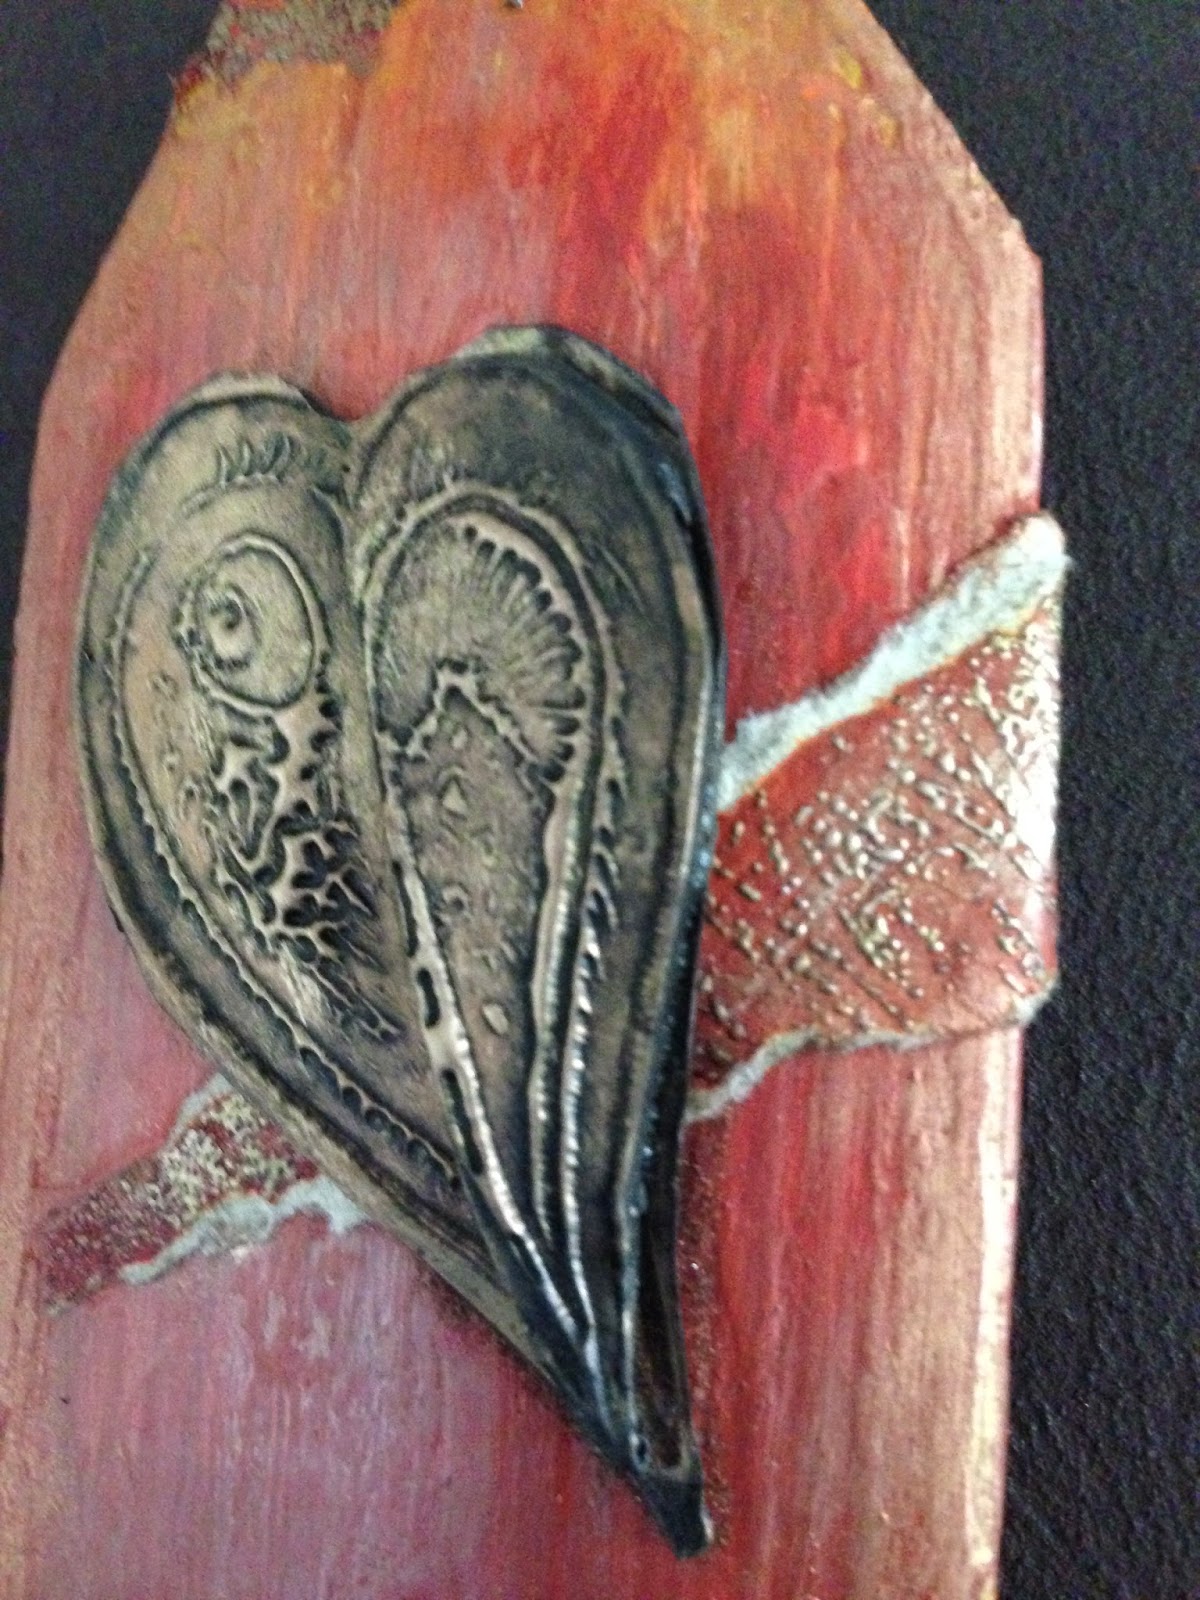
Red Passion! A Wooden wall hanging by Dee


Hi everyone! Today for my project I have altered a wooden
 garden border panel,


Firstly I covered the entire piece of wood with gesso, once dry I then painted 
with Fresco Finish paints in the following colours pumpkin soup, 
London bus, blood orange and claret.


Next I coloured a white tag with the following distress inks 
spiced marmalade, fired brick and aged mahogany.


 I  then inked up the Neil Walker Fantasy Background stamp with aged mahogany distress ink
and stamped the entire tag. Next I sprinkled on clear embossing powder,
then gold and heat set.


 I tore the tag up and glued it randomly to the wooden painted tag. I then used 
my cropadile to put three eyelets at the base then using jump rings
 connected the beads to the base. 


I rolled out some Fimo modelling clay in black and used the Neil Walker 
heart stamp to stamp into it then I heat set it, and the calligraphy mat.


I rubbed treasure gold in Spanish topaz over the heart and 
calligraphy embellishment.   


once baked in the oven I then buffed up with treasure gold.


I also used some treasure gold on the painted tag to give it a gleam.


And make it shine!


I then added a brass ring to fix to the wall


That's it from me today! I hope you have enjoyed this project, 
please don't be shy feel free to leave your comments.
happy stamping Dee X

Materials used : Artistic Stampers stamps:-  calligraphy mat 18,  Neil Walker stamps Heart and Fantasy1 background
Distress inks:- fired brick, mahogany, and spiced marmalade 
 Gesso, eyelets.

Saturday, 2 August 2014

Winner of July's Challenge

Hi !
A Big thank you to everyone who joined in our July Challenge. We loved all the entries, and it is always hard to choose a winner, so I got Mr Random.org to pick one, and congratulations to
 
for this gorgeous creation


Please email me to claim your prize.
Don't forget that we have a new challenge which this month is "Anything Goes" , which means you can use anything you like as long as it has stamping in it.
We are looking forward to seeing your creations.
Have a creative day
{hugs}
Jennie

Friday, 1 August 2014

August's Challenge- "Anything Goes"

Hi to all of our blog readers


A BIG thank you to everyone who joined in July's Challenge, We loved all of the entries.
 

Our new challenge for August is Anything Goes. You can interpret this anyway you like :) as long as it has rubber stamping in it.
 
We are  looking forward to seeing all your fabulous artwork and stamped projects that you submit in relation to this theme. To join in with this challenge (and you can join in as many times as you want), is simple; all we would like you to do is, make a piece of artwork, making sure that you include the theme and some rubber stamping. Pop back here to link up using the Inklinkz at the bottom of this post, so that we can see what you've made and then, leave us a comment to let us know you have joined in with the challenge. As always, there will be candy for one randomly picked entrant - the winner will receive £15 worth of The Artistic Stamper stamps of your choice. And don't forget....if you use Artistic Stamper stamps on your entry, you will entered into the draw, twice!!!! You can also enter as many times as you like!
 
Some of the team have created more fabulous artwork for you to be inspired by....


 I have first stamped the Sequin waste open stamp with Versamark on to my card and embossed it
Then I sprayed ink from Distress Re-inkers and aged the edges with Walnut Stain Distress Inks pad.
Cut and stuck a butterfly I have made using the stamp kissing technique, and I stamped the sentiment on a piece of kraft paper.


Alison (butterfly)

Since it's Anything Goes this month, I've been doing some art journaling - or at least I've been creating in a journal.  I used the Jumbo Camellia by Katy Leitch - which has lots of extra flower heads to play with - as well as Calligraphic Mat #4 to add to the romantic background layering of book pages, tissue tape and gesso.


Once the background was in place, I started layering papers and ephemera - lots of it from the Tim Holtz Ephemera packs, though Jennie's got some fab ephemera packs too.  These just happened to match!  I also added some metal leaves which I "rusted" with Distress Embossing Powder.  Lots of Dylusions splatter gives the pages their finishing touch.  Come and see more over at Words and Pictures.
 
 
I am here today with my first Artistic Stamper challenge.
 I made it by using the insects and butterflies plate,
Time and Keys plate. 


Fresco Finish paint in the following colours London Night, Mushroom 
and Nougat. A wooden butterfly painted and treasure gold applied 
Chipped Sapphire distress ink on the butterflies and clear embossed
glitter paste through a small dot stencil. 

We hope you will join in this month's challenge and look forward to seeing you creations. Don't forget to add a comment when you have posted your entry.
 
I will be back tomorrow with the winner of July's Challenge.
Have a very creative month
{hugs}
Jennie