Showing posts with label Dee Adams. Show all posts

Wednesday, 4 May 2016

Crystal Encrusted Flourish Chest by Dee

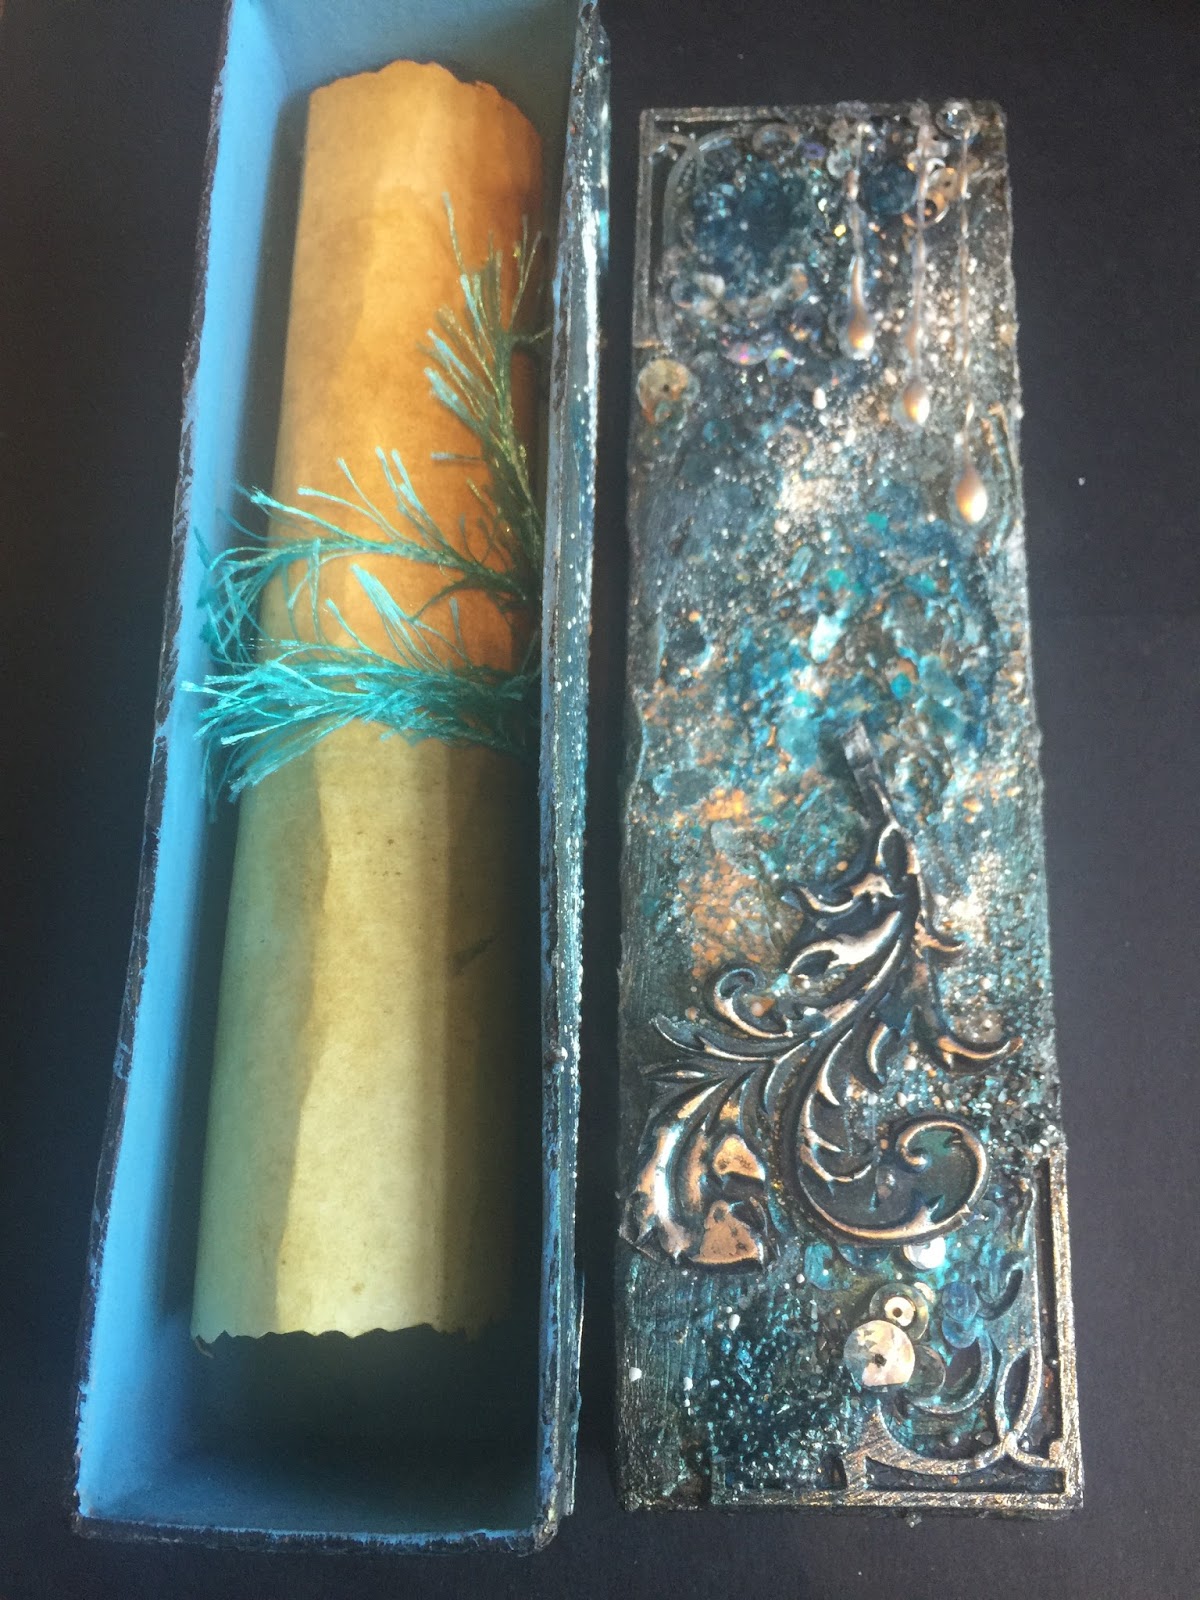
Hi everyone Dee here with a encrusted chest that 
I have made out of various techniques.
I started with putting modelling paste in the middle and 
corners of the box.
Once a skin had formed on the modelling paste I used the 
flourish from the ornate 2 plate to stamp
into the paste.
I used silver sequins from my stash to embed in the modelling
 paste.
Next I covered it all with white gesso followed by 
crackle paint on the lid sides.
Deco arts prussian blue hue was painted on in washes
till happy with the result.
A mix of silver, pewter, white & turquoise embossing powders 
was used to add extra interest.
White embossing powder was sprinkled over to add 
to the contesting colours.
I triple embossed the flourish into melted embossing
 powder.
A close up.
Another showing micro beads that I applied around the 
corner and the base of the box.
Thats all for today thank you for popping by.
Cheers Dee x
Products Used
  1. Artistic Stamper Stamps used were the Flourish BackgroundFlourish Ornate 2
  2. Deco Art Prussian Blue Hue.
  3. Modelling paste
  4. Crackle paint
  5. Embossing powders 


Friday, 22 April 2016

Kate Crane inspired projects By Dee

Hi everyone I hope you are all well and joining in with us with this 
months challenge all things distress.
I was lucky enough to help Kate out recently when she was doing
 a class.


As she worked I listened and very unusual for me remembered
 what she said and the steps that she takes to create
 her amazing pieces.
One thing I have noticed about her art is how relaxed it is how 
you just immerse yourself in it.
For mine I used Fresco Finish Acrylics white and black pens.
For the small book I used shades of blue beige and plum
The bunny boy I used green's blues and yellows.
Artistic stamper stamps used were Mini Backgrounds #1, Sequin Waste open,

Kate Crane is going to
 be doing a workshop at The Artistic Stamper on Saturday
25th June & Sunday 26th June there are still a few place available if you would like to go.

That's it for today folks hope you enjoyed this post I can't recommend Kate's workshop
enough if you get a chance go.


Monday, 4 April 2016

Distress Elephant by Dee

Hi everyone I hope you are well and enjoying the start of spring
with the lighter evenings it lifts you after the long 
evenings of winter.
 I have an altered beer matt for you today with the artistic stamper 
elephant. I have created this in the theme of this months
challenge.
I started with colouring a tag with distress inks followed by 
by stamping the elephant with black versa fine onyx black 
and clear embossing. next I coated it with distress glaze.
I tripple embossed the saddle on my elephant and cut out.
for the matt I used texture paste through Tim's flourish 
stencil and crackle paste round the edges.
 Once dry I coloured with distress paint and spritzed 
with water. I also used Ken Olivers metallic
burst's in iron oxide.
Thats all for today folks hope you like my card please
feel free to let me know what you think.
Cheers Dee.
Products used
  1. Artistic stamper stamps Elephant .
  2. Distress inks:- Spiced Marmalade, Aged Mahogany, Broken China.
  3. Distress paints:- Scattered Straw, Spiced Marmalade, Fired Brick  & Chipped Sapphire. 

Tuesday, 22 March 2016

Kiki By Dee

Hi everyone I hope you are all well and being very crafty.
I have a variant on KiKi for you this month
I hope you all like it.
I started by using distress ink off my craft matt then splashed 
water droplets over it.
Once happy with the results I then took the Neil Walker 
Alphabet soup stamp and stamped it randomly
over the card and clear embossed it.
Nect I used the splats mask and used black modelling paste
through the circle images and dried.
I then took a white gel pen and drew a circle in the middle
and a squiggle I repeated with black pen.
Next I brushed with gold Gulding wax.
I coloured a piece of lint with black paint and placed to the side.
I stamped Kiki onto white card and coloured in.
Next I cust her face out and the upper part of
her cloak.
I used some gold ink to scribble on and three gold brads
finished it off.
Well I hope you all like my Kiki please feel free to let 
me know what you think.
PRODUCTS USED
  1. Artistic Stamper.s Neil Walker Kiki stamp & Splats & Swirl Mask.
  2. Distress inks in the following colours:- Rusty hinge, Stormy sky & barn door.

Friday, 4 March 2016

Playing with dylusions by Dee

Hi folks I popped down to see Jennie and have a play at The Artistic Stamper
when I had a week off work in January. We did a class on
journaling not something that I am used to but seem
to have started doing this year.
The Artistic stamper has a load of amazing journaling stamps
so I thought I would do a piece playing with the stamps that 
I picked up while I was there.
I also picked up some Dylusion paints while I was there
which have a finish that I really like and are very neon
 bright, again not colours I would usually use.
So I did three panels using a different colours but one
colour that was common to all three.
Fresh Lime and vibrant turquoise
I stamped different journalling word stamps onto each 
panel.
Purple pink and turquoise
Journal word inspiration
collated it all onto a black journal page ooh a white pen and
 doodled around the edge.
That's it for today I hope you like my play.
Please let me know what you think.

Products Used
  1. Artistic Stamper stamps used Borders A6#2, Journaling Words, Fabric 3 C334, Mini Backgrounds #1.
  2. Dylusions paint Vibrant Turquoise, Crushed Grape, Fresh Lime, Bubblegum Pink.
  3. White ink pen for doodling.


Monday, 22 February 2016

Bubbles & Fish

Hi everyone Dee here with a couple of altered beer mats. Looking at 
the photos it looks a bit dark but it actually is quite pale.
Firstly I put texture paste through a stencil when dry covered 
it in a coat of gesso or thick cream paint if you don't 
have gesso.
Next I used the paint in pale blue, green, pink violet & orange.
Spritz each colour as you apply it drying in-between. 
Once happy with the result stamp the random dots from the boarders plate 
& the 3 large circles from swirls splats and dots plate in black
 archival ink. Colour the dots on the small open dots images with a
white gel pen and the large circles use gesso to colour.
take a fine black pitt pen and scribble a zigzag line round the larger circles.
To finish the effect apply the Black Soot Distress Spray and
activate with water. 
Stamp the fish image from the sea side 1 plate on white card and cut in half.
use the glitter paste see below around the edges. Also use it through 
the circle stencil, along with crackle paste colour with
a silver wax.
Swipe the edges with silver once finished.
That's it for today folks I hope
you enjoyed it.
Cheers Dee x

Products Used
  1. The Artistic stamper stamps:-Borders A6#2, Swirls Splats and Dots, Seaside No. 1 # 018.
  2. Stencil 6 x 6" - Cobbles, A various sized circle stencil.
  3. Any Acrylic paint spritzed with water so it becomes translucent.
  4. Modelling paste
  5. Black soot distress stain spray.
  6. White gel pen or sharpie.
  7. Crystal Stickles/ clear 3D gel with glitter mixed through it to create a glitter paste.
  8. White Gesso and crackle paste.

Thursday, 4 February 2016

Heart Art Part II The Love Letter by Dee

Hi Everyone Dee here today with the second part of my post and
 continuing the theme heart art. This is the inside of the box and is 
called the love letter as she has it all secreted away in her love 
box the photo of her love and his letters all held 
together with a gold heart.
I painted the inside of the box with distress paints and spritzed them so the 
colours mingled together to give a lovely warm red.
For the letter I used an old craft coloured envelope which I stamped with 
the Calligraphic Mat 12 and used Distress inks both Walnut Stain &
 Vintage photo.  Around the torn edges I distressed with 
running vintage photo round.
I glued two different sized beer mats together to create my note photo
 keeper. this was coloured with the same distress paints that were used 
on both the lid and the inside of the box.
This was then stamped with the bark background stamp from The
 Artistic Stamper, Archival ink was used on the stamp & black soot 
was applied to the edges of the matt.
I tore a strip of the craft paper off and stamped with the calligraphy matt
in black archival and glued it down the middle of the matt.
Gold embossed heart see link here to previous post for the box. The photo's 
were then attached as was the film strip which I attached with
 glossy accents.
The ornate corner was then applied.
Well that about sums it up I hope you have enjoyed this post as much as 
I have creating it.
If there is anything you are not sure of please contact Jennie at the shop I am sure she will be able to get it for you. I hope you all have an amazing Valentines day and see you again towards the end of the month. Please feel free to leave a comment as these are what inspire me 
and make doing these projects so rewarding.
Cheers Dee x

Products Used
  1. Artistic Stamper stamps:- Calligraphic Mat 12, Bark 2 Background, Doodle Bubbles Background size A6 & Neil Walkers Large Heart.
  2. Distress Paint in the following colours:-Barn Door, Fired Brick, Spiced Marmalade, & Wild Honey.
  3. Distress ink:- Vintage Photo, Walnut Stain & Black Soot.
  4. Jet Black Archival Ink.
  5. Gold embossing powder &  & Embossing ink pad.
  6. Other pieces from my stash to include film strip Tim's Ideaology, beer mats, Old photo's, brads & Metal Ornate Corner.