Showing posts with label Distress paint. Show all posts

Sunday, 10 April 2016

Distress Birthday Card by Debs

Hi Everyone

Hope you are all enjoying this months challenge, I know I am.


I started this card believe it or not with a piece of gold card - the gold card i used wasn't quite mirri board, but that works equally well with this technique

Emboss - i used a Tim Holtz embossing folder but any will do.  Then the fun starts

Cover with dark paint as i had used a gold background i opted for Ground Espresso Distress Paint.  If i had used Silver Mirri board i would have used black paint or black gesso.  Work the paint into all of the grooves with your finger

When you are happy with the coverage get a piece of kitchen roll and wipe the paint off - yes really!!

Once you have wiped the paint off this is what you are left with

Here is a piece of the original card next to the painted and embossed piece as you can see its completely changed the colour and texture of the card, i promise it really was the same piece.

I used two more pieces one i just wiped over with the Ground Espresso Paint but guess what I forgot to take the photo of that one!!  This one i wiped the paint on and then with a piece of scrunched up kitchen roll dabbed it into the paint and got this lovely stippled texture.

I distressed all of the edges with a distress tool and inked up with Ground Espresso Distress ink  I also painted a couple of pieces of white card with Shabby Shutters Distress Paint and stamped one piece with the Phineas Pinchbeck Stamp and Happy Birthday from the Grungy Greatings plate twice onto another and again edged the same way. 

Then mounted all of the layers together with foam tape stuck to a cream card again edged with Distress Ink.

Looking forward to seeing your creations on here and on Facebook and don't forget to let me know what you think by leaving a comment.
Happy Creating 
Debs x


Wednesday, 24 February 2016

HeArt Art with a twist

Hi All

So we have got Valentines Day out of the way, and unless we are making cards etc for loved ones or the occasional wedding.  I know i tend not to bother too much about hearts.  However, we all like extra usage out of our stamps so here is alternative use, which I am sure some or all of you will have already thought of  - turn hearts into petals and make up a flower.


This was quite a simple canvas and came from an idea about using the three colours of Distress Paint which were sitting on my desk! Weathered Wood, Frayed Burlap and Victorian Velvet.  The three colours are all quite muted colours and as paints personally come into their own, working really well with each other.


I started off with a 12 x 12 canvas and added grunge paste through The Artistic Stamper Chevron 6x6 and Large Dot 6x6 Mask with Grunge Paste  

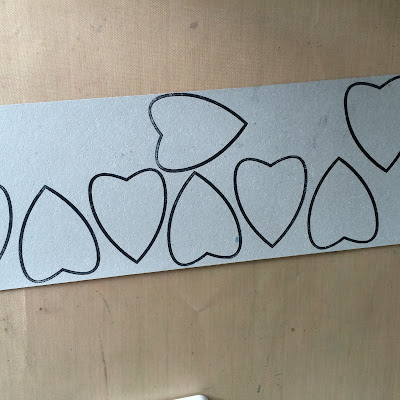
Whilst i was waiting for the Grunge past to dry I stamped 8 of the large hearts from the Roses are Red Plate with Black Archival Ink onto Tim Holtz Grunge Paper

And then cut them out and painted with a quick coat of Gesso not quite sure why as I didn't really need to!!

And also stamped the Chinese Background stamp onto a piece of beige tissue paper again with Archival


Then painted stripes in Weathered Wood and Frayed Burlap overlapping as i went across


Whilst waiting for the stripes to dry I painted all of the hearts with the Victorian Velvet.  The paint comes out a beautiful dusky pink, far less muted than the Distress Ink

I then stamped each heart with the Dots Background A6 stamp using Victorian Velvet Distress Ink

I also went around the outside edge of each heart with Ground Espresso Ink


Using the Dots Background again i added some Victorian velvet paint and stamped some random dots directly onto the canvas, and also added some bottle top marks from the lids of the three colours


Ripped up pieces of the tissue I had stamped with Chinese script and added that to the canvas using Prima Soft Matt Gel

And added the heart petals to make the flower using Prima 3D Matt Gel This gel is absolutely amazing.  You can use it through stencil or as an ordinary glue however if you put a dollop of it onto a project it will stay raised so that you can add dimension really easily.  Plus it adheres pretty much everything including metal and it dries really quickly.  You do have time to move it but you do need to be quite quick if you do.


I stamped the lovely flourish from the Swirls Splats and Dots Plate onto white white tissue and carefully tore around the edge.  I also stamped Follow your dreams from  Journaling Words #1 onto a bit more of the beige tissue and added it onto a piece of cardboard and painted in Weathered Wood and Frayed Burlap but when mounting ensured the colours were the opposite of underneath!  Stuck down the tissue with the soft matt gel 


I made three smaller hearts and coloured the same as the large ones however, this time i used Ground Espresso Ink to add the dots as well as to edge


Added a metal embellishment and a glass bead from my stash and there it is!
As always do let me know your thoughts good and bad, and don't forget to add your project to the blog, we do enjoy seeing what you have produced and you still have a few more days to go.

Happy Crafting Debs


Wednesday, 10 February 2016

Where there is love tag by Debs

Hi All

Debs here with my latest little creation in the form of a tag, and the first person that comments my deliberate mistake can win the tag.  I will also do my best to get it to them before valentines day ;-)


I started off  doing some printing with my gelli plate,  and this is when the fun started  I decided to use Distress Paints so out came all of my reds.  Candied Apple made its appearance first with a nice couple of squiggles on the plate, next came Barn Door and this lovely little container of paint usually works with a gently squeeze to get some extra paint out!  This is what happened when the gentle squeeze didn't work


You can imagine what the gelli plate looked like lol!  Anyway I digress, after cleaning up and progressing with the actually printing i came up with some prints ready to be used, the cream is Antique Linen Distress Paint.
I used a #10 tag (one of the big ones) and having decided on the prints i was going to use I added one of these to the tag. And added some bottle top marks with candied apple.


Then i added a smaller piece to one side ripping the overlapping edge and colouring with Candied Apple Distress Ink.


I stamped the large heart from The roses are red plate onto adhesive canvas i had already painted with the candied apple from gelli plate, which is what is giving the heart that lovely mottled effect.  


I also stamped and folded in half two more hearts and glued these to an extra canvas heart the folded hearts then create a 3D effect, which also looks nice.  


I also used the swirls mask and some of the other heart stamps to add some extra dimension to the tag and edged the tag and the canvas hearts with Black Soot Distress Ink  I also stamped the Where There is Love quote onto another piece of the canvas and frayed the edges!


I added an extra canvas heart to the side and snipped the edge of it


Added some black lace to the bottom, and some ribbon and fibres to the top and a touch more black soot around the edge!
As always do let me know what you think I really do appreciate your comments as we all do, on Facebook or on here we don't mind.  
Don't forget to enter the challenge I shall look forward to seeing your creations
Happy Crafting 
Debs


Thursday, 4 February 2016

Heart Art Part II The Love Letter by Dee

Hi Everyone Dee here today with the second part of my post and
 continuing the theme heart art. This is the inside of the box and is 
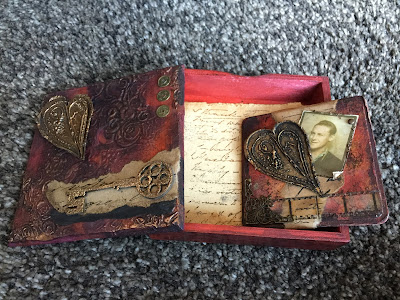
called the love letter as she has it all secreted away in her love 
box the photo of her love and his letters all held 
together with a gold heart.
I painted the inside of the box with distress paints and spritzed them so the 
colours mingled together to give a lovely warm red.
For the letter I used an old craft coloured envelope which I stamped with 
the Calligraphic Mat 12 and used Distress inks both Walnut Stain &
 Vintage photo.  Around the torn edges I distressed with 
running vintage photo round.
I glued two different sized beer mats together to create my note photo
 keeper. this was coloured with the same distress paints that were used 
on both the lid and the inside of the box.
This was then stamped with the bark background stamp from The
 Artistic Stamper, Archival ink was used on the stamp & black soot 
was applied to the edges of the matt.
I tore a strip of the craft paper off and stamped with the calligraphy matt
in black archival and glued it down the middle of the matt.
Gold embossed heart see link here to previous post for the box. The photo's 
were then attached as was the film strip which I attached with
 glossy accents.
The ornate corner was then applied.
Well that about sums it up I hope you have enjoyed this post as much as 
I have creating it.
If there is anything you are not sure of please contact Jennie at the shop I am sure she will be able to get it for you. I hope you all have an amazing Valentines day and see you again towards the end of the month. Please feel free to leave a comment as these are what inspire me 
and make doing these projects so rewarding.
Cheers Dee x

Products Used
  1. Artistic Stamper stamps:- Calligraphic Mat 12, Bark 2 Background, Doodle Bubbles Background size A6 & Neil Walkers Large Heart.
  2. Distress Paint in the following colours:-Barn Door, Fired Brick, Spiced Marmalade, & Wild Honey.
  3. Distress ink:- Vintage Photo, Walnut Stain & Black Soot.
  4. Jet Black Archival Ink.
  5. Gold embossing powder &  & Embossing ink pad.
  6. Other pieces from my stash to include film strip Tim's Ideaology, beer mats, Old photo's, brads & Metal Ornate Corner. 

Friday, 22 January 2016

Ohh!! I Do Love a Dragon fly By Dee

Hi Everyone I hope you are all well I have the beautiful Dragon fly
from the Butterflies #2 size A5 plate.
I started out with a cream tag that has some crackle paint on it in places.
Next I used the Calligraphic Mat 12 
 I swiped it through mat sealer and stamped onto the tag.
I then spritzed the distress paint with water then swiped the tag
 through the paint. Knock back the area's that had the script stamp 
stamped on it.
Next I took a square beer mat and cut the Tag up and assembled it to 
fit.
Crackle paste was put round the edges of the mat then antiquing cream
in black and patina were applied once paste was dried.
Iridescent turquoise paint was.
For the dragon fly I used pewter embossing powder and ultra thick embossing
powder followed by silver.
I stamped the dragon fly twice into the hot embossing powder.
I cut it out and then trimmed the top one back.
I threaded the beads with wire to make the main body and the antennae.
The base was coloured with the alcohol ink.
A close up of the dragon fly 

Well that's it for today I hope you all enjoyed my post 
please feel free to let me know what you think.
Cheers Dee x

Products Used
Alcohol inkCrackle Paste, embossing powder, Iridescent turquoise paint.