Monday, 15 December 2014

Special Deliveries - Winter scene

Hello Everyone, 
Shilpa here,
Today I would like to share 'A winter scene' created with Debbie cotton designed Special Deliveries stamp. And here it is...


It was fun to color this adorable stamp. I used watercolors for this. 
here are step by step...
1. I've used watercolor paper. Colored grass and sky with watercolor.
2. Applied distress inks at the edges. 
4. I stamped and colored Special Deliveries image with water colors and also used PIIT pens to highlight them.
5. Attached the image on base.
6. Applied Snow Tex for creating snow effect.

It was easy one, Astistic stamper has wonderful images to play with. You can see them all here.
Thank you so much for your visit
Merry Christmas to you all!!


Supplies used:
Artistic Stamper stamps- Special Deliveries, Pine Tree
from my stash - Watercolor paper, Watercolors, snow tex


Wednesday, 10 December 2014

Snowy Tree

Hello everyone, Alison (butterfly) here with a wintry tag for you.  There's snow forecast for the UK this week, so it may well fit perfectly with the weather for some of you.  You can click on any of the product links in the text if you need to go shopping right now!!


From the moment I saw the large Snowflakes Backgrounds by CaroLines, I had plans for them!  This tag uses the Palette Snowflakes as the background.


I stamped it onto a whitewashed tag using Stormy Sky and Weathered Wood Distress Inks.  I gave it a slight spritz of water beforehand, which is why you get that nice watercolour splatter effect in places.


The other new winter stamp here at The Artistic Stamper which really caught my attention was this beautiful Pine Tree, also CaroLines.


It's stamped in Potting Soil Archival Ink (or maybe Coffee - sorry, can't quite remember, but it's bound to be one of the two!), and clear embossed with SuperFine powder to make it really pop against the snowy blizzard in the background.


The sentiment comes from the Christmas Greetings #1 plate, and got the same treatment.


I cut the figures using a Tim Holtz die from some "rusted" card leftover from another project.  The effect is created using some of the new DecoArt Mixed Media line.  You'd need the Carbon spray and Quinacridone Gold.
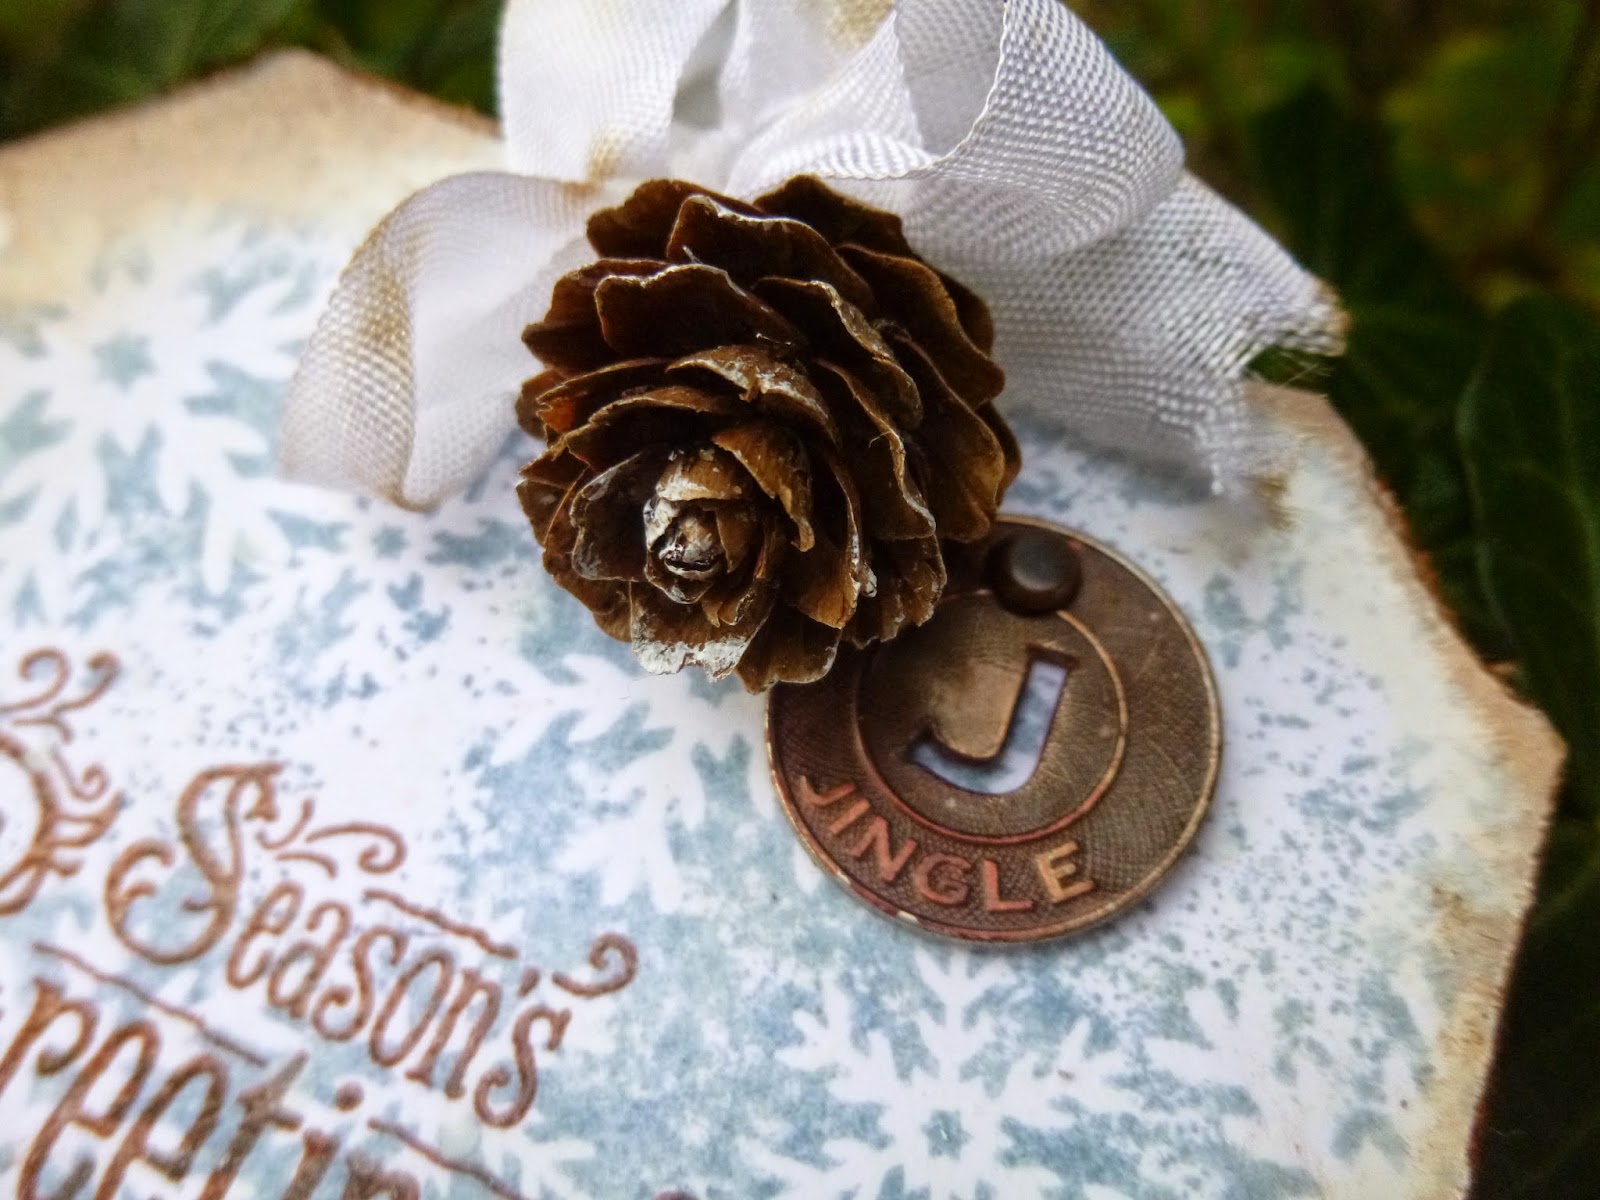

I used Ginger and Rust alcohol inks to alter my metal Idea-ology Findings - the Muse Token here, and the Word Band below.


And once the inks were dry, I smeared Picket Fence Distress Paint onto the Word Band and wiped it back, leaving the lettering highlighted.  Despite being dry, the alcohol inks seeped into the colour, but I rather like the distressed look.


I brushed some Chalk Fresco paint (part of the new JOFY Limited Edition) onto the edges of the tag to draw the eye inward and give a softer, snowier look.  I blended on some Vintage Photo Distress Ink too, to tie in to the rusty accents of the tag.


The whole thing is finished off with a couple of my tiny pine cones (UPDATE: sorry for any confusion - they are real pine cones, not "mine" as in I made them!!) and some seam binding which has just had a tiny touch of Vintage Photo Distress Ink to shabby it up (down?).  And a splatter of Chalk paint at the very end...


So there you have it... I hope that you are staying safe and warm if it's snowing where you are.  And if the weather is keeping you indoors, why not use the time to come and play in our Anything Goes challenge this month at The Artistic Stamper.  You don't have to use Artistic Stamper stamps to enter, but if you do you get two entries in the prize draw.

Thanks so much for stopping by today, and I'll see you again soon.

Alison xx

Monday, 8 December 2014

A Starry Christmas by Alison Hall

Hello Stampers!

I couldn't resist using that faux dichroic glass technique again. This time I used it on a couple of wooden stars.


Ingredients...

2 Wooden Stars
Viva Croco Crackling Colour - Silver or Gold
Ranger Alcohol Ink - Sailboat Blue & Purple Twilight
Clear Embossing Enamel - Ultra Thick
Book Paper
Distress Ink - Black Soot
Clear Crushed Glass Glitter
Tinsel Twine - Silver 
2 Adhesive Gems

Instructions...

1. I started by applying Viva Croco to the stars, then left them for 24 hours, to dry and crackle.

2. I then used a felt applicator to apply the two colours of alcohol ink all over the stars, front, back and sides.

3. I applied Versamark Ink to the crackled surface, then dipped it into clear ultra thick embossing enamel. I added a couple of layers.


4. I lightly painted the book paper with Snowflake paint, then stamped the words. The word 'Wishes' comes from the greeting 'Best Wishes', I just cut out the word I wanted. I inked the edges of the words with Black Soot Distress Ink.

5. I reheated the embossed stars, and used a cocktail stick to push the words into the molten enamel. I sprinkled more clear powder on top & melted it with my heat gun.

6. I applied Glossy Accents to the edges of the stars, and dipped them into some glass glitter. This took about 24 hours to dry thoroughly.

7. I finished my stars off with an adhesive gem and some silver tinsel twine.

I hope this inspires you to have a go at this fabulous technique.

Thanks for visiting,

Alison x

Saturday, 6 December 2014

Waiting for Christmas...

Hi there, this is Titbelsoeur today !
I love to use books for home deco, especially for Christmas. Do you remember my Nativity scene in a book from last year (here) ?

Here is a foretaste : little card, season's greetings from Christmas Greetings # 1 on a pinecone :


Then I divided my book on 3 thirds, stamped a Best wishes quote from the same Christmas Greetings # 1  set and glued it with a Christmas image on the last page of the 1st third :


then glued a Girl by Fireplace  card on the first page on the 3rd third of the book :


the 2nd third was folded to make a pine tree, you will see how I did it here (tried to find a short video for you), and here it is :


And, as a bonus, here is my last experiment of the year : how to embellish basic baubles with Artistic Stamper's stamps ?
Just stamping some snowflakes with white acrylic paint ! I am not very gifted at such practicals, but I couldn't resist to give you the idea !


I hope my experiments will inspire you and I am looking forward to reading your comments !
Thank you for visiting, à tout bientôt !

Wednesday, 3 December 2014

A Trio Of Christmas Tags

Hi hope you are all well, and have done all your Christmas prep! Craft work aside 
I tend to be last minute dot com when it comes to Christmas.
Today I bring you three tags from the Artistic Stamper's
Christmas selection of stamps.
My products used are
Crafty notion guiding flakes in Autumn gold, craft card (mine is the back of a box of Pepsi packaging),  
3 x tags, black card. 


Firstly I coloured the three tags with blending wild honey, spiced marmalade & 
aged mahogany distress ink onto the tags. 


I then stamped the snowflakes and the merry christmas on to them with fired brick and chipped sapphire. I covered the tag in gloss multi medium and pressed them all against each 
other to create a texture into the medium.


 I then sprinkled glass beads onto them and also crafty notions guilding flakes, and allowed to dry
once dry I sprayed each tag with the delusions sprays and allowed to dry.


Tag 1
For this tag I used the snow flake stamp,  the season greetings from the Victorian 2, 
 and the little girl at the fireplace from the mini Christmas plate. I stamped them in 
black archival onto craft card tags. The wooden snowflake coloured with distress
 ink and coated in media crackle glaze. The top star was black fimo clay stamped with the bauble pattern and a star shaped cutter was used to cut it out, once baked it was highlighted with treasure gold.


Tag 2
Father Christmas of the mini Christmas 2 plate and the snowflake stamp.
Wooden snow flake same as above merry Christmas stamped into 
black fimo clay baked and highlighted with treasure gold.


Tag 3
Same as above for snowflakes and stars stamps used were snowflake stamp, merry Christmas of the Christmas greetings and father Christmas of the Victorian Christmas plate 2. string on the tags was swiped with fired brick distress stains. All tags were glued on using my hot glue gun as had trouble fixing them on with other glues. 
they were all attached with a mini attacher to the back of Pepsi packaging which had had the sides  treated with distressing blade and then finished with walnut stain distressing ink.

I have done it again I must try to make much simpler posts with less products. Thank for popping by
and don't forget to leave a comment or two.
Cheers Dee x


Tuesday, 2 December 2014

Winner of November's Challenge

Hi,
A big Thank you to all of you who joined in last month's Challenge. Wow! An amazing number of entries, all of them just so creative!
Of course, I cannot pick just one winner, so with the helping hand of Mr Random.org I have picked no 40

with this very festive card.


Please contact me to arrange for your prize.
We hope you will join in this month's challenge which is Anything Goes.
Have a very creative day
{hugs}
Jennie

Monday, 1 December 2014

December's Creative Challenge-Anything Goes

Hi to all of our blog readers,
A BIG thank you to everyone who joined in November's  Challenge, All the entries were gorgeous.
Our new challenge for December is Anything Goes. You can interpret this anyway you like :) as long as it has rubber stamping in it.


We are  looking forward to seeing all your artwork and stamped projects that you submit in relation to this theme. To join in with this challenge (and you can join in as many times as you want), is simple; all we would like you to do is, make a piece of artwork, making sure that you include the theme and some rubber stamping. Pop back here to link up using the Inklinkz at the bottom of this post, so that we can see what you've made and then, leave us a comment to let us know you have joined in with the challenge. As always, there will be candy for one randomly picked entrant - the winner will receive £15 worth of The Artistic Stamper stamps of your choice. And don't forget....if you use Artistic Stamper stamps on your entry, you will entered into the draw, twice!!!! You can also enter as many times as you like!


Some of the team have created artwork for you to be inspired by....
 

I have created a cheeky little ATC for the challenge, using the stamp Saucy Girl 1.
I made it Christmassy very simply by adding a Santa hat & some words cut from a dictionary.


 I've used latest, Debbie Cotton Designed - Florence Flowers Seeds Stamp and created this mixed media piece. The detailed tutorial is given at my blog- Neon Diary


I created a Christmas card. Probably the only one I will get time to do this year! I used some Graphic 45 papers for the background, and a Tim Holtz Snowflake rosette die and the words from Christmas Greetings #1
 

We hope that you will join in this month's challenge and look forward to seeing your creations. Don't forget to add a comment when you have posted your entry.
I will be back tomorrow with the winner of last month's Challenge.
Have a very creative month
{hugs}
Jennie