Showing posts with label Artistic stamper insects and butterflies. Show all posts

Wednesday, 11 July 2018

Distressed Butterfly with Lisa

Hi lovelies, Lisa here with today's post is for The Artistic Stamper and this month's theme is 'Distress'.
Distress. My favourite subject!!!


I first started with a plain piece of white card and used ink sprays to add some colour to the background. 


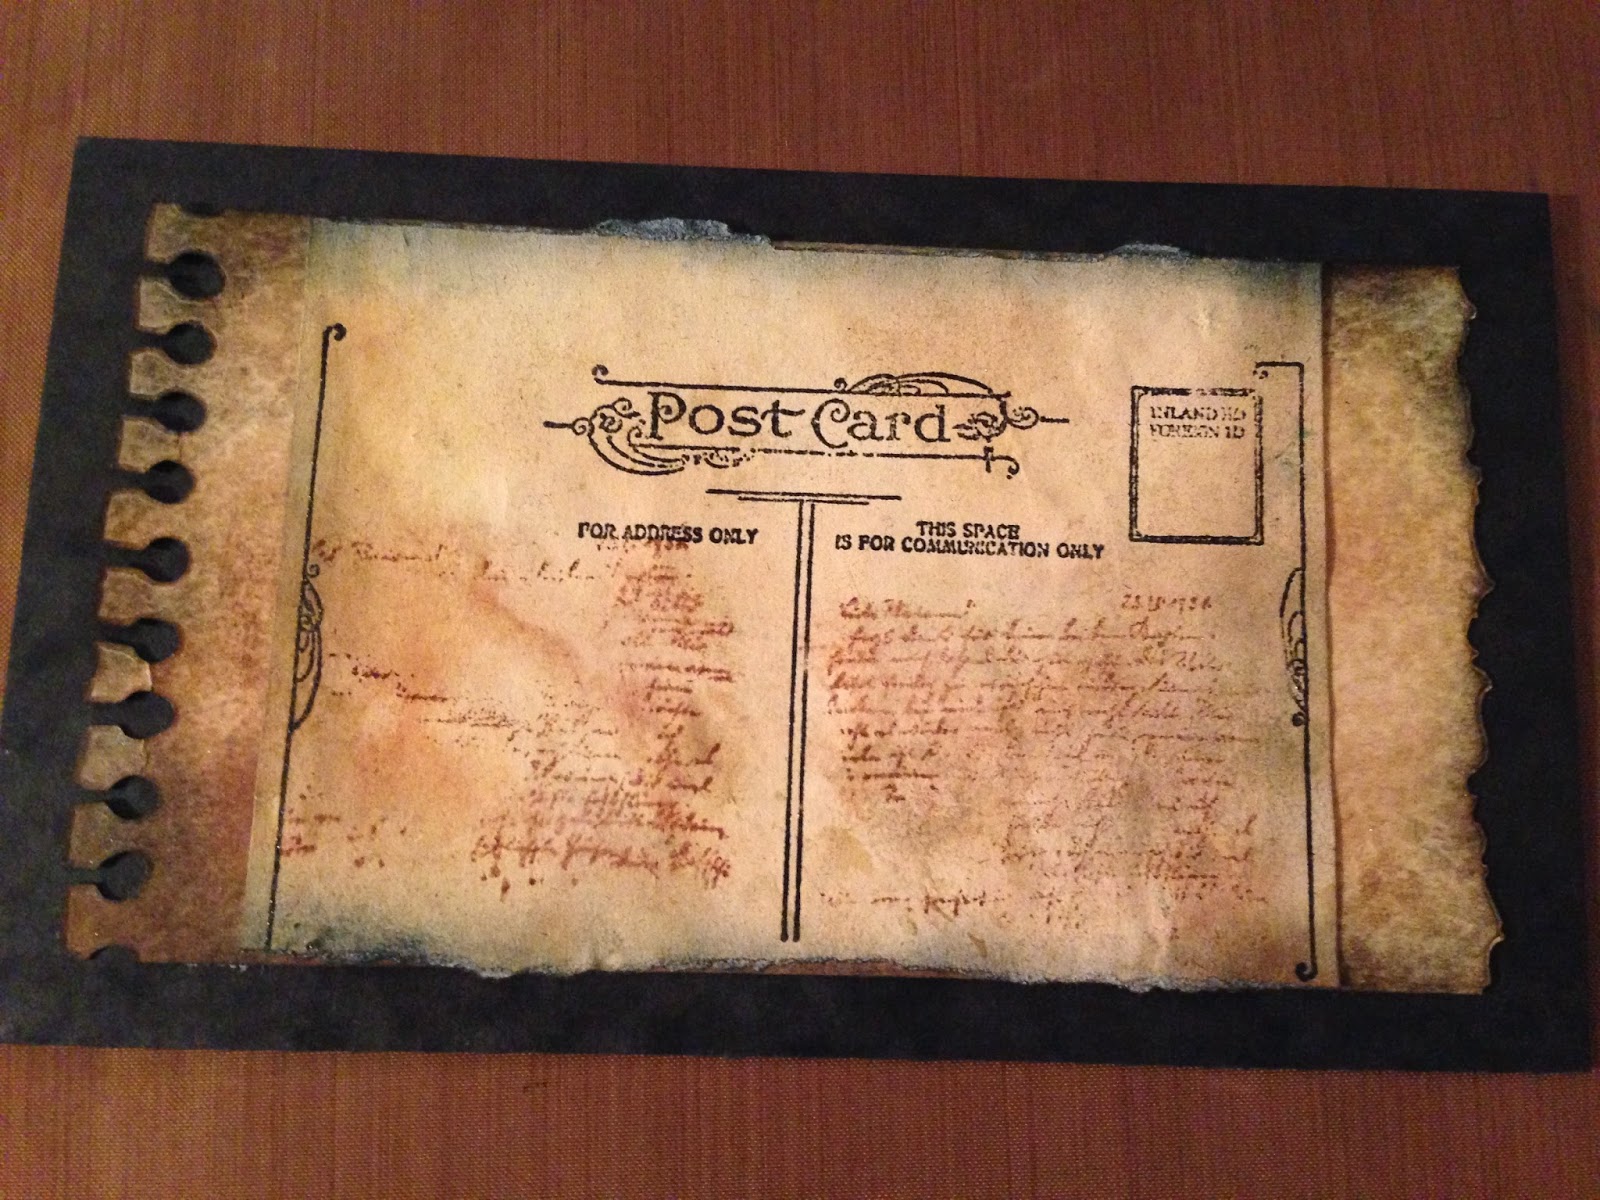
I then added some layers using Mini Backgrounds #1 & #2 with black ink.


I stamped the large butterfly from the Insects and Butterflies stamp set on to patterned paper then cut out and sprayed with teal ink spray.


I stamped the butterfly on to the background multiple times, overlaying the image with light pressure. 


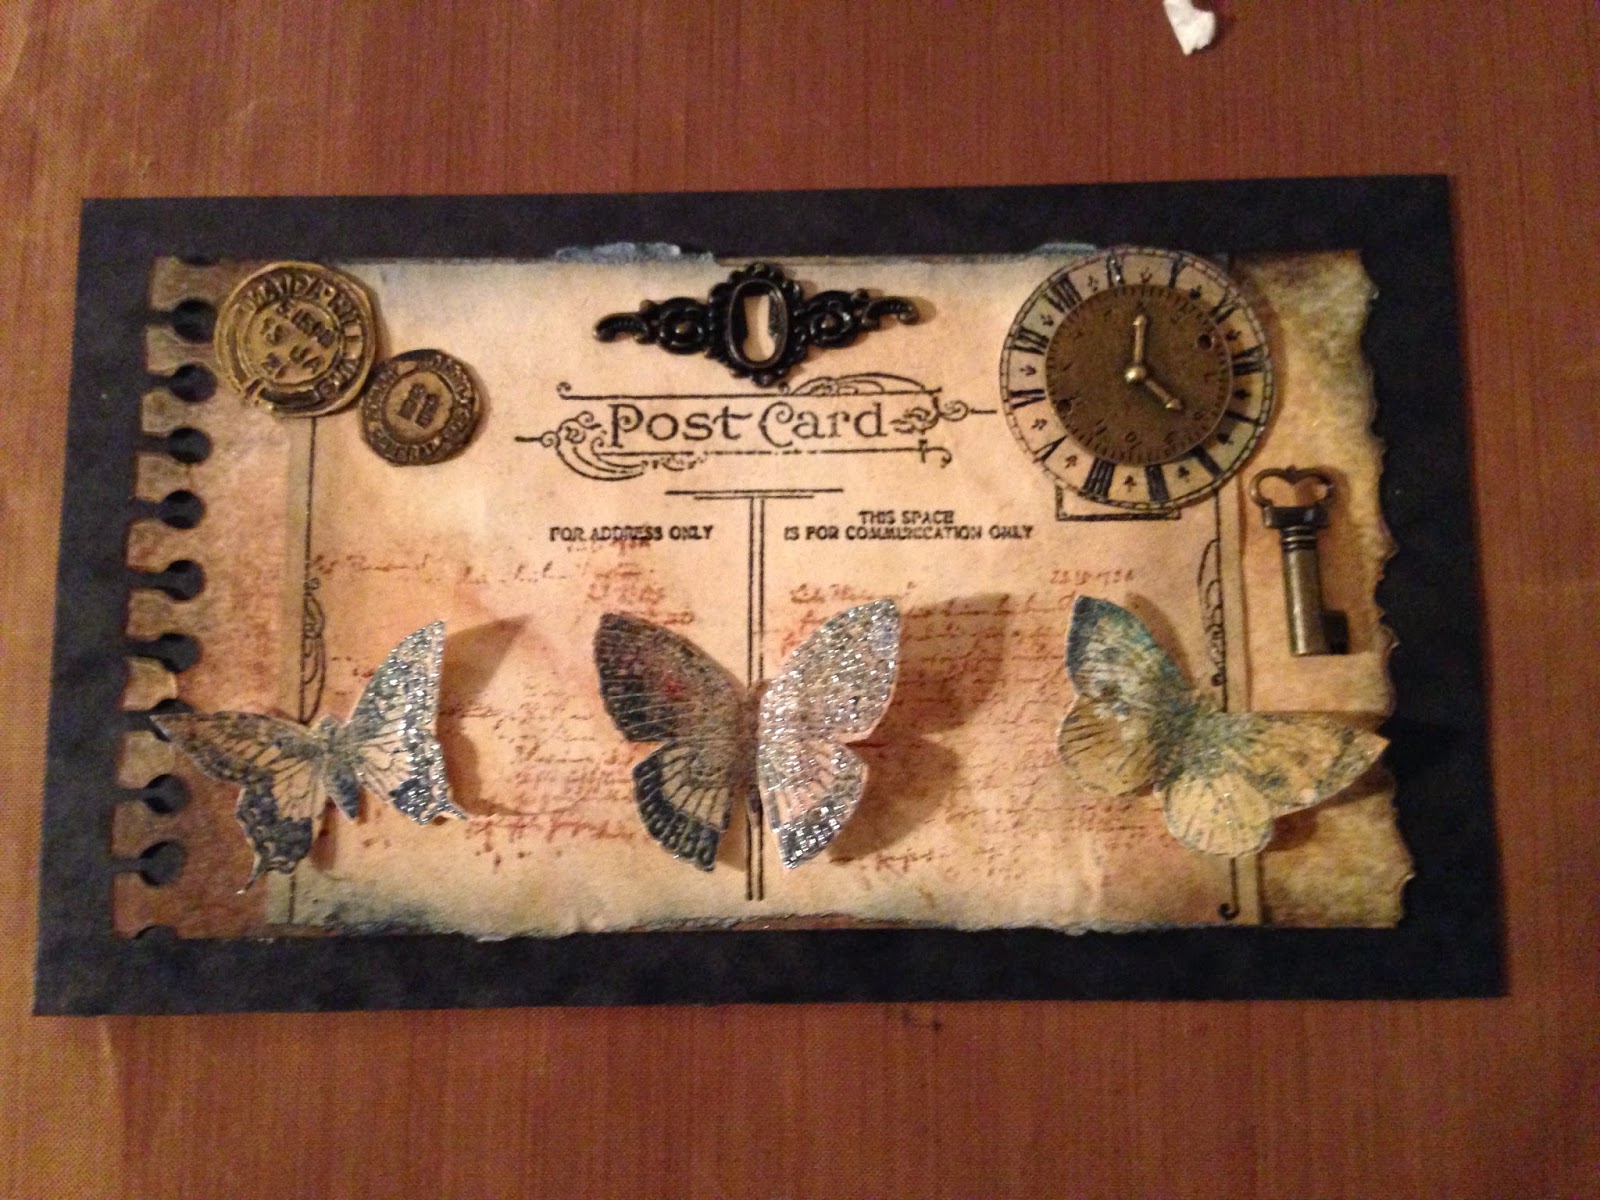
Then adhered the cut out butterfly over the top.

To finish, I distressed the edges of the card with a pair of scissors. 


Thanks for popping by the blog today,
toodles for now,
Lisa x 


Here are the Artistic Stamper stamp sets I used....


Mini Backgrounds # 2 size A6  ( cut and  mounted on cling cushioning )   Mini Backgrounds #1  size A6 (cut out and mounted on cling cushioning)      Insects and Butterflies 1 A5  (cut out and mounted on cling cushioning)


Wednesday, 25 April 2018

Birds and Bees month - with a twist...

Hello, Lisa here with another inspirational look at April's theme - Birds and Bees. 
But with a twist... I've used butterflies.

I used The Artistic Stamper A5 Insects and Butterflies stamp set, which has a gorgeous collection of winged creatures. 

My previous creations for this theme included bees and birds. So, this time I went with a more pretty version of a winged creature - butterflies. 

Of course, there is no limit to what winged creature you could have using this technique. 

Here is my creation...


I coloured a piece of white card with Distress Inks using Mustard Seed, Cracked Pistachio and Blueprint Sketch. I then sprayed the inked background with water and left to dry.


I used The Artistic Stamper 3 x 3 Harlequin Mask with the same colours of ink to add some depth.


I then stamped the butterflies and coloured them them with Carved Pumpkin, Wilted Violet and Picked Raspberry Distress Inks.


I stamped the word 'fly' using black ink then 
over-stamped with Carved Pumpkin Distress Ink, and lightly brushed Blueprint Sketch ink over the top. 


To finish, I matted the background on to Kraft Card.


Thanks for popping by.
Toodles for now,
Lisa xxx


The stamps and stencil I have used are available on The Artistic Stamper website


Insects and Butterflies 1 A5  (cut out and mounted on cling cushioning)   The Artistic Stamper Mask Harlequin 3" X 3"      Decay Alphabet lower case size A5 (cut out and mounted on cling cushioning)

Tuesday, 14 March 2017

Now it's spring...by Angie Coomber

Hello everyone,

It's been a very beautiful spring day here in Kent today!

Here is a layout in my very large ledger for the "Springtime" Challenge.

First of all I created a background using the yummy new Distress Oxide inks (Cracked Pistachio, Peeled Paint, Spiced Marmalade & Vintage Photo).


Next I sketched and painted a tree branch and wrote a quote on the branch. I also splattered some green, pink and white acrylic paint on the page to represent blossom.


I stamped some Artistic Stamper insects onto some mop up pages and embossed with sparkly black embossing powder, cut them out and adhered to the page.


I hope you like it!
Angie

Monday, 22 June 2015

A Swirl Of Colour


Hi everyone I feel like summer is here as I have just returned from Corfu.
I must say I fell in love with it and would Love to live 
there  (a dream me thinks!!!).
Back to the real world I have for you today a
butterfly and texture plaque.


I started by colouring a tag with Adirondack colour
wash which I then sprayed with water.


I put clear texture paste through the Swirl mask.


Once dry I cut out a strip and placed it across the middle
I sealed the whole thing with Matt sealer. 


Next I used antiquing cream to highlight the swirls or you could use
acrylic paint and just before its dry knock 
it back with a baby wipe.


A close up 


I stamped the butterfly x2 off the insect plate onto some extra card
 that had been coloured the same way as the main plaque.


I used versa fine black ink and clear embossed the butterfly
this got antiquated as well


Round the edges I used crackle paste and allowed to dry.


I used a torn page to go across the middle strip which 
i coloured with spiced marmalade distress ink.


The crackle paste was painted with acrylic paint to match it in.
I triple embossed create stamp and cut out
 the letters to form the art.


To finish off I highlighted it all with gilding wax.
Thank you for popping by & don't forget to
let me know what you think.
Cheers Dee x

Products used
  1. Adirondack Colour Wash in the following colours Butterscotch, Stream & Sunset Orange.
  2. Artistic Stamper stamps butterfly off the insects plate and creative stamp.
  3. Artistic stamper swirl mask.
  4. Texture paste, crackle paste, clear embossing powder, versa fine black onyx ink pad.
  5. Gilding wax. 


Monday, 27 April 2015

Mail Art

Hello Everyone,
Shilpa here,

I've got these fabulous Postage stamps(No1) from Artistic Stamper and I kept them to use for some special project... today is the day... :)
I created Post Cards.


I created 4 1/4" * 6" Post card with white card stock. I started with spraying Dylusions Vibrant Turquoise on it. I spritzed water on it to dilute the color. Next I've done Dyan's famous ghost technique, got some lovely layers. I've used many stamp stamps at the top right corner. Calligraphy Mat12 for text. Leaves stamp is from Leaves A5 set.
I stamped dragonfly twice, once on this post card and second on another white paper. Fussy cut it and adhered it to create layered effect.

I got carried away and made two more Post cards,


here I've used Dylusion's Cheery Pie spray ink and Neil Walker bird Stamp.


And on this card, I spritzed Dylusion's Dirty Martini ink and have used bird from Birds of Feather stamp set.
Hope you liked my Mail art post!

Our monthly challenge is open till 30th April with theme - Flora and Fauna.
You still have time to join in.
Thanks so much for stopping by today.

 
Supplies Used:
Artistic Stamper Stamps - 


Sunday, 19 April 2015

Use and re-use as much as you like....

... these awesome Artistic Stamper's gardening stamps !
Hello, this is Titbelsoeur with you today, organizing her backyard... upcycling, as usual... otherwise it is not me !
I have collected can caps and stamped flowers, salads and insects with Archival black ink, then dried the ink and written the names of herbs and vegetables with a permanent pen.

And tadammm, here they are, in context :


I have used :
gardening stamps
butterflies stamps
black Archival ink

Thanks so much for stopping by,
your comments are very much appreciated.
Don't forget to participate in our monthly challenge to win some fabulous Artistic Stamper stamps.

Titbelsoeur

Thursday, 26 February 2015

Art Journal page- Fly

Hello Everyone,
Shilpa here,

I've art journal page to share with you.


I've taken few photos while making this ...here are they


Journal is of A4 size. At two corners I adhered paper and texture strips. In the middle I created textured butterflies with stencil and modeling paste.


Next I applied gesso and spritzed Lindy's sprays in teal, brown and yellow shades. I loved this undefined spread created by inks...drips and drops!


I used Artistic stamper stamps- Calligraphy Mat8
and small butterfly stamp in the background


I wanted to highlight texture in my  background, I outlined textured butterflies and strips with Faber Castell PIIt pens.


I stamped 2 butterflies from Artistic stamper Insects and butterflies stamp set on white card, colored them with ink. I fuzzy cut them and adhered on my journal page.

here is the another picture


Thanks so much for stopping by today, hope you liked my page :)

Supplies used:


Saturday, 7 February 2015

Is spring on its way ?

It's so cold these days, Spring is definitely not on its way....
And yet, why wouldn't we hope a little bit ? 
Take a sheet of paint paper...
A paintbrush...
watercolor....
archival ink...
black and white markers....
and...
these amazing new Artistic Stamper's butterflies !!

I don't know yet whether this will be a card or an art journal page... 


But it was just a great pleasure to stamp and color them, color the background, and then write the quote ! I could almost forget the cold outside !


Thanks so much for stopping by,
your comments are very much appreciated.
Don't forget to participate in our monthly challenge to win some fabulous Artistic Stamper stamps.

Titbelsoeur

Friday, 3 October 2014

Post Card from Maida.Hill


Hi everyone hope you are all well. Today I am bringing to you a 
project using the lovely Carte Postale plate from the 
Artistic Stamper 


I also used the butterflies from the insects & butterflies plate and the small
 clock from the tick tock plate.


Firstly I coloured a lightweight card with distress inks in 
scattered straw, antique linen with a bit of
Vintage photo.


I die cut a piece of thicker card with Tim Holtz on the edge die torn notebook.
I coloured a second piece with the same colours and edged
 with black soot distress ink.


I stamped the post card stamp onto the lighter card in versafine onyx black
and clear embossed it 


Next I stamped the script from the carte postal stamp in 
vintage photo.


I knocked it back a bit with a baby wipe.


The clock face was stamped onto distress coloured card 
and clear embossed the butterflies were stamped in 
chipped Sapphire distress inks and clear embossed
then gently sprayed with mica spray. 


The post marks were triple embossed with gold embossing powder,
and then cut out and fixed. 


Finally I added a brass clock to sit over the clock face, a final sweep
with black soot distress ink, a keyhole and key 
glued it all onto black card to 
complete the project.


Thank you for stopping by hope this project inspires you to 
dig out your distress inks and have a play.
Have a great day!
Cheers Dee x