Showing posts with label Carte Postale. Show all posts

Monday, 3 November 2014

Phineas Pinchbeck

I loved the Phineas Pinchbeck stamp from the moment I saw it. For this
 project I used the following Artistic stamper stamps, Numerical plate, 
glory and Ephemera 1. Tim Holtz cargo stencil  & 
 photo and scattered straw.  


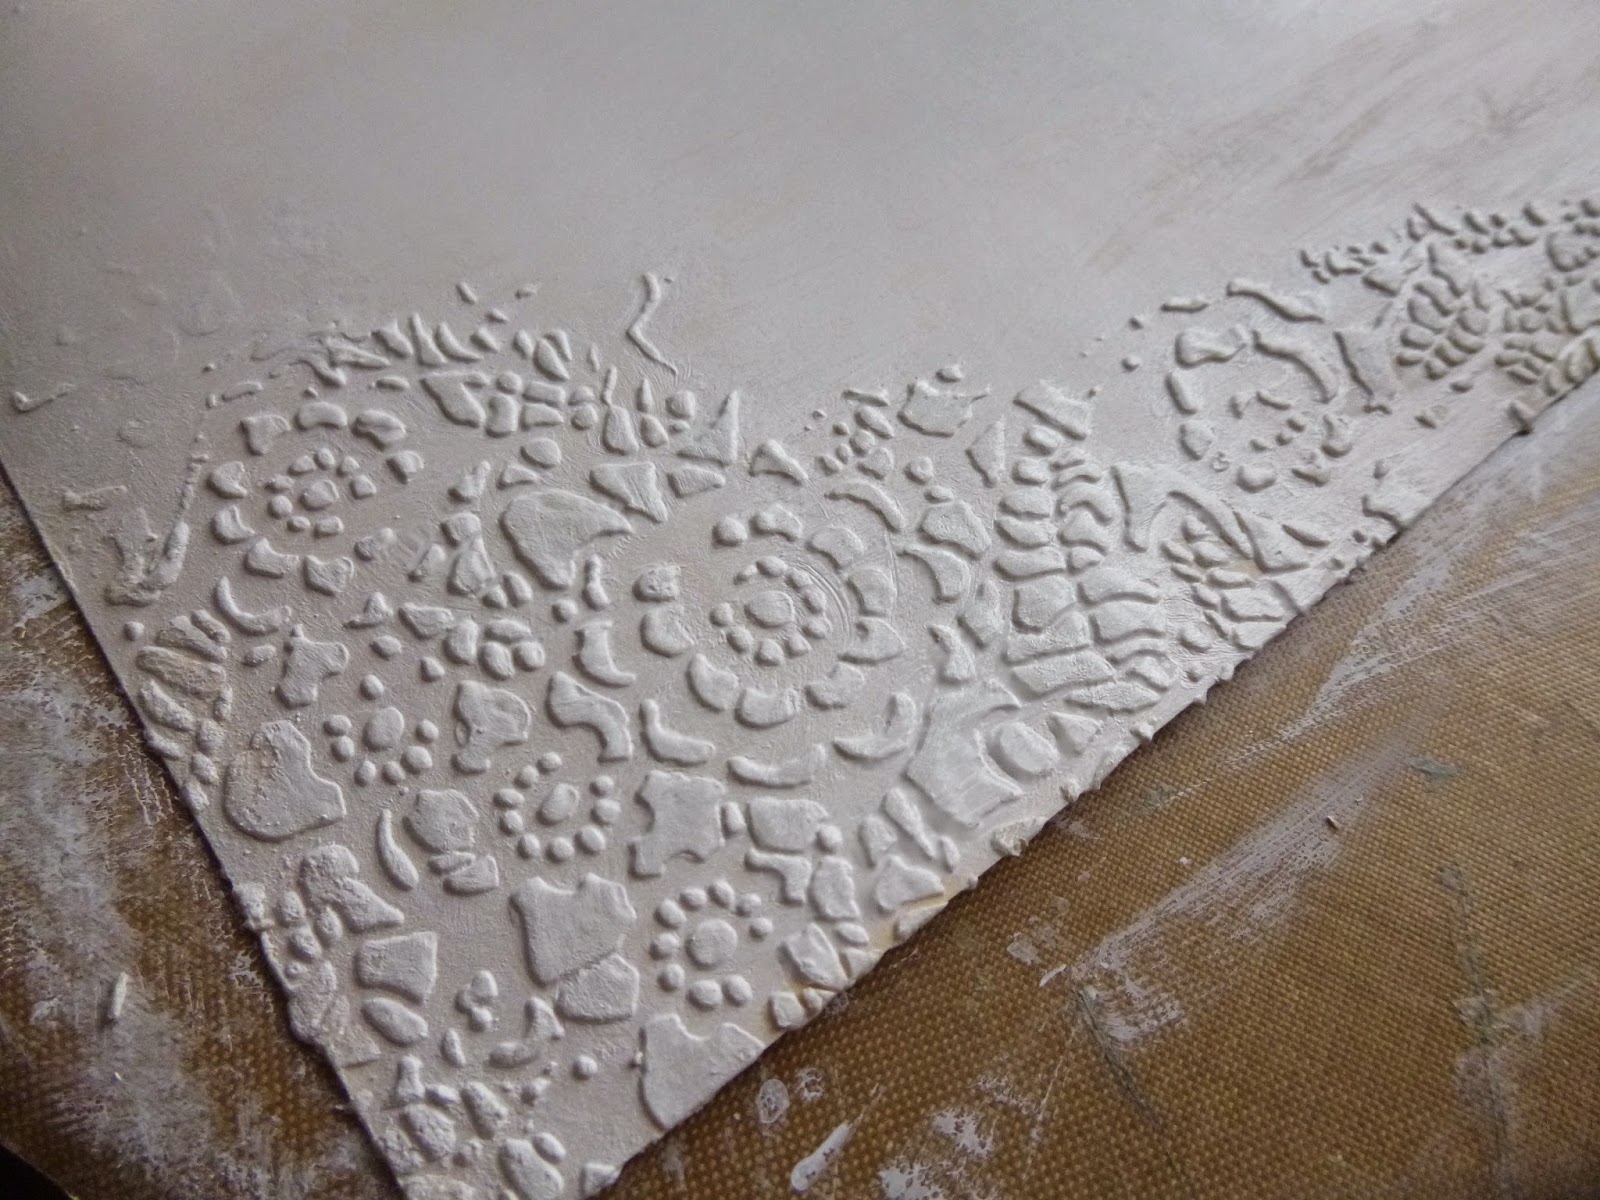
Firstly I painted grey board with fresco finish paints in stone, nougat,
and mushroom, through a honeycone stencil I put squid ink
paint that I then knocked back with nougat. 


I stamped the two sets of numbers off the Numerical 
plate in chocolate pudding.


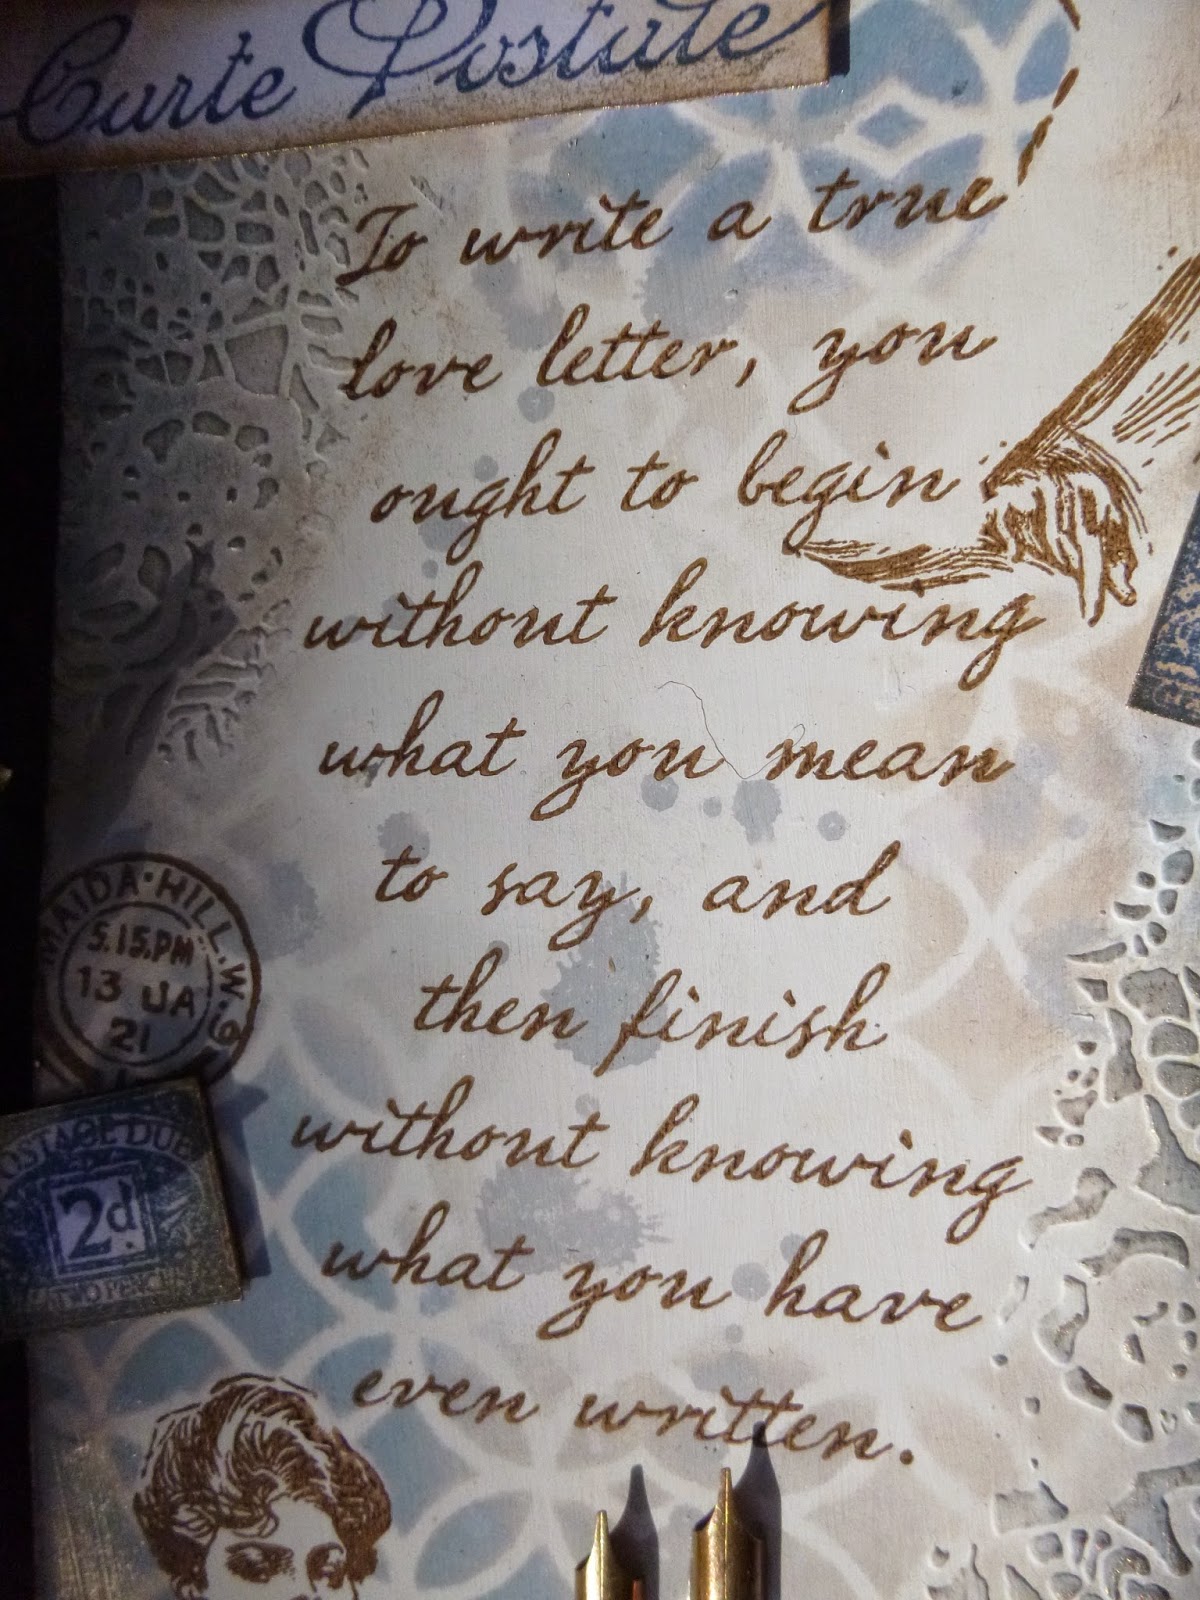
The two stamps of the postal plate were stamped in claret
 and baltic blue. The ruler of the Ephemera plate was 
stamped in archival ink. 


Grunge paste was put through the cargo stencil numerical 
once dry this was coloured with 
geletoes and treasure gold. 


Gauze was coloured with claret fresco finish paint then darkened 
with black soot distress ink.


Card coloured with distress inks was stamped with the Phineas
 stamp and the crown from crowning glory which I 
then highlighted with liquid pearls.


The clock face x 2 from Phineas stamp was covered in crackle 
accents. this was layered up with the clock faces of the 
time and keys plate. I used a cog die that I had in
my stash.


The sign at the bottom was hand written with white gel pen on 
black card and then backed onto kraft card.


I then backed it onto burlap and black card and finished off with 
 four gold brads on all corners. Thank you for stopping by 
please feel free to leave your comments as your
comments help to inspire me.
Cheers Dee


Saturday, 10 May 2014

How to write a letter...

Hello all, Alison (butterfly) here with a romantic tag for you.  I've loved the Jean-Jacques Rousseau quote about how to write a love letter for years, so I was delighted when it appeared amongst the new Tim Holtz releases.  And who else but the Gibson Girls could possibly fit so well with those words?!


I started by adding Grunge Paste to a large tag through the Tim Holtz doily stencil.


Once that was dry, I painted over the whole tag and texture with gesso.


I hadn't at that point planned what I'd be stamping, so it was pure luck that the two women and the quote all fitted (just!) between the textured areas!


I have some Gibson Girls masks ready cut (from the very first time I used them) and stored with the stamp set so I grabbed those and my go-to stencil at the moment, the TH Latticework.  In the first image, she seems to be struggling slightly to free her mind to just write... maybe she's falling out of love?


I used Stormy Sky, Faded Jeans and Chipped Sapphire Distress Inks.  Because they're going over gesso, all the colours end up quite muted, but that was fine for me with this tag.  In this second image, I think she's just reading a love letter she's received, and is pausing to let the thoughts sink in... good or bad news?


I added postage accents using Carte Postale by Katy Leitch (formerly Katy Fox).  There are the stamps and postmarks...


... stamped in Cobalt Archival and mounted on padded tape.


And the lovely Carte Postale stamp itself...


... as well as these fabulous postal ephemera labels.


I altered an Idea-ology Muse Token with some paint and White Fire Treasure Gold.


And then there's the quote itself, in such delicate handwriting.


And I've got some blotches from Katy Leitch's Messy Art, stamped in Pumice Stone.  Ink blots, or perhaps tear drops?

There's a shimmer of White Fire across the doily texture and on the edges of all the embellishments.


I couldn't do a tag all about letter-writing without adding a couple of pen nibs, also gilded with the White Fire.


And the whole thing is topped off with some very feminine lacy ribbon tied with delicate twine.


I don't know.... I must have been having a girly day!


Thanks so much for stopping by.  Do come and play along with this month's challenge In the Garden.  We'd love to see you there.  Happy Crafting all!


Ingredients:
Artistic Stamper stamps:  The Gibson Girls Plate #1; Katy Leitch sets - Carte Postale, Messy Art
Stampers Anonymous stamps: Random Quotes
Distress Inks: Stormy Sky, Faded Jeans, Chipped Sapphire, Pumice Stone
Archival Inks: Coffee, Cobalt
Tim Holtz Layering Stencils: Doily
Idea-ology Muse Token
Grunge Paste
Gesso
Twine
Size #10 Manila Tag
From my stash: Treasure Gold, lacy ribbon

Monday, 28 October 2013

Collect Moments by france papillon

Hi all,
It's with a sad heart that i'm writing here for the last time. To cheer this moment up a bit, a made an art journal page, with a wording that is right up to the situation me thinks ;)


I played in my mini Moleskine Sketchbook, which i use to wipe up excess paint and ink. As you can see, this page had already quite some layers: acrylic paint and several left overs from a dictionary page used for decoupage.
 I added some more turquoise acrylic and Decopatch glue to seal everything.
I stamped the Inspiration Jars: the plain one in Jet Black Archival ink on kraft cardstock colorized with Peacock Feather and Rusty Hinge Distress ink, the empty one in Black Staz'On on Wendy Vecchi's Clearly for Art. I trimmed both. I also prepared the big dragon fly from the Insects and Butterflies stamp set with Black Tuxedo Memento ink and colorized it with Copic markers.
I assembled the layers from the jars, placing the dragon fly in between them and glued it in my journal, placing it on Tim Holtz tissue tape. To glue the clear one, I used Matt Accents. I stamped a word from the Carte Postale on PaperArtsy Smoothy paper and colorized it with Vintage Photo Distress ink so that i had a label for the jars.
I added black lace on the sides and layered cambric and Tim Holtz tissue tape underneath the wording that i printed out. I stamped the little butterlfy from the Insects and Butterfly stamp set on PaperArtsy Smoothy paper and colorized it with Copic markers. To avoid having to trim too many details, i stamp the original image directly in my journal and glue the trimmed images on top of it. I also added a word from the Carte Postale set as a label on the jars and the post stamp as back ground.


That's me signing off.
 I wanted to thank you all lovely peeps here at Artistic Stamper and especially Emma and Jennie for giving me moments to collect. 

Much love,

france


Thursday, 3 October 2013

Special Delivery by france papillon

Hi all!

I'm France (from Belgium) and i'm so excited to be here with you! 
Thank you Jennie and Emma for adopting me as a new member of the Artistic Stamper family. 
I hope i'll do you proud!

For my first offering as guest designer, i hand made one of my favorite toys: an art journal.
When i started working on this project, all i came up with, was this little fellow: a tiny mini journal that ended up being an embellishment on a bigger one.
To make it, i ripped water color paper (200gr) to the wanted size: 3,5 x 4,8 cm. Out of a packaging cardboard, i cut what would be the cover: 3,6 x 6 cm (spine: 9,9mm). 
I added color to the cover using the two layered Verdigris Patina by Pébéo and added Vintage Photo Distress Ink on the edges.
To give the paper a vintage look, i colorized it with Vintage Photo Distress ink and sprayed some water. I randomly added some stamping with the 'Carte Postale' stamp set with Vintage Photo Distress ink and the 'Dance Dictionary Background' with Black Archival ink. Once dry, i assembled the pages in 3 signatures and sew them together with a coptic binding.
Using the same 'Carte Postale' stamp set, i added some stamping on the cover with Black Archival ink.
Adding light touches of embossing ink on the edges with a sponge allowed me to add accents of Weathered Wood Distress Embossing powder.
 I glued the first and the last page of the inside pages to the front and back cover and added an eyelet so that i could place a chain. I now had a very fun but very small journal. But he needed a bigger brother:
I opened up an empty box of pasta, covered it with gesso and added gommed kraft to reinforce the edges.
Once dried, i gave it the same Verdegris Patina treatment as his little brother, but with a rougher finish.
I covered it with Tim Holtz Tissue Wrap, applying the glue to the paper and not to the cover, to make sure the patina would stay in place.
I dressed up the inside using Kraft Cardstock and linen canvas, then filled it with the same water color paper i used for the mini journal, sewing the signatures to the spine.
I prepared several plaster strips by dipping them into water, laying them flat to dry and then colorizing them with Sepia and Tobacco Colorex and Vintage Photo Distress ink. I printed a photo from my dad when he was 4 (love that photo!!), added some stamping to it with the 'Carte Postale' stamp set inVintage Photo and Black Soot Distress ink and glued it to black Cardstock. 
As fastener, i glued a coil with Matte accents to the cover and embellished it with a button. The 'Special Delivery' was stampend on Smoothy paper with Black Archival ink and colorized with Vintage Photo Distress ink.
I added an eyelet to the back cover, so that i could slip a piece of Tim Holtz Crinkle Ribbon through the it and attach it to the coil on the front cover.

To keep the small journal closed, i added a closed strip that has the same 'Special Delivery' stamping as the front, but stamped with Sepia Archival ink.
Wishing you all a fantastic end of the week,
be back soon with more Artistic Stamper fun!!

xx
france