Showing posts with label artistic stamper tick tock. Show all posts

Sunday, 13 September 2015

Steampunk flowers and more...by Shilpa

Hello Everyone,

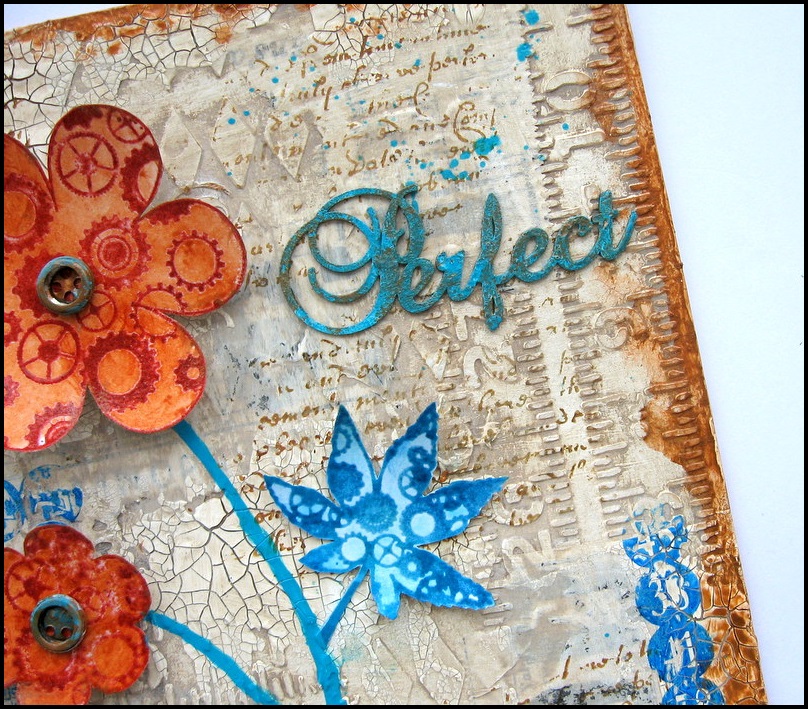
Today I would like to share with you a mixed media piece I created with Artistic stampers Steampunk flowers 


I've taken few photos while making this art piece...here we go..


I adhered Tim Holtz Postal tissue paper to the base. After that I stenciled with texture paste. I also applied crackle paste randomly on the surface.


Here you will find, I've applied thin layer of Raw umber, let it dry a bit and wiped it with baby wipe. So the dark colour remained in the grooves


I've done some texture stamping with Artistic stamper text stamp and Numbers stamps.
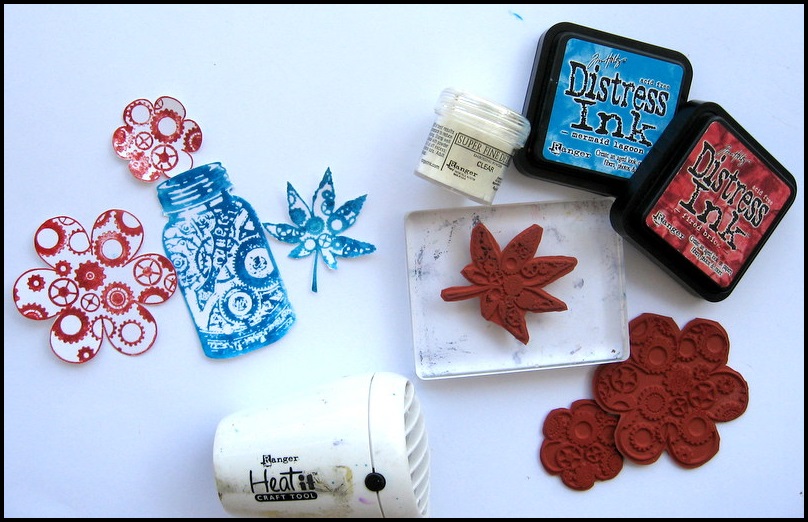


I stamped Artistic stamper Steampunk flowers and leaves with Distress inks and heat embossed them with clear embossing powder.


I assembled everything..on the main surface.

here are some of the close ups..


Hope you are inspired to try Artistic stamper Steampunk stamps.
Thanks so much for stopping by.

Products Used here:
Artistic stamper stamps : Tick Tock flowers and Inspiration Jars
Calligraphy mat 13
  Katy Leitch Numerical Plate


Sunday, 16 August 2015

DIY Postcards by Gemma

Hi All

I was taking a wander through town recently and came across some blank postcards, and instantly thought what a good idea. You could decorated them any way you wanted, and use them as intended, make sets of them for gifts, or even just to drop somebody a note to tell them your thinking of them.


I used several different colours of Distress ink, including shabby shutter, twisted citron and frayed burlap. I used the same process on all three postcards pictured above, which started by blended two different Distress inks over the whole postcard. Then stamping over the top with a background stamp, The one below shows the chicken wire background stamp.


 Over this on all the postcards I stamped with various cogs and springs from the Tick Tock stamp set, using different distress inks.


Using black archival ink, I stamped the large clock face and the text from the same set of stamps and doodled around the edges with a black pen. It was such a fun,quick, simple idea, and so handy to have a few made up and sitting about. Even just to flick through and cut apart for other projects, 


Thanks for reading
Gem (inkykitty)


Monday, 4 May 2015

Time Birdz

Hi everyone I have for you today Neil Walkers Birdz stamp Steampunked up. 
I started with an old page from a book unfortunately it is a medical
journal (so some of the text is a bit weird).


I started by stamping the birdz stamp onto the page and the clock at the bottom.
Next I painted the inside of the bird and the clock's with 
cream/buff acrylic paint. 


I then touched up the base of the beak with Quinacridone Gold and a bit of grey/blue
on the top of the head and wing. I then did a wash around the entire image 
with the blue/grey.


I then followed up with a wash of very diluted Prussian blue. For the base of the main clock I used a
 technique that was used by Jennie Atkinson on this blog back in 
may 2012 click here to go to it > Time Flies . 


I assembled it all together gave a final wash of really watered down red/brown
a coat of matt varnish to seal it all.


Around the edges I used the blending technique of a craft mat with
Vintage photo and Walnut stain.


A close up of the clocks the lower one was stamped onto grunge paper
I would use card/grey board next time as I found 
grunge paper buckles.


I added a fuse and four bolts plus the clock die cut this was painted with
burnt umber then while wet sprinkled with UTEE then heat set. 
Final touch a bit of gilding wax.
Products Used
  1. The following Artistic stamper stamps Neil Walker Birdz, Tick Tock plate.
  2. Distress inks Vintage photo & Walnut Stain.
  3. Distress stain spray in wild honey
  4. UTEE
  5. Deco Art Media fluid acrylic Titan Buff, Prussian Blue, Quinacridone Gold, Burnt umber & Paynes grey.
  6. Gilding wax.

That's it for today folks! let me know what you think.
Cheers Dee x

Wednesday, 23 July 2014

Klimt Take On Salome By Dee


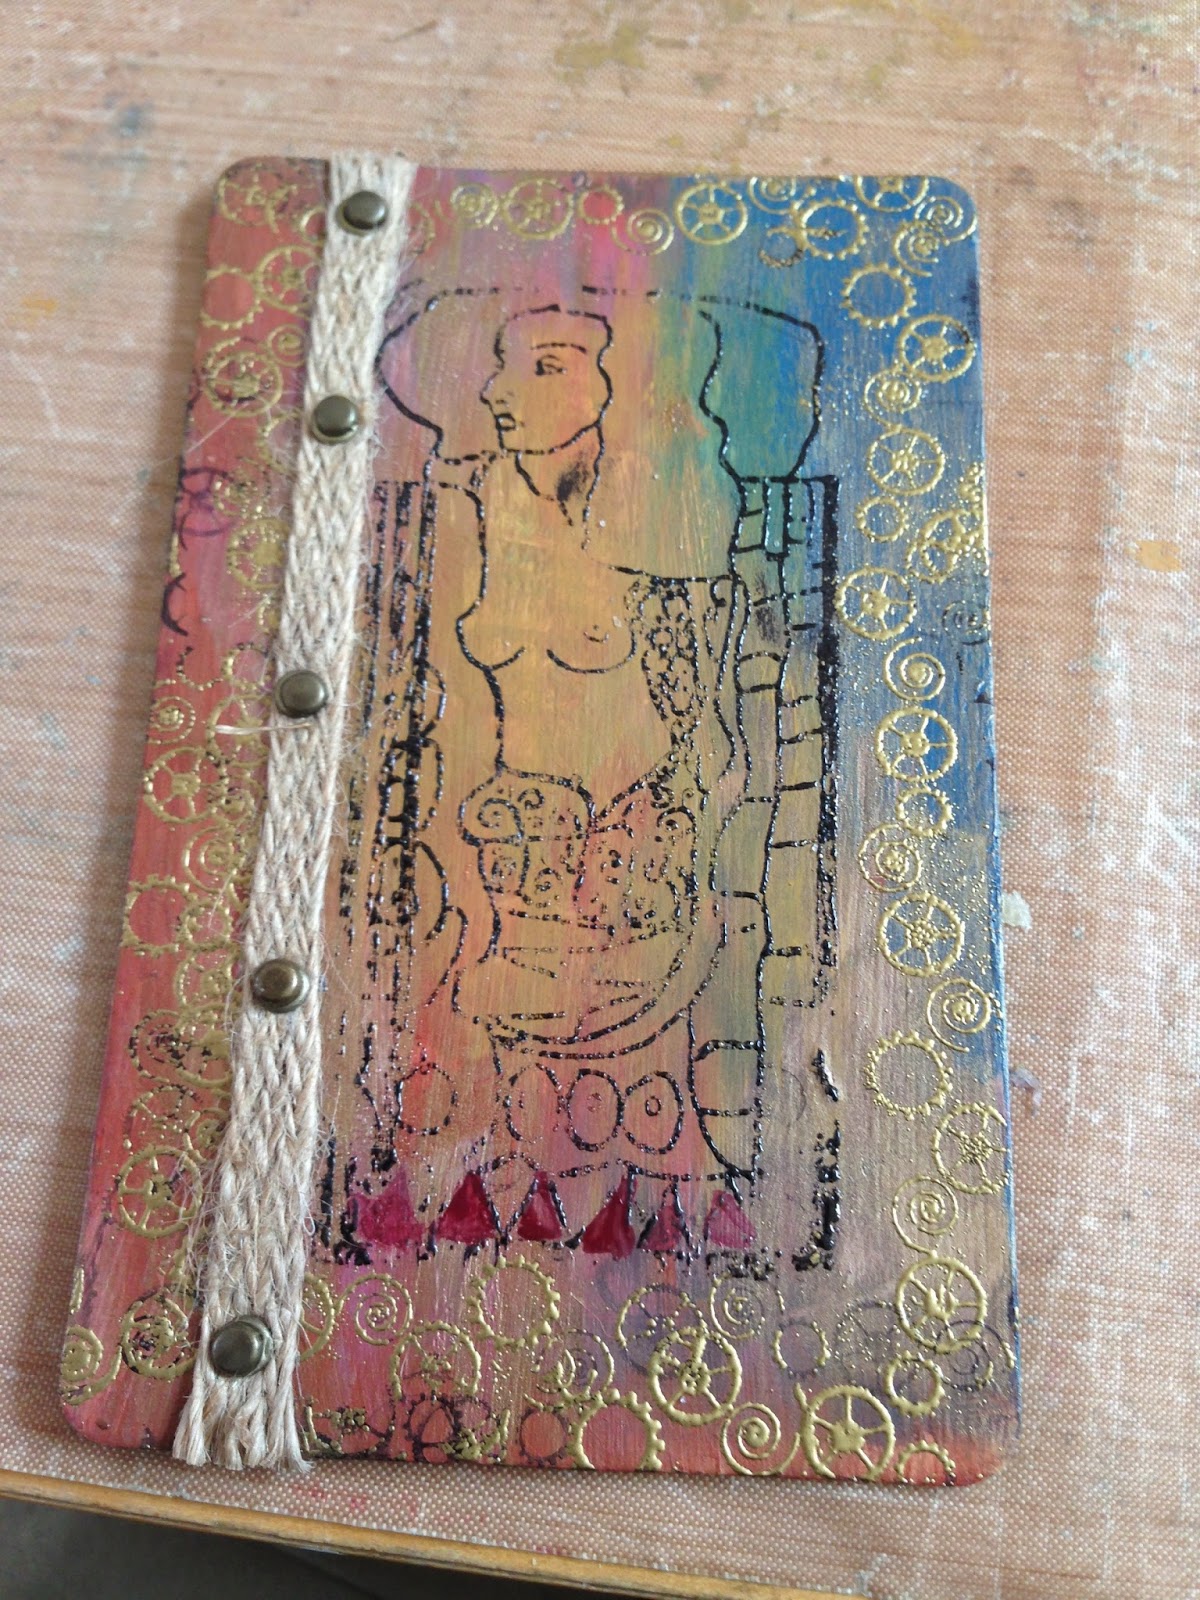
Hi everyone I hope you are all well, this piece is inspired by the artist
Gustav Klimt if any of you know about him
he was a symbolist painter. 


The moment I spotted this stamp I thought of his work
So with that in mind it would be rude
not to use gold.


Firstly I painted my board with Fresco  Finish paints in the
following colours Tikka, Seaweed, Brownshed, 
claret and Baltic Blue.


I stamped the Salome stamp to the centre in versa fine onyx black
and then clear embossed it. Then around the edges I stamped


I then added some hessian ribbon down the left hand side and
attached this with five brads. 


Next I picked out areas to highlight with old gold 


I also used the Claret and brown shed to highlight 
other area's.


Next I used a small paint brush and applied glossy accents to 
highlight certain area's.


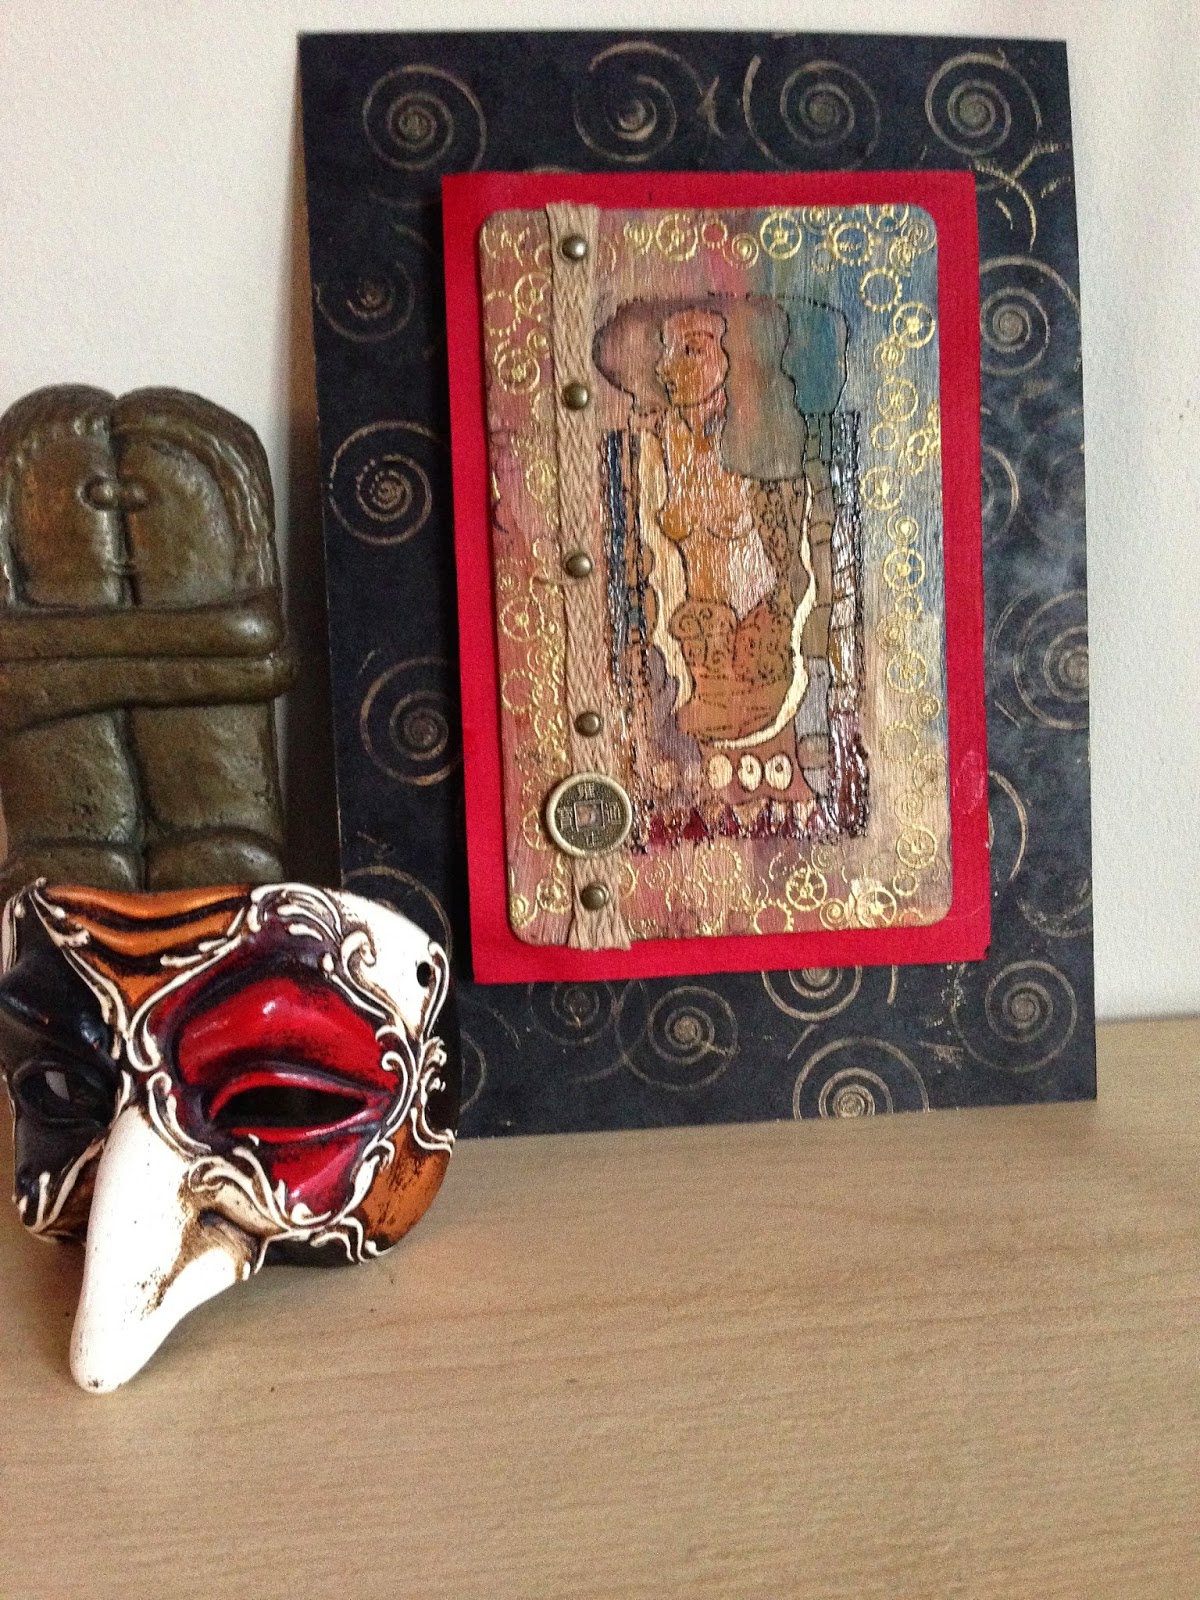
I poped this on to a vibrant red covered foam board.


I then placed this on to a black piece of card that I had randomly
stamped with the swirl pattern of the tick tock plate that had
 been inked with gold brilliance and heat set.

That's it from me today thank you for taking the time to pop by
please feel free to leave your comments 
happy stamping!
Dee x


Materials used:- Artistic Stamper Stamps  Tick Tock, Borders A5, Salome 4 x 9 
  Embellishments,  Dee Adams