Showing posts with label Mixed Media. Show all posts

Saturday, 13 February 2016

Adventure - Tag by Shilpa

Hello Everyone,
Shilpa here,


I've created this mixed media tag with Artistic stamper Dragonfly stamp and Decay swirl background stamp.

here are step out


I applied Prima modeling paste on the tag with my palette knife. Before it dry, I took out my swirls stamp, spritzed water on it and stamped into the paste, it gave this fab texture design. Let it air dry completely.


Next, I spritzed Peacock feather and cracked pistachio distress sprays randomly on the surface. 


When the surface was dry, I stamped text and texture with few of Artistic stamper stamps and archival inks.


Further I stamped dragonfly and fuzzy cut it. I created layered background for it with burlap, tag, Tim's tissue paper. Attached brad onto the dragonfly for more interest. 


Hope you liked my tag and got inspired.
Thanks so much for stopping  by.


Products Used :

Thursday, 26 November 2015

Oriental Elephant by Shilpa

Hello Everyone,

I've created small mixed media banner with Artistic stamper Oriental stamps


Our theme of this month's challenge is fabric


I've used Burlap and lace material in the background. I used various Distress paints to bring on the colours. I've stamped Chinese script with Chinese text background stamp and Orange Blossom Archival ink.


Oriental Elephant is stamped with Jet black archival ink and coloured with Watercolor markers. For more visual interest I added few Tim Holtz Ideology embellishments.

Hope you liked and got inspired with my project. There are still 4 more days, you can join us for our 'Fabric Challenge' this month.

Thanks so much for stopping by.

Products used from Artistic Stamper:


Tuesday, 13 October 2015

Gibson Girl Triptych

Hello Everyone,
Shilpa here

Today,I would like to share with you Triptych.


I've used Artistic stamper stamps- Gibson Girls, botanical plate1,2

Here are close up views of each panel.


For the background, first I applied distress paints dusty concord, vintage photo and milled lavender.
when it dried, I applied DecoArt crackle glaze randomly on the surface, kept it to dry overnight, which resulted into beautiful crackle texture. To highlight it, I applied little bit of white acrylic paint. Next I stamped text, texture and flowers with archival inks.
Butterflies are stamped, cut and adhered, I've added small lavender pearls on them.


I love all Gibson girls stamps by Artistic Stamper. This image is new in my collection. I stamped her with Ranger jet black archival ink and coloured with distress inks.


Hope you liked my triptych and got inspired!

Thanks so much for stopping by.

Products used from Artistic Stamper:
Background stamps - Calligraphy mat


Sunday, 13 September 2015

Steampunk flowers and more...by Shilpa

Hello Everyone,

Today I would like to share with you a mixed media piece I created with Artistic stampers Steampunk flowers 


I've taken few photos while making this art piece...here we go..


I adhered Tim Holtz Postal tissue paper to the base. After that I stenciled with texture paste. I also applied crackle paste randomly on the surface.


Here you will find, I've applied thin layer of Raw umber, let it dry a bit and wiped it with baby wipe. So the dark colour remained in the grooves


I've done some texture stamping with Artistic stamper text stamp and Numbers stamps.


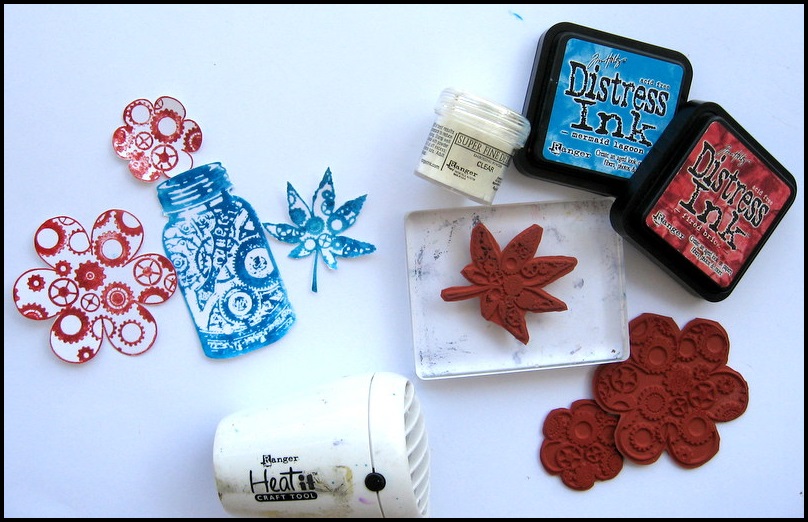
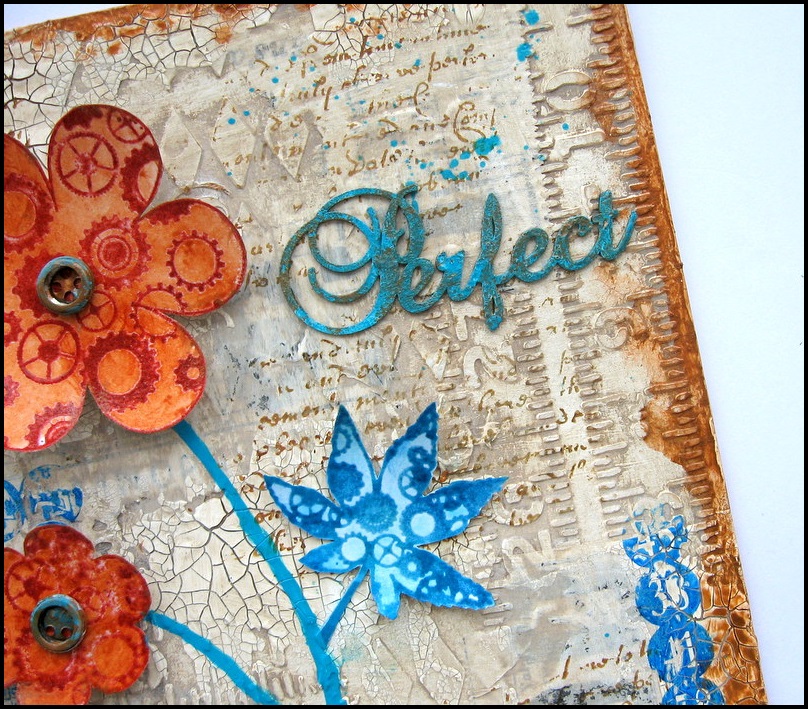
I stamped Artistic stamper Steampunk flowers and leaves with Distress inks and heat embossed them with clear embossing powder.


I assembled everything..on the main surface.

here are some of the close ups..


Hope you are inspired to try Artistic stamper Steampunk stamps.
Thanks so much for stopping by.

Products Used here:
Artistic stamper stamps : Tick Tock flowers and Inspiration Jars
Calligraphy mat 13
  Katy Leitch Numerical Plate


Friday, 17 October 2014

The family is a little home.

I have a wonderful stamp with collage - it illustrated happy family and relevant inscriptions ...


Despite the fact that the stamp is good in itself, I wanted to make with it something interesting, but better - something a bit philosophical.

Therefore, this image appeared on the big house, made ​​of gypsum.
As well as butterflies began coexist with this family - as if hinting at ease and a wonderful family atmosphere.


To make the background a little more interesting, I added to it the structural paste, in which I've put the stamp "Stars", as well as a little spray of vintage colors.


And so a great decoration for the home is ready!


Due to the design features, it is not too heavy, but it looks very imposing)))))


And, sorry, one more photo)))))


I hope you liked the idea of ​​a large decoration for home)

See you)
And have a good day!

Maria Potapovich (mellpellmell)


Wednesday, 15 October 2014

Memories - Journal Page

Hello Everyone, Happy Wednesday!!
Shilpa here,
Couple of days back I shared with you my new journal and how I created it's vintage cover. If you have not seen it, here is the link- Layered Journal cover

And today, I created my first journal page in it. This is inspirational project as we have 'Memories' theme for this month's challenge.


I have used 'Faces' stamps from Artistic Stamper. They have vintage look and perfect for memories journal page.

.
I had fun playing with layers and texture. I started my first layer with book pages. And next layers were - washi tapes, design paper strips, canvas strips, lace. After this, I applied white crackle texture paste through Tim Holtz Star stencil.


I applied gesso at some places and when it dried I stamped with texture stamps and Ranger black Archival Ink. Next, I spritzed inks in various red, golden and brown colors, I dried them between each layer.


I created same texture on both sides of page.


Middle part of the page has various paper layers which I created with stamping, distressing, coloring. 

here are some of the close- ups......


Hope you liked my project, do let me know your views in comments.
Don't forget to join us for our monthly challenge to win beautiful Artistic stamper stamps.

Supplies used:
Artistic stamper stamps: Faces,  Calligraphy Mat 13,
Tim Holtz Layering stencil - stars
From my stash Washi tapes, gauze.

Sunday, 15 June 2014

Free your soul - Mixed Media Canvas

Hello Everyone, Shilpa here today,  with my first project with ASCTB and I am super excited about it. I have created a Mixed media canvas with beautiful Artistic stamper stamps.


 I started with 6*8" canvas. And applied Wendy Vecchi white embossing paste through Crafters workshop stencil- Pomegranate.


I wanted to use Dona's - Free your soul stamp, which is image of lady experiencing freedom. I chose shades of pink and purple for my background.

I spritzed water on the canvas. After this at random places I applied Milled Lavender, Spun Sugar, Worn Lipstick, Dusty concord Distress paints. I heat set it with my heat tool.


I stamped this lovely image with Dona's Free your soul stamp and Tree Branch Archival ink. I've also used Pen and ink hatched background stamp and Calligraphic Mat 13 to create more layers in the background.  


To make these butterflies, I've used New Flutterby stamp set and Spun sugar and worn lipstick Distress paints. I stamped them on watercolour paper, let them dry and cut them out, applied walnut stain distress ink (Mini) on the edges. I also applied Vintage photo DI at the all edges of canvas.


Thanks so much for visiting today. Looking forward to your feedback and comments.

Supplies used:
Artistic stamper stamps - Dona's - Free your soul,
Pen and Ink hatched background stamp
Calligraphic mat 13
Flutterby stamp set 
Distress paints - Spun sugar, worn lipstick, milled lavender, dusty concord
Archival Ink - Tree branch
Distress inks - Mini set with walnut stain, vintage photo


Wednesday, 26 March 2014

Encourage Inspiration ATCs by Astrid

Hello everyone and lovely to have you drop by here! I have been having loads of fun altering playing cards recently and that got me in the mood for playing with a smaller format, so today I would like to share 3 mixed media ATCs with you....
I used just two stamp sets for this project, Katie Fox Numerical and Journaling Words 3
This is how I went about it:
I cut 3 bits of card to ATC size (2.5 x 3.5") and covered them with Tissue Wrap, wrinkling it up a bit to get some texture.
Next I added some Distress Paints, Picket Fence and Frayed Burlap
This was followed by some messy background stamping with various stamps from the Numerical plate, mostly with Jet Black Archival, but on one of them also with Red Geranium.
I'll show you some close ups and talk you through some of the details:
I have a thing about hearts at the moment, all three ATCs have a heart on them, these were created with the help of one of the new Crafters Workshop Stencils, the Gothic Romance one. It has hearts in two sizes and some really cool other patterns, I just love these new stencils!! You can see one of the patterns done rather messily in Picket Fence Distress Paint. The heart itself and all the other colours were done with Distress Markers.
I used a really cool technique for this: After you have finished your stamping, cover the whole surface with a thin layer of Glue N Seal. I used Matte. Once it has dried, scribble your Distress markers where ever you want some colour and just blend with your finger. You get a lovely translucent layer of colour. On this one I used Fired Brick, Bundled Sage, Aged Mahogany, Broken China, Black Soot and Walnut Stain.
For this one I used a larger heart on the same stencil, more of the Numerical stamps, both in Black and Red Geranium. I also stamped a bit with a bottle cap and some more Picket Fence Distress Paint. Colour was added in the same way, similar colours but also Faded Jeans.
And here is the last one, more of the same. I over stamped the heart with some Picket Fence DP, I also added some marks with an old credit card. I wanted these ATCs in a messy mixed media journaling style, with lots of layers.

The Final part was to stamp the word Inspiration from the Journaling 3 plate onto old book paper.
I added it to the side of my hanger and finished it all off with some Chit chat stickers and Label Letters.
Well, there you have it, - not quite my usual style, but I had fun playing and I hope you like it.

Thanks so much for visiting, and if you are interested in becoming part of our Design Team, check out Jennie's DT call!!