Showing posts with label Calligraphic Mat 13. Show all posts

Sunday, 13 September 2015

Steampunk flowers and more...by Shilpa

Hello Everyone,

Today I would like to share with you a mixed media piece I created with Artistic stampers Steampunk flowers 


I've taken few photos while making this art piece...here we go..


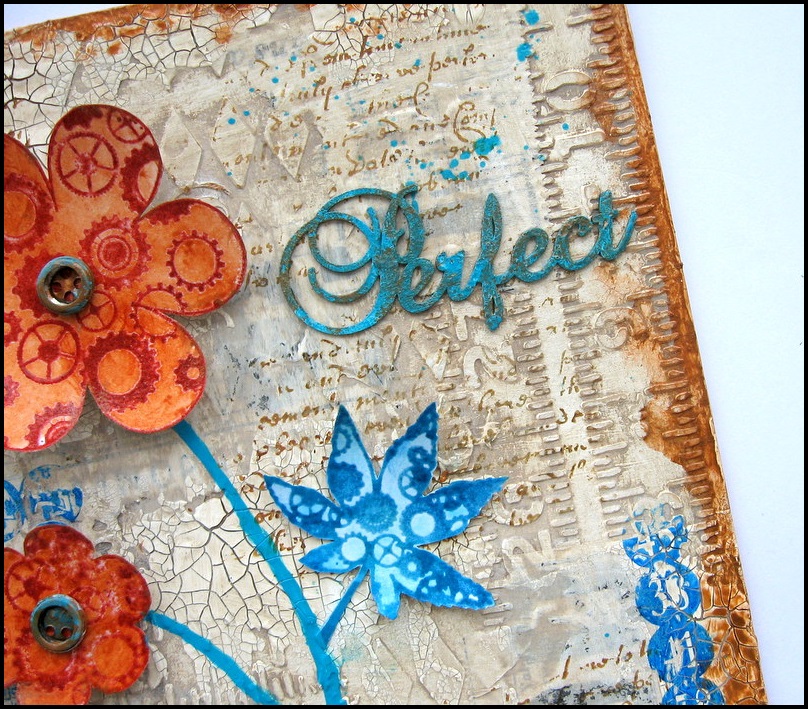
I adhered Tim Holtz Postal tissue paper to the base. After that I stenciled with texture paste. I also applied crackle paste randomly on the surface.


Here you will find, I've applied thin layer of Raw umber, let it dry a bit and wiped it with baby wipe. So the dark colour remained in the grooves


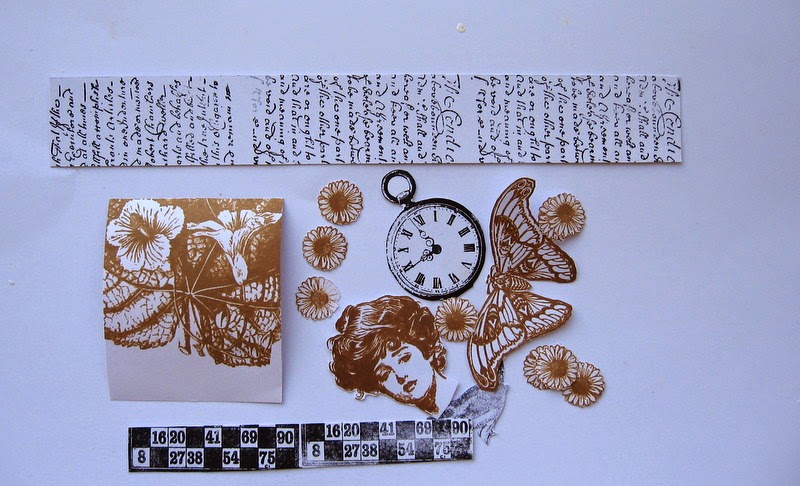
I've done some texture stamping with Artistic stamper text stamp and Numbers stamps.


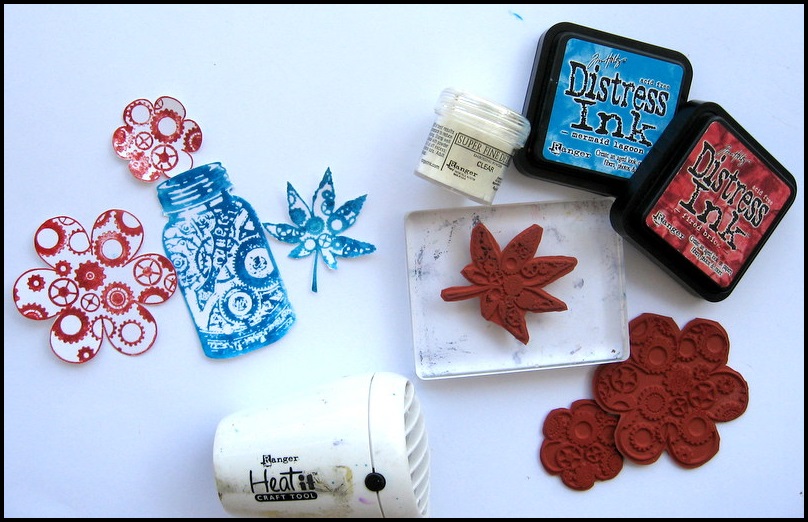
I stamped Artistic stamper Steampunk flowers and leaves with Distress inks and heat embossed them with clear embossing powder.


I assembled everything..on the main surface.

here are some of the close ups..


Hope you are inspired to try Artistic stamper Steampunk stamps.
Thanks so much for stopping by.

Products Used here:
Artistic stamper stamps : Tick Tock flowers and Inspiration Jars
Calligraphy mat 13
  Katy Leitch Numerical Plate


Wednesday, 15 October 2014

Memories - Journal Page

Hello Everyone, Happy Wednesday!!
Shilpa here,
Couple of days back I shared with you my new journal and how I created it's vintage cover. If you have not seen it, here is the link- Layered Journal cover

And today, I created my first journal page in it. This is inspirational project as we have 'Memories' theme for this month's challenge.


I have used 'Faces' stamps from Artistic Stamper. They have vintage look and perfect for memories journal page.

.
I had fun playing with layers and texture. I started my first layer with book pages. And next layers were - washi tapes, design paper strips, canvas strips, lace. After this, I applied white crackle texture paste through Tim Holtz Star stencil.


I applied gesso at some places and when it dried I stamped with texture stamps and Ranger black Archival Ink. Next, I spritzed inks in various red, golden and brown colors, I dried them between each layer.


I created same texture on both sides of page.


Middle part of the page has various paper layers which I created with stamping, distressing, coloring. 

here are some of the close- ups......


Hope you liked my project, do let me know your views in comments.
Don't forget to join us for our monthly challenge to win beautiful Artistic stamper stamps.

Supplies used:
Artistic stamper stamps: FacesCalligraphy Mat 13,
Tim Holtz Layering stencil - stars
From my stash Washi tapes, gauze.

Friday, 10 October 2014

Layered Journal cover

Hello Everyone,
Shilpa here,
I got plain Art Journal for myself recently. And when I decided to make cover for that, I  could not think other than my lovely Artistic Stamper stamps. And I used many to create this Vintage Journal cover.


I started with stamping some images


I've used Gibson girl plate # 1stamp, Waches, large Butterfly stamp from Insects and Butterfly N0 1 , my favourite small bird from Birds of Feather set,
I stamped them with black and Coffee Ranger Archival Inks.


I took design paper from Prima Vintage Journey paper pad. Applied gesso and dried it with heat tool. With crafters workshop stencil and Clear Crackle embossing paste I created texture. If you click on this photo you can see beautiful crackles. Then, I spritzed Lindy's stamp gang inks in various blue, red and brown colors, created some drips. They made beautiful layers.


Here also you will see the background texture and layers.


Next on the base I created layers with stamped images, design papers from Graphic 45 couture pad, diecut doily, Tag. I gave these paper vintage look with spraying inks and applying Distress inks - Vintage photo, Broken China, Walnut stain. I distresses edges with Tim Holtz Paper Distresser.


Here you will see cute lil' birdie, vintage charm, wooden button and  flowers as my embellishments.


I am totally in love with these Gibson Girls stamp set. Images are lovely and we can add them on any project. I adhered the stamped image of this girl on diecut frame, which I distressed before with broken china distress ink. Other than flowers, you will see Prima jute trim which is perfected suited here. And colored butterfly is perfect fit in the corner, it has beautiful design on it.


In the middle, I've created tile with floral stamp. I colored it again with distress inks - Peeled paint and Broken china, vintage photo.


And this is the final look of my Journal cover. Do you like it? Let me know in your comments.
The theme of this Month's challenge at Artistic Stamper is 'Memories'. Use your favourite Rubber stamps and Distress Inks to create something beautiful from your memories. 
Thanks so much for your visit today.
Supplies Used:
Artistic Stamper Stamps: 
  Gibson girl plate # 1stamp Waches,  Insects and Butterfly N0 ,  Birds of Feather set,