Showing posts with label Messy Art. Show all posts

Tuesday, 19 May 2015

Art journal page project

Hello happy journalers ! 
Do you like art journaling ? I hope so, since our May challenge is  Journaling your heART out!
For those of you who are not at ease with art journaling, I will share this project with you. I got inspiration from Tracy Scott's art.

Materials :
paper or cardboard
acrylic paint
white gesso
black Archival ink
Artistic Stamper Mask : Large Dot 
Artistic Stamper stamps :
Backgrounds : Hessian, Cogs,
Katy Leitch : Messy Art, Encyclopaedia Botanica 
Seaside : Seaside No. 1 # 018
Neil Walker : Alphabet Soup

Start by painting the page with yellow, green and pink acrylics, and then stencil the large dots with gesso :


Stamp Dots Background with gesso and Hessian with black Archival :


Stamp Hessian, Cogs and Messy with black Archival, and again Dots Background with gesso on other places :


Draw circles with black acrylic paint on a thin brush, let it drip here and there, allow it to dry and then fill the circles with acrylic paints. 
Create shadows around the circles with paint or charcoal :


Stamp Alphabet soup with white acrylic, and with black Archival ink blots (from the Messy Art plate) and text (from the Encyclopaedia Botanica one) into the circles :


And here is the final page. Since my pictures from Gil Bruvel were relating to the sea world, I have finished by stamping some shells and starfishs :


Once you’re done with your art journal page, you can post it here to participate in our May challenge to win some fabulous Artistic Stamper stamps !

Thanks so much for stopping by,
your comments are very much appreciated.

Titbelsoeur

Monday, 24 November 2014

I am... journalling again

Hello all, Alison (butterfly) here with a journal page for you today.


This one started a while back, and got as far as having all the texture in place and a sharp monochromatic look.  But then it got a bit stuck, wondering where to go next.


Then the new Distress Stain Sprays appeared, and suddenly the game was on!  Faded Jeans and Vintage Photo and we're away.  I'll show you some close-ups of my favourite bits as I let you in on the steps I took to get here.


I started with strips of tissue tape across the page and added crackle paste in various areas.


I spread it quite thinly so that the crackle would be very fine.


The large heart was created with a hand-torn stencil shape, through which I first spread texture paste and then added a coat of crackle once that was dry.  I wanted a really thick, dimensional look, and that's what I got.


I embedded the pen nibs before the crackle heart had set, so no need for glue.


This was the point at which things ground to a halt.  However, once I knew there was spraying in the offing I gave the whole thing a wash of Fresco paint in Chalk.  It's part of one of the JOFY Limited Edition sets.  As well as muting the tape, it gives a lovely warm base colour.


In order to really add depth to the crackles of the heart, I splodged Black Soot Distress Stain over it, then wiped it back, leaving it just in the cracks.  Then I let loose with the two chosen Distress Stain Sprays.  It's such a delight finally to have sprays in the Distress colours without having to tip my Distress Stains into spritzers.  Perfectly possible, yes, but fiddly and always with the risk I'd knock the lidless stain over and lose it all!!


I added some of the fabulous Katy Leitch splodges and blots from the Messy Art plate, stamped in Coffee Archival.


And I used the I am... stamp from the Journalling Words #5 set on a Chalk-washed tag also stamped in Coffee Archival.


It wasn't quite popping enough, so I drew around the edges with a PITT pen and used an embossing ink pen to fill in the letters, followed by clear embossing powder to give it a hint of shine.


As you can see, I also used Treasure Gold to add a touch of warmth and glamour.  It also helps to highlight all that texture.


So there you have it.  I am... rather happy with this one.  It pleases me, and I'm looking forward to lots more Distress spritzing!


Thanks so much for stopping by today.  It's always lovely to hear what you think.

You've still got a week or so to come and play in our Christmas is Coming challenge.  You don't have to use Artistic Stamper stamps, but if you do you get two entries in the prize draw.  Hope to see you there.

Ingredients used:
Artistic Stamper stamps: Journalling Words #5Katy Leitch Messy Art
Distress Stain Sprays - Faded Jeans, Vintage Photo
Fresco Paints - Chalk (JOFY Limited Edition Autumn 2014)
Coffee Archival Ink
Croco Crackling Colour - White
DecoArt Crackle Paint
Idea-ology Tissue Tape
PITT pen
Inkssentials Embossing Pen
Clear Embossing Powder
Treasure Gold - Florentine

Sunday, 24 August 2014

Gentle Journalling

Hello all, Alison (butterfly) here.  I've been trying to be gentle with myself in the run-up to my big journey.  It's been so busy round here that I needed the little play time I've had lately to double as mind-calming relaxation, so I just did some gentle journalling in the pages of a book.  It's only looking at it now that I realise how much of a story it's telling about my imminent adventure!


All being well, I should be en route to the States later today - yes, the passport arrived with the visa inside just in time!  I'll be in New York working on a production of Christopher Marlowe's Tamburlaine.  So while these pages provided a little respite in a crazy August of work and admin and preparation and packing, they also clearly have that sense of taking flight into new adventures built right into them, along with some ancient text.  (Okay, it's not ancient text I'll be working on, but it is more than four centuries old!)


I started from the idea of wanting to "preserve" some of the original book text, and I used Katy Leitch's butterfly silhouettes to do it.  They're stamped in Versamark and then clear-embossed.


Next came a wash of Chalk Fresco paint, and while that was still wet, I swept some Turquoise on too.  (Both colours are from the new Limited Edition JOFY set.)


Through all the later stages I did my best to keep them clean and clear so that the text would stay fully present.  I do like how they'll still catch the light and gleam at certain angles.


I used one of the Artistic Stamper masks to create my largest bubbles of positivity sweeping across and up the page spread.  (That seems to be the direction my art journal pages move in - look!) I sponged through the mask with Faded Jeans and Broken China Distress Inks and then did some shading and highlighting with pastel pencils.


Over that I stamped the Artistic Stamper Large Random Dots in both the Chalk and the Turquoise.  And finally I did some spattering with the inner stick of the Dylusions White Linen spray.


I seem to be a little bit obsessed with the meadow grasses from Tim's Spring Sprung stamp set at the moment, so they put in an appearance along the foot of the page.  And I used the Mini Polka Dot Background to add extra texture around the sky.


The tags had been soaked in tea and coffee, and then I stamped the beautiful Calligraphy Mat 4 in Sepia Archival Ink.


The large words from Journalling Words 2 are stamped in Sepia, as are the blots and splotches from the Katy Leitch Messy Art plate.  The big words got a bit of clear embossing for that magical extra shimmer. 


Once they were glued down, I used a couple of Inktense pencils to shade and outline them.  I really love how that makes them pop against the turquoise sky behind. And I tied some rustic twine through the tops of course.


There's a little bit of Vintage Photo and Gathered Twigs inking all the way around the edge, but that's about it.  This was just a little oasis of calm in my crazy August, and I had a lovely gentle time playing with it!

Thanks so much for stopping by.  There's still a week to enter our Anything Goes challenge this month - no need to use Artistic Stamper stamps, but if you do you get two entries to the prize draw.  Hope to see you there.

Ingredients used:
Artistic Stamper masks: Large Dot Mask
Dylusions - White Linen
Fresco Finish Paints - Chalk and Turquoise from the new JOFY Limited Edition
Archival Inks - Olive and Sepia
Versamark embossing ink
Distress Inks - Faded Jeans, Broken China
From my stash: twine, book, Spring Sprung stamps, tea and coffee!

Saturday, 10 May 2014

How to write a letter...

Hello all, Alison (butterfly) here with a romantic tag for you.  I've loved the Jean-Jacques Rousseau quote about how to write a love letter for years, so I was delighted when it appeared amongst the new Tim Holtz releases.  And who else but the Gibson Girls could possibly fit so well with those words?!


I started by adding Grunge Paste to a large tag through the Tim Holtz doily stencil.


Once that was dry, I painted over the whole tag and texture with gesso.


I hadn't at that point planned what I'd be stamping, so it was pure luck that the two women and the quote all fitted (just!) between the textured areas!


I have some Gibson Girls masks ready cut (from the very first time I used them) and stored with the stamp set so I grabbed those and my go-to stencil at the moment, the TH Latticework.  In the first image, she seems to be struggling slightly to free her mind to just write... maybe she's falling out of love?


I used Stormy Sky, Faded Jeans and Chipped Sapphire Distress Inks.  Because they're going over gesso, all the colours end up quite muted, but that was fine for me with this tag.  In this second image, I think she's just reading a love letter she's received, and is pausing to let the thoughts sink in... good or bad news?


I added postage accents using Carte Postale by Katy Leitch (formerly Katy Fox).  There are the stamps and postmarks...


... stamped in Cobalt Archival and mounted on padded tape.


And the lovely Carte Postale stamp itself...


... as well as these fabulous postal ephemera labels.


I altered an Idea-ology Muse Token with some paint and White Fire Treasure Gold.


And then there's the quote itself, in such delicate handwriting.


And I've got some blotches from Katy Leitch's Messy Art, stamped in Pumice Stone.  Ink blots, or perhaps tear drops?

There's a shimmer of White Fire across the doily texture and on the edges of all the embellishments.


I couldn't do a tag all about letter-writing without adding a couple of pen nibs, also gilded with the White Fire.


And the whole thing is topped off with some very feminine lacy ribbon tied with delicate twine.


I don't know.... I must have been having a girly day!


Thanks so much for stopping by.  Do come and play along with this month's challenge In the Garden.  We'd love to see you there.  Happy Crafting all!


Ingredients:
Artistic Stamper stamps:  The Gibson Girls Plate #1; Katy Leitch sets - Carte Postale, Messy Art
Stampers Anonymous stamps: Random Quotes
Distress Inks: Stormy Sky, Faded Jeans, Chipped Sapphire, Pumice Stone
Archival Inks: Coffee, Cobalt
Tim Holtz Layering Stencils: Doily
Idea-ology Muse Token
Grunge Paste
Gesso
Twine
Size #10 Manila Tag
From my stash: Treasure Gold, lacy ribbon

Friday, 10 January 2014

Always and Forever Changing!

Hello all!  Alison (butterfly) here with my first Artistic Stamper post of the New Year.  I should probably have made a resolution about trying to write shorter posts, but I didn't, sorry!  I've another photo-heavy marathon for you (and remember you can click on the photos for a closer view).


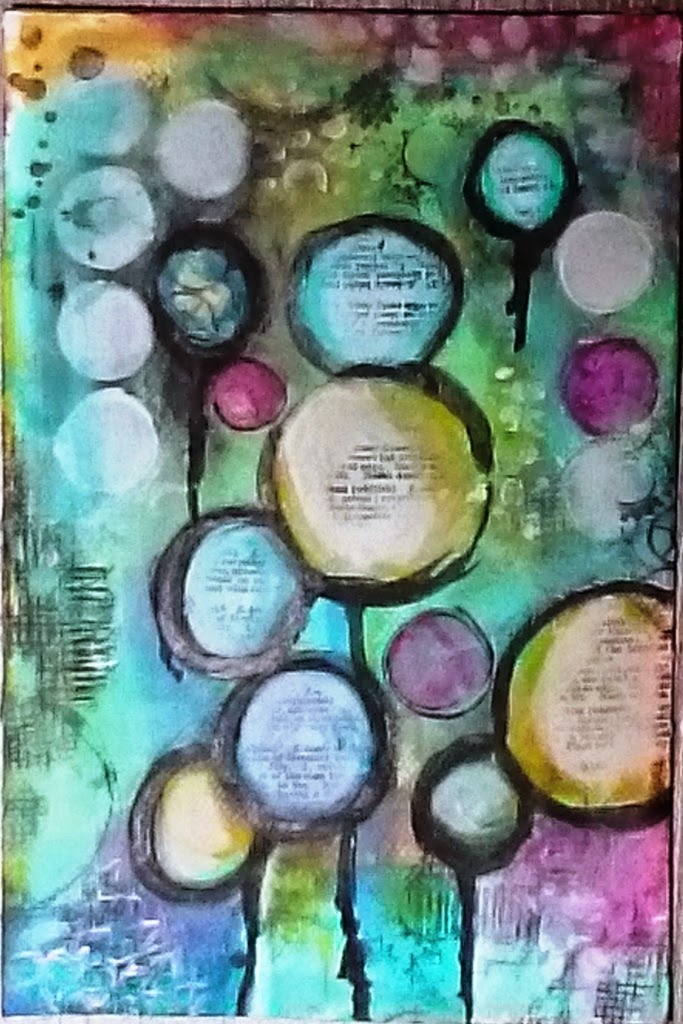
I started with one idea in my head with this one, went via a completely different possibility and ended up in an utterly unexpected destination - but one that I'm very happy with.  In fact, it may be one of my favourite makes.


I'm afraid I don't have many photos en route since most of the way along I was pretty sure I was going to bin it.  Very glad I didn't now!


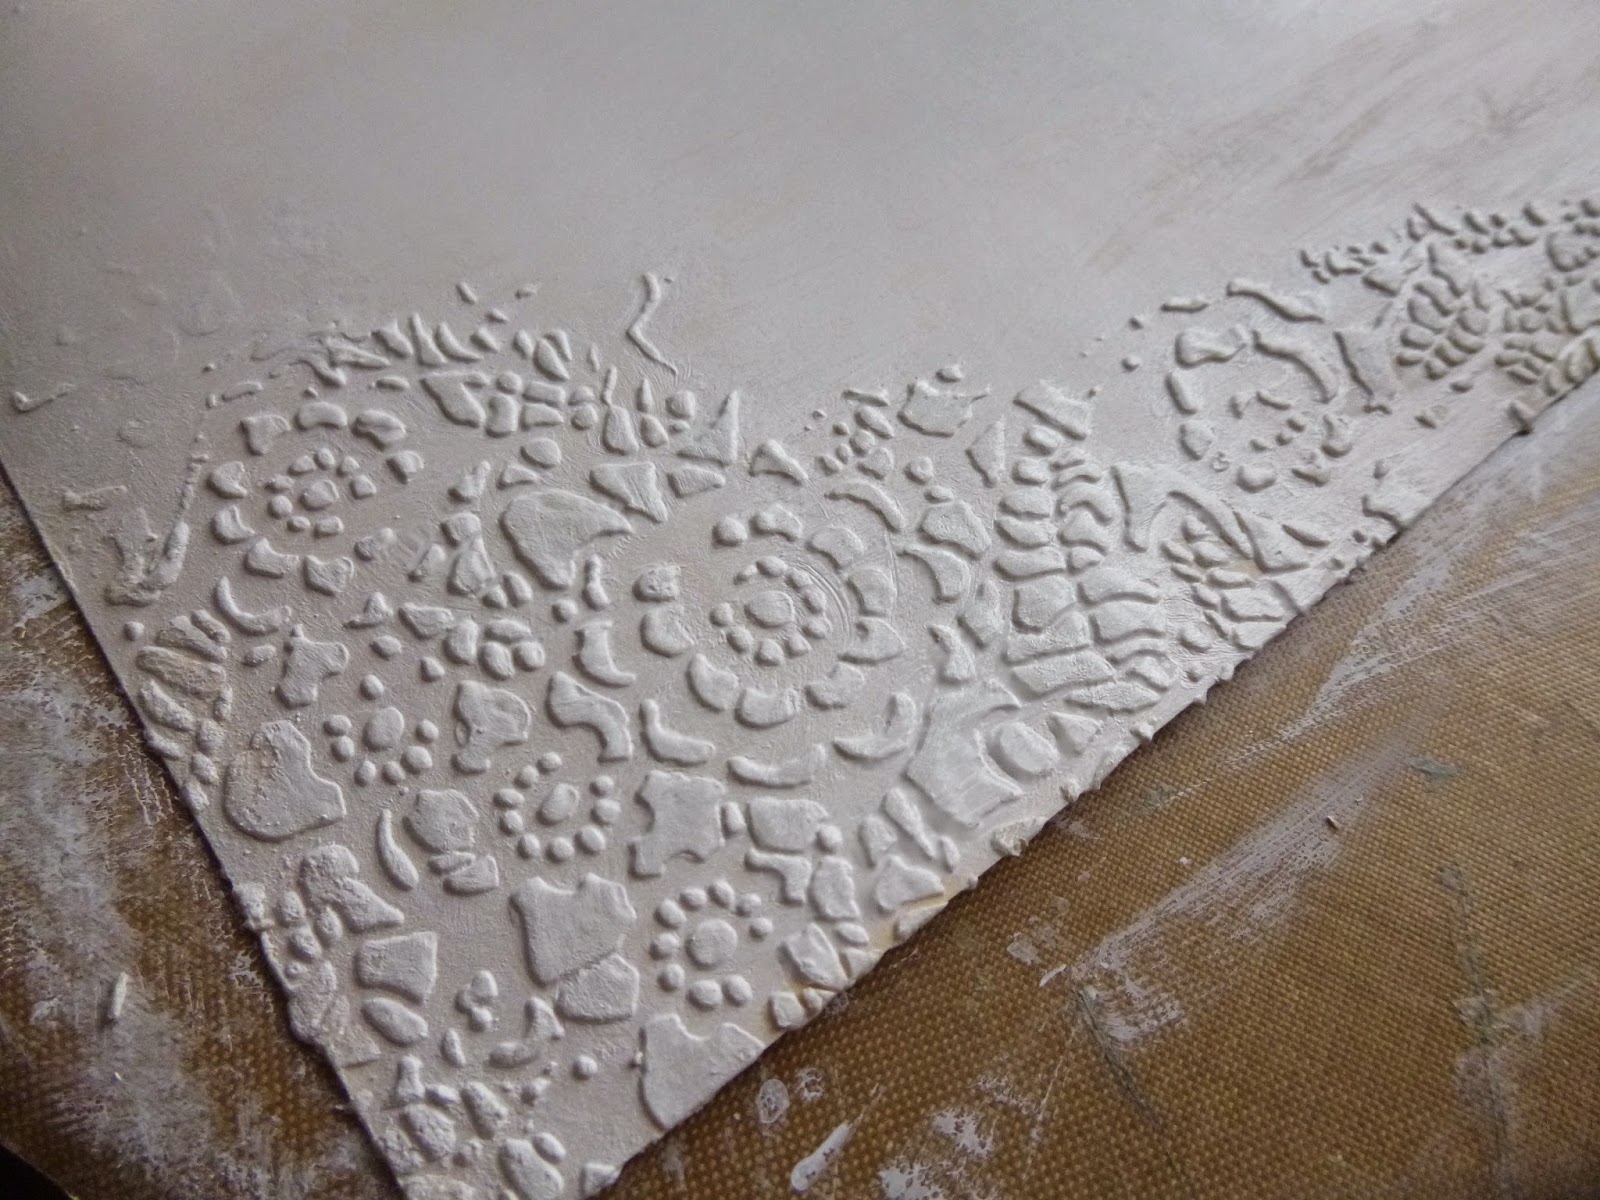
I started with one of the papier mâché icons and some PaperArtsy crackle glaze, but that's long lost under some heavy gesso and loads of ColorWash sprays.  What I can tell you is a little bit of how the background shaped up once I'd gesso'd over my first idea.


I started with some text, stamping the botanical definitions from Katy Fox's Encyclopaedia Botanica plate in Potting Soil Archival (just as well I picked Archival with everything that then happened).


I stencilled Walnut Stain Distress Ink through the Harlequin stencil - it's really pale because of being over the gesso - and then clear embossed it, using only a light covering of powder.  (Again, just as well I kept it in place with the embossing - it wouldn't have lasted through the spritzing.)


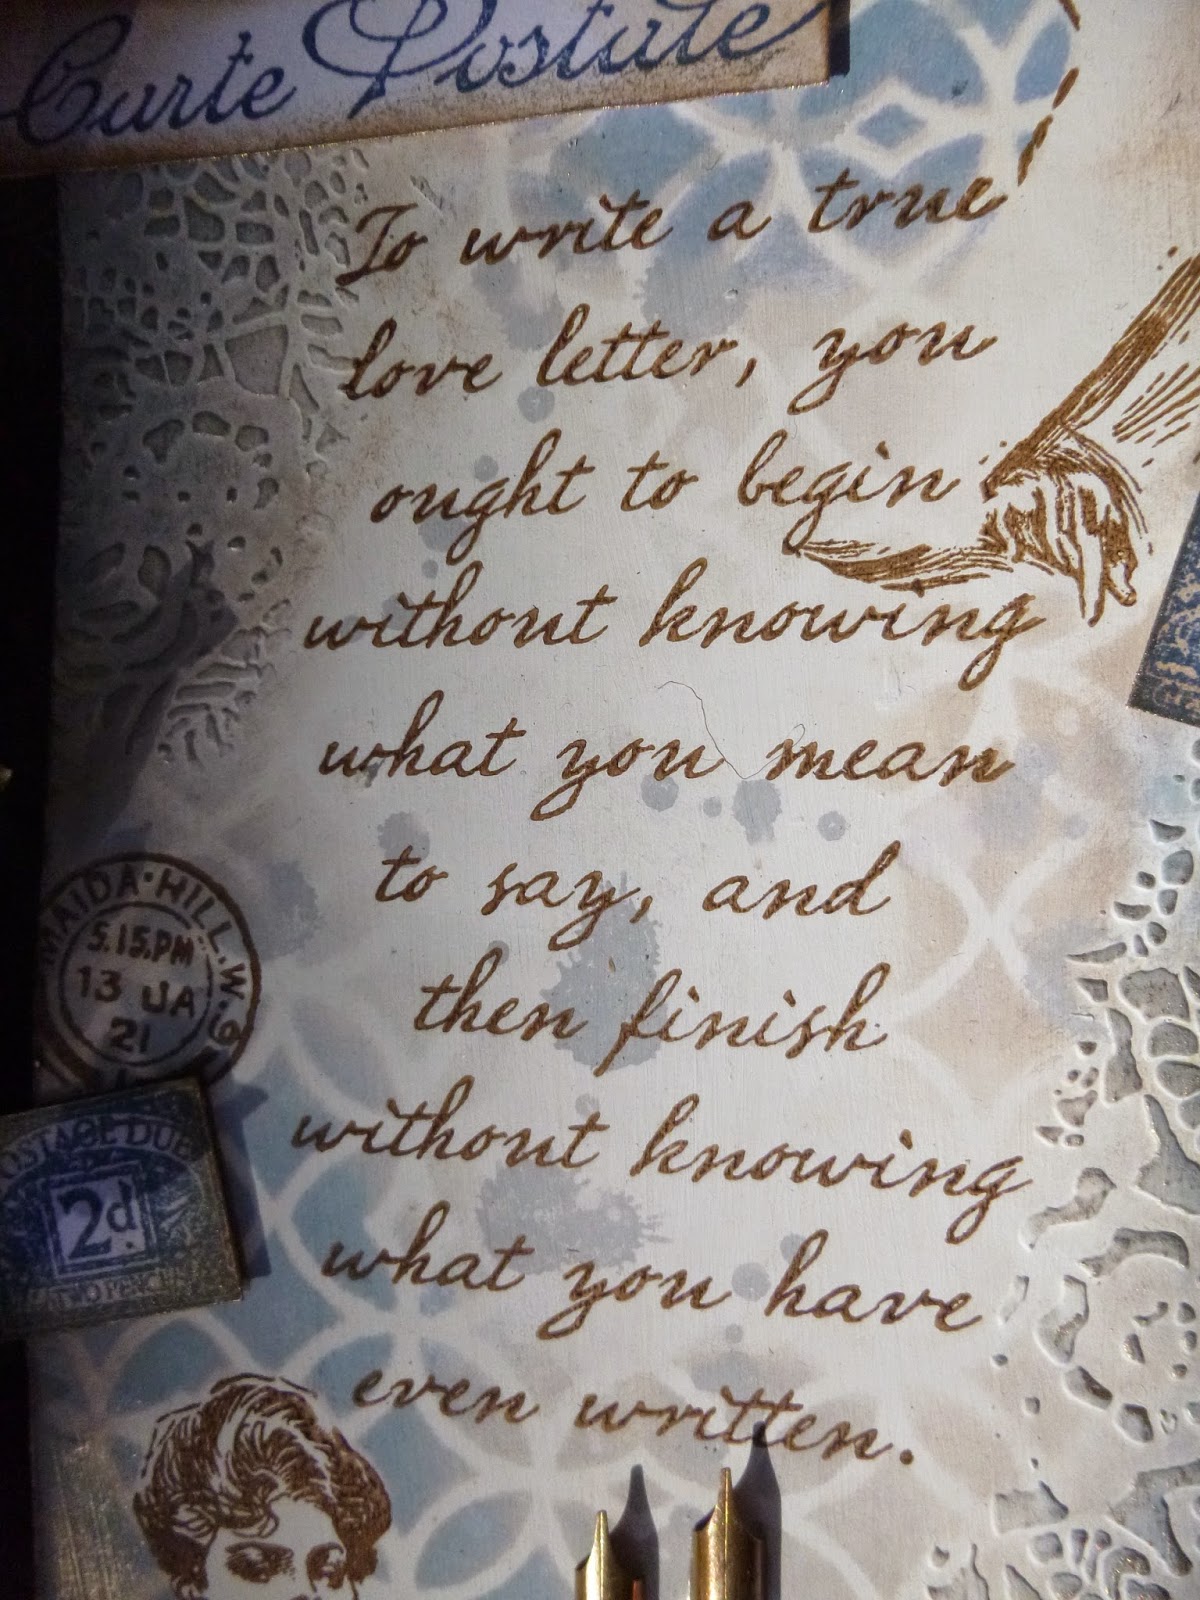
At this point I had a gentle neutral affair on the way - white background, dark brown stamping, and I was still planning to stamp one of Katy's flowers directly onto the icon.  But, in my usual fashion, I had more than one thing on the go, and chance intervened at this point.


I happened to use a kraft tag to mop up some white paint from the mat, and suddenly wondered how the flower would look stamped onto that instead... the answer was "lovely"!  This particular flower is from Katy Fox's latest Botanical 2 release, and it's stamped in Potting Soil.


But then it started looking a bit bland to me.  I thought I'd like just a little hit of colour in the background... hmm!  I got out the ColorWash sprays, with their yummy earthy, natural tones, and tried them out on a nearby tag which gave me lovely spray patterns and some gentle blending and dripping.  But when I sprayed them onto the gesso, they behaved very differently and I ended up with really full on colour going on - not what I'd intended!


However, thanks to the embossed Harlequins, there was a lovely resist effect in places that toned in with the whitewashed kraft tag, so I decided to persevere.


I stamped the Artistic Stamper Messy Art blots and splashes (Katy Fox again!) in Fresco Snowflake...  I hadn't used these before and, oh, how I love them now!


I added a couple of spritzes of Dylusions White Linen too...


... and dry brushed some Snowflake around the edges of the icon too.  Obviously, all this is being carried over the edges as usual.


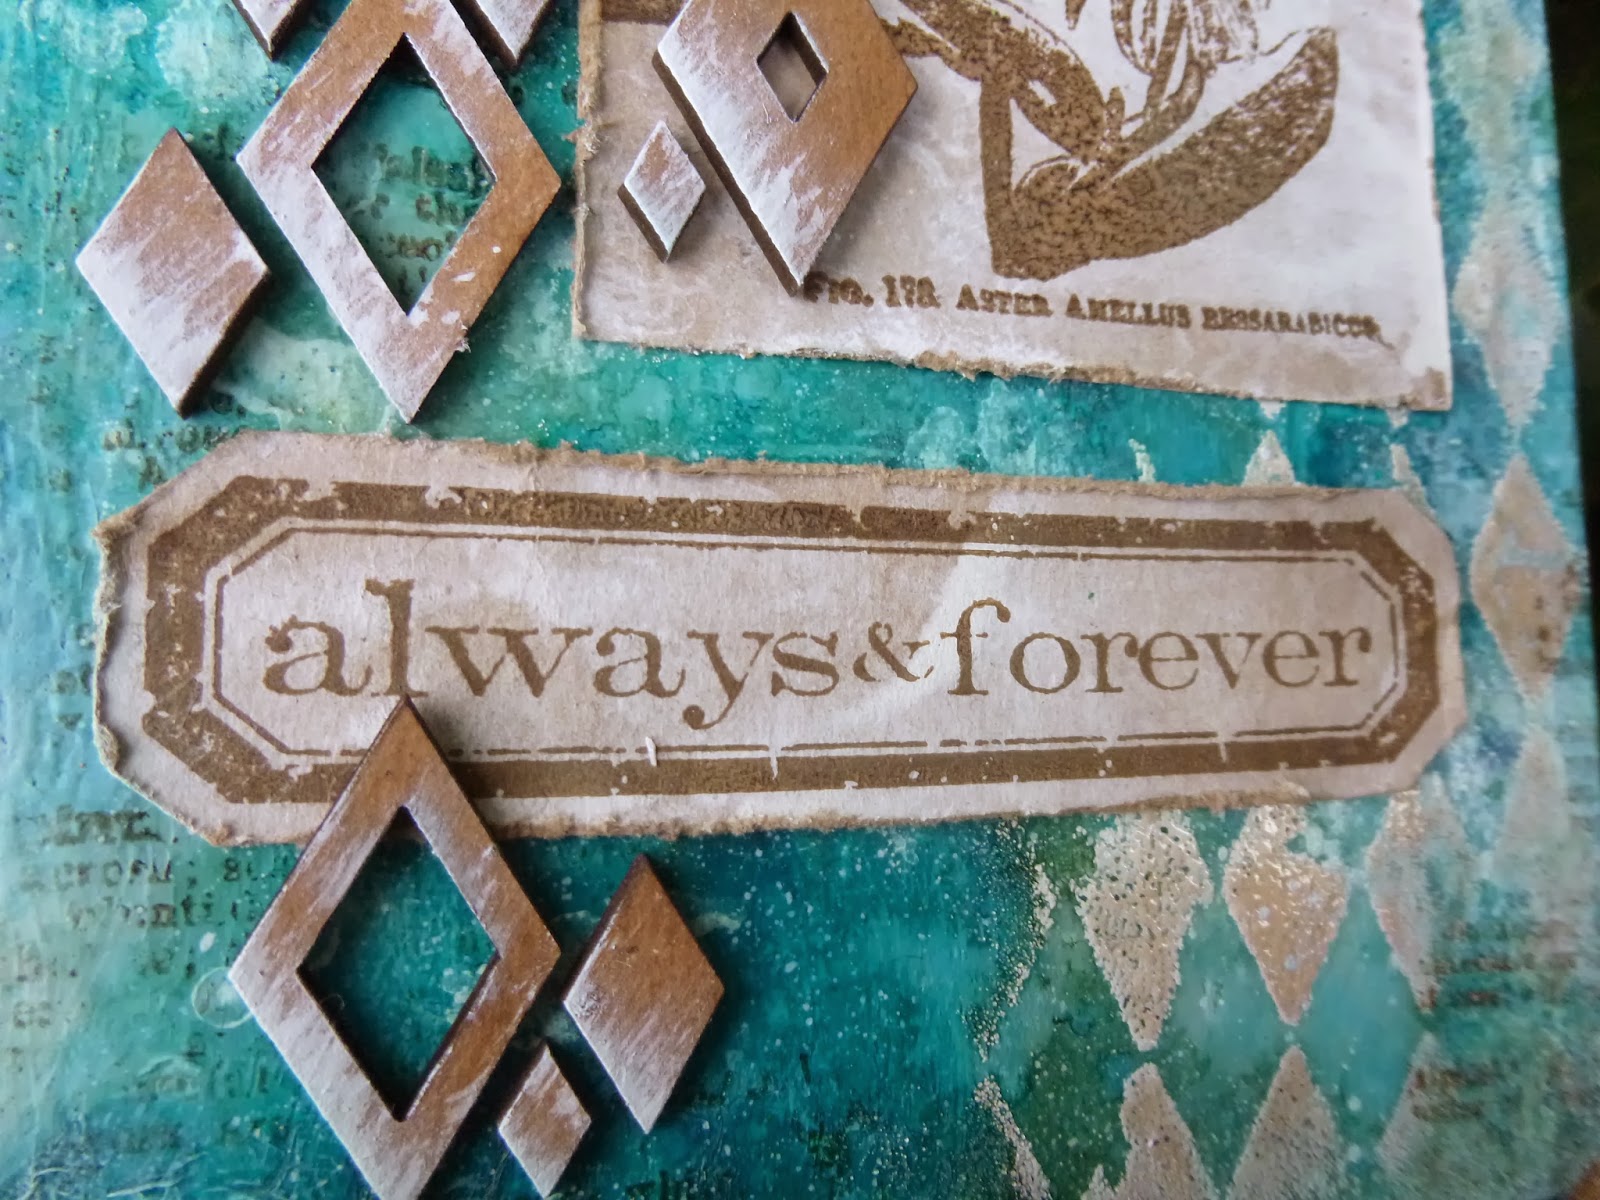
I stamped one of Tim Holtz's Simple Sayings in Potting Soil onto another whitewashed kraft tag and cut it out and distressed it.


And I added some Idea-ology Linen Ribbon to the top of the tag.


My final brainwave was to add some "Diamond Confetti" chipboard from the UmWow Studio, and highlight it with a dusting of Snowflake Fresco brushed up from the bottom corner.


I'm really pleased with how these drift across the piece, echoing my embossed Harlequins, and adding a touch of dimension to the composition.


So that's me for today.  Thank you so much for stopping by, and I hope you'll come along and play in The Artistic Stamper challenge this month - Love is in the Air - we'd love to see you there.

Ingredients used:
Artistic Stamper stamps: Katy Fox stamps - Encylopedia Botanica, Botanical 2, Messy Art
Tim Holtz Simple Sayings
Papier Mâché Icon - large
Adirondack ColorWash sprays - Meadow, Stream, Denim
Distress Inks - Walnut Stain
Archival Ink - Potting Soil
Gesso
Fresco Finish Paints - Snowflake
Clear Embossing Powder
From my stash: Diamond Confetti by UmWow, Idea-ology Linen Ribbon (find similar here), small kraft tags