Showing posts with label WOW Embossing Powders. Show all posts

Thursday, 10 December 2015

Christmas Card by Debs

Hi  All

Here is a Christmas Card I made using a Gelli print, Jewelled Snowflake and Ornaments stamp plate and the Christmas Greeting #1 plate.


First I stamped and embossed the lightbulb onto plain white card and then stamped and embossed a large snowflake using Versamark Ink and Wow Silver Embossing Powder 
Then I stamped and embossed the banner from the Borders #1 plate and the Swirl Background Open stamp.
I then cut all three elements out.

I found some silver twine and made some bows and stuck these to the lightbulbs.

I made a Gelli print using Brushed Pewter Distress Paint with a little bit of Broken China and did three or four pulls from the Gelli Plate.  Once they were dry I stamped the same large snowflake with White Linen Dylusions paint over the whole of one of the sheets in a random manner, ensuring that the snowflakes weren't too dominant i wanted a subtle effect so that the one in the lightbulb would stand out.
Apologies for the lack of photos at this point - Brain was obviously not in gear 

I cut the card down to a DL size and also trimmed the gelli print and then mounted it onto a piece of card, distressed the edges and mounted onto the card with 3D tape, adding the banner before sticking down.
I Added one lightbulb directly to the paper and the other one with 3D tape overlapping slightly.
Thanks for Stopping By
Debs


Thursday, 10 September 2015

Life is like.... by Debs

Hi All

Today I have done an altered book page for you. One of the benefits of living reasonably close to the shop is being able to go to Jennie's classes and one of my regular classes is the altered book club.  I would not have dreamt of altering a book before, but its so much fun!


Here is a brief how to


take a book and open it up - that bit always helps!


Randomly paint (using a dry brush) a dark colour i used Dylusions post box red paint


added some squeezed orange and then some lemon zest and a bit more red


Then some white, all done very randomly - the more random the better


I added on a couple of pieces of corrugated cardboard that were laying on my desk, one of which was nicely shaped for a corner.  Stamped a butterfly from Butterflies #2 in Black Soot Distress ink and embossed with Wow clear sparkle embossing powder and painted once cooled.

Stamped the words using the Decay letters  onto a piece of card and painted using the same colours. Added some background stamping to the page using the new background Fabric 2 stamp set using Archival black ink and the Calligraphic Mat 11 using Dylusions White Linen paint The Shadow effect around the butterfly and words was created using a charcoal pencil.

There have been some amazing entries so far for this months challenge so please do keep them coming we really do enjoy looking at all your creations.

Debs 

Wednesday, 10 June 2015

A Quick Card by Debs

Hi All, Debs here with a quick card for you.


This was all done with the new Dylusions paint, which is like using melted chocolate, it really is that yummy!  The hearts were embossed after the paint had dried to give it a bit of a sheen,  I was hoping to have done it with Glossy Accents but was running out of time.


Products used:
Stitchels Dashy Dot A6
Jouraling mini words #1
6x6 Word Mask
Dylusions paints - Vibrant Turquoise, Fresh Lime and Squeezed Orange
Archival Black ink
Wow embossing powder - clear gloss
Distress embossing dabber
Full Instructions on how i made this can be found on my blog

Tuesday, 10 February 2015

How does your garden grow?

Hello all!  Alison (butterfly) here with a gentle tag for you today.  I've been playing with some of the lovely new gardening stamps just released here at The Artistic Stamper.  There are some fantastic new releases.  If you haven't seen them yet, do check them out.

So here's my relaxing garden tag - a fairly simple affair, but it gives me lots of pleasure.


I started by putting Distress Ink onto a large acetate gridblock, spritzing it with water and stamping onto a watercolour paper tag.  I did some spritzing and flicking of water to create even more of a textured look.


The fork and spade from Garden #1 are stamped in a combination of Coffee and Potting Soil Archival inks and clear embossed.


I stamped the very useful "extra bit of earth" from Garden #2 next to the main image, so as to 'fade out' the earth rather than have it stop abruptly.


I added another layer by stamping the tiny bubbles from the Borders 2 plate in colours to coordinate with the background.  And there's plenty of white splatter to create more life and movement.


The sentiment is from a PaperArtsy set, and is stamped in graduated Archival inks - Cobalt, Leaf Green and Olive, I think, and then clear-embossed as usual.


I tried out a number of different embellishments, but each time I preferred the simpleness of the tag without any extras until I suddenly remembered these tiny wooden confetti circles, hiding in my stash.


I glued them in place and gave them a tiny swipe of Chalk Fresco paint from one angle.


The Distress-dyed ribbons at the top are tied with some Idea-ology paper string, and the whole thing is mounted on some distressed corrugated cardboard for that rustic look.


And that's your lot for today.  Thanks so much for stopping by - your comments and visits really mean so much.

I hope you'll come and play along in our Love challenge here at The Artistic Stamper this February.  You don't have to use Artistic Stamper stamps, but if you do you'll qualify for a double entry in the prize draw.  What have you got to lose?!  Happy crafting!

Ingredients used:
Artistic Stamper stamps - Garden #1, Garden #2, Borders #2 A6
Distress Inks - Broken China, Stormy Sky, Vintage Photo, Gathered Twigs, Walnut Stain, Peeled Paint, Mowed Lawn, Pine Needles
Archival Inks - Coffee, Potting Soil, Cobalt, Leaf Green, Olive
Fresco Paints - Chalk
Seam binding
From my stash - watercolour paper, paper string, corrugated cardboard, wooden confetti, sentiment stamp

Saturday, 27 September 2014

Autumn colour Tag

September has come to end, have you participated in our Autumn Colours Challenge yet? 
The winner will get fabulous Artistic stamper Stamp set.
If not, here is one more inspiration!!

Hello Everyone,
Shilpa here,
Today, I made a tag with lovely autumn colours and Botanical stamps from Artistic stamper


I've stamped the floral image with Botanical Plate 2 stamp set and Leaf Green Archival Ink


To create the interest, I've adhered chipboard design at the edges of the tag. I heat embossed (twice) with Wow Olive green opaque embossing powder.
Diecuts and flowers are from stash. And orange background paper is from Graphic 45.


Don't forget to join the challenge this month. 
Link is here.
Thanks so much for stopping by.

Supplies used:
Artistic stamper stamps - Botanical plate 2
Flowers and die cuts from my stash


Tuesday, 10 June 2014

Dappled and Drowsy

Hello all, Alison (butterfly) here from Words and Pictures, with another musically-inspired tag for you today.

Simon & Garfunkel fans may have already clocked the post title, and be humming along.  It's the 59th Bridge Street Song"I'm dappled and drowsy and ready to sleep"... those were the words running through my head as I was playing with this one, with light and shade playing across the leaves.


I started from what was basically a mop-up tag.  There's definitely paint involved, and some Dylusions sprays.  It also has some texture from being pressed against another tag while all the paint and ink was wet on the surface.


Over that, I started clear-embossing some of Katy Leitch's lovely Leaves, stamped in Versamark and heat-embossed with some Clear Detail powder.


That glossiness captures the sunlight and makes it twinkle and reflect at you as you move the tag around.


I also stamped some of the smaller leaves in Olive and Leaf Green Archival inks, building up the layers... like lying beneath a tree and looking up through the layers of branches above you.


By this point, the song was in full flow (well, at least those couple of lines going round and round incessantly!)...


... so there was no difficulty in choosing the words to go on the tag.


The torn edges give a lovely textured surface for inking.


For the background layer, I added some ink and stains to a piece of watercolour paper, and stamped some more of the leaves in Archival ink of various colours.


And the torn edges again absorb the ink really well, so you get a lovely intense colour around the border.


A little bit of Distress Stain-dyed seam binding and some curly white twine keep things simple at the top.


And I did lots of splattering - most of it Dylusions, as far as I remember (taking the top out and splattering using the end of the spray attachment).


I was just having fun dappling and splattering by this point, so I wasn't really paying much attention!


Hope you're getting to enjoy a few drowsy afternoons in dappled sunlight...


Don't forget to come and play in our June challenge: we'd like you to Colour It Red.  And if you're thinking I'm not setting a very good example with all these greens, hop by Words and Pictures tomorrow for some redder inspiration - yup, even I've been tempted into the red zone!


Thanks so much for dropping in, and I'll see you again soon.

Ingredients used:
Artistic Stamper Stamps: Katy Leitch - Leaves
Dylusions Sprays - White Linen, Dirty Martini, Calypso Teal, Cut Grass, Vibrant Turquoise, Chopped Pesto
Archival Inks - Olive, Leaf Green, Aquamarine, Fern
Versamark Ink Pad
Wow Clear Gloss Superfine embossing powder
Manila Tag
Seam binding
From my stash: white twine, watercolour paper, Hero Arts alphabet stamps

Friday, 10 January 2014

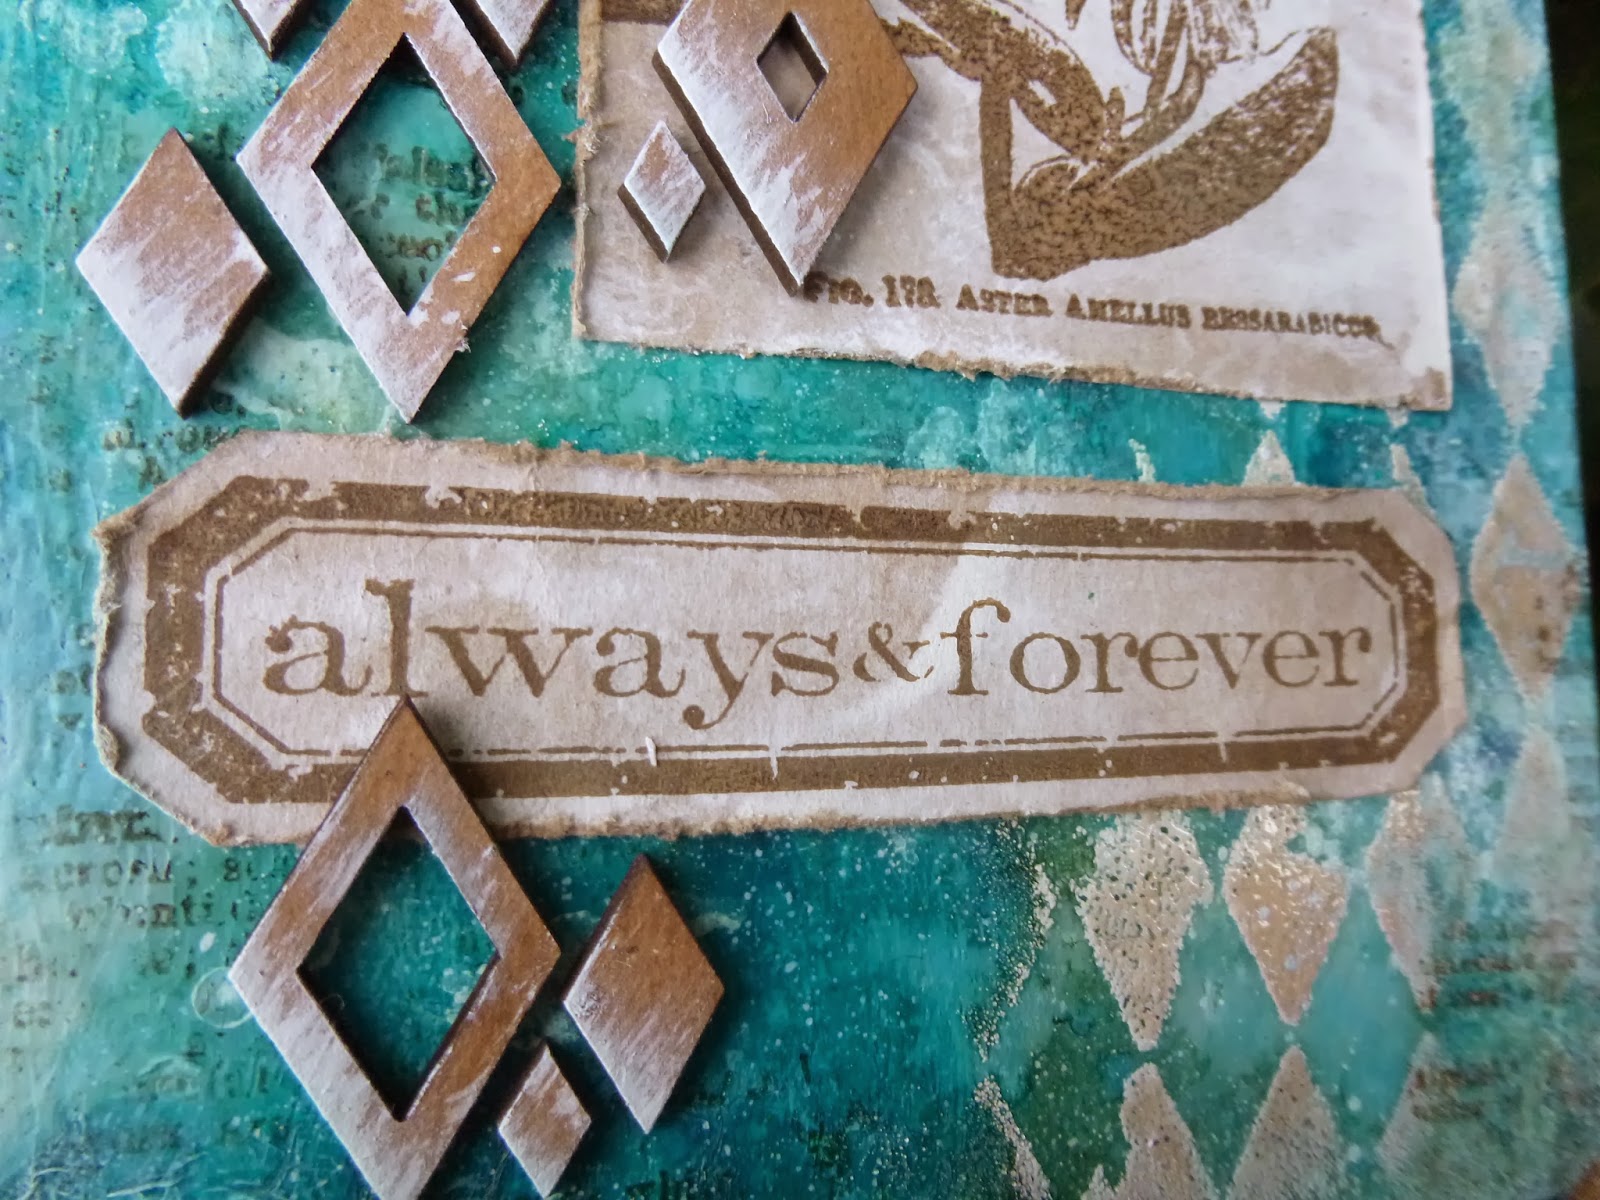
Always and Forever Changing!

Hello all!  Alison (butterfly) here with my first Artistic Stamper post of the New Year.  I should probably have made a resolution about trying to write shorter posts, but I didn't, sorry!  I've another photo-heavy marathon for you (and remember you can click on the photos for a closer view).


I started with one idea in my head with this one, went via a completely different possibility and ended up in an utterly unexpected destination - but one that I'm very happy with.  In fact, it may be one of my favourite makes.


I'm afraid I don't have many photos en route since most of the way along I was pretty sure I was going to bin it.  Very glad I didn't now!


I started with one of the papier mâché icons and some PaperArtsy crackle glaze, but that's long lost under some heavy gesso and loads of ColorWash sprays.  What I can tell you is a little bit of how the background shaped up once I'd gesso'd over my first idea.


I started with some text, stamping the botanical definitions from Katy Fox's Encyclopaedia Botanica plate in Potting Soil Archival (just as well I picked Archival with everything that then happened).


I stencilled Walnut Stain Distress Ink through the Harlequin stencil - it's really pale because of being over the gesso - and then clear embossed it, using only a light covering of powder.  (Again, just as well I kept it in place with the embossing - it wouldn't have lasted through the spritzing.)


At this point I had a gentle neutral affair on the way - white background, dark brown stamping, and I was still planning to stamp one of Katy's flowers directly onto the icon.  But, in my usual fashion, I had more than one thing on the go, and chance intervened at this point.


I happened to use a kraft tag to mop up some white paint from the mat, and suddenly wondered how the flower would look stamped onto that instead... the answer was "lovely"!  This particular flower is from Katy Fox's latest Botanical 2 release, and it's stamped in Potting Soil.


But then it started looking a bit bland to me.  I thought I'd like just a little hit of colour in the background... hmm!  I got out the ColorWash sprays, with their yummy earthy, natural tones, and tried them out on a nearby tag which gave me lovely spray patterns and some gentle blending and dripping.  But when I sprayed them onto the gesso, they behaved very differently and I ended up with really full on colour going on - not what I'd intended!


However, thanks to the embossed Harlequins, there was a lovely resist effect in places that toned in with the whitewashed kraft tag, so I decided to persevere.


I stamped the Artistic Stamper Messy Art blots and splashes (Katy Fox again!) in Fresco Snowflake...  I hadn't used these before and, oh, how I love them now!


I added a couple of spritzes of Dylusions White Linen too...


... and dry brushed some Snowflake around the edges of the icon too.  Obviously, all this is being carried over the edges as usual.


I stamped one of Tim Holtz's Simple Sayings in Potting Soil onto another whitewashed kraft tag and cut it out and distressed it.


And I added some Idea-ology Linen Ribbon to the top of the tag.


My final brainwave was to add some "Diamond Confetti" chipboard from the UmWow Studio, and highlight it with a dusting of Snowflake Fresco brushed up from the bottom corner.


I'm really pleased with how these drift across the piece, echoing my embossed Harlequins, and adding a touch of dimension to the composition.


So that's me for today.  Thank you so much for stopping by, and I hope you'll come along and play in The Artistic Stamper challenge this month - Love is in the Air - we'd love to see you there.

Ingredients used:
Artistic Stamper stamps: Katy Fox stamps - Encylopedia Botanica, Botanical 2, Messy Art
Tim Holtz Simple Sayings
Papier Mâché Icon - large
Adirondack ColorWash sprays - Meadow, Stream, Denim
Distress Inks - Walnut Stain
Archival Ink - Potting Soil
Gesso
Fresco Finish Paints - Snowflake
Clear Embossing Powder
From my stash: Diamond Confetti by UmWow, Idea-ology Linen Ribbon (find similar here), small kraft tags