Showing posts with label Journaling Words. Show all posts

Monday, 4 May 2020

Your Journey by Jane

I read somewhere today that in these strange times we are all going through, that we are all in the same storm, but all on a different boat, our journey is different for each individual. I hope you are all staying safe and well.


for this months "journaling" challenge I have made a little book, using that paper leather material..forgot what it is called, but it is fabulous stuff, I just dampen it a bit, then scrunch it up, it gives the appearance of real leather. I then went on to stamp the SKELETON LEAVES, they are only faint here, but gorgeously gold in real life, then I stamped the DRAGONFLIES, and finally the JOURNALING WORD.


Friday, 19 July 2019

Creative flag by Titbelsoeur

Hello there, I hope you are having a good Summer time, though I also hope you take some time to view our CT makes !
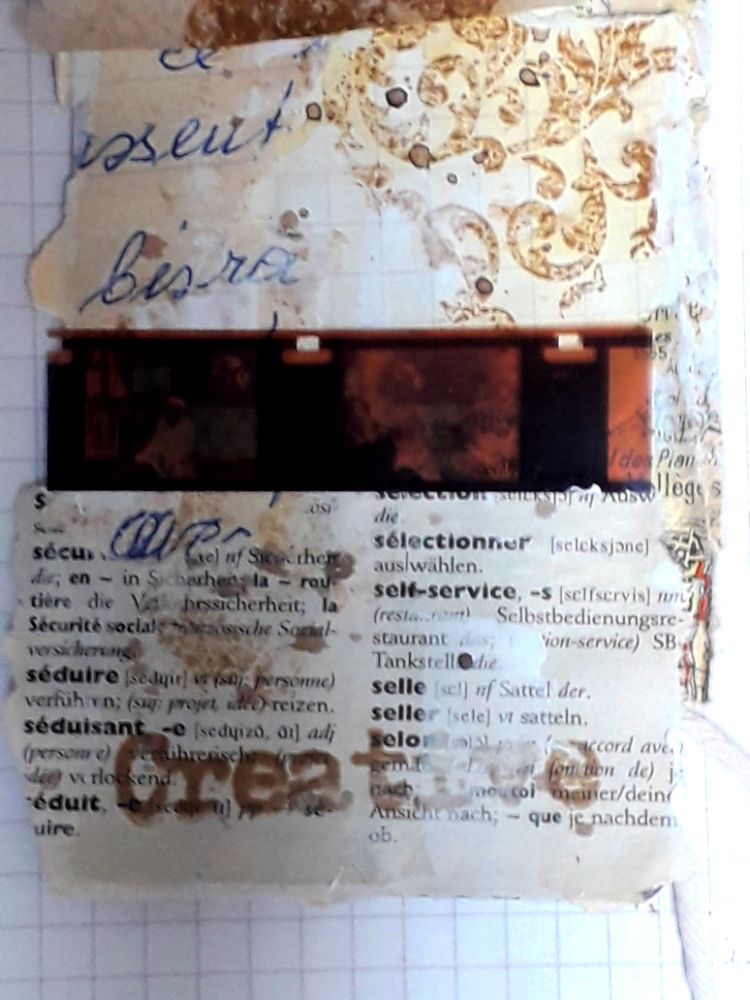
Here is a flag and here is how I made it :

The support is a notebook page I have torn. I sticked on it some pieces of an old letter, a dictionary page and a negative. Then I stamped some of the Mini Backgrounds # 2 size A6 MIni Backgrounds # 3 size  A6  and Mini Backgrounds #1 size A6 , and the Creative 4.5 cm word.


creative


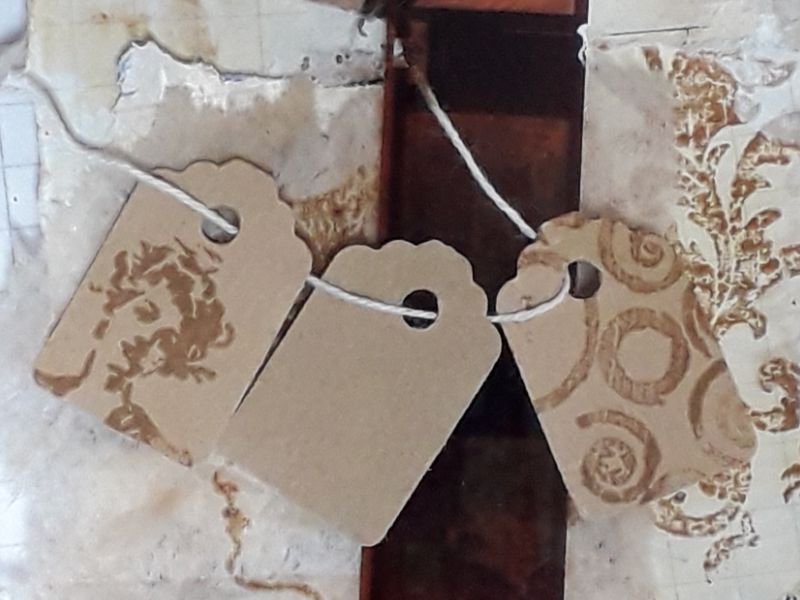
I added 3 mini-tags I had stamped 2 of them


creative


and I added the female touch with Gibson Girls, one stamped on the mini-tag and the other one on to a tea bag 


creative


I hope this flag gives you inspiration to participate in our 

July's creative challenge - Female

for 3 chances to win some of these fabulous Artistic Samper stamps !
Thank you so much for stopping by.
Your comments are very much appreciated here, on my blog
Bye for now and happy creating. 
Titbelsoeur

Tuesday, 7 November 2017

Vinyl notebook by Titbelsoeur


Hello happy crafters !
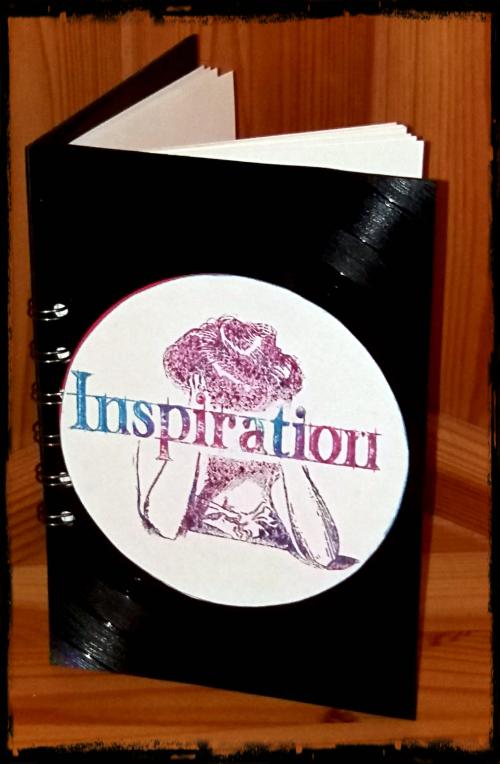
This is a notebook I made with 2 LPs and a few paper sheets :


I cut out a circle and stamped the Inspiration word with 2 different Distress inks, and hid it to stamp the Gibson Girl with 2 other different inks. Do you like it ?
Here you will find the stamps :
Gibson GirlsJournaling Words 3 size A5 in Words and Sayings


Would you like to win these fabulous stamps ? Easy : just participate in our challenge 

November's Creative Challenge - Use a Quote

 for 3 chances to win !

Thank you so much for stopping by.
Your comments are very much appreciated here, on my blog

Titbelsoeur

Sunday, 24 April 2016

Franswar says Journal, believe, grow - Distress Page by Debs

Hi Everyone

Hope you are all enjoying this months challenge, I certainly am!


I had great fun with this page, believe it or not i have only used two colours plus black and white!

I started with a book page and added Ground Espresso Distress Ink to the whole page

Then I added some of the new PaperArtsy Infusions, these are quite simply little pots of magic!! They work a bit like Color Burst or Brushos, however the more water and powder you add the browner the colour gets as they have walnut stain pigment in them.  The above photo shows just two corners with a bit on each corner

Here is the page after i had finished playing, as you can see i have yellows, orange, pink as well red and Brown  I used Sunset Beach, basically you sprinkle them onto the page add a spritz of water and voila!

I added some to the back of a piece of Tim Holtz Tissue by putting some infusions on my craft mat, spritzing with water and then pulling the paper through the colour 

I wanted a lot of texture so i made sure that when i adhered both the tissue and the sheet of paper that there were lots of wrinkles in it, which for me is quite hard as i found myself smoothing them out and then trying to pull the wrinkles back!

I also did the same thing to a piece of Jennies wonder printed material ribbon

The original piece next to a piece coloured with infusions 

On another book page covered with Ground Espresson Distress Ink I Stamped Neil Walkers Franswar and coloured him in using the infusions, the Distress Ink and a water brush again added it to my craft mat and lifting the colour with my brush and adding it

The I added some white pen around the stamped image and around the piece of paper with the stamped image and then stamped Two shapes from the Urban Decay set in black Archival and again edged with white pen

Added some gears around Franswar in Picket Fence Distress Ink


I stamped some words from the Journaling Words 4 Set onto a scrap piece of Distressed Ink Paper

And added some white pen to highlight the words and around the edge of the paper.

Looking forward to seeing more of your creations and don't forget you have two chances of winning a prize if you enter on the blog and the Facebook page.

Happy crafting Debs


Friday, 4 March 2016

Playing with dylusions by Dee

Hi folks I popped down to see Jennie and have a play at The Artistic Stamper
when I had a week off work in January. We did a class on
journaling not something that I am used to but seem
to have started doing this year.
The Artistic stamper has a load of amazing journaling stamps
so I thought I would do a piece playing with the stamps that 
I picked up while I was there.
I also picked up some Dylusion paints while I was there
which have a finish that I really like and are very neon
 bright, again not colours I would usually use.
So I did three panels using a different colours but one
colour that was common to all three.
Fresh Lime and vibrant turquoise
I stamped different journalling word stamps onto each 
panel.
Purple pink and turquoise
Journal word inspiration
collated it all onto a black journal page ooh a white pen and
 doodled around the edge.
That's it for today I hope you like my play.
Please let me know what you think.

Products Used
  1. Artistic Stamper stamps used Borders A6#2, Journaling Words, Fabric 3 C334, Mini Backgrounds #1.
  2. Dylusions paint Vibrant Turquoise, Crushed Grape, Fresh Lime, Bubblegum Pink.
  3. White ink pen for doodling.


Wednesday, 24 February 2016

HeArt Art with a twist

Hi All

So we have got Valentines Day out of the way, and unless we are making cards etc for loved ones or the occasional wedding.  I know i tend not to bother too much about hearts.  However, we all like extra usage out of our stamps so here is alternative use, which I am sure some or all of you will have already thought of  - turn hearts into petals and make up a flower.


This was quite a simple canvas and came from an idea about using the three colours of Distress Paint which were sitting on my desk! Weathered Wood, Frayed Burlap and Victorian Velvet.  The three colours are all quite muted colours and as paints personally come into their own, working really well with each other.


I started off with a 12 x 12 canvas and added grunge paste through The Artistic Stamper Chevron 6x6 and Large Dot 6x6 Mask with Grunge Paste  

Whilst i was waiting for the Grunge past to dry I stamped 8 of the large hearts from the Roses are Red Plate with Black Archival Ink onto Tim Holtz Grunge Paper

And then cut them out and painted with a quick coat of Gesso not quite sure why as I didn't really need to!!

And also stamped the Chinese Background stamp onto a piece of beige tissue paper again with Archival


Then painted stripes in Weathered Wood and Frayed Burlap overlapping as i went across


Whilst waiting for the stripes to dry I painted all of the hearts with the Victorian Velvet.  The paint comes out a beautiful dusky pink, far less muted than the Distress Ink

I then stamped each heart with the Dots Background A6 stamp using Victorian Velvet Distress Ink

I also went around the outside edge of each heart with Ground Espresso Ink


Using the Dots Background again i added some Victorian velvet paint and stamped some random dots directly onto the canvas, and also added some bottle top marks from the lids of the three colours


Ripped up pieces of the tissue I had stamped with Chinese script and added that to the canvas using Prima Soft Matt Gel

And added the heart petals to make the flower using Prima 3D Matt Gel This gel is absolutely amazing.  You can use it through stencil or as an ordinary glue however if you put a dollop of it onto a project it will stay raised so that you can add dimension really easily.  Plus it adheres pretty much everything including metal and it dries really quickly.  You do have time to move it but you do need to be quite quick if you do.


I stamped the lovely flourish from the Swirls Splats and Dots Plate onto white white tissue and carefully tore around the edge.  I also stamped Follow your dreams from  Journaling Words #1 onto a bit more of the beige tissue and added it onto a piece of cardboard and painted in Weathered Wood and Frayed Burlap but when mounting ensured the colours were the opposite of underneath!  Stuck down the tissue with the soft matt gel 


I made three smaller hearts and coloured the same as the large ones however, this time i used Ground Espresso Ink to add the dots as well as to edge


Added a metal embellishment and a glass bead from my stash and there it is!
As always do let me know your thoughts good and bad, and don't forget to add your project to the blog, we do enjoy seeing what you have produced and you still have a few more days to go.

Happy Crafting Debs


Thursday, 7 May 2015

Let's art journal in May by Titbelsoeur

Hello happy journalers !
You know that the May challenge at the Artistic Stamper is "Journaling your heART out!" and I have decided to make this page for you...

I started by gluing some pieces of "test" pages, this one to test Neil's stamp on to my home-made gelli plate :

or that one that was used to clean my A.S. Sequin mask up :


So here is the 1st layer background :


Some gesso here and there, then brown and green acrylic paint, with a brush or with a baby wipe through A.S. Sequin and Petals masks 


Then stamps as backgrounds : car, alphabet soup, dots with black Archival 


And to end, let's stamp words with black and brown Archival, paint some circles with a bottle cap and write some unreadable words in white and black, and here it is :


To make this page, I have used :
black and brown Archival inks
Large Sequin and Petals Artistic Stamper's masks 
Dots background stamp
Neil Walker's alphabet soup and fantasy background
Debbie Cotton's Linington's automotive Sales
Journaling Words #5, Imagine 4.5 cm, Creative 4.5 cm and Journaling Words 3 

Thanks so much for stopping by,
your comments are very much appreciated.
I hope you will participate in our May challenge
 to win some fabulous Artistic Stamper stamps.

Titbelsoeur

Wednesday, 13 November 2013

Altered Slide Mailer

Hello everyone Astrid here. Can you believe we are nearly half way through November?.... Soon it will be time to dust off those Christmas stamps, but for today, one more non Christmassy project..., an altered slide mailer.

These are the stamps and products I used:
Calligraphic Mat 13
Journaling words 3
Scrabble and Tags Plate (these are available for special order)
Tim Holtz Stampers Anonymous Attic Treasures
Tim Holtz Stampers Anonymous Classics 1

Paper Artsy Fresco Finish Paints in Snowflake, Nougat and French Roast
Paper Artsy Crackle Glaze
Ranger Archival Ink in Plum and Wateringcan
Adirondack Dye Inkpad in Espresso
Artistic Stamper Splats and Swirls mask
Tissue Tape
 French Industrial scrapbook paper
From my stash: A 4 slide slide mailer, a wing and key charm, jump rings, some lace and some Kraft paper for the spine and a home made flower.

I started by painting the front and the inside of the mailer with Snowflake Fresco paint. As the mailer had been in my stash for a long time it had broken into two pieces, so I knew I would have to create a spine.
Next I added some Crackle Glaze in the corners, to give it all a bit more aged effect when done. (Forgot to take a photo here but I am sure you can imagine it...)
I then blended Nougat around the middle and French Roast around the outside of both the cover and the inside pieces until I was happy with the result.

Sorry for the blurry picture, below you can see a corner after the crackle has done it's work.

When everything was dry I stamped my chosen butterflies and word stamps in Plum Archival, added some stencilling with Adirondack Espresso ink and finally some background text in Watering can Archival.


I made a little spine from Kraft paper for extra strength and also added some Tissue Tape along the inside for the same reason.


The back was covered with a piece of the scrapbook paper and I embellished with some lace and charms.


Well, that's it and I hope you like it.
See you next time