Showing posts with label Calligraphic Mat 11. Show all posts

Saturday, 24 June 2017

A Girly Card - well sort of.. by Debs


Hi Everyone, I hope you are all enjoying the sun as much as i am.

With the sun, comes nice and bright cheery colours and i really made the most of them on this card.

I used some watercolour paper as my substrate and added dark and light pink, and orange paints randomly over each other until i was happy, making a few circles of paint with my fingers as i went along.  I used Amsterdam paints but any acrylic will work.

Over the top of the main body of pain i stamped the mini hexagon and dots background stamps using both pink paints
and black ink.  I also popped some paint through a couple of stencils as well, and then did the same thing over a small tag.  Before i painted the tag i added some of the wonderful washi tape that is currently in stock. I also used an old credit card with the light pink to add some marks and also  using the calligraphy mat 11 stamped with the light pink paint.

I finished off the tag by adding Trish Latimers World Girl One and used the same colours to colour her in.

I shall look forward to seeing your creations after all there is still a week left so plenty of time, if you haven't entered already!
Happy crafting
Debs
x


Monday, 24 October 2016

Inspiration...... by Debs

Hi Everyone

Here is my latest project using the theme of this months challenge - Patterns.  Sorry its a bit dark,  these dark evenings are not good for photographing projects!!


This was journal page which started life as one of those pages that you use up paint and paste on.
This page had some texture and some colour and i just thought the texture would make a good start for a new page


 Followed by some Bubblegum Pink and London Blue

 i then added some stencilling using assorted mini stencils from The Artistic Stamper
 Using the same colours again over the top or the original

 Gradually building up the background
 Using the Lesley Matthewson pattern 2 mask i added some White Linen Dylusions paint 

 
I added some stamping into the background with Calligraphy Mat 11 and Mini Polka Dot using Archival black ink

Loving your entries so far this month.  Still a week to go so lets see what else you can all come up with.
Debs


Saturday, 16 April 2016

Cog note book by Gemma


Hello Everyone

I have a little note book to share with you today. 


The cover was made from a paracetamol box. I removed the top, bottom and one of the side panels, before wrapping the card with part of a brown file. Before gluing the file to the box I places a piece of ribbon between the layers, so the book could be closed once it was finished.                                              


The whole book was completed using Distress Ink and Distress embossing powders.  I started by stamping over the whole book with calligraphy mat 11 and then in places with square wire.


I then stamped out and heat embossed a clock face and a few cogs from the Tick Tock stamp plate. I dragged my finger through the embossing powder on a couple of the cogs before the embossing powder had completely cooled down and hardened. I then stamped the same calligraphy mat over the clock face and then the Punk Plaid and Hatched background stamps on a few scraps of paper.


Once I had edged everything with a little black ink I arranged them on the cover before gluing them into place. To finish I added a few gems and a boarder around the edge to frame everything.


This months challenge is Distress. There is still plenty of time to join in, both here and on the new facebook page. We really love looking at all your entries and reading your comments. 

Thank you for reading
Gemma (inkykitty)

Monday, 29 February 2016

Hearts Canvas by Gemma

 Hi Everyone

February is over and it is my last chance to use as many hearts as I possibly can for another year. So this time I painted a 12x12 inches square canvas.


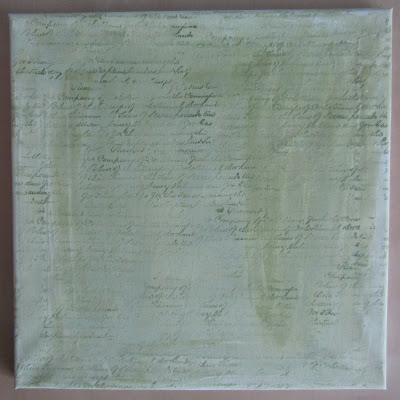
After covering the canvas with gesso, I painted the whole canvas with two different shades of green fresco finish paint. I used Teresa Green and Granny Smith. I then stamped over top with the darker shade of green (Granny Smith) using  Calligraphy mat 11. When I was stamping I made sure to cover the whole canvas but stamped two or three time before applying more paint to the stamp as I wanted some areas to be more faded than others.


 I used both Haystack and Chalk fresco finish paints and the dots from the swirls, splats and dots plate, to add the circles to the canvas. I love how imperfect they are, areas where you can see the paint has splodges or areas that were missed.  


The hearts are wooden and just something I had floating about in the crafty stash. I covered them with gesso and then with the Haystack fresco finish paint. I really should have added a second layer of gesso because as time has gone on I have noticed areas where the wood is still visible. Then I stamped on the top of them using Tango fresco finish and the dots background stamp.
.


After edging the hearts with the same Tango paint I glued them in place using Cosmic shimmer acrylic glue. Then with a black stabilo pencil I added a boarder, some stems and some grass, so the hearts are a little like flowers. To finish I added the word love from the words mask.


Thank you for reading, taking part in the challenges and commenting. Me and my Team mates really appreciate it.

Gemma (inkykitty)


Sunday, 29 November 2015

Note Book By Gemma

Hi Everyone

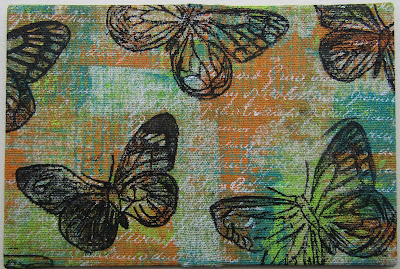
 I covered a plain mini note book (7.5x10.5 CM), with fabric that I painted using stamps and Dylusions paints.

I used a sheet of adhesive backed fabric and scraped Dylusions, squeezed orange, fresh lime and vibrant turquoise paint  over the top in places using a card. I really tried to scrub and push the paint into the weave, so you could still see the weave through the paint.


Then using all the same colours of paint I stamped the square wire stamp, stamping both vertically and horizontally.

I then stamped over the top with calligraphy mat 11 using white dylusion paint.


I then stamped over the top, two different butterflies from the butterflies #2 plate, some of them did not stamp completely so I sketched over them with a black paint pen.


I cut the pages from the note book with a craft knife. Then recovered the cover by removing the backing from the self adhesive fabric, smoothed it in place on the front and then tucking it around  the sides, before I re-glued  the pages in place.


Thank you for reading
Gemma (InkyKitty)

Thursday, 24 September 2015

Gibson Girls can Fly!!

Hi Everyone

Hope you are all enjoying this months challenge.  If you haven't entered yet, you still have a few days to go.  Here is my latest piece to hopefully inspire you!


I took a 6X6 card and stamped the Gibson Girl in Archival Potting Soil and re-stamped onto a post-it note to use as a mask, cut out the mask and stuck it to cover the image. Inked up one of the wings from the Dance A5 set and stamped the first one and then moved the same stamp over slightly and stamped again.  Leaving the mask in place I stamped the flourish from the Borders A5 set.  

I then used the Swirl 6x6 Mask and using cut and dry sponge applied Rusty Hinge Distress Ink, I also coloured the Gibson Girl's dress with the same sponge.  I used the Calligraphy Mat 11 again in Archival to add to the background and the Flourish from the Swirls, Splats and Dots Mat.

I finished it all off with a bit of Rusty Hinge around the edge of the card and the Kisses stamp is from Grungy Greetings and was done on a separate piece to add an extra bit of dimension.

Don't forget you still have time to add a project to the challenge. 
Debs

Thursday, 10 September 2015

Life is like.... by Debs

Hi All

Today I have done an altered book page for you. One of the benefits of living reasonably close to the shop is being able to go to Jennie's classes and one of my regular classes is the altered book club.  I would not have dreamt of altering a book before, but its so much fun!


Here is a brief how to


take a book and open it up - that bit always helps!


Randomly paint (using a dry brush) a dark colour i used Dylusions post box red paint


added some squeezed orange and then some lemon zest and a bit more red


Then some white, all done very randomly - the more random the better


I added on a couple of pieces of corrugated cardboard that were laying on my desk, one of which was nicely shaped for a corner.  Stamped a butterfly from Butterflies #2 in Black Soot Distress ink and embossed with Wow clear sparkle embossing powder and painted once cooled.

Stamped the words using the Decay letters  onto a piece of card and painted using the same colours. Added some background stamping to the page using the new background Fabric 2 stamp set using Archival black ink and the Calligraphic Mat 11 using Dylusions White Linen paint The Shadow effect around the butterfly and words was created using a charcoal pencil.

There have been some amazing entries so far for this months challenge so please do keep them coming we really do enjoy looking at all your creations.

Debs 

Monday, 24 August 2015

Brayered background card by Debs

Hi All, well this challenge has certainly inspired lots of you and as there is still over a week to go I thought i would do a card for you to see how many more we can inspire! 


The background was made with Fresco Finish Paints, (I used Toffee, Irish Cream, Dusty Teal, Guacamole and snowflake) a piece of paper, a brayer and some stamps.


To make the background just lightly brayer four colours over a sheet of paper randomly.  Once dry go over the whole sheet with Fresco Finish Snowflake on a brayer and allow to dry.  Then stamp in the same colours of paint to create a patterned background I used the new Fabric #2 background stamps and Calligraphic Mat 11.

I stamped Neil Walkers Franswar onto white card using Archival Jet Black and coloured him in using water brushes with the same colour Fresco finish (put a little paint in the reservoir of the water brush with the water)  The words are from Journaling Mini Words

We are enjoying all of your  entries and I am looking forward to seeing more.  Don't forget to leave your comments we do read them and they are very much appreciated.
Thanks for joining in the fun and don't forget to enter!

Debs


Wednesday, 28 May 2014

Hugs by Guest Designer, Sherry Cheever!

Hello!  Sherry Cheever here again with my final post as Guest Designer.  First, I want to say how much I’ve enjoyed being here with you and in particular want to thank Jennie for asking me to be a guest designer!  It’s been a blast!

My project today is a stampy one.  I’ve recently felt the need to get back to my stamping roots and wanted to finish up here with a project that included mostly stamps.

HugsCard

The first step for me in assembling this card, was the flower image.  Actually, I had a different vision when I started and once I stamped the flower I couldn’t make myself do it.  I liked it so well, that I couldn’t mess it up and decided to die cut the image with an oval die template.

HugsCardCloseUP

The flower is one of the images from Botanical Plate 1.  The image was colored with Peeled Paint and Dusty Concord Distress Markers, misted with water and then stamped on watercolor paper.  Using a water brush, the ink was colored in and touches of blue were added to the flower with Tumbled Glass.  While the image was still in the die template, the edges were sponged with Bundled Sage and Tumbled Glass Distress Inks.

The background for the card was made with the Wrinkle-Free Distress Technique and water color paper.  Colors used for the background were Bundled Sage, Shaded Lilac and Tumbled Glass Distress Inks.

Once the background was dry, painters tape was used to mask off a line down the page.

Hugs Card Step1

Using the tiny dots from Mini Backgrounds 1, the image was stamped down the center with Shaded Lilac.   While the tape was still in place, Bundled Sage was sponge over the stamped area.

Hugs Card Step3

The stamped line was then masked with painters tape

Hugs Card Step4

and the Calligraphic Mat 11 was stamped over the remaining background with Shaded Lilac.

Hugs Card Step5

“[Hugs]” from Grungy Greetings 1 was stamped at the bottom of the page in Hydrangea Archival Ink.  (my daughter jokingly said it looked like chug . . . if so, tip one back for for this BAD girl!)

HugsCard

Bundled Sage was used to dye the seam binding ribbon, which was attached to the background layer before it was affixed with foam tape to the card base.  The image was then mounted on the front with foam tape for more dimension.

Thanks for stopping by and joining me!

SHERRY SIGNATURE