Showing posts with label Journaling Mini Words. Show all posts

Monday, 24 August 2015

Brayered background card by Debs

Hi All, well this challenge has certainly inspired lots of you and as there is still over a week to go I thought i would do a card for you to see how many more we can inspire! 


The background was made with Fresco Finish Paints, (I used Toffee, Irish Cream, Dusty Teal, Guacamole and snowflake) a piece of paper, a brayer and some stamps.


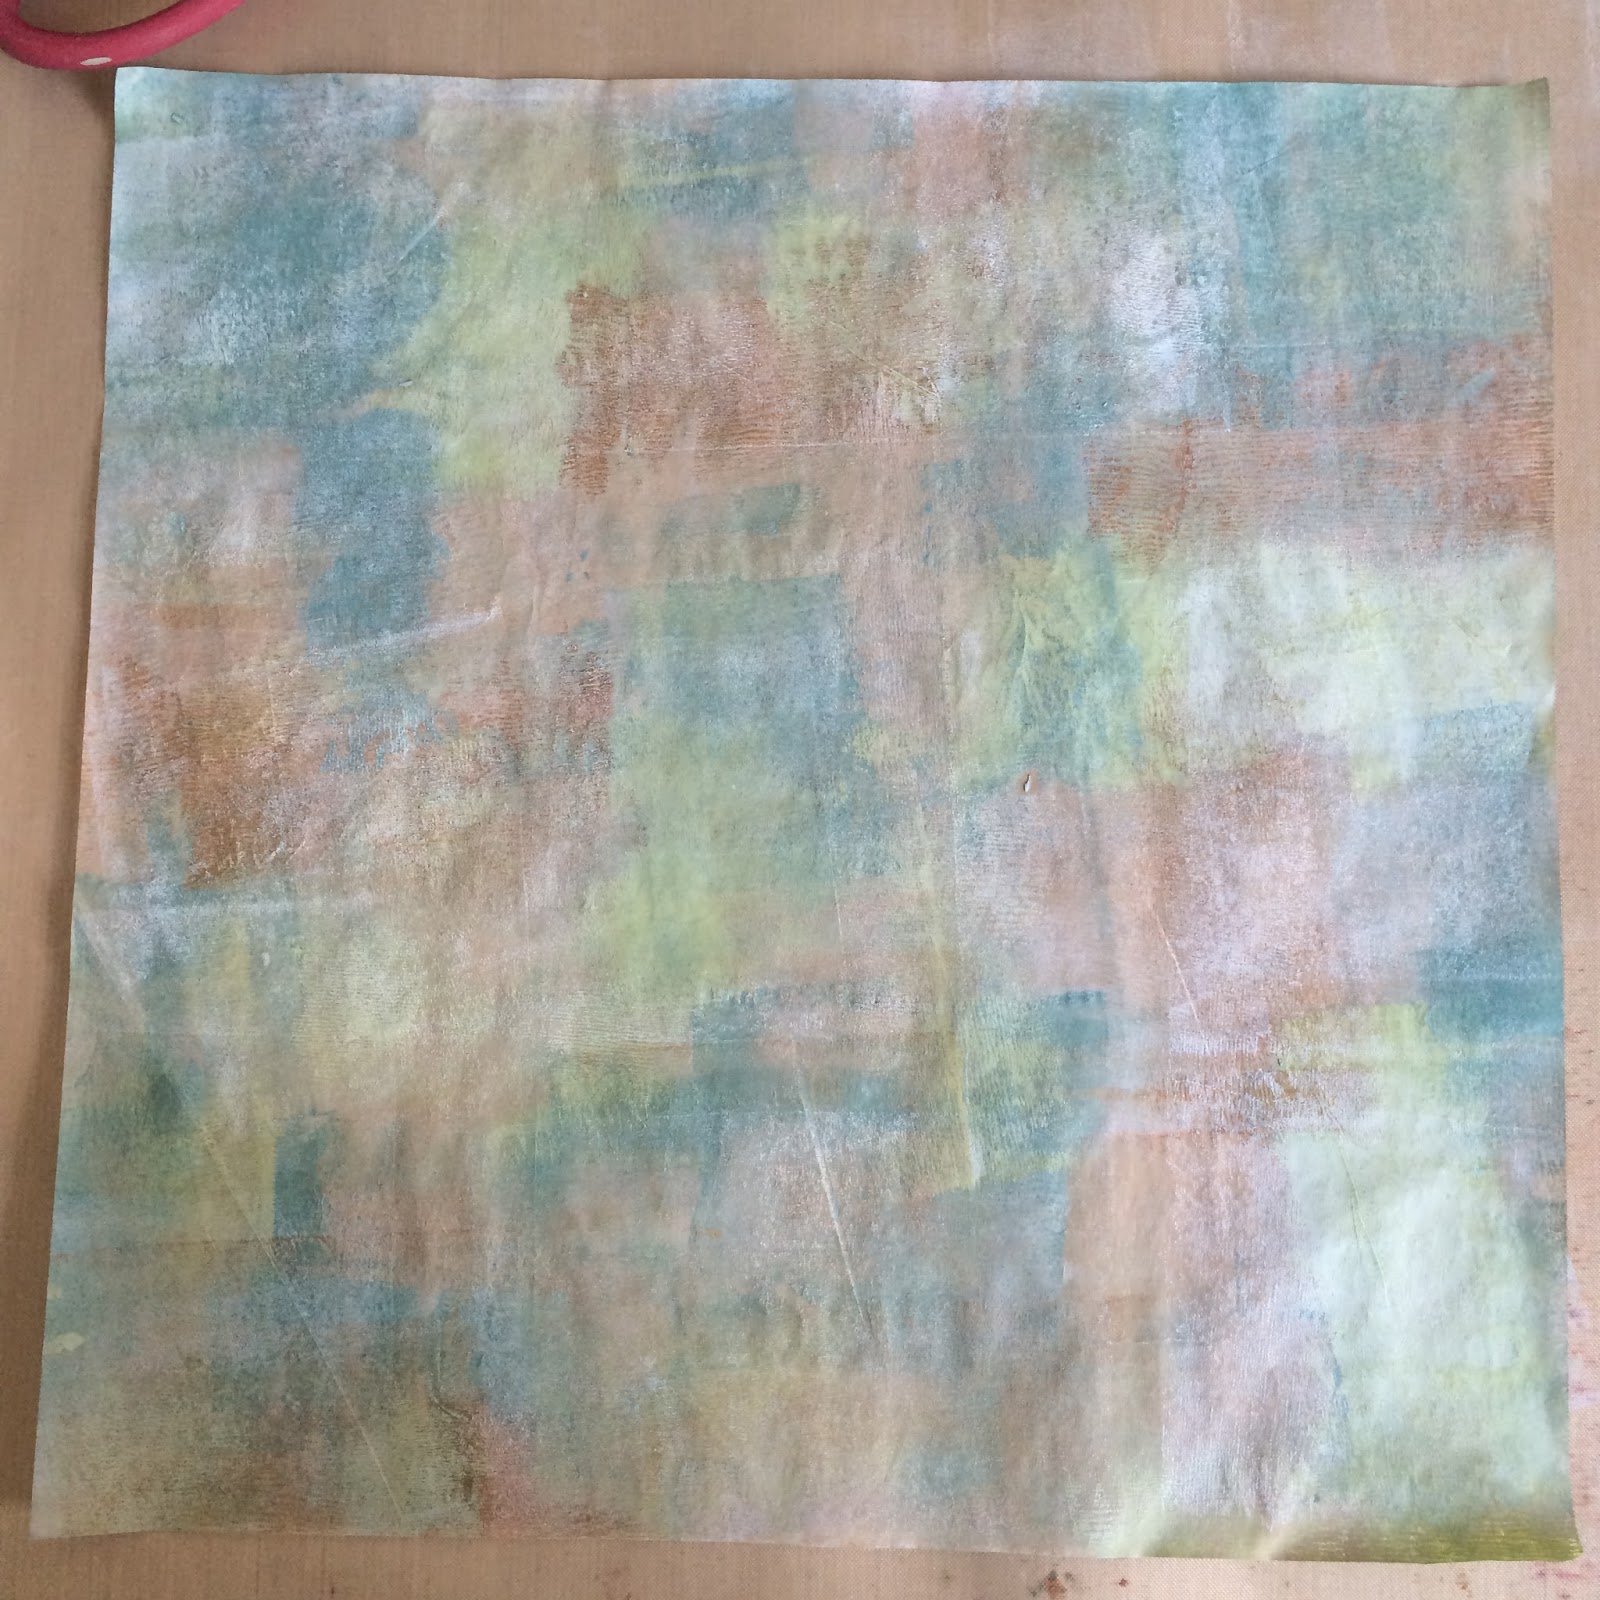
To make the background just lightly brayer four colours over a sheet of paper randomly.  Once dry go over the whole sheet with Fresco Finish Snowflake on a brayer and allow to dry.  Then stamp in the same colours of paint to create a patterned background I used the new Fabric #2 background stamps and Calligraphic Mat 11.

I stamped Neil Walkers Franswar onto white card using Archival Jet Black and coloured him in using water brushes with the same colour Fresco finish (put a little paint in the reservoir of the water brush with the water)  The words are from Journaling Mini Words

We are enjoying all of your  entries and I am looking forward to seeing more.  Don't forget to leave your comments we do read them and they are very much appreciated.
Thanks for joining in the fun and don't forget to enter!

Debs


Friday, 10 July 2015

Make me live tag by Debs

Hi All

I had a bit of fun with sprays and stencils on this tag.


I started with a large craft tag and covered it with gesso

Then out came the ink sprays, I used Dylusions and Distress ink sprays and stencils.  I started by putting a layer of just ink down, waited for that to dry off and then sprayed more ink through stencils until I was happy with the background.  Whilst I waited for it all to dry I stamped one of the Gibson girls onto plain white card with brown archival and coloured her in with distress markers.


Once the ink was dry, I then stamped the swirly stamp from the Decay Journaling stamp set in Peacock Feathers and Salty Ocean, after these were dry i also did a couple in Archival black.  The words were stamped as a block onto white card with Archival and then cut out the words that I wanted.  I used grunge paste with the swirls and splodges stencil, one of the nice things about grunge paste is its ability to soak up the ink that is underneath it, meaning in. This instance I didn't need to colour it.  I made a large paper flower with a die, some book pages and stuck a wooden bead in the middle.  Then re-arranged the words and stuck them down.

Hope you are all enjoying this months challenge.  See you all soon

Debs

Products used

Artistic stamper Masks


Saturday, 30 May 2015

...bye-bye...

Farewell of MarIa Potapovich (mellpellmell).
Hi to all of you, mellpellmell is here for you today.

And today I'm going to tell you not only "hi", but "Goodbye"...
...because this post  is the last one that I have created as an official member of the ASC design team.

I'm a little sad, but so sometimes it happens ...

It was very interesting - to be here with you and work with wonderful stamps. In spite of my forgetfulness, Jennie has always managed to keep me in the plan (well, almost always) - special thanks to her for understanding, patience and organization! You're just a miracle!

And, of course, thank Jennie for her generosity and clear leadership, and the opportunity to work with her fantastic stamps.
I consider myself very lucky that I had this privilege - to be in such a wonderful team of designers.


Today I want to make a small flash-back - let us see with me, how that time has passed for me, and what work has appeared in the meantime.

So...

The first thing I would like to remember once again with you - it is a regular notebook.


  And as you see - I've used just a single stamp to decorate it:


Here my "Bug's card":


  I've used the Encyclopedia Botanica stamps set  here

Gibson Girls Plate 1
Calligraphic Mat 
(stamping, masking, spraying, splashing... - it was fun!)

Now...here is the Bloom shadow-box - I like to make them (maybe it's a mania?)...


And here is a one of my canvases. It's about girl's spring)))))


 I've used  Encyclopaedia Botanica Size A5


And of course the Botanical Plates 1 and 2.


Do you know I like  watercolor and ink drawing?
And  I like to add stamps to my watercolors.
I've used the Encyclopedia Botanica stamps set  again:


Mmmmm... Mixed-media. Yes, it's one of the greatest style, I think...


And here is the video of it's creating:


I've used Journaling Mini Words stamps set to make this card.


 This philosophical image are adhered on the big house, made ​​of gypsum.


  Encyclopaedia Botanica stamps set and Family Values


Oh, I nearly forgot!

Special thanks to all those who have left great comments and kind words to my post - these words graced my days!

I leave the team, but I'm still here - because it is a wonderful blog with an incredible amount of inspiration and positive!

Good luck and enjoy your creativity!

<3

Saturday, 16 May 2015

Creating mixed-media card using masking fluid, watercolor and acrylic ink

Hello, dear! 

Hi, it's me, Maria Potapovich (mellpellmell) here for you today)))))

Today we will have fun with colors. 
Well, with the masking fluid.
And with the beads.
And with stamps. 

Oh, do keep your eyes peeled!


Here is my result:


I've used stamps set to make this card: Journaling Mini Words 

I hope you liked my idea.

If you decide to repeat it yourself, then feel free to leave here or in the comments below the video links to your work - I really wonder what will  you get! 

<3

Thursday, 30 April 2015

B&W card


Hi, it's me, Maria Potapovich (mellpellmell) here for you today)))))

Do you like b&w art? I like it sooooooooo much!

And today you have to have a look at my b&w card.

It's about girls.

And about girlish hopes ;)

Every girl should have to hope for and what to believe!


Look at from a different angle:


Hope you like it ;)

Have a good day!

Thursday, 29 January 2015

Words LO

Hi)
Here is Maria Potapovich (mellpellmell) here for you today.

Flu raging in our house for several days.
This year it is particularly insidious ...
So this LO, probably done  the most in order to cheer me up.

To be honest, for the creating this project, I did not need anything but a photo and stamp with positive words)
Let's see.


A little closer:


Slightly to the left:


Downwards slightly to the right:


And another angle:


Here is the best Journaling Mini Words stamp , heh:

P. S. I have to confess that in addition to photo and stamp I also used the paper for the base, glue, white gel pen and two kinds of acrylic ink (for splashes). Although still is not very much material ...) Do you agree?

Sunday, 17 August 2014

Bloom card by Maria Potapovich (mellpellmell)

Hi, it's me (Maria Potapovich, mellpellmell) here for you today))

As you know, I'm adherent of stamps)))
But I also love the watercolor paints. I like to use it for it's intended purpose))

This time to create the card I took the watercolor and kraft paper, stamps, ink, watercolor, pens  and, of course, a pair of scissors)))

Having in the arsenal stamps like these it is easy to create the illusion a good ability to draw)))


I added a rough line, made ​​with a pens, to slightly reduce the effect of "art", which appeared by the addition of watercolor to the stamp's image.


In this card I've used Botanical Plate 2 A5 and  Journaling Mini Words #1


I think this sufficiently minimalistic card, with a touch of "art" is a bit rustic but quite elegant...isn't it?


Thursday, 17 July 2014

Creative life card by Maria Potapovich (mellpellmell)

Hi))) 
It's me, Maria Potapovich (mellpellmell) here for you today!


I am here for the first time, so I have to explain something.

I love everything associated with paper, brushes, paints, stamps, ink, stencils, scissors ... 
Well, you get my point ... 


I do different projects, but today I want to share with you just a small postcard. 
At first glance, it is quite simple. Let's be honest:  at second glance everything is the same))) 

At the beginning I suggest you watch the video, and then I'll tell you the details. Ok?


Just want to tell you that I've used these stamps:

Star Background 2 A6 

Journaling Mini Words #1

Now let's talk about the process)))

1. So, first I made the background using a stencil "honeycomb", ink (distress/fired brick) and sponge.

2. Then I added the stars, putting the stamp mark with star background stamp and ink (distress/black soot).

3. When the background was "a half ready", I sprinkled a little water (just with my wet hands) and then added a little splash of white ink.

4. Then I outlined the hexagons on the right side with a black pen.

5.  And finally I glued two printed and  crookedly cut words on 3D foam squares.

6. The End))) Card is already ready! Nothing more to write here!)))


I hope you enjoyed this simple card made ​​for one very creative person! ;)

Have a nice day!


Friday, 18 April 2014

Inspiration Hanging by Alison (Craftytrog)

Hello Stampers! Today I have a piece of hanging art to share with you.
I actually took some step-by-step photos for once! Lol!
Here's what I started with, a piece of corrugated packaging, & some leftover strips from Gelli prints & other projects.
I began by brayering some Snowflake Fresco Finish paint on my packaging. Then I used a mini brayer to apply some colour. As you can see, I used Zesty Zing, Beach Hut & Autumn Fire.
Next, I stamped in a few places, using Calligraphic Mat 11 & Black Archival Ink.
I then used Ranger Glue & Seal Matte to glue down my painty strips, alternating positioning them vertical & horizontal.
I used the Crafter's Workshop stencil, Dina's Mini Boulders, which at the time of writing, is on special offer HERE, & applied Grunge Paste through it.
When the GP was dry, I re-positioned the stencil, & sponged Autumn Fire paint over the top.
I stamped the Journaling Mini Words onto white card, then cut out the words I wanted to use. I used Glue & Seal Matte to attach them to the circles, then added shading to the words & circles, using a black aquarellable pencil.
I inked the edges of my artwork, then matted it onto black card.
I finished by adding some metal eyelets & some ball chain.
Here's my finished hanging again...
Thanks for dropping by,
Alison xxx