Wednesday, 19 August 2015

Headaches by Titbelsoeur

Hello happy stampers !
Today I am sharing a journal page with you.
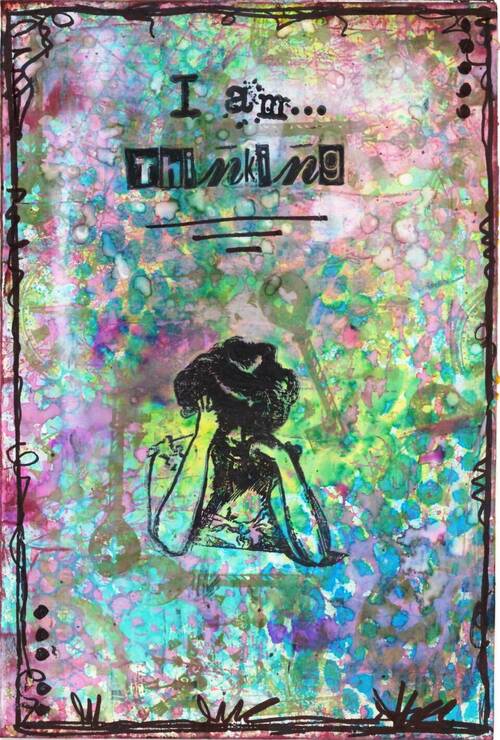
To make it, I started coloring the background with pastel acrylics, then I sprayed ink throught the Petals from Artistic Stamper Masks.
Then I started stamping...
Europe Map @ Backgrounds
Time and Keys and Tick Tock  Time
Gibson Girl 3 @Gibson girls
Journaling Words #5 and Grungy Greetings #2 @  Words and sayings

Some doodles on the edges, and that was it... 
and here was my page :
And then...
I wanted to add "just" a word...
and the new Decay Stamps were on my table... and here is my final page with a new layer !


Thanks so much for stopping by,
your comments are very much appreciated, 
here, on my blog, or on the Artistic Stamper's Facebook page.
I hope that my page did inspire you and that
you will participate in our August challenge
 to win some fabulous Artistic Stamper stamps.


Titbelsoeur

Sunday, 16 August 2015

DIY Postcards by Gemma

Hi All

I was taking a wander through town recently and came across some blank postcards, and instantly thought what a good idea. You could decorated them any way you wanted, and use them as intended, make sets of them for gifts, or even just to drop somebody a note to tell them your thinking of them.


I used several different colours of Distress ink, including shabby shutter, twisted citron and frayed burlap. I used the same process on all three postcards pictured above, which started by blended two different Distress inks over the whole postcard. Then stamping over the top with a background stamp, The one below shows the chicken wire background stamp.


 Over this on all the postcards I stamped with various cogs and springs from the Tick Tock stamp set, using different distress inks.


Using black archival ink, I stamped the large clock face and the text from the same set of stamps and doodled around the edges with a black pen. It was such a fun,quick, simple idea, and so handy to have a few made up and sitting about. Even just to flick through and cut apart for other projects, 


Thanks for reading
Gem (inkykitty)


Thursday, 13 August 2015

Youth is a Gift- Art Journal Page by Shilpa

Hello Everyone,
Shilpa here,
I've a face art journal page to share with you ..


I've used Artistic stamper 'Age' stamp, Gelli Plate, Small Tattered flower Sizzix die  and new distress ink colors.

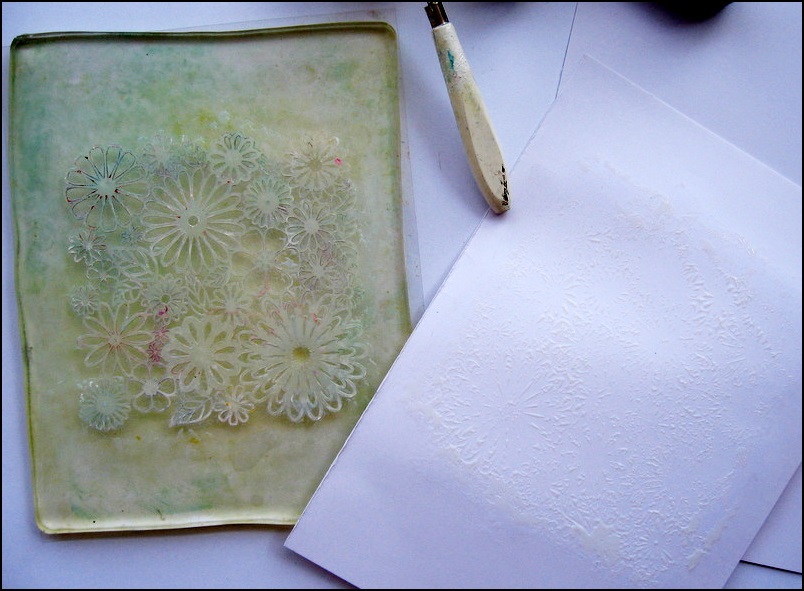
I've created the background for this page with  Gelli Plate, here is small tutorial..


I took out Gel medium from the box with my palette knife on Gelli plate, as it is very sticky. Rolled it with my brayer.


I kept flower stencil on it, on that paper and took the Gel Medium print.
You need to wash your stencil immediately or it will get spoil. Or keep them in water until you finish your project.


 I applied Mowed lawn distress stain with its dauber. Its very easy to color big surfaces with distress stains. I like to add Picket fence distress stain in my other color to get color variations on the surface.


I cut out my standard size (6*6) for face journal page from that Gelli print . 


In this closeup view, you will find texture stamping and stenciling with Hickory smoke and Mermaid Lagoon distress inks.


And these cute little flowers are made with Sizzix Tiny Tattered flowers. If you are interested to how I made them...here is the link to Anna Karin's Video tutorial.


I stamped face with Wendy Vecchi Forget me not Archival ink.
Finally I adhered them all together on my small page.
hope you liked my today's project.
For more art journal pages... pls visit my blog Neon Diary.

Thanks so much for stopping by.


Monday, 10 August 2015

Sea Shells on the Sea Shore! By Debs

Hi All

Hope you are all getting as much sun as we are down here in Sunny Kent! When its nice and warm and sunny it makes you think of holidays and the sea and with that in mind I have created this little sea scene.


I painted the box in Distress Paint and went for Mermaid Lagoon (it seemed rude not too)


The background was cut out of a Gelli Print i had made the other day using Dylusions paints and the Swirls Stencil.  After the paints had dried I then sprayed it with pale blue Colour Bloom spray.


I then stamped the shells #1 plate onto shrink plastic with coloured stazon ink.  This meant that as they were all ready coloured i didn't need to colour any of the images as once the shrink plastic and the heat gun had done its stuff they were all a really nice colour!  I painted some multi medium in various places and the sprinkled Prima micro beads to create a sand effect! Then added in the various shells.  I also used the Simple Swirls plate to create the sea grass. Although some of the swirls are not ideal for using on shrink plastic I didn't want them to be perfect, they did actually come out better than expected.


The bubbles around the frame were stamped with one of the borders from the borders A6 stamps and the 3D bubbles were made by simply using a glue gun and leaving blobs on a mat on to harden and dry.

Well I hope you like my latest piece to get you all inspired and entering this months fab challenge Anything Goes.  Cant wait to see what you all come up with.

Stamps used


Sunday, 9 August 2015

Winner of July's Challenge

Hello!
I am a little late with this posting, but I have got there in the end!
Thank you to everyone who joined in last month's challenge, was a fabulous range of tags.
There can only be one winner, and Mr Random.org chose


with this gorgeous creation.

Congratulations and please email me so we can arrange your prize.

Don't forget to join in this month's challenge which is Anything Goes.
We look forward to seeing your creations.
Have a creative day
{hugs}
Jennie

Friday, 7 August 2015

Time... by Titbelsoeur


Hello happy card senders !
Since the August challenge is about Anything goes, the project I want to share with you today is a card.
About time.
Start glueing a dictionary page on your cardboard
Use watercolor chalks here and there and wet your paper here and there too.
Then stamp the background with Plum Archival ink and outline the cogs and clocks with white chalk or white pen when necessary.
Stamp the big clock and the quote on to another piece of a dictionary page,
And here it is !!
You will find the time stamps HERE !

Thanks so much for stopping by,
your comments are very much appreciated.
I hope that my card did inspire you and that
you will participate in our August challenge
 to win some fabulous Artistic Stamper stamps.


Titbelsoeur

Tuesday, 4 August 2015

Small Art

Hi everyone I hope you are all having an amazing summer.
I have a piece for you today that uses the Neil Walker
  Birdz stamp, Fantasy 2 background & the new 
decay journaling stamps.
A few stencils
Firstly I used distress paints and a brayer to create the background 
card that would be the base of the 
bird and the matt card.
Next I inked or I should say painted up the Fantasy stamp
with fresco finish paint and stamped randomly over 
the background.
Next i used versa fine ink and gold embossing powder and stamped 
randomly with both the fantasy and decay stamp. I stamped the 
bird onto the painted background and embossed with clear, 
also the swirl from the decay stamp was embossed with gold.
I used some mop up card that was on my desk I think it was distress stains
that I had used. I used a dot stencil with grunge paste 
put through on the dots I put embossing powder 
on and heat set. Next I ripped two strips off and 
attached it on to a rectangle of grey board.
The base board had grunge paste through a stencil applied and dried.
next this was painted with
Fresco finish paints.
To finish it off I used some brass pieces from my stash and
mounted it all up.
I hope you enjoyed my post. 
Please feel free to let me know what you think.
PRODUCTS USED
  1. Artistic Stamper Neil Walker Fantasy 2 & Birdz stamps, The swirl of the decay journaling plate.
  2. Distress paints in Aged Mahogany, Wild Honey, Barn Door.
  3. Fresco Finish space cadet, Smurf and snowflake (also used to highlight the bird).
  4. Gold & Clear embossing powder,
  5. Grunge paste.